


You placed the order, waited (somewhat) patiently for weeks if not months, and now the day has come—unboxing and building your new mountain bike! Whether it’s your first mountain bike or you’ve always bought them pre-built, you might be wondering where to start. Is there anything you should check, or is it just a matter of throwing the wheels on? Fortunately for you, one of the staffers here at Rokform spent years building bikes as a mechanic at local bike shops all through school. Read on to learn the tricks of the trade from someone who’s been wrenching on bikes for over 25 years!
1—When Building A Mountain Bike, Start By Taking It Apart
The first thing to keep in mind when unboxing a new mountain bike is that most of them aren’t professionally assembled at the factory. The majority of bikes are quickly put together using minimal lubricants, thread locking compounds, or heeding torque specs. Because of this, you’ll actually need to do some disassembly to make sure you get the most life from the parts on your new rig.
Items such as stem bolts, seatposts, derailleur mounting hardware, and other metal-to-metal interfaces should be properly greased with a high-quality bike lube. Slather grease (or carbon paste) on that seatpost before sliding it into the frame to keep it from binding up, along with helping block moisture from entering the frame.
Some items may need thread locking compound instead of grease, such as the brake rotor bolts and brake mounting hardware. Be sure to use the correct color—usually blue—to prevent this hardware from being too hard or easy to loosen later.
2—Use A Torque Wrench During Assembly
When reassembling greased hardware, tighten them to the manufacturer’s torque specs using a quality torque wrench. This prevents breaking parts, loosening of bolts while riding, and stripping bolt-heads. Yes, these wrenches are a bit pricey, but having one in your toolset will serve you for many years, and all it takes is breaking one part to offset the upfront investment. Bikes and parts aren’t cheap, so don’t be cheap with your tools. Skimping on correct methods will always cost more over time.
3—Hand-Tension And True Your Wheels
Another crucial step to keep your new bike rolling fresh for longer is tensioning and truing your wheels before putting them on. Back when I was working in shops in the late 90’s, there was a huge range of wheel build quality between brands. Rocky Mountains had nearly perfect wheels out of the box, but other brands (I’ll leave unnamed) had spokes so loose I could jiggle them around in the rim.
An easy way to get a read on your wheels is to grab two spokes that are parallel to each other on one side of the wheel and try to squeeze them together. The spokes shouldn’t move laterally more than about a quarter of an inch. If your spokes are too loose, the wheel will more easily bend, causing costly damage.
The best remedy is using a spoke tension meter, but in general, spokes can be sufficiently tightened using the hand-squeeze technique. Tighten spokes the same amount all the way around, starting from the tire valve. If they’re really loose, you might be able to give them a half a turn each the first time around. Turning them a quarter turn at a time is ideal, as it prevents the wheel from becoming too out of true if the starting trueness isn’t perfect.
After the spokes are tensioned up properly, give them a spin in a truing stand or by securing a zip-tie to the frame or fork next to the rim for a visual. Carefully true by tightening spokes three at a time at most to get the wobbles and hops out.
4—Install Wheels, Pedals, Seat, And Handlebars
If you bought a complete bike that came in one box, the most significant assembly is putting on the wheels, pedals, possibly seat, and handlebars. Often the fork and stem are already installed, with the handlebars already fitted with brake levers, shifters, and grips. Don’t worry about things being exact just yet. You’ll perfect the cockpit positioning at the end.
5—Adjust The Gears And Brakes
After everything is put together, it’s time to start dialing everything in. Check the brakes to ensure the rotors aren’t rubbing on the brake pads. Next, run all the way up and down the gear range in rapid succession about 30-50 times to account for initial shifter cable stretch.
You might notice the cable has become much looser after this step. First, turn the barrel adjuster on the shifter clockwise until it stops, then back it out four clicks. Then, loosen the cinch bolt at the derailleur and pull the cable taught again.
Finally, run through the gears slowly one by one while turning the pedals (in a bike stand). If it’s slow to shift into the easier gears, drop it down to the hardest gear, then turn the barrel adjuster out two clicks counter-clockwise. This will pull the shift cable tighter, making it shift into easier gears more smoothly.
If you notice the chain trying to drop off the cassette into the spokes, tighten the (L) screw on the derailleur. If it’s dropping into the frame at the hardest gear, tighten the (H) screw on the derailleur. Make these adjustments a quarter-turn at a time. You can also loosen them if the chain isn’t getting up or down to the farthest ends of the gear range.
6—Get That Mountain Bike Cockpit Dialed
Once everything is adjusted to run smoothly, it’s time to set the seat height. With your dropper post all the way up and one pedal all the way down while seated, your knee should only have about a 10-degree bend. When rotating the pedals, you shouldn’t have hip movement or knee strain.
Next, lay your hands out flat with palms on the grips and fingers on the brake levers. Position the levers so your fingers don’t have any bend down or up, as everything should be on an even plane from shoulder to fingertip.
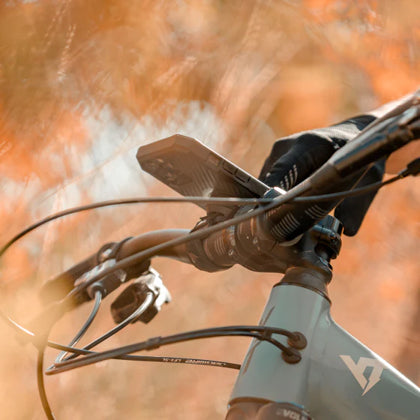
Finally, mount up any accessories like lights, bells, or a Rokform Bike Mount to securely hold your iPhone 13 or new Galaxy S22 Ultra. Adjust everything so it’s easy to reach without getting in the way of shifting and braking.
Now you’re all set to shred mountain bike trails on your new whip! Be sure to tag us on Instagram so we can see you enjoying the fruits of your labor!