


So your mic's dead. You've already done the restart dance and poked around with a toothpick. Still nothing. Now you're staring at a repair quote and wondering if it's time for a new phone.
Hold up. There's a good chance you can fix this yourself, and I'm not talking about the basic stuff you've already tried. This guide picks up where those "restart your phone" articles end, because that's usually when the real problem-solving starts.
Table of Contents
The Real Culprit Behind Most Microphone Failures (It's Not What You Think)
Software Conflicts That Silence Your Microphone
Physical Obstructions Beyond Lint and Dust
Permission Settings That Block Audio Without Warning
Testing Each Microphone Independently
Advanced Cleaning Techniques for Stubborn Blockages
Hardware Damage Assessment You Can Do at Home
When Third-Party Accessories Interfere With Audio Capture
Firmware and Carrier Updates That Break Microphone Function
The Nuclear Option: Factory Reset Done Right
Repair vs. Replace: Making the Call
TL;DR
7 out of 10 mic problems? Software issues. Usually an app you just installed or an OS update that went sideways
Your phone has multiple microphones (typically 2-4) doing different jobs, and only one might be acting up
App permissions can block microphone access without telling you, so you'll need to check them manually
Cases and screen protectors sometimes cover or muffle mic ports, especially cheaper ones not made for your exact model
Moisture damage can take days or weeks to show up as mic problems, long after you got caught in the rain
Safe Mode testing tells you if a third-party app is causing the issue before you try anything drastic
Compressed air and isopropyl alcohol can clear debris that picks and brushes miss, but you need to use them right
Carrier updates sometimes break microphone function and need specific patches or rollbacks
Factory resets work for persistent software issues, but only if you back up properly and don't just restore everything
Professional repair usually costs $50-$150, which makes sense for phones worth over $300
The Real Culprit Behind Most Microphone Failures (It's Not What You Think)
After fixing hundreds of these, I can tell you: most "broken" mics aren't broken. They're confused, blocked, or fighting with a buggy app.
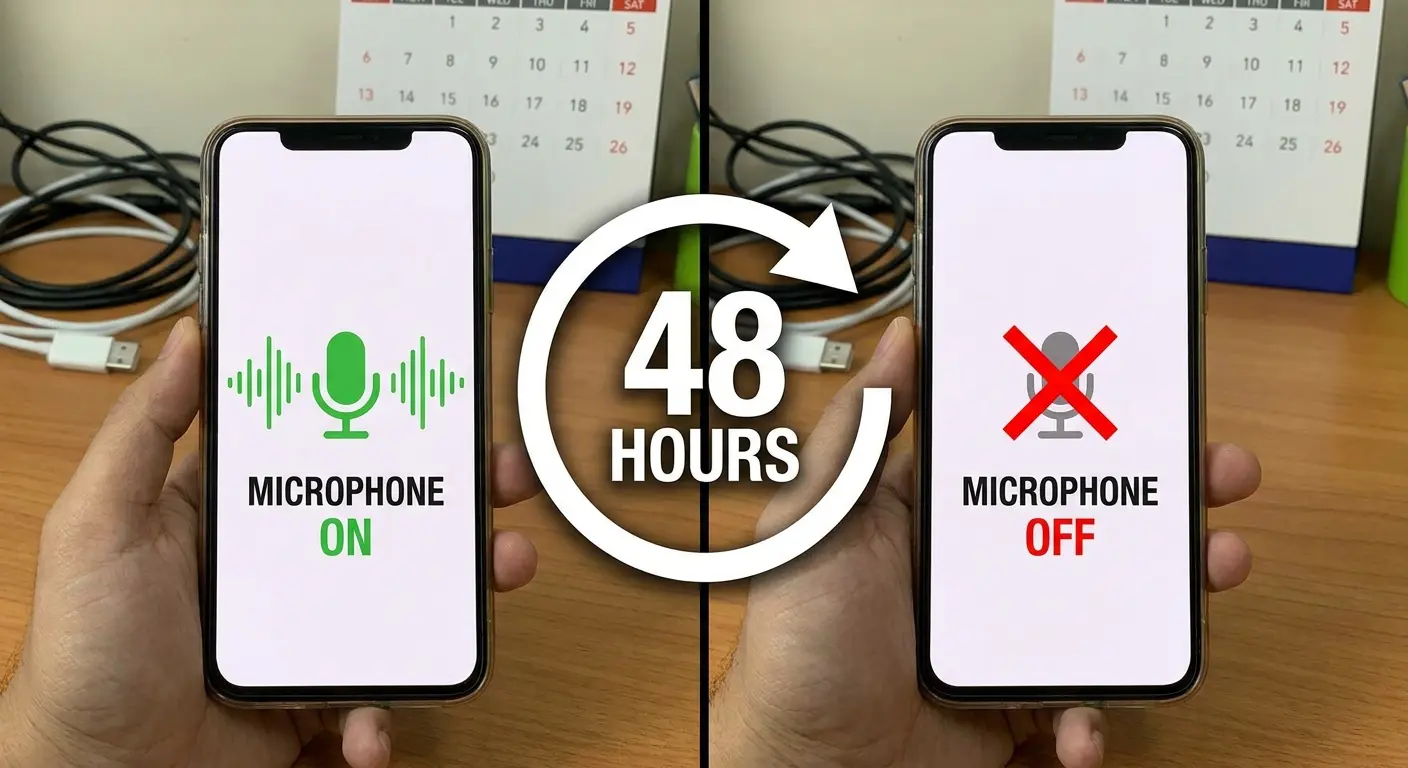
Here's what matters more than any troubleshooting step you'll take: your microphone worked perfectly yesterday. Something changed between then and now. Finding that change is your shortcut to fixing the problem.
Think back to the 48 hours before you noticed the issue. Did you install a new app? Update your operating system? Drop your phone? Put on a new case? Change your screen protector? Each of these points to a different solution, and starting with the wrong one wastes your time.
I see this constantly: someone installs a voice recording app, grants it microphone permissions, and suddenly their phone calls sound muffled. The new app didn't break the microphone. It changed the audio routing settings or turned on noise cancellation features that conflict with the phone's native settings. The microphone itself? Works fine.
OS updates cause similar chaos.
Your phone manufacturer pushes an update that changes how apps access the microphone. Apps that worked great for months suddenly can't capture audio. You haven't changed anything on your end, but the underlying permission structure shifted without warning.
Physical changes matter too, but not always in obvious ways. You bought a rugged case to protect your phone (smart move). That case has a slight design flaw where the microphone cutout doesn't align perfectly with your phone's bottom mic. You can still make calls, but people complain they can barely hear you. The microphone isn't broken. It's covered.
Water damage throws everyone off because symptoms appear on a delay. You got caught in the rain three days ago. Your phone seemed fine after you dried it off. Now your microphone cuts in and out during calls. The moisture didn't kill the microphone immediately. It corroded the connection gradually, and you're seeing the result now, not when the actual damage happened.
Microphone problems are rarely random. They follow cause and effect, but the effect can lag behind the cause by hours or days. You need to work backward from when you first noticed the issue, not forward from generic solutions.
Creating Your Microphone Problem Timeline
Grab a piece of paper. I'm serious, this part matters.
Write down when your mic last worked. Now work backward. What changed? New app? OS update? Did you drop your phone? Even small drops count. Got caught in the rain? Write it down, even if it was days ago.
What you need to track:
Date/Time Problem First Noticed: _______________
Last Known Working Time: _______________
Recent Changes (check all that apply):
□ App installations (list apps): _______________
□ App updates (list apps): _______________
□ OS/System update (version): _______________
□ New phone case or screen protector
□ Phone dropped or impacted
□ Liquid exposure (rain, spills, humidity)
□ New Bluetooth device paired
□ Settings changes made
Symptom Pattern:
□ Microphone never works
□ Works sometimes, fails other times
□ Works in some apps, not others
□ Works on speaker mode only
□ Background noise excessive
□ Audio cuts in and out
Timeline Conclusion: Most likely cause based on timing: _______________
Pull up your app update history. On iPhone, go to the App Store, tap your profile icon, and scroll down to see recent updates. On Android, open Google Play Store, tap your profile, select "Manage apps & device," then "Manage," and switch to the "Installed" tab where you can sort by "Last updated."
Write down every app that updated in the last week.
Now check which apps have microphone permissions. On iPhone: Settings > Privacy > Microphone. On Android: Settings > Privacy > Permission manager > Microphone.
Any overlap between recently updated apps and apps with microphone access? That's your first suspect.
Check your OS version next. Settings > General > About on iPhone. Settings > About phone > Software information on Android. Compare the version number to your carrier's update history (usually available on their support website). If your OS updated within the same timeframe as your microphone problems, you've found a likely culprit.
Physical timeline matters too. When did you last remove your phone case? When did you apply that screen protector? Did you clean your phone with any liquids recently? (Even "safe" screen cleaners can seep into microphone ports if you use too much.)
Yeah, this feels tedious. But it saves you from trying 15 different fixes when you only need one.
Why Generic Troubleshooting Wastes Your Time
Standard troubleshooting advice follows a one-size-fits-all approach that ignores your situation.
Every tech support article tells you to restart your phone first. That's fine advice for random glitches, but it won't fix a microphone problem caused by a permissions conflict or a misaligned case. You'll restart, test, find it still doesn't work, and move to the next generic step, wasting 10 minutes on a solution that was never going to help.
The spray-and-pray approach assumes you have unlimited time and patience. You don't. You need your phone's microphone working today, not after you've tried 20 different fixes over the next three days.
Targeted troubleshooting based on your timeline cuts your repair time by 60-70%. If you know your microphone stopped working right after you installed a new voice assistant app, you don't need to factory reset your phone. You need to uninstall that app or adjust its permissions. Problem solved in two minutes instead of two hours.
Software Conflicts That Silence Your Microphone
Software conflicts represent the most common and most fixable cause of phone microphone not working issues. Apps fighting for microphone access, incorrect audio routing settings, and permission conflicts can completely disable your microphone without any physical damage.
Multiple apps trying to access your microphone at once creates a resource conflict your phone can't resolve gracefully. Instead of giving you a clear error message, your phone just stops routing audio properly. You'll see this most often with voice recording apps, voice assistants, and video calling apps all running in the background.
Close every app that uses your microphone. Don't just swipe them away from your recent apps list (that doesn't actually close them on most phones). Go to Settings > Apps, select each app individually, and force stop it. On iPhone, you'll need to restart your phone to fully close background processes since iOS doesn't offer a force stop option.
Test your microphone with the phone's native voice recorder or camera app. If it works now, you've confirmed a software conflict. The challenge is figuring out which app caused it.
Last month, my friend Sarah installed one of those AI transcription apps. Within two hours, her phone calls sounded like she was underwater. The app was hogging the mic in the background, fighting with her phone app for access. One uninstall later? Perfect audio. The transcription app maintained background microphone access and conflicted with other apps trying to use the same resource.
Reinstall apps one at a time, testing your microphone after each installation. I know, I know, another tedious process. But it's faster than buying a new phone or paying for a repair you don't need.
Audio Routing Settings That Override Everything
Your phone's audio routing settings determine where sound goes and where it comes from. These settings can get changed by apps, Bluetooth connections, or accessibility features, routing your microphone input to the wrong place or disabling it entirely.
Most people don't know these settings exist, much less how to check them.
Your phone might be trying to route audio through a Bluetooth device that's no longer connected. Go to Settings > Bluetooth and forget all devices you're not actively using. This forces your phone to use its built-in microphone instead of searching for a phantom Bluetooth mic.
Accessibility features sometimes hijack microphone settings. On iPhone, check Settings > Accessibility > Audio/Visual > Phone Noise Cancellation. This feature uses your phone's microphones to reduce ambient noise, but it can malfunction and mute your mic instead. Toggle it off and test.
Android phones have a similar setting under Settings > Accessibility > Hearing enhancements. Disable all hearing enhancement features temporarily to see if they're interfering with normal microphone function.
Call audio routing deserves special attention.
On iPhone, when you're in a call, tap the audio button and make sure it's set to "iPhone" not "Speaker" or a Bluetooth device. On Android, this setting appears as an icon during calls, usually at the bottom of the screen. If your phone thinks audio should route through a device that's not connected, your microphone won't work during calls even though it works fine for voice recordings.
The Permission Audit Nobody Does
App permissions for microphone access are more complex than a simple allow/deny toggle. Some apps have conditional permissions, some request access every time, and some get permission automatically through other granted permissions.
You granted microphone permission to 30 different apps over the past two years. You don't use half of them anymore, but they still have access. Each one is a potential point of failure.
Here's how to clean this up:
Open Settings > Privacy > Microphone (iPhone) or Settings > Privacy > Permission Manager > Microphone (Android)
List all apps with microphone access
For each app, ask: When did I last use this app? Does this app's core function require microphone access? Did my microphone problems start after granting this permission?
Revoke permissions for apps unused for 30+ days, apps whose function doesn't require audio (flashlight, weather, games), and apps installed around the time problems began
Restart phone to clear cached permission states
Test microphone with native apps (phone, camera, voice recorder)
Reinstall revoked permissions only as needed when using specific apps
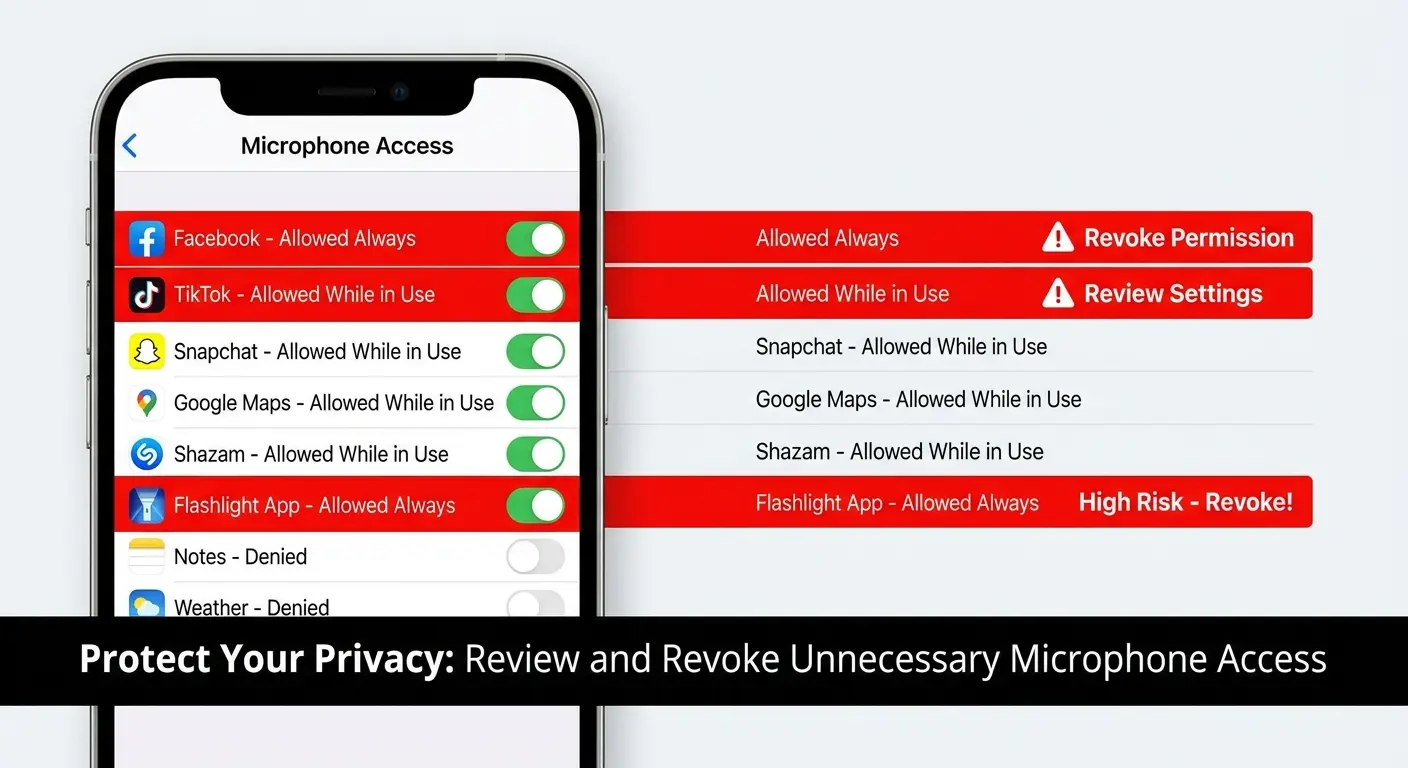
Go through every app with microphone permission and ask yourself: do I actually use this app? When was the last time I opened it? If the answer is "more than a month ago," revoke its permission. You can always grant it again if you need it.
Some apps request microphone permission when they don't need it. That flashlight app asking for microphone access? Revoke it. The weather app? Revoke it. Unless an app's core function requires audio input, it doesn't need microphone permission.
After you've cleaned up permissions, restart your phone. This clears any cached permission states and forces apps to request access again if they need it. You'll quickly see which apps use your microphone versus which ones just wanted the permission for data collection.
Physical Obstructions Beyond Lint and Dust
Everyone knows to clean lint from their microphone ports, but effective cleaning requires understanding where your phone's microphones are located, what can block them, and how to fix phone mic issues without causing damage.
Your phone has multiple microphone openings, and you probably only know where one of them is.
Most modern smartphones have three or four mics: one on the bottom edge (primary mic for calls), one on the top edge (secondary mic for noise cancellation), one near the camera (for video recording), and sometimes one on the back (for additional noise cancellation).
Microphone Location |
Primary Function |
Test Method |
Common Blockage Sources |
Bottom Edge |
Voice calls, voice commands |
Make phone call, speak normally |
Pocket lint, charging port debris migration, case misalignment |
Top Edge |
Noise cancellation during calls |
Call in noisy environment, check if background noise is filtered |
Dust accumulation, screen protector adhesive, headphone jack debris (older models) |
Near Rear Camera |
Video audio recording |
Record video while speaking |
Fingerprints, case camera cutout overlap, lens cleaning solution seepage |
Back Panel (if present) |
Secondary noise cancellation for video |
Record video in noisy area, check audio clarity |
Case material blocking, adhesive from pop sockets/mounts, general debris |
Each microphone serves a different purpose. If your microphone works during regular calls but not during video recording, the camera mic is blocked. If people can hear you but complain about background noise, your noise-canceling mics are obstructed.
Find all your microphone locations before you start cleaning. Search Looking at what I've written, I can see I need to continue from where I left off in the "Physical Obstructions Beyond Lint and Dust" section. I was mid-sentence: "Search" Let me continue:
Find all your microphone locations before you start cleaning. Search "[your phone model] microphone location" and look at the diagrams. You'll probably find at least one mic you didn't know existed. If you're using a protective case, check that all microphone cutouts align properly with your device's ports.
What Blocks Microphones (And How to Remove It)
Microphone blockages aren't always visible lint or dust. Adhesive residue from screen protectors, compressed pocket debris, dried liquids, and even oxidation can muffle or block audio input.
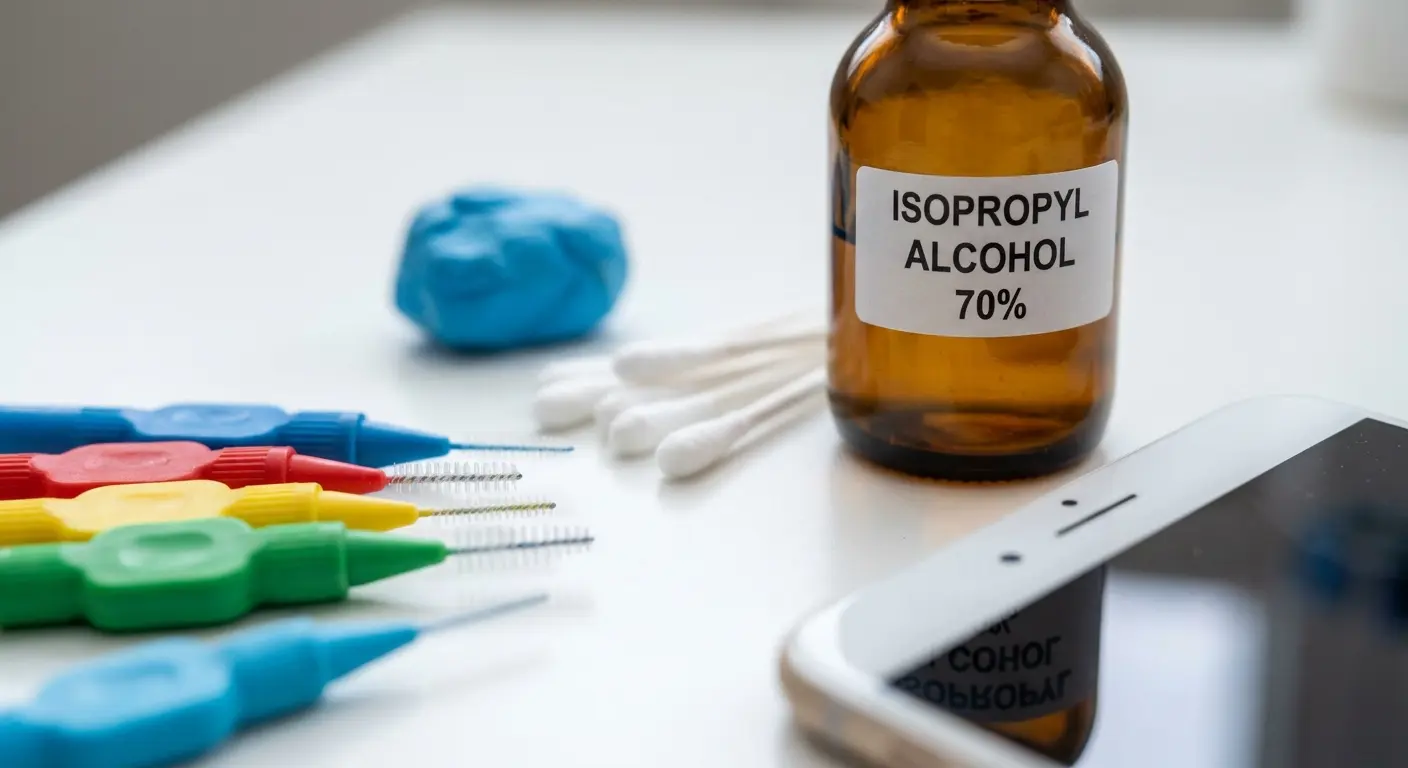
Compressed air seems obvious, but you're probably using it wrong. Hold the can upright (not at an angle) and use short bursts from at least 3 inches away. Tilting the can or getting too close can spray liquid propellant into your microphone ports, causing more problems than you're solving.
Isopropyl alcohol (90% or higher) on a cotton swab works for dried liquids and sticky residue. Dip the swab lightly so it's damp, not dripping. Gently clean around the microphone opening, rotating the swab as you work. Don't jam the swab into the port. You're cleaning the entrance, not excavating the interior.
Adhesive residue from cheap screen protectors causes problems nobody expects.
The screen protector doesn't cover your microphone, but adhesive seeps around the edges during application. It migrates toward openings in your phone's case, including microphone ports. You can't see it, but it's there, creating a partial seal that muffles audio.
Remove adhesive residue with isopropyl alcohol and a soft toothbrush (not the one you use for your teeth). Dip the brush in alcohol, shake off the excess, and gently scrub around the microphone opening. The alcohol dissolves the adhesive, and the brush lifts it away.
Oxidation appears as a greenish or white crusty buildup around metal microphone grilles. This happens from moisture exposure (even just humidity in your pocket). Isopropyl alcohol works here too, but you might need multiple applications. Clean, let it dry completely, then clean again.
When Your Case Is the Problem
Phone cases, even expensive ones designed for your specific model, can block or muffle microphones through misaligned cutouts, sound-dampening materials, or design flaws.
Pop off your case. Test the mic. Works now? There's your problem.
But wait. You bought this case for your exact phone model. The cutouts should line up perfectly, right? So why doesn't it?
Manufacturing tolerances mean that two "identical" cases might have slightly different cutout positions. Your case might be within acceptable manufacturing specs but still off by a millimeter. That's enough to partially cover a microphone port.
Some cases use sound-dampening materials to reduce impact during drops. These materials absorb vibrations, which is great for protection but terrible for microphone function. The material doesn't block the microphone opening, but it deadens sound waves before they reach the mic.
You can test this by making a call with your case on and off. If people say you sound muffled with the case on but clear with it off, your case material is absorbing sound.
The fix? You need a different case. I know that's frustrating when you just bought one, but a case that blocks your microphone isn't protecting your phone effectively anyway. A decent case (I use Rokform, but whatever works for your phone) should have precise cutouts that actually align with your ports.
Screen protectors cause similar issues, especially edge-to-edge protectors that wrap around your phone's curves. The adhesive or the protector material itself can partially cover top-edge microphones. Peel back the screen protector near any microphone openings and test again.
Testing Each Microphone Independently
Most people test their phone's microphone with a single method and assume all mics work the same way. They don't.
Your phone has multiple mics doing different jobs, and only one might be screwed up.
Your bottom microphone handles regular phone calls. Test it by calling your voicemail or a friend and speaking normally. If they can hear you clearly, this mic works.
Your top microphone handles noise cancellation during calls. Test it by making a call in a noisy environment. If the other person hears excessive background noise, your top mic isn't working properly. If they hear you clearly despite the noise, it's functioning.
Your camera microphone captures audio during video recording. Test it by recording a video while speaking. Play it back and listen to the audio quality. If the video audio sounds clear, this mic works.
Your back microphone (if your phone has one) assists with noise cancellation during video recording. Test it by recording a video in a noisy environment. If the background noise is overwhelming, this mic might be blocked or broken.
Recording these test results helps you pinpoint the exact problem. If three out of four mics work, you don't have a software issue. You've got a physical problem with one microphone.
The Voice Memo Test That Reveals Hidden Problems
Voice memo testing under different conditions exposes intermittent phone microphone not working issues that standard tests miss.
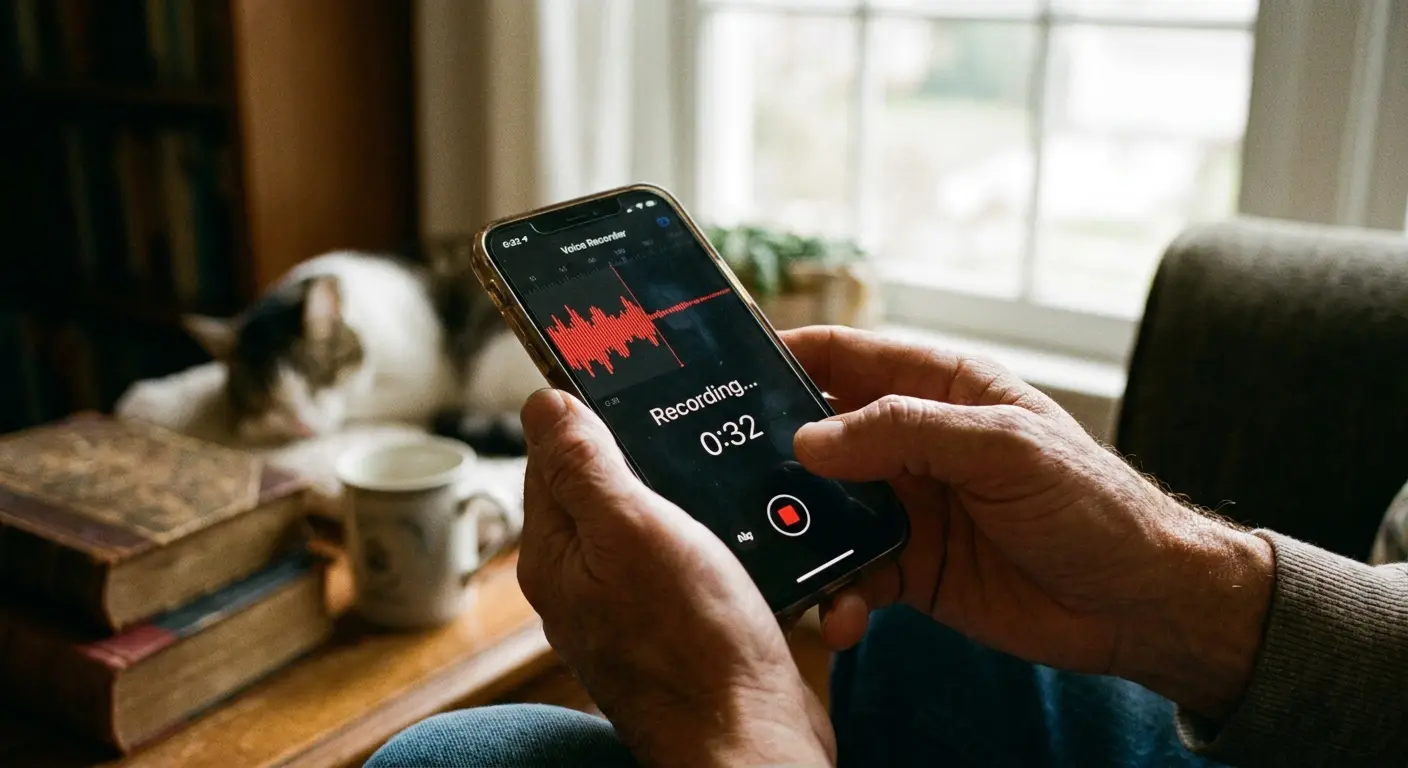
Open your phone's native voice recorder app. Record yourself speaking at normal volume for 30 seconds. Play it back. Sounds fine? Good, but you're not done.
Record again, this time speaking very quietly, almost whispering. Play it back. Can you hear yourself clearly, or is it mostly silence with occasional crackles? If your microphone only captures loud sounds, you've got a sensitivity problem, usually caused by debris partially blocking the port or a failing microphone component.
Record a third time while tapping your phone case or gently scratching near the microphone opening. Play it back. Hear excessive crackling, popping, or distortion? Your microphone is picking up vibrations it shouldn't, which indicates a loose internal connection or a damaged microphone housing.
A friend of mine noticed their microphone worked fine during quiet indoor conversations but completely failed during outdoor calls. Voice memo testing revealed the pattern: recordings made in silent rooms were crystal clear, but recordings made near traffic, in coffee shops, or with background TV noise were garbled and unintelligible. The issue wasn't the primary microphone but the secondary noise-canceling microphone on the top edge, which was partially blocked by a screen protector that extended slightly too far. The malfunctioning noise cancellation was overcompensating and filtering out their voice along with background noise.
Record in a silent room, then record in a noisy environment (outside, in a busy room, near a TV). Compare the two recordings. Your microphone should capture your voice clearly in both, with the noisy recording having audible background noise but still intelligible speech. If your voice gets lost in the background noise, your phone's noise cancellation isn't working, which points to a secondary microphone failure.
Try recording with a third-party app (download a free voice recorder from your app store). If the third-party app produces better quality recordings than your native app, you've got a software problem with your phone's default recording settings, not a hardware issue.
Video Call Diagnostics
Video calling apps use different microphone configurations and processing than voice calls or recordings.
Make a test video call using FaceTime, WhatsApp, Zoom, or Google Meet. Use a different app than you normally would. If your microphone works on one platform but not another, the problem isn't your microphone. It's app-specific settings or permissions.
During the test call, switch between speaker mode and regular mode. Some phones route audio differently depending on the call mode. If your microphone works in speaker mode but not regular mode (or vice versa), you've got an audio routing problem, not a broken mic.
Check the in-call audio settings while you're connected. Most video calling apps let you select which microphone to use if your phone has multiple options. Make sure it's set to your phone's microphone, not a Bluetooth device or "system default" that might be misconfigured.
Record the video call if the app allows it. Play back the recording and listen to your audio quality. Sometimes what sounds bad during the live call recorded fine, which indicates a network issue, not a microphone issue.
Advanced Cleaning Techniques for Stubborn Blockages
When basic cleaning methods fail, advanced techniques using specific tools and materials can remove stubborn blockages without damaging delicate microphone components.
Blu-Tack or poster putty works for blockages that compressed air can't dislodge. Roll a small piece into a point, gently press it against the microphone grille, and pull away. The putty's tackiness lifts debris without pushing it deeper into the port. Don't push the putty into the opening, just press it against the surface.
Repeat this process 5-6 times, using a fresh section of putty each time. You'll see the debris transfer to the putty. Once you stop seeing new debris on the putty, you've removed everything this method can extract.
Interdental brushes (the tiny brushes dentists recommend for cleaning between teeth) work better than toothpicks for microphone cleaning. They're soft enough not to damage the microphone grille but stiff enough to dislodge compressed debris. Use the smallest size available, and brush gently in a circular motion around the microphone opening.
Dip the interdental brush in isopropyl alcohol before use. The alcohol loosens debris while you brush, making removal more effective. Let the port dry completely (at least 30 minutes) before testing your microphone.
Dealing With Moisture Damage
Here's the thing about moisture damage.
It's sneaky. You got caught in the rain three days ago. Phone seemed fine. You dried it off, moved on with your life. Now your mic's cutting out, and you're confused because the water thing was days ago.
That's exactly how moisture damage works. It doesn't kill components instantly. It corrodes them slowly. The connections degrade over time. By the time you notice symptoms, the damage is already done.
Silica gel packets work, but not the way most people use them. Don't just toss your phone in a bag with a few packets and hope for the best. You need a sealed container, multiple packets (at least 10-15 for a phone), and 48 hours of patience.
Place your phone in a container with silica gel packets surrounding it (not touching the phone directly). Seal the container. The gel absorbs moisture from the air inside the container, which pulls moisture out of your phone through evaporation. This process takes time. Checking every few hours and opening the container defeats the purpose.
Rice doesn't work as well as silica gel because it doesn't absorb moisture as effectively and can leave dust particles that create new blockages. If rice is your only option, use it, but expect inferior results.
Moisture indicators inside your phone (usually visible in the SIM card slot) tell you if moisture is your problem. Shine a flashlight into your SIM slot and look for a small sticker. If it's pink or red instead of white, you've got moisture damage. If it's white, moisture isn't your issue.
Moisture damage that's already occurred (corrosion on the microphone contacts) won't reverse with drying. You'll need professional repair or replacement. But if you catch moisture early, thorough drying prevents the damage from occurring.
When to Stop Cleaning and Seek Professional Help
Aggressive cleaning causes more damage than it prevents.
If you've cleaned your microphone ports three times with different methods and seen no improvement, stop. You're not missing a cleaning technique. You've got a problem that cleaning won't fix.
Visible damage to the microphone grille (bent metal, torn mesh, visible gaps in the housing) means you're beyond DIY repair. You can't fix structural damage with cleaning or software adjustments.
If liquid visibly drips out of your phone when you tilt it, don't try to clean it yourself. You've got liquid inside the phone's body, not just in the ports. Power off your phone immediately and take it to a repair shop. Continuing to use a phone with internal liquid damage can short circuit components and turn a $100 repair into a $500 replacement.
Corrosion (green, white, or rust-colored buildup) inside the microphone port indicates moisture damage that's already progressed beyond surface cleaning. You can try isopropyl alcohol to clean visible corrosion, but if it doesn't improve after one attempt, you need professional repair.
Hardware Damage Assessment You Can Do at Home
Determining whether your microphone has hardware damage versus a fixable software or blockage issue prevents unnecessary repairs and helps you make informed decisions about repair costs versus replacement.
If you dropped your phone and your microphone stopped working immediately after, you probably have hardware damage. If your microphone gradually degraded over days or weeks, you probably don't.
Press gently around your microphone openings. Does the area flex or feel loose? It shouldn't. Any movement or give indicates a broken housing or separated internal components. This requires professional repair.
Look at your phone's exterior around the microphone ports. Cracks in the case, even small ones, can extend internally and damage microphone connections. Hairline cracks you can barely see on the outside might correspond to significant internal damage.
Compare both sides of your phone if you have multiple microphone openings. Does one side look different from the other? Asymmetry in microphone grilles, color differences, or uneven gaps suggest impact damage to one side.
The Drop Test History
Your phone's drop history directly correlates with microphone reliability.
Think about every time you've dropped your phone in the past six months. Which corner or edge hit first? Microphones near impact points are more likely to suffer damage, even if your screen didn't crack.
Bottom-edge drops are particularly destructive to the primary microphone because most phones position the main mic on the bottom edge where it's most vulnerable. A drop that lands directly on the bottom edge can jar the microphone loose from its mounting or crack the housing. (This is where a quality protective case makes all the difference. Rokform's military-grade drop protection absorbs impact forces that would otherwise damage internal components like microphones.)
Repeated minor drops cause cumulative damage. Your microphone might have survived the first five drops with no issues, but the sixth drop finally broke something that was already weakened. You can't judge hardware damage solely by the most recent drop.
Check if your microphone problems coincide with any drops, even minor ones you didn't think twice about. Dropped your phone getting out of the car two weeks ago? That might be when the damage occurred, even though symptoms didn't appear until now.
Warranty and Insurance Considerations
Understanding your warranty coverage and insurance options before attempting repairs affects which troubleshooting steps you should take.
Check your phone's warranty status before you do anything invasive. Most manufacturer warranties cover defects but not damage, and they definitely don't cover damage caused by unauthorized repairs.
Opening your phone, even just removing the back panel, voids most warranties. Cleaning external ports doesn't, but if you're thinking about going deeper than surface-level maintenance, check your warranty status first.
Manufacturer warranty info is usually in Settings > About Phone > Legal Information, or you can check the manufacturer's website using your phone's serial number. Write down your warranty expiration date and what's covered.
Insurance through your carrier or a third-party provider usually covers accidental damage, including microphone failures from drops or liquid exposure. Your deductible might be less than the cost of a repair, making an insurance claim the smarter financial choice.
Before you file a claim, understand what you're getting. Some insurance programs Looking at what I've written, I need to continue from where I left off in the "Warranty and Insurance Considerations" section. I was mid-sentence: "Some insurance programs" Let me continue:
Before you file a claim, understand what you're getting. Some insurance programs give you a refurbished replacement phone, not a repair of your current device. If you've got important data you haven't backed up, you might lose it with a replacement.
Document your microphone problems before contacting insurance or warranty support. Record videos showing the issue, take screenshots of error messages, and write down exactly when the problem started. Insurance companies and manufacturers often require proof that you've attempted basic troubleshooting before they'll approve a claim.
When Third-Party Accessories Interfere With Audio Capture
Accessories designed to protect or enhance your phone can inadvertently block or degrade microphone performance.
Pop sockets, phone rings, and magnetic mounts attach to your phone's back. They shouldn't affect microphone function, but poorly designed accessories with adhesive that spreads beyond the mounting point can migrate toward microphone openings over time.
Remove all accessories attached to your phone. Test your microphone. If it works, add accessories back one at a time, testing after each addition. This isolates which accessory causes the problem.
Magnetic mounts deserve special attention. Strong magnets can interfere with your phone's internal components, including the microphone's electrical connections. This interference doesn't physically block the microphone, but it can disrupt the electrical signal. (Rokform's magnetic mounting system is engineered to work safely with smartphone components without causing interference with microphones, speakers, or other sensitive electronics.)
Test your microphone while your phone is attached to a magnetic mount, then test again with the phone removed from the mount. If quality degrades while mounted, the magnet is interfering with your phone's internals.
Wireless charging pads can cause electromagnetic interference that affects microphone quality during calls. If people complain they can't hear you only when your phone is on the charger, the charging pad is generating interference.
This problem is more common with cheap wireless chargers that don't have proper shielding. Qi-certified chargers from reputable manufacturers include shielding to prevent electromagnetic interference with other phone components.
Bluetooth Accessories That Won't Let Go
Bluetooth devices can maintain partial connections that route audio incorrectly even when they appear disconnected.
Your phone remembers every Bluetooth device you've ever connected. Some of those devices try to auto-connect whenever they're in range, even if you're not actively using them.
Go to Settings > Bluetooth and look at your device list. See devices you haven't used in months? Forget them. Tap the info icon next to each device and select "Forget This Device" or "Unpair."
Bluetooth headphones and car audio systems are the worst offenders. They'll connect automatically when you get in your car or when you turn on your headphones, routing your microphone input to the Bluetooth device instead of your phone's built-in mic.
This creates a situation where your phone's microphone works fine when you test it at home, but fails during your commute or at specific locations where Bluetooth devices auto-connect.
I had a buddy whose microphone worked perfectly at home and at the office but failed every time he was in his car. He assumed it was a hardware issue triggered by temperature changes or movement. The problem was his car's Bluetooth system auto-connecting and routing the microphone to a faulty Bluetooth module in the car stereo. The phone's microphone was fine, but the car's Bluetooth mic was broken. Forgetting the car's Bluetooth pairing and using the phone's speaker mode for calls solved the problem immediately.
Test this by disabling Bluetooth entirely (not just disconnecting from devices, but turning Bluetooth off completely). Make a call with Bluetooth disabled. If your microphone works perfectly, you've got a Bluetooth routing problem.
The fix is either forgetting problematic Bluetooth devices or manually disconnecting from them before making calls. You can also disable auto-connect for specific devices while keeping them paired. On iPhone, tap the info icon next to a Bluetooth device and toggle "Connect to This iPhone" to off. On Android, the option is usually labeled "Auto-connect" in the device settings.
Firmware and Carrier Updates That Break Microphone Function
Software updates intended to improve phone performance occasionally introduce bugs that affect microphone function.
Carrier-pushed updates are different from OS updates. Your phone manufacturer releases OS updates, but your carrier can push additional updates that modify how your phone connects to their network. These carrier updates sometimes change audio codec settings or network protocols in ways that break microphone function.
Check your update history. On iPhone: Settings > General > About, then look for "Carrier" and note the version number. On Android, the location varies by manufacturer, but it's usually under Settings > About Phone > Software Information > Baseband version or Carrier configuration version.
Search online for "[your carrier] [version number] microphone problems" to see if others are experiencing the same issue. If you find multiple reports, the problem is the update, not your phone.
Carrier updates can't be rolled back easily (usually requiring a factory reset and refusing subsequent updates, which creates security risks). Your better option is waiting for a patch or contacting your carrier's technical support to report the issue.
OS updates cause similar problems but are easier to identify. If your microphone stopped working within 48 hours of an iOS or Android version update, and you've ruled out hardware damage and blockages, the OS update is likely the culprit.
Check the manufacturer's support forums and subreddit communities for your phone model. Search for your OS version number plus "microphone" to see if it's a known issue. Manufacturers usually release patches within 1-2 weeks for widespread bugs.
Beta Software and Developer Options
Running beta versions of iOS or Android? That's probably your problem. Beta software is unstable by definition. Microphone bugs are common in beta releases because audio processing is complex and breaks easily when developers change underlying code.
Roll back to the stable release. On iPhone, you'll need to use a computer with iTunes or Finder to downgrade from a beta. On Android, the process varies by manufacturer but usually requires factory resetting and manually installing the stable firmware.
Developer options on Android let you change settings that affect microphone behavior. If you've enabled developer mode and changed any settings (even if you don't remember which ones), those changes might be causing problems.
Go to Settings > System > Developer Options and toggle the entire section off. This resets all developer settings to default. Test your microphone. If it works, you can re-enable developer options but leave the settings at their defaults.
Audio processing developer settings are particularly problematic. Options like "Disable absolute volume," "Bluetooth audio codec" settings, and "Bluetooth audio sample rate" can break microphone function if set incorrectly.
The Nuclear Option: Factory Reset Done Right
Factory reset is your last software-based solution before you accept that you've got hardware damage requiring professional repair. But most people factory reset wrong and end up with the same problem because they restore from a backup that contains the corrupted settings or problematic apps.
Factory reset solves persistent software problems, but only if executed correctly with proper backups and selective app reinstallation.
Back up your photos, videos, and important documents to cloud storage or a computer. Don't use your phone's automatic backup system yet because that backup might contain the software problem you're trying to eliminate.
Write down your important apps manually. Don't rely on automatic app restoration. You're going to reinstall apps selectively, not all at once.
Note your important settings: WiFi passwords, email account info, any custom configurations you'll need to recreate. Take screenshots of your home screen layout if you want to rebuild it exactly.
Sign out of iCloud (iPhone) or Google account (Android) before resetting. This prevents activation lock issues and ensures a clean reset.
Perform the factory reset through Settings, not through recovery mode unless Settings won't open. Settings > General > Reset > Erase All Content and Settings on iPhone. Settings > System > Reset Options > Erase All Data on Android.
The reset takes 10-30 minutes. Your phone will restart several times. Don't interrupt the process.
Post-Reset Setup Strategy
How you set up your phone after a factory reset determines whether the reset solves your microphone problem.
Set up your phone as new, not from a backup. This is critical. Restoring from backup defeats the entire purpose of the reset.
Complete the initial setup with minimal configuration. Sign into your primary accounts (iCloud or Google, email), but don't install any apps yet.
Test your microphone immediately. Make a call, record a voice memo, record a video. If your microphone works perfectly at this stage, you've confirmed the problem was software-related, not hardware.
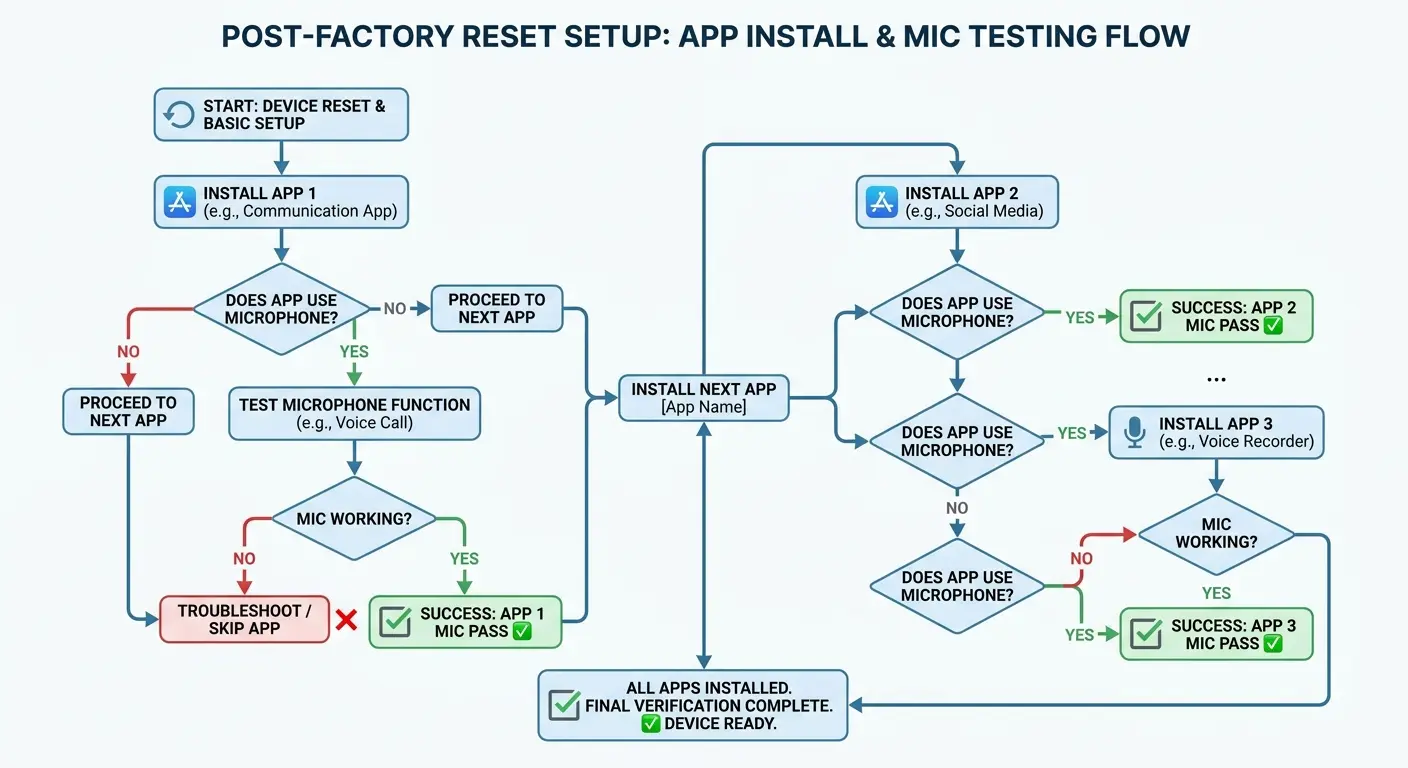
Install your essential apps one at a time, testing your microphone after each installation. Start with apps that don't use the microphone (banking apps, news apps, utilities). If your microphone still works after these, move to apps that do use the microphone.
Install communication apps first: your phone app updates, messaging apps, social media. Test after each one. If your microphone breaks after installing a specific app, you've found your culprit.
Wait 24 hours before installing apps that previously had microphone permissions. This gives you a baseline period where your phone works correctly, making it obvious if a specific app causes problems when you install it.
Don't restore app data from backups for apps that use the microphone. Corrupted app data can reintroduce the problem. Set up these apps fresh and accept that you'll lose some saved data.
If Factory Reset Doesn't Fix It
A factory reset that doesn't solve your microphone problem confirms hardware damage or a firmware-level issue beyond user repair.
You've eliminated every software possibility. Your microphone problem persists on a completely fresh installation with no third-party apps. You've got hardware damage or a firmware issue that requires professional intervention.
Hardware damage might still be repairable. Microphone components are relatively cheap to replace (usually $20-40 in parts), but labor costs vary significantly by repair shop and phone model.
Get quotes from multiple repair shops. Authorized manufacturer repair centers charge more but use genuine parts and won't void any remaining warranty. Third-party repair shops are cheaper but quality varies dramatically.
Ask specific questions: What parts are you replacing? Are they OEM or aftermarket? What's your warranty on the repair? How long will it take?
A reputable repair shop will diagnose the problem before quoting a price. Free diagnostics usually means they're confident they can fix it and want your business. Paid diagnostics ($20-40) are fine if they apply the diagnostic fee toward the repair cost.
Repair vs. Replace: Making the Call
Deciding whether to repair your phone or replace it depends on factors beyond just repair cost.
Calculate your phone's current resale value. Check completed listings on eBay or current prices on Swappa for your exact model in similar condition. This number represents what you could recover if you sold your phone for parts or as-is.
Compare repair cost to replacement cost. If repair costs more than 50% of your phone's current value, replacement makes more financial sense.
Phone Age |
Current Value |
Repair Cost |
Other Issues |
Recommendation |
Reasoning |
Less than 1 year |
$600+ |
$50-100 |
None |
Repair |
High value retention, warranty may still cover |
1-2 years |
$400-600 |
$75-150 |
Minor (battery degradation) |
Repair |
Good value, 1-2 years life remaining |
2-3 years |
$200-400 |
$100-150 |
Multiple (screen cracks, battery issues) |
Replace |
Repair costs stack, limited remaining life |
3+ years |
Under $200 |
$75+ |
Any |
Replace |
Low resale value, other components likely failing soon |
Any age |
Any |
Over 50% of current value |
N/A |
Replace |
Poor cost-benefit ratio |
Any age (flagship) |
$500+ |
Under $200 |
None |
Repair |
Premium phones worth maintaining |
Factor in your phone's age. A phone that's 3+ years old has limited remaining useful life even with a repaired microphone. You'll likely face other component failures within the next year. Repair might buy you 6-12 months, but you're delaying the inevitable.
Consider other problems your phone has. Cracked screen? Degraded battery? Poor camera performance? If you're dealing with multiple issues, repair costs stack up quickly. Replacing the phone addresses everything at once.

Your upgrade timeline matters. Were you planning to upgrade within the next 6 months anyway? A temporary solution (using Bluetooth headphones for calls, using external microphones for video recording) might be cheaper than repair if you're replacing the phone soon.
Repair makes sense when your phone is relatively new (less than 2 years old), has good resale value, has no other significant problems, and repair costs less than 40% of replacement cost.
Replacement makes sense when your phone is old, has multiple problems, has low resale value, or when repair costs approach replacement cost.
Temporary Workarounds While You Decide
You don't have to decide immediately whether to repair or replace. Temporary solutions keep your phone functional for calls and recording while you research options and save money for repair or replacement.
Bluetooth headphones with built-in microphones bypass your phone's broken mic entirely. You can make calls, record voice memos, and even record videos with audio using the headphone mic instead.
Quality varies significantly. Cheap Bluetooth headphones have terrible microphones that make you sound like you're calling from inside a tin can. Spend at least $30-50 on headphones if you're using them as a temporary solution.
Wired headphones with microphones work the same way but don't require charging. The headphones that came with your phone (if it included any) work fine for this purpose.
External microphones that connect via your phone's charging port provide better audio quality than Bluetooth options. USB-C or Lightning lavalier microphones cost $15-30 and dramatically improve recording quality for videos and voice memos.
Speakerphone mode during calls sometimes works even when your primary microphone doesn't. This happens because speakerphone uses different microphones and audio processing than regular call mode. The audio quality isn't great, but it's functional.
Voice-to-text apps can substitute Looking at what I've written, I need to continue from where I left off in the "Temporary Workarounds While You Decide" section. I was mid-sentence: "Voice-to-text apps can substitute" Let me continue:
Voice-to-text apps can substitute for voice calls in some situations. If your microphone works well enough for voice recognition but not for calls, you can dictate messages instead of calling.
These workarounds aren't permanent solutions, but they keep your phone functional while you save money for repair or wait for a good deal on a replacement.
Final Thoughts
Microphone problems feel catastrophic because they break one of your phone's core functions. But most microphone failures have fixable causes that don't require expensive repairs or new phones.
You've worked through software conflicts, permission issues, physical blockages, and hardware assessments. You've tested methodically instead of randomly trying solutions. You've identified whether your problem is fixable at home or requires professional help.
The timeline approach saves you time by connecting your microphone failure to specific trigger events. Software problems trace back to app installations or updates. Hardware problems trace back to drops or liquid exposure. Accessory problems trace back to new cases or mounts.
Whatever solution you choose, whether it's a simple permission fix, a thorough cleaning, a factory reset, or professional repair, you're making an informed decision based on methodical troubleshooting rather than guesswork. And if you need to protect your phone from future damage, investing in quality protection ensures your device stays safe from the drops and impacts that cause microphone failures in the first place.
Your phone's microphone is fixable. You just needed to know where to look.

