


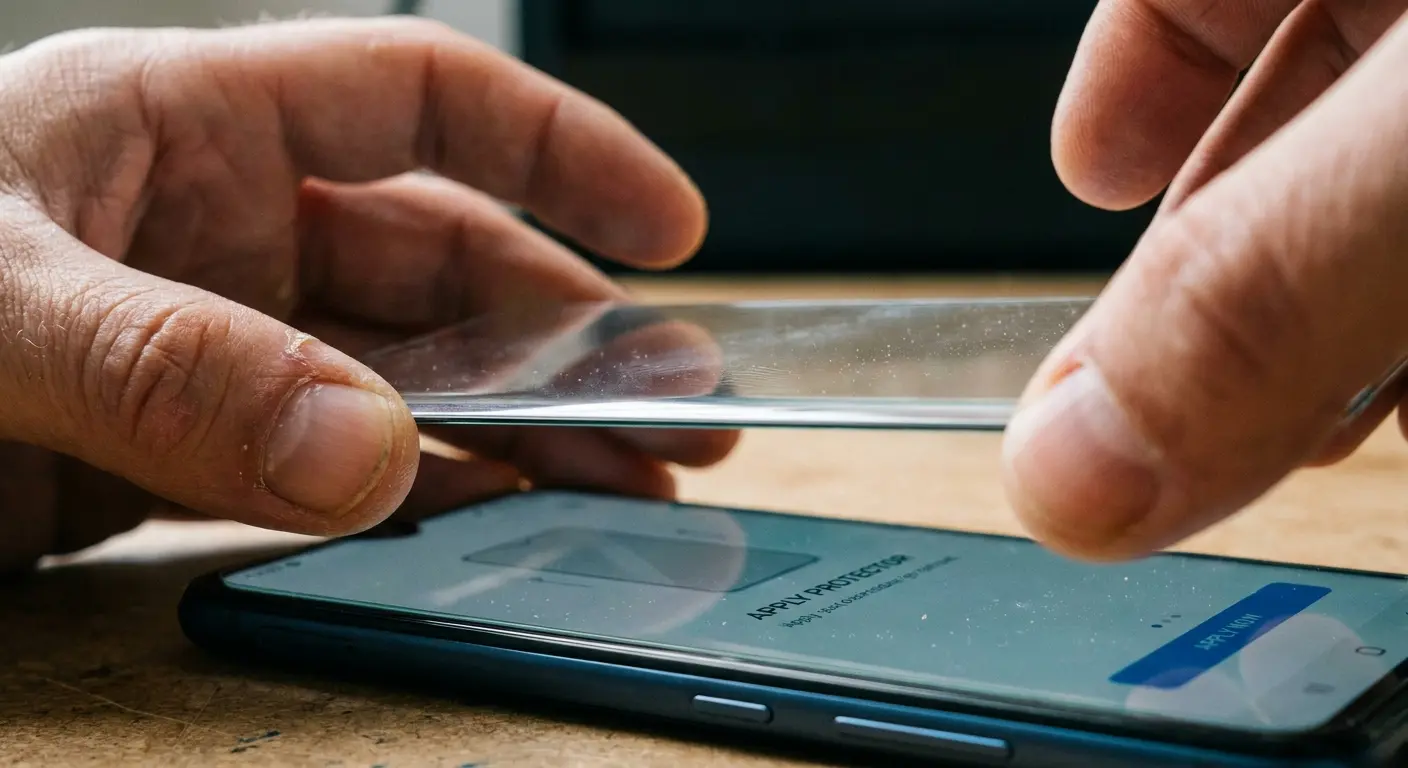
I've ruined exactly eleven screen protectors. Not because I'm an idiot (debatable), but because every installation guide skips the actual hard part: getting the damn thing to land where you want it.
You can clean your screen until it's sterile. You can buy the $50 protector with the fancy kit. Doesn't matter. If your alignment is off by half a millimeter, you've got a crooked piece of glass that'll bother you every single time you look at your phone.
So let's talk about alignment. Not the bubbles, not the dust. Everyone covers that. The alignment problem that turns a 30-second task into a sweaty-palmed nightmare.
Why Screen Protector Installation Fails Before You Even Touch the Adhesive
You know that moment when the protector touches the screen and you realize it's wrong? That stomach-drop feeling?
You've got about a second, tops, before that adhesive starts doing its thing and your alignment becomes permanent. Miss that window and you're screwed. Most installation guides skip this timing element entirely. They'll tell you to "carefully lower" the protector, but they won't explain that the adhesive's initial tack changes based on temperature, humidity, and how long the protector has been sitting out of its packaging.
The adhesive spreads. Fast. You're not just placing glass anymore. You're racing against chemistry. Once that spreading begins, you're fighting against an expanding zone that's bonding to your screen. Pull up too soon, and you risk ripping the adhesive off the protector itself. Wait too long, and congratulations, your crooked protector is now permanent.
I've done both. Multiple times.
We've tested this with cheap protectors and expensive ones. The window exists either way. Premium protectors give you maybe an extra half-second. Wow. Worth the $40.
The Misalignment Window Closes Faster Than You Think
Your eyes can't accurately judge gaps smaller than half a millimeter without reference points. Phone bezels seem like obvious guides until you realize that manufacturing tolerances mean your screen might sit slightly off-center within the frame. Using the bezel edge as your alignment reference can result in a protector that looks centered but leaves one side of your actual display exposed.
Camera cutouts present another problem. You're trying to align a hole in the protector with a camera bump while looking at both from an angle. What looks centered from your viewing position might be off by a full millimeter when viewed straight on. That millimeter matters when you're working with cutouts that have only a hair of tolerance around the camera lens.
Your hands shake during precision tasks. You're making micro-corrections you don't even perceive, and each correction shifts the protector's position slightly. Holding your breath helps (it reduces tremor by about 30%), but most people don't think to do it during the critical descent phase.
Yes, I'm telling you to hold your breath. I know how it sounds.
Installation Videos Hide the Failure Rate
Every smooth installation video you've watched represents somewhere between 3-7 failed attempts that didn't make the final cut. I know this because I've filmed my own installation guides. The perfect take where the protector lands flawlessly and bubbles self-expel happens maybe 15% of the time, even with experienced installers.
Videos also can't convey the tactile feedback you need to recognize when you're about to make contact. There's a slight resistance change in the air gap as the protector approaches the screen, caused by air pressure building between the two surfaces. Experienced installers feel this and use it as a signal to finalize their alignment. First-time installers blow right past it.
The other thing videos don't show is the decision-making process when you realize mid-application that your alignment is off. Do you commit and try to fix it after? Do you abort and lift before full contact? That split-second choice determines whether you end up with something salvageable or a ruined protector, and there's no universal right answer because it depends on how much adhesive has already bonded.
Here's what actually happens: You're applying a protector to an iPhone 15 Pro. The camera cutout is your main reference point, and you've positioned the protector so it looks perfectly centered over the triple camera array. You begin lowering it, and at 2mm above the screen, you notice the left edge of the protector is going to land closer to the phone's edge than the right side.
You have two choices. First option: abort the descent, lift back up, and reposition, but your hands are already fatigued from holding the protector steady for 15 seconds, and repositioning introduces new tremor. Second option: commit to the placement, accepting that the left-right symmetry will be off, but the camera cutout alignment (your main goal) will be perfect.
An experienced installer commits. A first-timer panics, tries to adjust mid-descent, and ends up with both poor camera alignment and asymmetric edges because they introduced lateral movement during the critical contact phase.
Trust me on this one.
The Physics of Why Your Fingers Betray You During Application
The natural oils on your fingertips reduce friction compared to dry contact. You're essentially holding the protector on a micro-thin layer of oil that acts as a lubricant. Each micro-adjustment you make has a delayed response because the protector slides slightly before friction catches up.
Washing your hands helps, but skin oil production ramps up within 90 seconds of washing. Your fingers are already re-coating themselves while you're opening the protector package. Wearing gloves seems like a solution until you realize that latex and nitrile gloves have their own slip characteristics, and you lose the tactile sensitivity you need to feel when the protector is about to make contact.
Finger Oil Creates Controlled Slip Zones
The edges of screen protectors are where you must grip, but they're also the smoothest part of the product. Manufacturers polish edges to prevent chipping and to improve the feel when swiping from screen edges. That polish works against you during installation. You're gripping a surface specifically designed to be slippery, trying to hold it steady enough to align tolerances measured in tenths of millimeters.
This part sucks and there's no way around it.
Static charges on screen protectors create measurable attractive forces toward your phone's screen. We're talking about forces that don't sound substantial until you realize that's enough to pull a lightweight tempered glass protector a few millimeters off your intended trajectory in the final approach.
Static Electricity Isn't Just About Dust Attraction
The charge distribution isn't uniform across the protector. It concentrates at corners and edges, which means the protector doesn't just move toward the screen, it can rotate slightly as different areas experience different attractive forces. You'll notice this as a tendency for one corner to "want" to drop faster than the others.
Humidity affects static charge buildup. Below 40% relative humidity, static builds up like crazy. Above 60%, it dissipates faster than it accumulates. This is why some people swear by bathroom installation after running a hot shower (the steam raises humidity), while others have success in climate-controlled environments. Neither approach is wrong. They're just managing the same physics problem through different environmental controls.
The intrinsic muscles of your hand (the ones that control fine motor movements) begin experiencing fatigue within 8-12 seconds of sustained precision positioning. You feel it as a slight tremor or a need to readjust your grip. By the time you've cleaned your screen, removed the protector from its packaging, peeled the adhesive backing, and positioned the protector for application, those muscles are already working.
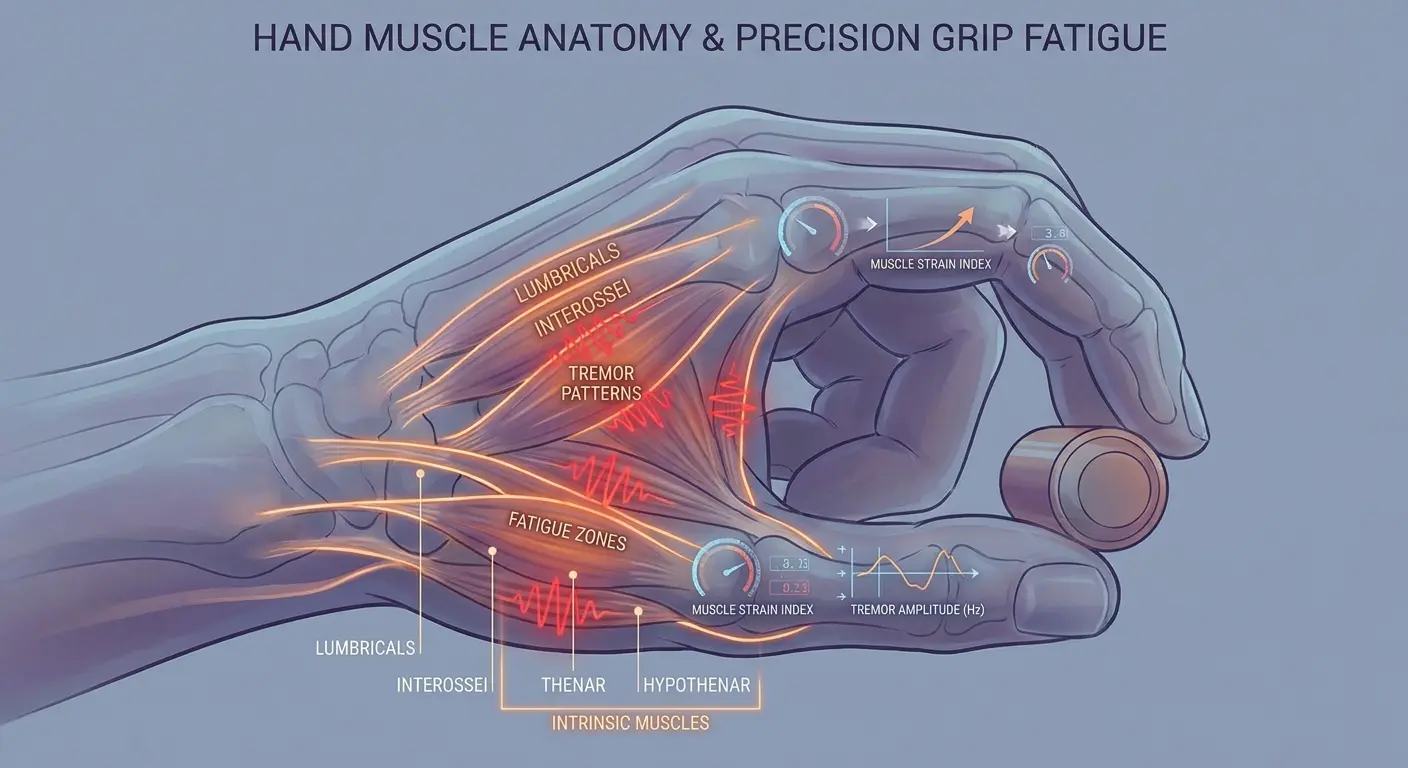
Muscle Fatigue Happens Faster Than You Expect
The fatigue compounds because you're not just holding the protector steady, you're actively suppressing your hand's natural tremor while simultaneously trying to lower the protector at a controlled speed. Your brain is processing visual alignment cues, tactile feedback from your fingertips, and proprioceptive data about your hand position in space. That's a massive cognitive and physical load for what seems straightforward.
Grip strength doesn't correlate with installation success. I've watched people with strong hands crush protectors by gripping too hard when fatigue sets in, and people with weaker grips lose control as their muscles tire. The sweet spot is a firm but not tense grip, maintained for the shortest possible duration, which means you need to have everything else ready before you pick up the protector.
Here's what worked for me:
How You Hold It |
Stability Level |
Rotation Risk |
When Your Hand Gives Up |
Works Best On |
|---|---|---|---|---|
Two-corner grip (diagonal) |
Low |
High |
6-8 seconds |
Small protectors under 5 inches |
Two-edge grip (parallel sides) |
Medium |
Medium |
10-12 seconds |
Standard phone protectors |
Four-corner grip |
High |
Low |
8-10 seconds |
Large protectors, tablets |
Center-edge combination |
Medium-High |
Low |
12-15 seconds |
Protectors with centered camera cutouts |
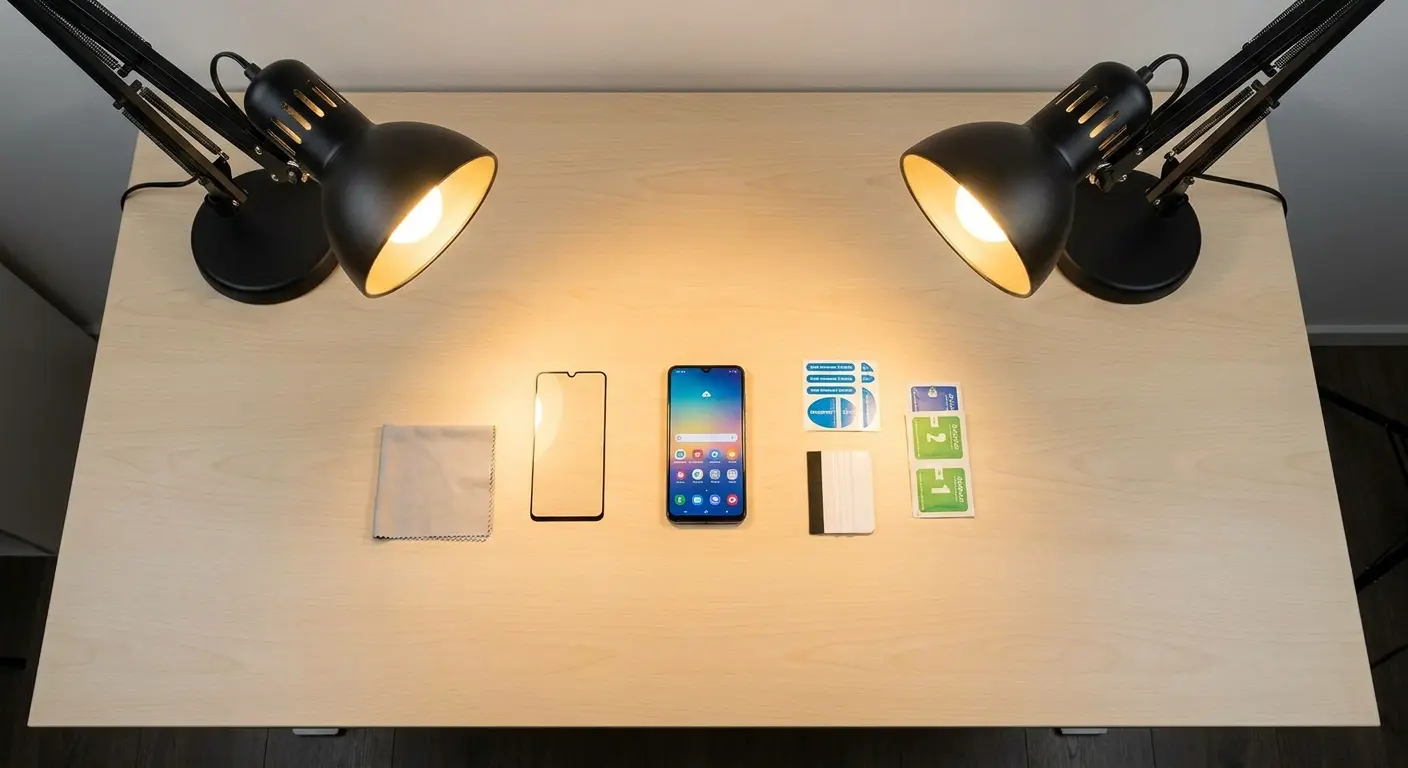
Pre-Installation Prep That Actually Matters (Not Just Wiping Your Screen)
Your screen isn't as clean as you think. Even after wiping it down, there's invisible crap on there. Broken-down oleophobic coating that's been degrading for months. You can't see it, but your protector's adhesive will find it.
Over months of use, the oleophobic coating doesn't just wear away, it breaks down into a residue that sits on your screen's surface. Standard microfiber wiping doesn't remove it. You'll think your screen is clean because it looks clean, but there's a molecular-thin layer of degraded coating that prevents screen protector adhesive from achieving full contact.
Oleophobic Coating Residue Is Your Hidden Enemy
You can test for this residue by breathing on your clean screen. If the condensation doesn't form a uniform layer but instead beads up in some areas and spreads in others, you've got residue. The fix requires isopropyl alcohol at 70% concentration or higher, applied with a lint-free cloth using circular motions, followed by a straight-line wipe to remove streaks.
The timing of this cleaning matters. Alcohol evaporates, but it also leaves behind trace amounts of whatever was dissolved in it. You need to clean with alcohol, let it evaporate completely (about 30 seconds in normal humidity), then do a final wipe with a dry microfiber cloth to remove any residue the alcohol left behind. Skip that final wipe, and you're installing your protector onto an invisible film of dissolved oils and coating fragments.
Understanding the best iphone glass screen protectors starts with proper surface preparation. The right protector paired with proper installation makes all the difference.
Here's my actual process (not the official one, the one that works):
Remove phone from case and power off device
Wipe the screen. Just get the obvious stuff off.
Hit it with isopropyl alcohol (70%+) on a lint-free cloth. Never spray directly on the phone unless you want liquid in your speakers.
Clean screen using circular motions, working from center outward
Do a straight-line wipe to eliminate streaks
Wait 30-45 seconds for the alcohol to evaporate completely
Final dry wipe with a fresh microfiber cloth section
Breath test: exhale gently on screen to check for uniform condensation pattern. If the fog is uneven, you've still got residue. Repeat the alcohol step.
Use the dust sticker thing on any specks you see
Install within a minute or dust will land on it again
That's it. Don't overthink this part.
Professional installers use alignment jigs, but you can create temporary reference points using the dust removal sticker that comes with most screen protectors. Before you clean your screen, place small pieces of the sticker at the top and bottom edges of where your protector will sit. These create tactile reference points you can feel without looking directly at them.
Creating Alignment References Without Marking Your Phone
The key is placement precision. Measure from your phone's edge to where the protector edge should sit, then place your reference stickers at that exact distance. When you're lowering the protector, you can feel when it contacts these stickers, giving you confirmation that your horizontal alignment is correct before the protector touches the screen.
Camera cutout alignment is trickier. You can't put a reference sticker over your camera, but you can use the edge of the camera bump as a guide. Most phone camera bumps have a defined edge that's exactly parallel to the screen edge. Position yourself so you can see the gap between the protector's camera cutout and the camera bump edge. Equal gaps on both sides mean you're centered. This requires good lighting and the right viewing angle, which is why environmental prep matters.
Overhead lighting creates shadows under the protector's edges that make it nearly impossible to judge gaps accurately. You need angled lighting from at least two directions, positioned so that you can see the gap between the protector edge and your phone's bezel as a distinct line, not a shadow.
Lighting Angles That Reveal Alignment Errors Early
The best setup uses a bright light source (desk lamp, phone flashlight, even a window) positioned at about 45 degrees to your work surface. This creates enough contrast to see the gap without creating harsh shadows. A second, dimmer light source from the opposite angle fills in shadows and lets you verify alignment from multiple perspectives without moving your head (which would change your viewing angle and introduce parallax error).
You can verify your lighting setup before you start the installation by placing the protector on your phone without removing the adhesive backing. Look at the gaps between the protector edges and your phone's edges. Can you clearly see whether they're equal? Can you see the camera cutout alignment without tilting your head? If you can't judge alignment with the backing still on, you won't be able to judge it during the actual installation when you're working against the clock.
The Hinge Method Explained Without Oversimplifying the Technique
Everyone recommends the hinge method. I'm lukewarm on it. It works great when it works, and it's a disaster when it doesn't.
The edge you choose for your hinge determines which alignment errors you can correct and which ones become permanent. Hinge on the top edge, and you can adjust left-right alignment until the moment the protector makes contact. Hinge on the side, and you can adjust top-bottom alignment. You can't do both.
Phone design dictates your best hinge position. If your phone has a centered camera cutout at the top, you want a top-edge hinge because left-right centering of that cutout is your most critical alignment task. If your phone has an off-center camera (common on many models), a side-edge hinge might give you better control because you're aligning to the screen edge rather than trying to center a cutout that isn't centered to begin with.
Hinge Edge Selection Changes Everything
The hinge also needs to account for how you'll lift the protector away from the screen during alignment. Top-edge hinges mean you're lifting the protector up and away from yourself. Side-edge hinges mean you're rotating it open sideways. Your workspace needs to accommodate this movement. I've seen people choose a top hinge, then realize they don't have clearance above their phone to lift the protector high enough to see the alignment clearly.
The tape forming your hinge needs to be strong enough to hold the protector's weight when lifted but not so aggressive that it damages your phone's coating or leaves residue. Standard office tape is too weak. Duct tape is too strong. You want something in the middle, which is why most installation kits include specific hinge tape.
Tape Tension and Adhesive Strength Balance
The tape length matters as much as its strength. Too short, and the hinge creates a hard pivot point that can crack the protector if you lift it too far. Too long, and the hinge has slack that allows the protector to shift laterally, defeating the purpose of the hinge. You want the tape length to equal about 60-70% of your phone's edge length, centered on that edge.
Hinge placement distance from the screen edge affects how the protector behaves during lowering. Place the hinge tape too close to where the protector edge will sit, and you create a fulcrum that makes the opposite edge want to lift. Place it too far away, and the protector can shift under the tape before you've secured it properly.

