


Steady every shot: Magnetic Tripod Phone Mount and Adapter.
Soft where it should be sharp, shaky at the edges, lit by whatever the room was doing. My working assumption is that the defaults get used untouched and the file carries that decision to the timeline. Readers who came to capture what is on the display want a different page: we cover record your iPhone screen separately.
About nine in ten U.S. adults, 91 percent, own a smartphone, up from just 35 percent in 2011, according to the Pew Research Center Mobile Fact Sheet, from a nationally representative survey fielded in 2025. Most of those cameras hold capability their owners never switch on.
How to record video on iPhone properly is not about finding the record button. Four decisions before the take do the work: resolution, frame rate, stabilization and sound. Every question about how to make videos on iPhone that hold up returns to those four.

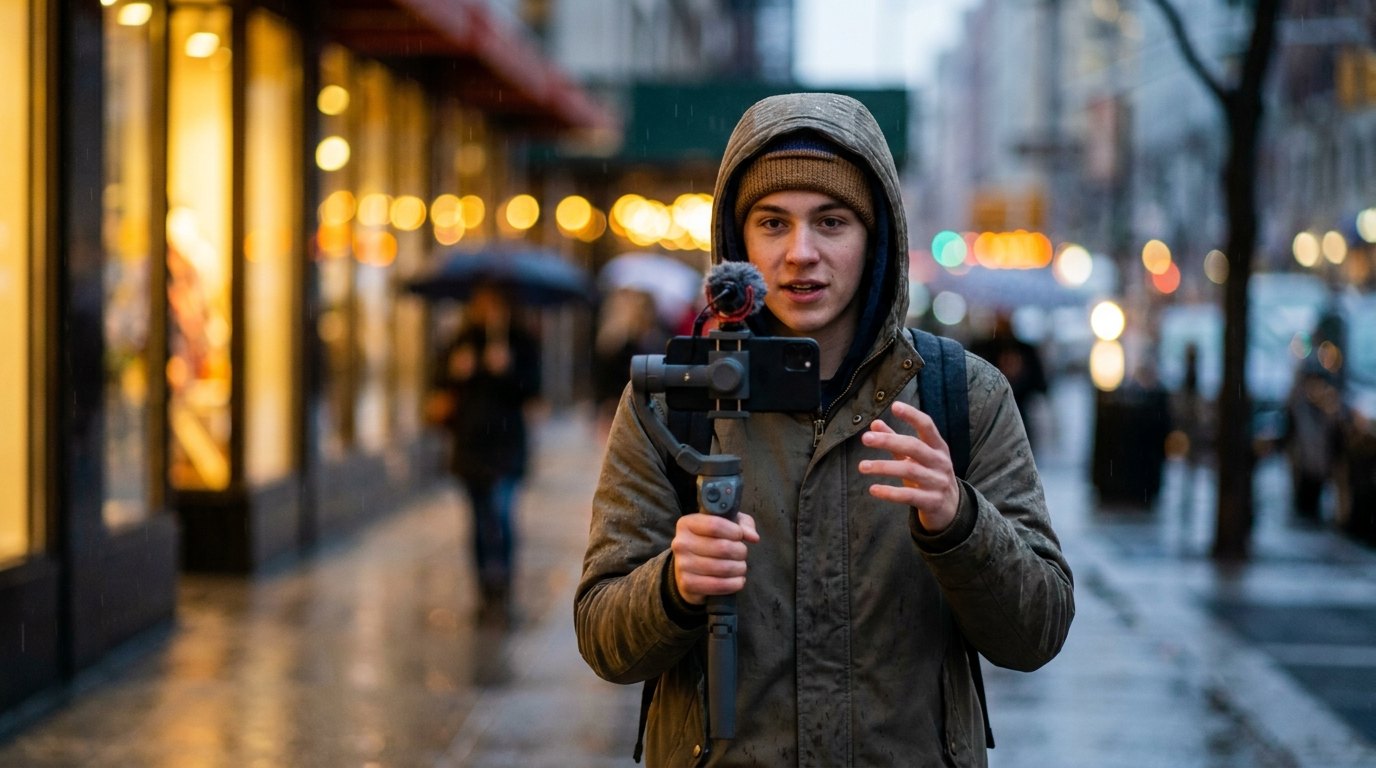
Alt text: Creator filming a walk and talk at dusk
Table of Contents
- The Four Decisions You Make Before Pressing Record
- Frame Rate Is a Delivery Decision, Not a Look
- Stabilization Gives You Four Fixes and Charges You for Two
- Exposure, Focus and White Balance That Stay Put
- Cinematic, Slow Motion and Time Lapse, and When Each Earns Its Place
- Recording Sound, and Fixing It Afterwards in Photos
- Framing for Vertical and Horizontal Delivery
- Storage, File Size and the ProRes Tax
- The Fix for Handheld Shake Is Not a Setting
- Final Thoughts
TL;DR
- Most of how to record video on iPhone is settled before you press record. Start at 4K at 30 fps.
- Auto FPS can drop capture to 24 fps in low light without telling you.
- Enhanced Stabilization is on by default and it crops, and Action mode caps capture at 2.8K.
- Set the best iPhone video settings tonight: Lock Camera on, Auto FPS off, then record a test clip and watch it back.
The Four Decisions You Make Before Pressing Record
Resolution decides how much detail exists. Frame rate decides how motion reads and whether the destination can take the file. Stabilization costs crop or pixels for every smooth frame. Apple ships a separate answer to each, which reads to me as an admission that the defaults are a compromise.
Apple Newsroom announced on 21 May 2026 that Apple TV would present an MLS match captured on iPhone 17 Pro in Apple Log 2, calling it "the first time iPhone will be used to capture the entirety of a major professional live sporting event broadcast."
The sixty second pre roll check:
- Wipe the rear lens with a soft, slightly damp, lint free cloth, per Apple's cleaning guidance. No spray, no compressed air.
- Confirm resolution and frame rate onscreen. Never assume they carried over.
- Tap the subject, drag exposure, hold until AE/AF Lock appears.
- Set the phone on something solid, or pick stabilization for handheld.
- Record five seconds and play it back, volume up.
Those five steps cover most of how to record video on iPhone, and most of what how to make videos on iPhone demands once clips from different hours cut together.
Open Camera and Start Recording in iOS 26
Apple's iOS 26 notes describe a design that surfaces Photo and Video modes, puts the rest a swipe away, and groups the controls onscreen.
Tap Video, then start the take with the Record button, either volume button, or a click of the Camera Control, all listed as equivalent in Apple's recording guide.

Alt text: Diagram of four decisions before recording video
The shot you did not plan is what QuickTake is for. Touch and hold the Shutter button in Photo mode, or slide it right over the lock for hands free. QuickTake tops out at 4K Dolby Vision at 60 fps, so on a base iPhone 17 the casual route costs nothing. On a 17 Pro it costs something: 4K120 and ProRes live only in Video mode.
Two Menus Control Resolution and Frame Rate
Your iPhone video settings live in two places, and most people know one. Tap the resolution and frame rate values in the corner while Camera is open with Video selected. The other route, Settings > Camera > Record Video, adds every toggle that never appears onscreen. Both answer how to change video quality on iPhone; one shows the switches.
Apple's warning about how to change video quality on iPhone is blunt: faster frame rates and higher resolutions make larger files. Cinematic mode iPhone support does not reach across the current line. iPhone 17, 17 Pro and 17 Pro Max list it up to 4K Dolby Vision at 30 fps. The iPhone Air and iPhone 17e spec pages list none, only Cinematic video stabilization, a different, always on feature. Apple's guide confirms it is available on supported models only. 4K120, ProRes and Log stay inside the Pro phones.
| Capability | iPhone 17 | iPhone 17 Pro and 17 Pro Max |
|---|---|---|
| 4K Dolby Vision | 24, 25, 30 or 60 fps | 24, 25, 30, 60, 100 fps (Fusion Main) or 120 fps (Fusion Main) |
| Action mode | up to 2.8K at 60 fps | up to 2.8K at 60 fps |
| Formats recorded | HEVC and H.264 | HEVC, H.264, ProRes and ProRes RAW |
| Log encoding | not supported | Apple Log 2 |
Sources: Apple's iPhone 17 tech specs and Apple's iPhone 17 Pro tech specs. The stock app is not the only route: the best camera apps for iPhone expose controls Apple keeps out of the way.
Frame Rate Is a Delivery Decision, Not a Look
Settings guides recommend 24 fps for a cinematic feel without checking what the destination accepts. Capture rate and delivery rate are different jobs, and footage above the delivery rate gets conformed by an encoder you do not control.
How to Record Video on iPhone for YouTube Without a Conversion Step
YouTube's recommended upload encoding settings ask that the recording frame rate be preserved, then list them: "Common frame rates include: 24, 25, 30, 48, 50, 60 frames per second (other frame rates are also acceptable)." So 120 is not barred. It is expensive instead: file size, upload time, four times the frames to handle in the edit. Shoot 4K120 to slow down or reframe. The same page asks for MP4 with the moov atom at the front, H.264 High Profile, and 44 to 56 Mbps for 4K HDR at standard frame rates, the figure that matches leaving HDR Video on. SDR is 35 to 45.
YouTube Shorts averages 200 billion views per day, a first party figure from Neal Mohan's 2026 letter on the YouTube Official Blog. So the answer to how to record video on iPhone for YouTube is 4K at 30, 24 only if the project stays there, and 120 as source to slow down.
Auto FPS Quietly Drops You to 24 fps
Apple documents that iPhone "can improve the video quality in low-light situations by automatically reducing the frame rate to 24 fps," in the video recording settings guide. It does that silently, and it rarely comes up in settings guides. You picked 30, the light fell, the file says 24.
Picture a walk and talk on a city street after sunset, cut against interiors shot that afternoon. If Auto FPS is on and the light drops far enough, the capture rate moves without a prompt and the mismatch surfaces on the timeline.
Leave it on when the clip stands alone. Turn it off before any shoot that mixes light levels and gets cut together. Low light is worth solving at the source. Apple Newsroom profiled four filmmakers shooting on iPhone 17 Pro Max for MAMI Select: Filmed on iPhone on 7 May 2026. Shreela Agarwal used ProRes RAW on her short 11.11 to push ISO in post.
Stabilization Gives You Four Fixes and Charges You for Two
Four separate features do this job, and they are not interchangeable. iPhone video stabilization covers sensor shift optical stabilization in hardware, cinematic video stabilization in software, Enhanced Stabilization, and Action mode. Four answers to one defect says how dominant it is. Two charge you at capture.

Alt text: Two hands gripping a phone filming a cyclist
Enhanced Stabilization Crops Your Frame
Why does the wide shot come back tighter than you framed it? Apple's wording is easy to miss: the setting "zooms in slightly to provide improved stabilization," and it is on by default, per the same settings page.
Switch it off when the phone is mounted. Leave it on handheld, where that slice of crop is the cheapest iPhone video stabilization available.
Action Mode iPhone Users Trade Pixels for Steadiness
Movement is where this one earns its place. Apple caps capture at 2.8K in Action mode, so the steadiness comes out of the pixel count. The mode wants bright light, and Apple's workaround is qualified: "if you want to use Action mode in lower light," turn on Action Mode Lower Light in Record Video. My rule of thumb on a moving shot: take the 2.8K, since the 4K frame was unlikely to survive the wobble.
Lock Camera Stops the Mid Take Lens Jump
I doubt many people go looking for this one, and it is off by default. Apple's description is narrow: it "prevents switching between cameras while recording video." What that prevents in practice, and this is judgment rather than documented behavior, is a visible shift in exposure and color mid take, usually as a subject walks toward the lens.
The Record Video menu audit, one pass, one time:
- Resolution and frame rate: 4K at 30 fps for general use.
- Enhanced Stabilization: on handheld, off when mounted, it crops.
- Lock Camera: on, so lenses stop switching mid take.
- Lock White Balance: on for single location shoots in mixed light.
- Auto FPS: off when footage gets cut against other light.
- HDR Video: on unless your delivery chain chokes.
- Apple ProRes, under Formats: off unless the shot needs it.
Exposure, Focus and White Balance That Stay Put
Three controls stop the picture from breathing on you. Tap where you want the focus area, then drag beside it to bias exposure. Apple's instruction: touch and hold the focus area until AE/AF Lock appears, then tap the screen to unlock.
White balance gets its own lock because mixed lighting is common. Take a seated interview at a kitchen table, daylight on one side, a warm lamp on the other. The camera has two references, and skin tone can slide warm then cool inside one answer. Tap the face, drag exposure down for the highlights, hold for AE/AF Lock, then turn on Lock White Balance.
Turn on Grid and Level too, the same discipline running through our iPhone photography tips.
Cinematic, Slow Motion and Time Lapse, and When Each Earns Its Place
Three modes, each used for the wrong reasons, each locked out of something.
Cinematic Mode iPhone Cameras Blur the Background for You
Apple's description is precise: the mode "applies a depth-of-field effect that keeps the subject of your video sharp while creating a beautifully blurred foreground and background," and it moves focus when it identifies a new subject. A yellow frame marks the person in focus, a gray frame marks someone detected but not in focus, so tap the gray box to move focus.
Cinematic video records at 1080p HD at 30 fps by default, and Record Cinematic in Settings switches it to 4K at 24 or 30 fps. The effect can be adjusted or removed later in Photos, so shoot it when unsure and decide afterwards. One hard limit: ProRes is unavailable here.
How to Record Slow Motion on iPhone and Keep the Frame Rate Useful
Slo-mo records normally and plays back slow, reached by touching Photo or Video and swiping across. Apple sets the back camera to 1080p HD at 240 fps and the front to 1080p at 120 fps, and only the back camera rate is documented as changeable, in Settings > Camera > Record Slo-mo. Open the clip in Photos, tap Edit, then slide the vertical bars to set the slow section. Pro models get a shortcut. Tap the format values in the corner in Video mode on iPhone 16 Pro or 17 Pro and select 120 FPS. Either way, how to record slow motion on iPhone starts with what you point it at, since the capture decision is permanent.
Time-Lapse After Dark Needs a Tripod
An hour of a setting sun becomes a few seconds of video. Select the mode, frame the subject, then, in Apple's words, "place it on a stable surface or tripod." Apple repeats it for low light: on iPhone 12 or later, a tripod captures more detail.
A sunset from a balcony is the shot to practice on. Put the horizon on a grid line, lock exposure so the camera does not chase the light down, and check storage first. One limit on how to record timelapse on iPhone: ProRes is blocked here, and in Cinematic and Slo-mo too.
Recording Sound, and Fixing It Afterwards in Photos
Capture options come first, in Settings > Camera > Record Sound. Apple documents that iPhone 16 or later records Spatial Audio, with Stereo and Mono as alternatives. iOS 26 added a microphone input chooser, and AirPods can be the microphone.
Audio Mix, in Photos, on iPhone 16 or later, applies to video recorded in Spatial Audio. Open the clip, tap Edit, then Audio Mix, and pick Standard for the original audio, In-Frame to "reduce sounds and voices from sources not visible in the video frame," Studio to "reduce background sounds and reverb," or Cinematic to put voices on a front facing track. Apple's wording sits on its video editing page.
Microphone distance and wind technique are their own subject, handled in how to vlog.
Framing for Vertical and Horizontal Delivery
Where the video lands decides how you hold the phone, and most people settle it too late. Video accounted for around 50 percent of mobile data traffic across the four sampled European networks in the Ericsson Mobility Report, November 2025 edition, and social media video made up approximately 80 percent of all video traffic on three of those four, nearly 70 percent on the fourth. Read that for what it measures: bytes on four operator networks, not how anybody held a phone. The framing decision starts with where you plan to publish.

Alt text: Vertical video frame divided into safe zones
Two framing problems follow. A vertical frame gets overlaid by whatever the app puts on top, so a face centered in the viewfinder can end up crowded once posted. A horizontal frame cropped to vertical loses the sides of every shot, turning a two person interview into a one person interview. Leave headroom for the crop that is coming. Creators who plan to grow an audience on TikTok frame for the vertical crop at capture, a habit that shapes how to record video on iPhone for short form long before any setting does.
Storage, File Size and the ProRes Tax
Running out of space stops a shoot cold, and my ranking puts it above every toggle here. Apple publishes no per minute file sizes. Here is what it does. ProRes files run up to 30 times larger than HEVC files. ProRes needs ten percent of device storage free, and Apple ties a second behavior to ProRes being switched on: with less than five minutes of recording time available, the Camera app might free storage automatically.
| ProRes format | Storage requirement | Models |
|---|---|---|
| 1080p HD at 25 or 30 fps | 128 GB and up | All models that support ProRes |
| 4K at 24, 25 or 30 fps | 256 GB and up | All models that support ProRes |
| 4K at 60 fps | External drive at 220 MB per second | iPhone 17 Pro, 16 Pro and 15 Pro models |
| 4K at 120 fps | External drive at 440 MB per second | iPhone 17 Pro and 16 Pro models |
Source: Apple's About Apple ProRes on iPhone. External drives must be exFAT and reformatted before each 4K120 session. This is the least glamorous part of how to record video on iPhone, met at the worst possible moment. Capacity is a buying decision too, which our iPhone storage guide covers.

Alt text: Phone on ball head tripod beside portable SSD
The Fix for Handheld Shake Is Not a Setting
Four stabilization features, two of them charging crop or resolution, and Apple still says twice on one page to use a tripod. That is the ceiling of how to record video on iPhone handheld: software subtracts the shake it measures and cannot invent the frame it cropped away.
The Magnetic Tripod Phone Mount and Adapter, $149.99, answers that with hardware. Its magnetic base carries 32 lbs of pull force, the grip the mount itself has on a magnetic surface, so the rig holds position on a steel door or a car panel through a forty minute time-lapse. An included extender keeps the tripod out of frame on wide angle shots, the framing Enhanced Stabilization already crops into. Screw or Snap means it threads onto a standard tripod or snaps on magnetically, so a handheld shot gets mounted in seconds. No amount of iPhone video stabilization does the job of not moving.
Final Thoughts
Capability is not the limit. The gap closes with decisions in the right order, not a new device. Resolution and frame rate before the take, locks before the second.
Change three settings today, not all of them. Turn on Lock Camera, turn off Auto FPS if your shoots mix light, and record a test clip before it matters. The best iPhone video settings are the ones you proved on your own footage, and proving them answers most of how to make videos on iPhone that people finish watching. Everything else in how to record video on iPhone is detail. Go film the thing.

