


Table of Contents
Why Most People Overthink Phone Projection
The Real Problem: Brightness, Not Resolution
What You Already Own That Can Help
DIY Methods That Actually Work (and Which Ones Don't)
App-Based Solutions Worth Your Time
Getting the Setup Right for Different Spaces
When Wireless Beats Wired (and Vice Versa)
Troubleshooting Common Frustrations
Where Rokform Fits Into Your Setup
Final Thoughts
TL;DR
Your phone's screen is bright enough for dark rooms but useless in daylight. You probably already own something that can cast to a TV. Use that before buying anything. Shoebox projectors are fun for kids and completely useless for adults. Cables beat wireless for anything important. Most problems are about mounting your phone properly, not technical compatibility.
Why Most People Overthink Phone Projection
You're at your parents' house and want to show them the video of their grandson's first steps, but everyone's crowding around your phone like it's 2008. Or you're in a hotel room wanting to watch Netflix on something bigger than a 6-inch screen. Or (and this happened to me last month) you need to present slides to a client but your laptop died and you've got 10 minutes.
You search "phone projector" and get bombarded with product listings for mini projectors that cost $200+ or complicated tutorials involving magnifying glasses and cardboard.
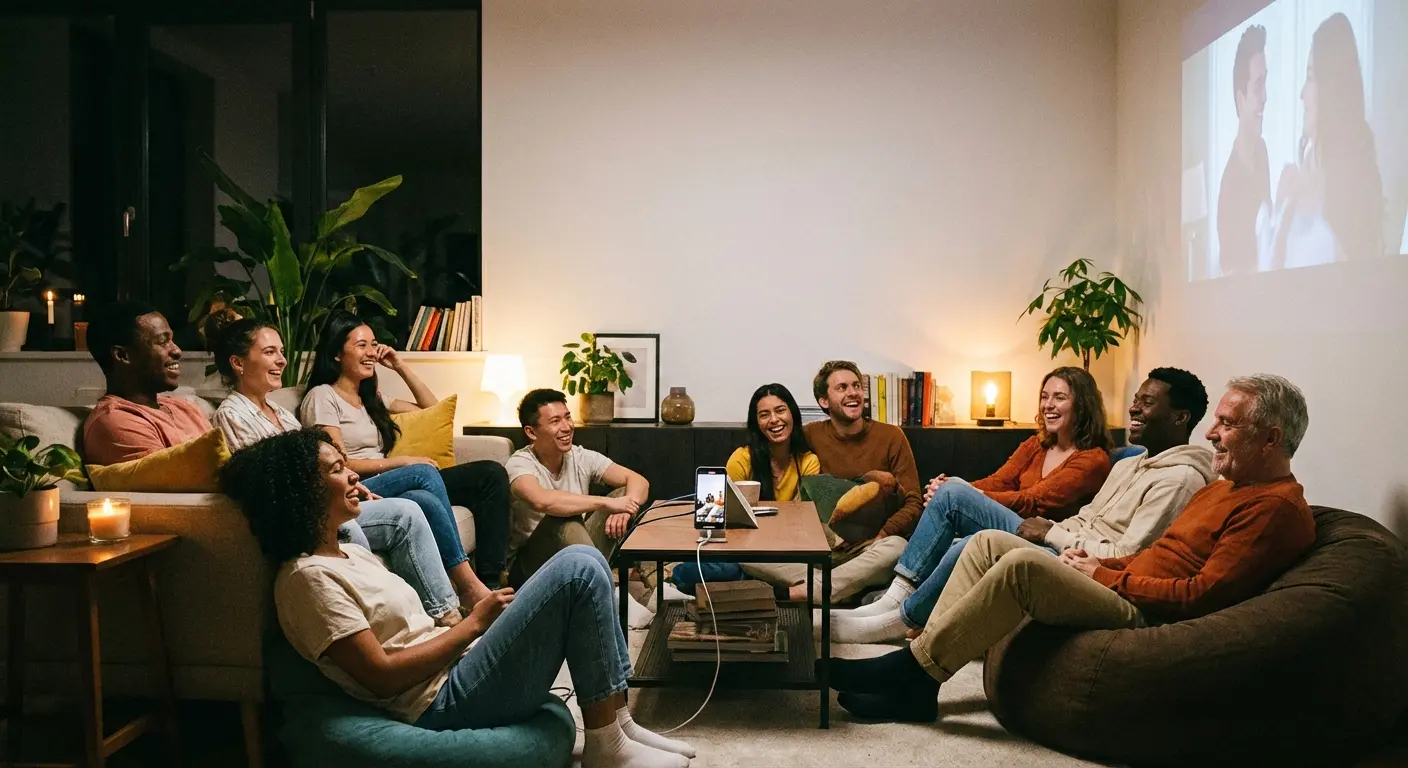
Look, the real issue is that you're probably asking the wrong question. It's not whether your phone can project. It's figuring out what kind of projection serves your purpose. There's a massive difference between watching a two-hour movie and showing someone a 30-second clip. Pictures and videos you're used to seeing on a 6 to 8 inch screen look incredible on a 200 inch mega-screen, especially when you have people over who want to see your content without crouching around a small, hand-held screen.
Phone projection isn't about replicating cinema quality. It's about solving specific, situational needs. Sharing content with groups, creating ambient displays, or presenting without lugging equipment. The focus should shift from "how do I make this perfect" to "how do I make this work for what I need right now."
Netflix killed casting from most Android devices in 2024. Their official reason? Not enough people used it. Translation: they want you using their app on your TV, not your phone. Annoying, but it is what it is.
Most guides treat phone projection as an all-or-nothing scenario. You either buy dedicated hardware or you don't bother. That's complete nonsense. Your phone already connects to dozens of devices that can display its content on larger screens. The trick is understanding which method matches your situation and learning how to use your phone as a projector effectively without overspending.
The Real Problem: Brightness, Not Resolution
Your phone's display? It's probably got better resolution than most budget projectors. Seriously, the pixel density on modern smartphones is kind of ridiculous for what we're talking about here.
Brightness is where everything falls apart.
Phone screens max out around 1,000 nits (the really bright ones, anyway). Traditional projectors pump out thousands of lumens to combat ambient light. Your phone can't compete with that, which means you need to control your environment instead of fighting it.
Does this make phone projection useless? Not even close. It just means you can't expect to project in a sunlit room and see anything worthwhile. Dim the lights, close the curtains, or wait until evening. Suddenly, your phone becomes a perfectly functional display source.
Quality portable projectors designed for phone connectivity need at least 400+ ISO lumens for indoor use, and 800+ ISO lumens for daylight or outdoor settings. That benchmark helps explain why phone screens alone struggle in bright environments.
Resolution becomes relevant only when you're projecting large or sitting close to the display surface. For most use cases (showing content to 3-5 people from 6-8 feet away) your phone's screen resolution translates just fine.
Understanding Lumens vs. Nits
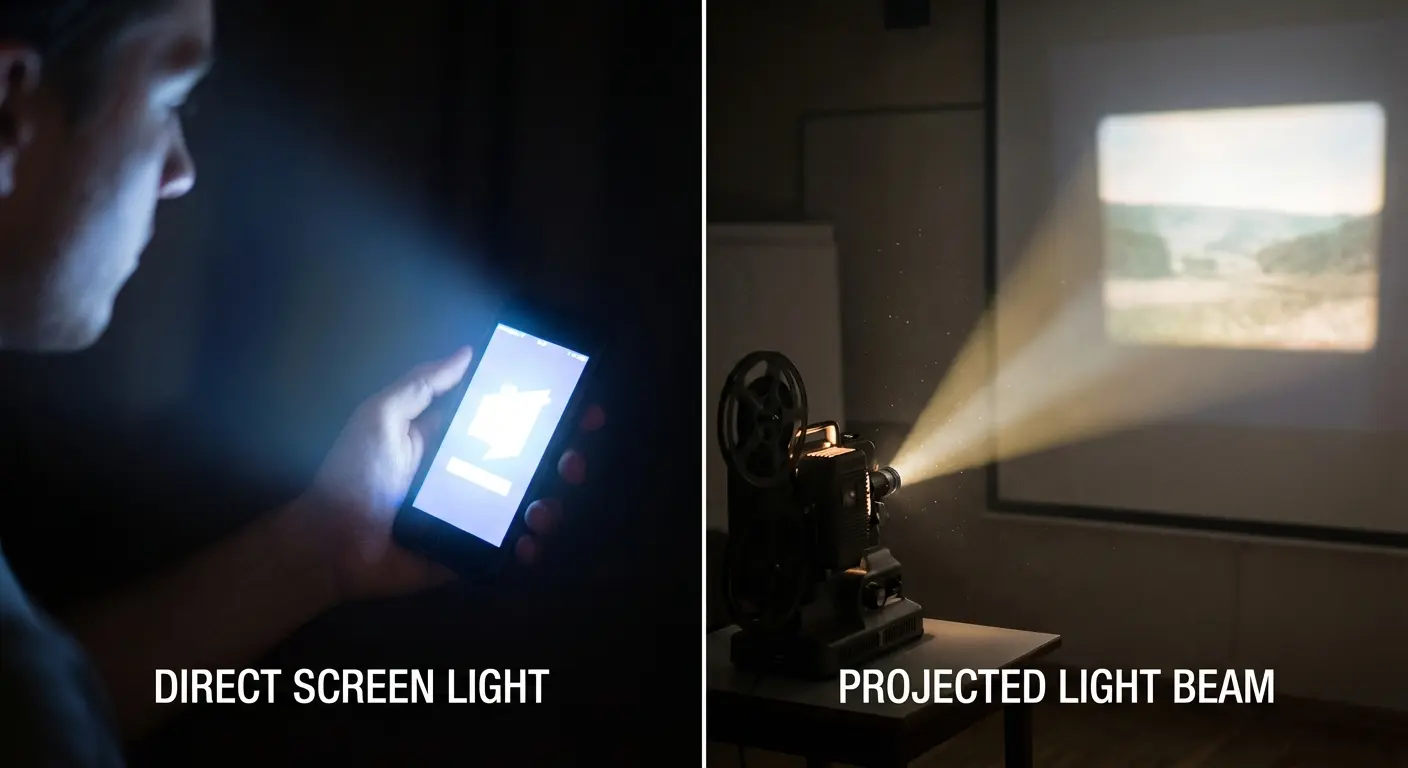
Lumens measure light output from a source. Nits measure brightness per unit area. Your phone's screen is bright per square inch but doesn't project that brightness outward the way a dedicated projector does.
DIY projection methods try to redirect and magnify your phone's existing light output. They can't create brightness that isn't there. You're working with a fixed amount of light, redistributing it across a larger surface, which inherently reduces intensity.
I know this sounds technical, but here's what it means in practice: that shoebox projector tutorial on YouTube? It's working with maybe 500 nits of phone brightness, spreading it across a 40-inch surface. The math doesn't work in your favor.
Measurement Type |
What It Measures |
Typical Phone Range |
Typical Projector Range |
Best Use Context |
|---|---|---|---|---|
Nits |
Brightness per square inch of screen |
500-1,200 nits |
N/A (not used for projectors) |
Direct viewing on device screens |
Lumens |
Total light output from source |
N/A (not used for phones) |
400-3,000+ lumens |
Projected images in various lighting |
ISO Lumens |
Standardized brightness measurement |
N/A |
400-800+ for portable units |
Comparing projector performance |
What You Already Own That Can Help
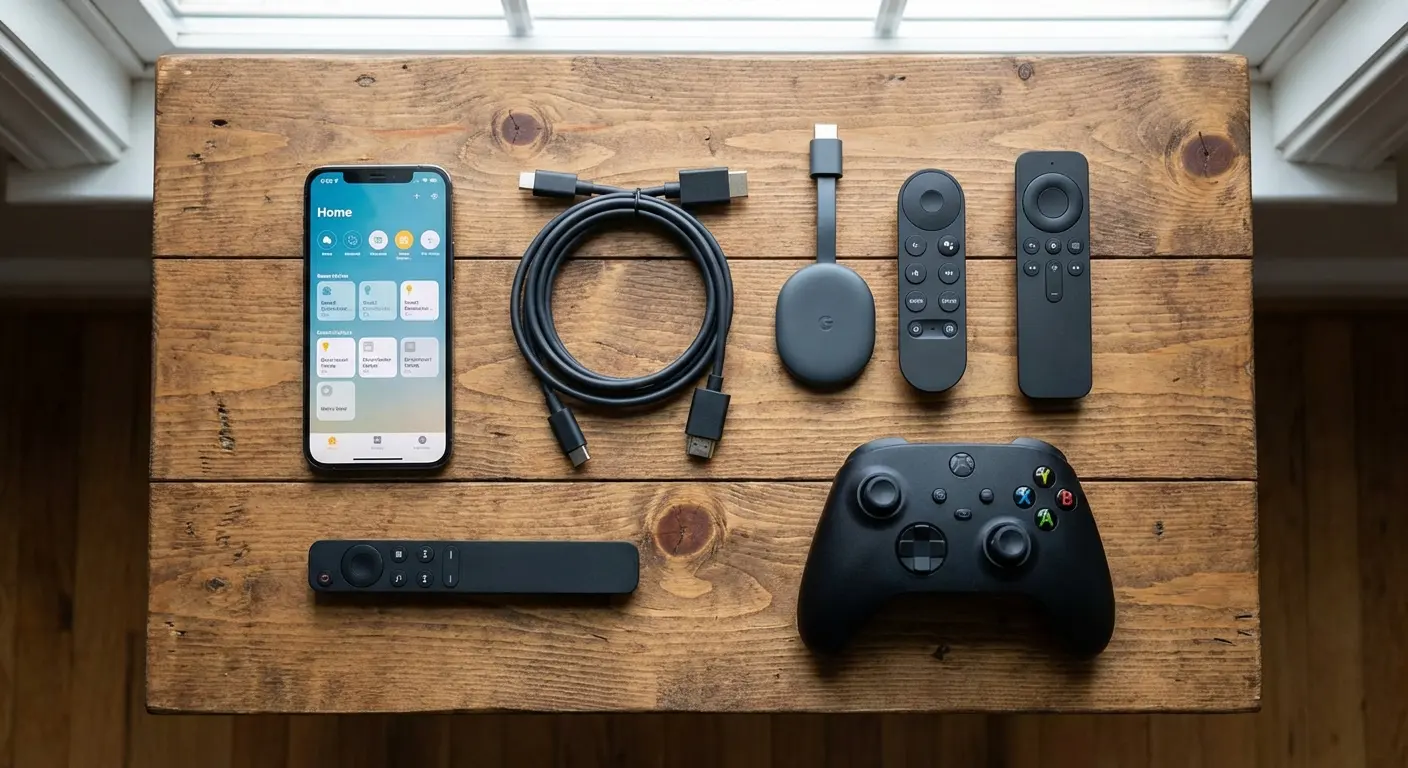
You probably own at least one device that can display your phone's content on a bigger screen. We're not talking about projection in the literal sense here, but the functional outcome is identical: getting what's on your phone onto a surface everyone can see.
Smart TVs with built-in casting support some form of wireless casting if they were manufactured after 2016. Most include Chromecast, AirPlay, Miracast, or proprietary systems. Your phone connects directly without additional hardware.
Streaming sticks and boxes like Roku, Fire TV, Apple TV, and Chromecast devices all enable phone-to-screen casting. You've probably got one plugged into a TV already.
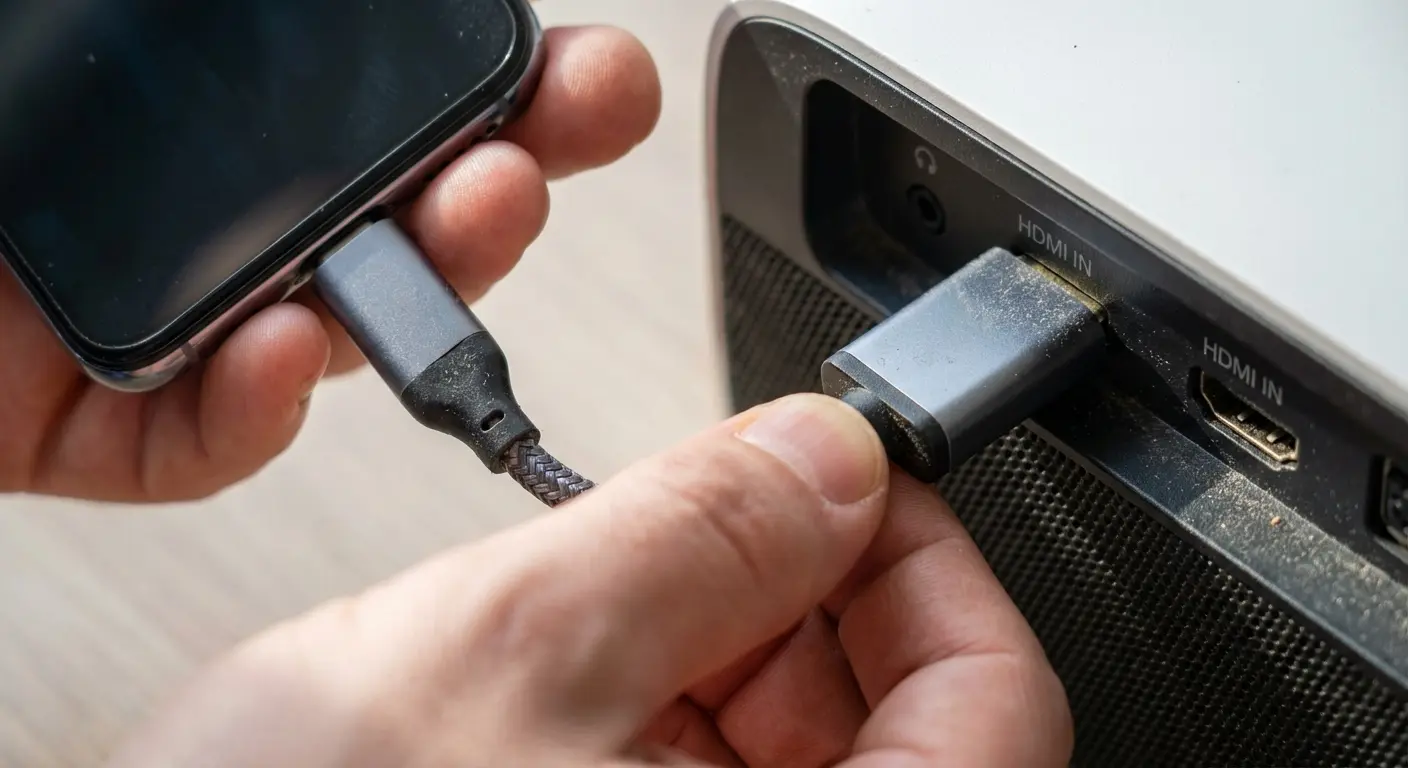
HDMI adapters cost $15-30 and provide wired connections. USB-C to HDMI or Lightning to HDMI adapters are dead simple and bypass wireless compatibility issues entirely.
With Netflix eliminating wireless casting from most Android devices in 2024, cable-based solutions using USB-C to HDMI adapters have become the primary method for streaming Netflix from mobile devices to TVs. Particularly useful for hotel rooms or visiting friends and family.
Gaming consoles support screen mirroring through their respective apps. If you've got a PlayStation or Xbox hooked up, you've got a projection pathway.
Your laptop can act as an intermediary. Computers can receive content from your phone (via apps or cable) and output to a larger monitor or projector. This adds a step but solves compatibility gaps.
Device Compatibility Quick-Check:
Check if your TV was manufactured after 2016 (likely has built-in casting). Identify your phone's port type (USB-C, Lightning, or micro-USB). Verify your streaming stick model and confirm it supports screen mirroring. Test your WiFi network strength in the room where you'll project. Confirm your phone's OS version supports your chosen connection method. Locate all HDMI ports on available displays and note which are in use.
When "Casting" Beats "Projecting"
Casting your phone to a TV isn't technically projection, but it solves the same problem: sharing content from a small screen to a larger viewing surface.
For indoor use with existing displays, this approach wins on every metric. Brightness, resolution, audio quality, and ease of setup. True projection becomes valuable when you don't have a screen available. Camping trips, backyard movie nights, hotel rooms, or presentations in spaces without displays. That's when you need actual projection methods.
I travel for work maybe twice a month. I keep a small USB-C to HDMI adapter in my laptop bag. When I arrive at a client office, I can connect my phone directly to their conference room projector or monitor within seconds. No need to transfer files to my laptop or worry about incompatible software. The adapter cost me $25 and has solved connectivity problems in dozens of different venues over the past year.
DIY Methods That Actually Work (and Which Ones Don't)
The internet loves DIY phone projectors made from shoeboxes and magnifying glasses. These tutorials promise cinema experiences from household items. The reality is way less impressive.
The Shoebox Projector Reality Check
I spent an entire Saturday building three different shoebox projectors from YouTube tutorials. Three. The first one didn't work at all. The second one produced an image so dim I thought my eyes were broken. The third one worked for about 20 minutes before my phone overheated and shut down.
Shoebox projectors use a magnifying glass to enlarge and project your phone's screen onto a wall. The concept is sound. The execution is terrible.
You'll need a completely dark room. Not dim. Dark. Any ambient light washes out the already-faint projected image. The phone screen must be at maximum brightness, which drains your battery in under an hour. The projected image appears upside down unless you use an app to flip your display (which not all content sources allow).
Image quality tops out at "barely acceptable." You're looking at a blurry, dim picture that works for showing simple content to kids or creating ambient visuals. Watching a full movie? You'll give up after 15 minutes.
The construction takes 20-30 minutes if you've got a suitable box, magnifying glass (6-10 inches diameter works best), and basic tools. Cut a hole for the lens, create a phone holder inside, and seal light leaks with tape.
Can we talk about those viral TikToks showing "amazing" phone projectors made from cardboard boxes? The comments are full of people saying "it didn't work" and the creator never responds. That should tell you something.
A shoebox projector costs maybe $15 if you need to buy the magnifying glass, takes half an hour to build if you're not completely hopeless with scissors, and produces an image quality I'd generously describe as "vintage home movie." It's perfect for kids who think blurry is cool, and basically useless for anything else.
Best Use Cases for DIY Projection
Instead of dismissing DIY methods entirely, here are specific scenarios where they make sense:
Creating a projected nightlight or ambient display in a kid's room. Temporary signage or displays for events (when professional equipment isn't justified). Emergency presentations when all other technology fails. Art installations or photography projects where the lo-fi aesthetic fits.
A kindergarten teacher I know created a shoebox projector to display constellation patterns on her classroom ceiling during naptime. The dim, slightly fuzzy projection enhanced the calming atmosphere, and the $12 investment (shoebox and magnifying glass from a dollar store) worked perfectly for this specific purpose. She's been using the same setup for two years during rest periods, and the low brightness is actually an advantage for helping kids settle down.
App-Based Solutions Worth Your Time
Apps can't make your phone brighter or magically improve projection quality, but they solve connection problems and optimize your content for larger displays.
Screen Mirroring and Casting Apps
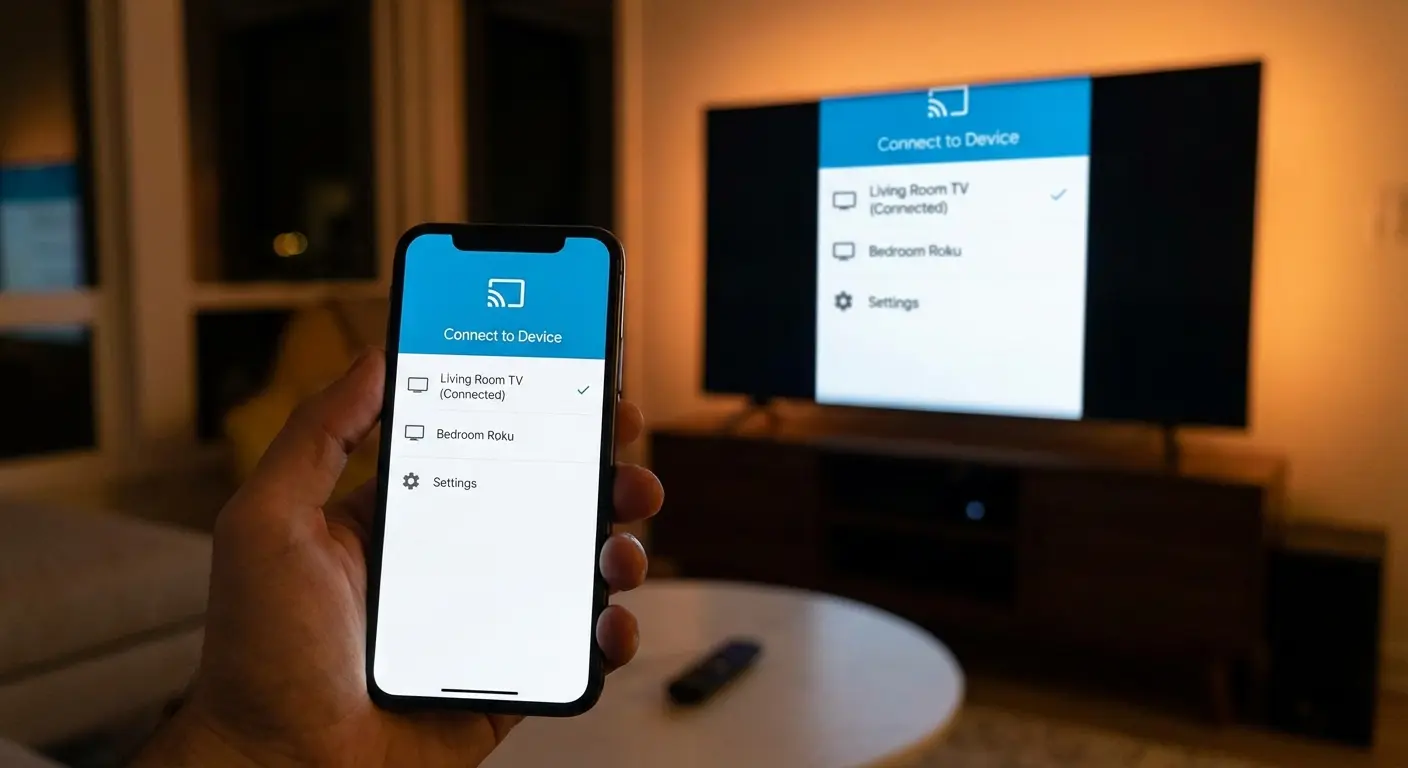
Google Home (Android/iOS) manages Chromecast devices and enables casting from your phone. It's free, works reliably, and handles both screen mirroring and app-specific casting.
AirScreen (Android) turns your Android device into an AirPlay receiver, which is useful if you're trying to connect an iPhone to an Android device or PC. Niche use case, but it solves a specific compatibility gap.
ApowerMirror offers cross-platform mirroring that works between phones, tablets, and computers. The free version has limitations, but it handles connections that native features sometimes miss.
Reflector turns your computer into an AirPlay/Chromecast receiver. Useful when you need to project your phone through a laptop that's already connected to a projector or large display.
Display Optimization Tools
Rotation Control (Android) overrides automatic rotation and forces landscape or portrait orientation. Essential when your projected content keeps flipping unexpectedly.
Screen Stream over HTTP broadcasts your phone's screen over local network, viewable in any web browser. It's unconventional but works when traditional casting methods fail.
Microsoft PowerPoint and Google Slides mobile apps both offer presentation modes optimized for external displays, with presenter notes visible on your phone while slides show on the projected screen.
These new ultra-portable projectors have expanded app-based projection possibilities. The Aurzen ZIP projector, released in early 2025, represents a new category of pocket-sized projectors that connect wirelessly through a simple AirLink process. You turn on the device, follow connection instructions, modify your audio source, and use it immediately across different mobile device brands without complicated setup.
Stuff I Wish I'd Known Before My First Presentation:
Your phone WILL go to sleep mid-presentation unless you change settings (learned this the hard way). Do Not Disturb mode or everyone sees your texts pop up (also learned this the hard way). Test the connection before people arrive, not while they're watching you sweat. Have a cable as backup because wireless always fails when it matters most. Plug phone into charger if available. Confirm screen orientation is locked correctly. Close all unnecessary background apps. Set phone to maximum brightness and disable auto-brightness.
Getting the Setup Right for Different Spaces
Setup matters more than equipment. You can have the best projection method available and still get terrible results if you ignore environmental factors.
Distance and Size Calculations
Your phone's projection (whether DIY or through an adapter to a projector) follows basic optical principles. The farther from the surface, the larger the image but the dimmer it appears.
For DIY magnifying glass setups, you'll get a viewable image at 3-6 feet from the wall, producing a 30-50 inch diagonal display. Beyond that, brightness drops below usable levels.
When using adapters to connect your phone to a real projector, follow the projector's throw distance specifications. Your phone just becomes the content source.
For casting to TVs or monitors, position seating at 1.5-2.5 times the screen diagonal for comfortable viewing. A 55-inch TV works best for viewers sitting 7-11 feet away.
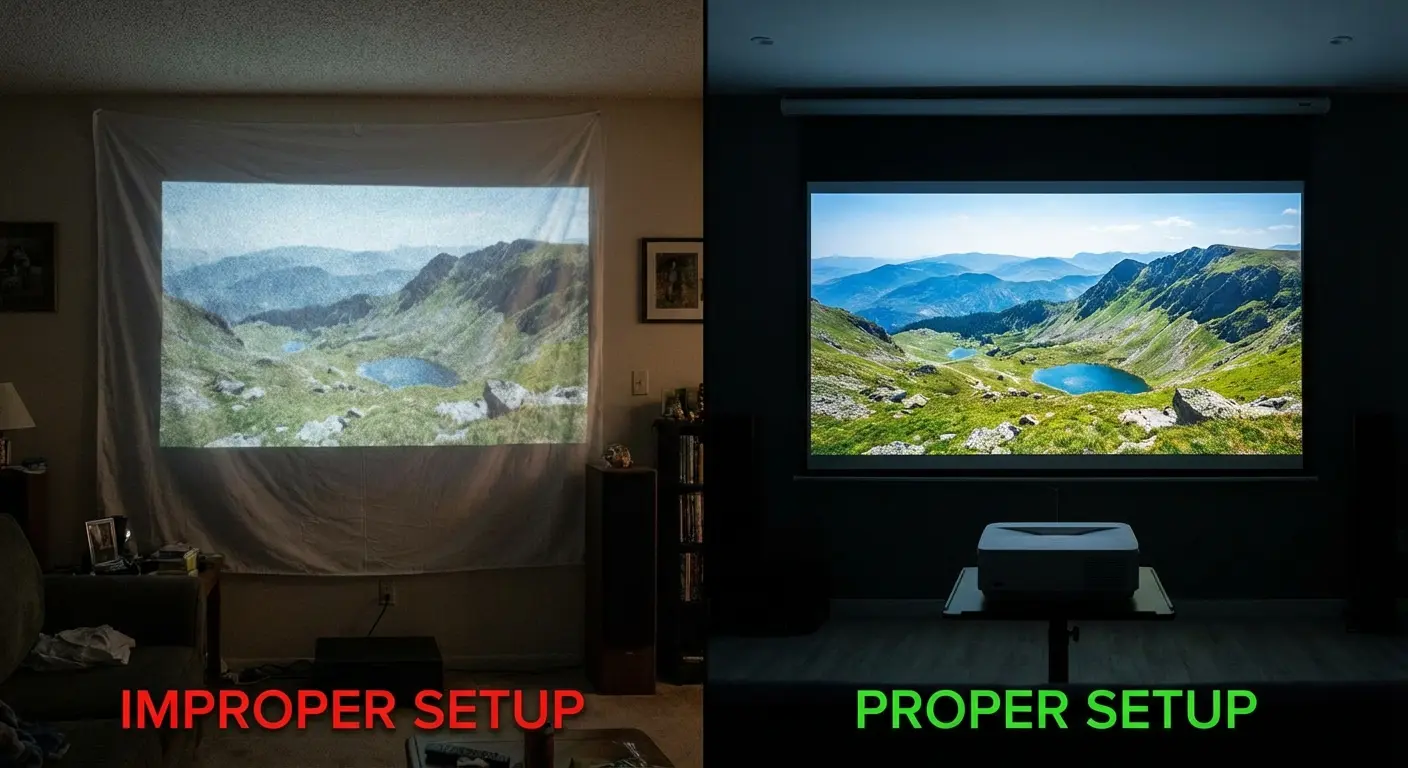
Controlling Light and Surfaces
Blackout curtains make a bigger difference than any equipment upgrade. They're cheap, reusable, and solve your biggest limitation (ambient light) immediately.
White or light gray walls work best for projection. Textured walls (knockdown or popcorn finishes) scatter light and reduce image sharpness. If you're stuck with textured walls, hang a white bedsheet or poster board as a smooth projection surface.
Outdoor projection requires waiting until full darkness. Twilight won't cut it. You need night. Position your setup with the projection surface facing away from any light sources (street lights, porch lights, neighbors' windows).
My friend Sarah tried the backyard movie thing last summer. Spent $40 on a white sheet from Target, waited until 9:30 PM, and the projection still looked like crap because she forgot about her neighbor's floodlight. She ended up moving everything to the other side of the yard, which meant sitting on the side with all the mosquitos. The movie was great though.
Audio Considerations Nobody Mentions
Your phone's speakers are terrible for group viewing. You already know this, but it's worth saying explicitly because so many projection setups ignore audio entirely.
Bluetooth speakers solve this for $30-50. Pair before you start projecting, position the speaker near the viewing area, and you're done.
When casting to a TV, audio routes through the TV's speakers automatically. This is one of casting's underrated advantages. You get better audio without additional setup.
For DIY projection or adapter-based setups, use an auxiliary cable to connect your phone to any speaker system. A $10 cable beats your phone's speakers by a massive margin.
When Wireless Beats Wired (and Vice Versa)
Wireless feels obvious. No cables, no adapters, just magic connectivity. Except wireless introduces variables that wired connections bypass entirely.
The Wireless Advantage
You can control content from across the room. Walk around during presentations, adjust playback from the couch, or hand control to someone else without swapping cables.
Multiple people can cast from their phones without physically connecting anything. This matters for collaborative viewing or when different people want to share content sequentially.
Wireless casting often includes additional features built into the protocol. Volume control, pause/play from notification shade, automatic screen orientation adjustment.
When Wires Win
Gaming or interactive content requires wired connections. Wireless casting introduces 100-300ms latency, which makes games unplayable and creates noticeable audio sync issues in videos.
Network congestion kills wireless casting. If you're on a shared network with multiple devices streaming, downloading, or gaming, your casting connection becomes unreliable. Wires bypass the network entirely.
Maximum quality demands wired connections. Wireless casting compresses video to reduce bandwidth requirements. For most content this compression is invisible, but if you're projecting high-bitrate video or detailed presentations, wired connections preserve quality.
Compatibility problems disappear with adapters. Wireless casting requires both devices to support compatible protocols. Adapters just need an HDMI port. They work with anything.
I bought a $35 wireless HDMI adapter from Amazon that had 4.5 stars and 2,000 reviews. It worked for exactly three days before developing a lag so bad it was like watching a dubbed foreign film. Returned it. The replacement had the same problem. That's when I gave up on wireless for anything important.
When it comes to adapter investments, quality USB-C to HDMI setups with proper certification, Power Delivery support, and data transfer capabilities cost anywhere from $30 USD to $80 USD, while simpler USB-C to HDMI cables without adapters range from $10 USD to $50 USD. The cheaper options may compromise quality due to lacking proper signal conversion.
Troubleshooting Common Frustrations
Things will go wrong. Your connection will drop, audio won't sync, or the image will look terrible. Here's how to fix the most common problems without losing your mind.
Connection Drops and Lag
Your casting connection worked fine for ten minutes, then suddenly stuttered or dropped completely. Network interference is usually the culprit.
Move your router closer to both your phone and the receiving device. Physical obstacles (walls, furniture, appliances) weaken WiFi signals more than you'd expect.
Close background apps on your phone. Streaming services, social media apps, and automatic updates compete for bandwidth and processing power. Force-close everything you're not actively using.
Restart both devices. It's cliché advice because it works. Most connection issues come from temporary software glitches that clear when you power cycle.
Switch to 5GHz WiFi if your network supports it. The 2.4GHz band is crowded with interference from other networks, Bluetooth devices, and even microwaves. 5GHz offers cleaner connections for casting (though with shorter range).
Audio Sync Issues
Audio plays a half-second before or after the video. This happens most often with wireless casting because audio and video take different processing paths.
Enable "audio delay" or "lip sync" adjustment in your casting app or TV settings. Most modern casting solutions include this feature specifically because sync issues are so common. Adjust in 50ms increments until audio matches video.
Use wired connections for content where sync matters. Music videos, dialogue-heavy shows, and anything with on-screen text that corresponds to audio needs the precision wired connections provide.
Check if your phone has a "game mode" or "low latency" audio setting. Some Android phones include audio processing that introduces delay. Disabling enhancement features often resolves sync problems.
And can we talk about how infuriating it is when your connection drops 45 minutes into a movie? You're sitting there, everyone's staring at you like you're the IT department, and you're frantically trying to reconnect while pretending you know what you're doing.
Image Quality Problems
Blurry projection usually means your source content is low resolution or you're projecting too large for the available light. Scale down your projection size or move closer to the surface.
Pixelation during casting indicates bandwidth problems. Your casting protocol is compressing video to maintain connection stability. Lower the video quality in your streaming app (counterintuitive but effective) or use a wired connection.
Color looks washed out because you're fighting ambient light. You can't fix this with settings. Block more light or wait for darker conditions.
For DIY magnifying glass projectors, focus is critical. The distance between your phone and the magnifying glass determines image sharpness. Adjust this distance in small increments (a few millimeters at a time) until the projected image sharpens.
App-Specific Content Won't Cast
Netflix, Hulu, and other streaming services sometimes block screen mirroring to prevent piracy. They allow casting through their built-in cast buttons but block full screen mirroring.
Use the in-app cast button instead of mirroring your entire screen. This works with most streaming services and often provides better quality anyway since the app streams directly to your TV rather than routing through your phone.
For apps that block all casting, your options are limited. HDMI adapters sometimes bypass these restrictions because they capture the video signal before DRM checks occur, but this varies by app and platform.
Downloaded content (legally purchased or rented) usually casts without restrictions. If you're planning a viewing session and worried about casting compatibility, download the content beforehand.
Where Rokform Fits Into Your Setup
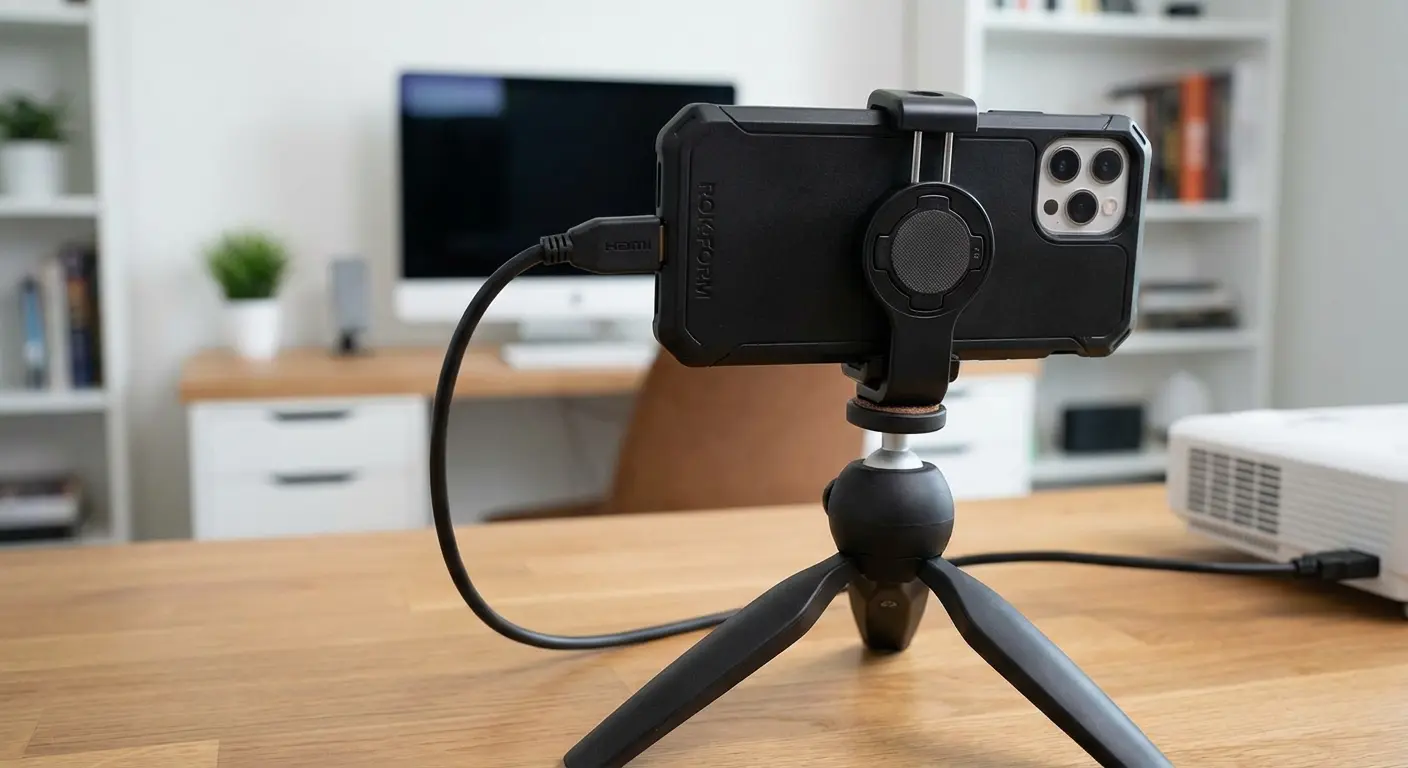
You've got your projection method figured out. Your connection is stable. The lighting is right. Then your phone tips over, slides down, or you can't get it angled correctly for optimal projection.
Mounting is the annoying problem that ruins otherwise functional setups. DIY projectors need your phone held perfectly still at a specific distance from the magnifying glass. Casting setups work better when your phone is positioned where you can see and access it without getting up. Wired connections to projectors require your phone to sit securely near the projector input.
Full disclosure: Rokform sent me some of their mounting gear to try out. And honestly? It solved the most annoying part of this whole thing. Keeping my phone positioned correctly. I was using a stack of books and a folded towel before, like some kind of cave person.
Rokform's mounting system addresses this specifically. The magnetic and RokLock mounting options position your phone securely on any compatible surface. Car mounts, desk stands, wall mounts, or custom setups. For projection scenarios, this means you can mount your phone exactly where it needs to be and trust it'll stay there.
The rugged cases protect your phone while maintaining full access to ports and buttons. When you're running HDMI adapters or charging cables during extended projection sessions, case design matters. You need port access without removing the case or fighting with covers.
Check out Rokform's magnetic mounting ecosystem to solve your phone positioning problems permanently.
Final Thoughts
Your phone won't replace a $500 projector, and that's fine. It doesn't need to.
What it can do is share content with the people around you without requiring specialized equipment or technical expertise. Whether you're casting to a TV, connecting through an adapter, or experimenting with DIY projection, the goal is the same: getting what's on your small screen onto something everyone can see.
I've overthought this whole phone projection thing way too much, which is why I'm passing on what actually worked. Start simple. Try casting to your TV first. If that doesn't work, buy a $20 cable. If you're still reading articles about shoebox projectors at 2 AM (like I was), you've gone too far.
Success depends less on which method you choose and more on whether that method fits your situation. Wireless casting wins for convenience in controlled environments. Wired connections deliver reliability when it matters. DIY projection works for specific, low-stakes scenarios where other options aren't available.
The overlooked truth about phone projection is that most people already have everything they need. You don't need to buy anything new. You need to connect what you already own in ways that match your specific use case.
The best setup is the one you'll actually use, not the one that sounds coolest on paper. My current solution? A $25 USB-C to HDMI adapter that lives in my bag and works everywhere. Is it exciting? No. Does it work every single time? Yes. That's the whole game.

