


Table of Contents
Visibility Upgrades That Work in Real Conditions
Adaptive Cornering LED Headlights
Auxiliary Fog Lights with Selective Beam Patterns
Modular Spotlight Systems
Daytime Running Light Strips
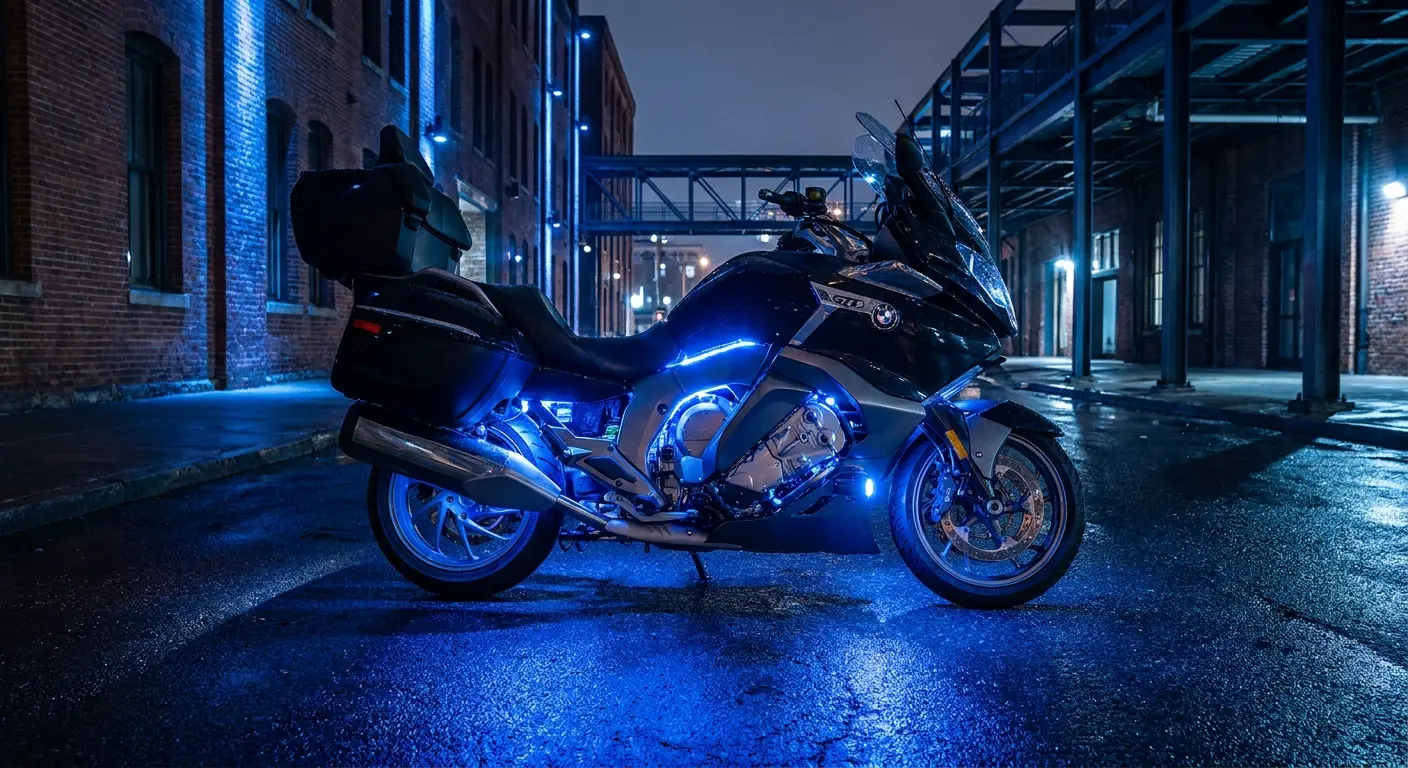
Functional Accent Lighting (Not Just for Show)
Engine Guard Illumination Bars
Fork Tube LED Wraps
Wheel Well Accent Strips
Frame-Mounted Glow Tubes
Safety-First Signal and Brake Enhancements
Sequential Turn Signal Strips
Integrated Tail Light Brake Flashers
Side Marker Projection Lights
Helmet-Mounted Brake Indicators
Utility Lighting for Maintenance and Camping
Magnetic Work Light Pods
Saddlebag Interior LED Strips
Multi-Function Camp Light Bars
Underbody Inspection Lights
Battery-Powered Portable Spotlights
USB-Rechargeable Handlebar Task Lights
TL;DR
Most of you are doing this backwards. You're buying underglow kits while your brake light is barely visible to the SUV riding your ass. Start with safety (brake flashers, turn signals that people actually notice), then add the fun stuff. And for the love of god, learn to wire things correctly or you'll melt something expensive. Ask me how I know.
Sequential turn signals and brake flashers measurably reduce rear-end collision risk by catching driver attention faster than static lights. Utility lighting (work pods, saddlebag strips, portable spots) transforms roadside repairs and overnight trips but gets overlooked in favor of aesthetic upgrades that do exactly nothing for safety.
Installation matters more than wattage. I've seen riders blow their entire electrical system because they tapped directly into circuits that couldn't handle the load. Adaptive systems that adjust beam patterns based on lean angle or speed offer the biggest safety upgrade for spirited riding. Red lights work well as accents but shouldn't replace amber turn signals or white headlights. That's not just good practice, it's the law in most places.
Visibility Upgrades That Work in Real Conditions
Here's what I see constantly at bike nights: riders with $400 worth of underglow while their stock headlights barely cut through fog. The primary function of your lighting should be making sure other drivers see you before they merge into your lane or turn left across your path. These upgrades address specific visibility gaps that factory lighting leaves wide open.
Most accidents happen at intersections, during lane changes, or in low-light conditions when a distracted driver glances your direction for half a second. That's your window. The systems I'm covering here maximize what happens in that critical moment through functional beam patterns, adaptive technology, and strategic positioning.
1. Adaptive Cornering LED Headlights
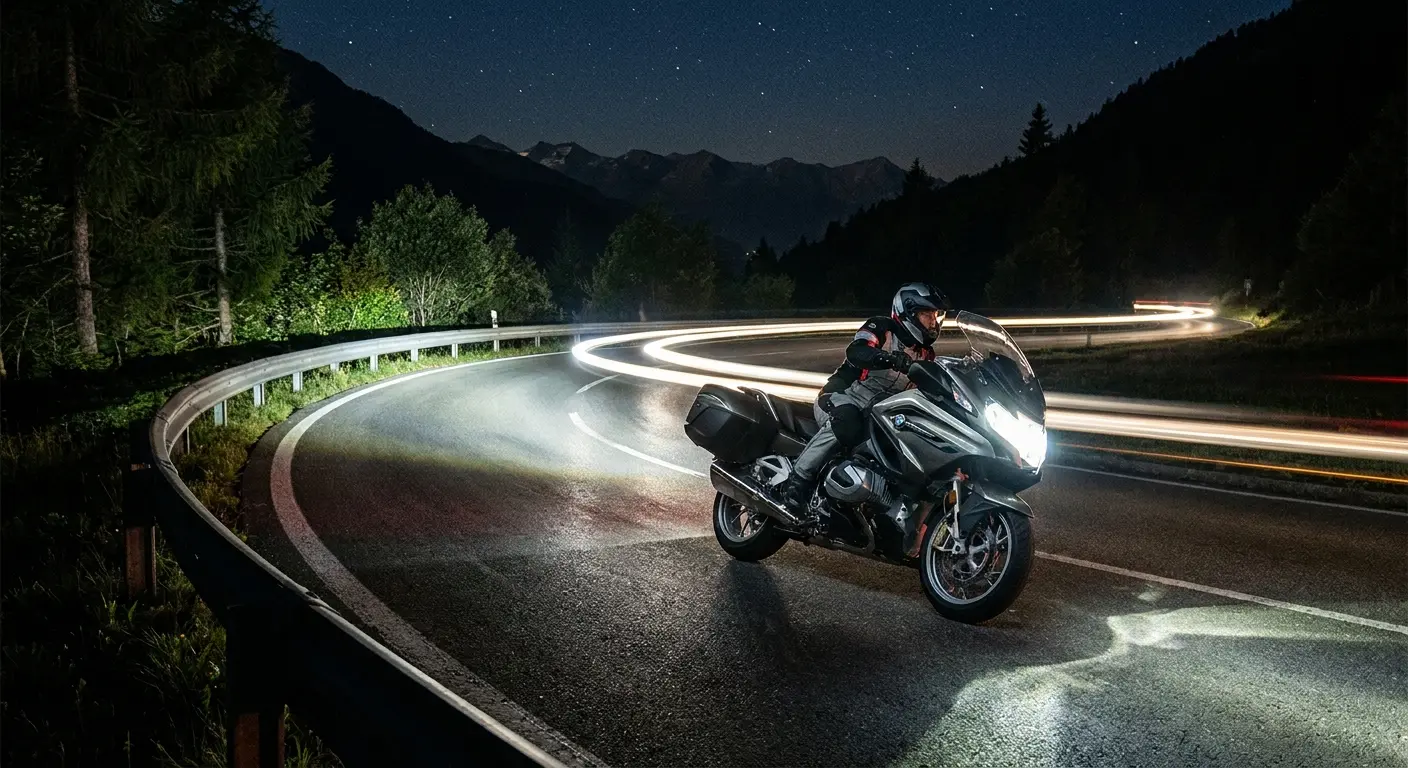
These pivot or activate additional light zones based on your bike's lean angle, illuminating the inside of turns before you enter them. Standard headlights point straight ahead while your bike leans, which means you're riding into darkness on twisty roads at night. The technology uses gyroscopic sensors or links to your steering input to redirect the beam where you're actually going.
Installation requires professional wiring to integrate with your bike's CAN bus system. Yeah, it's expensive. But the visibility improvement is immediate and dramatic. I'm talking about seeing deer, debris, or road damage several seconds earlier than you would with conventional lights.
Get these if you regularly ride mountain roads or commute on winding routes after dark. The difference between seeing a corner and guessing at it matters when you're carrying speed through unfamiliar territory. I've been running a set for two years and I can't imagine going back.
2. Auxiliary Fog Lights with Selective Beam Patterns
Standard fog lights cast wide, low beams. Selective beam pattern models let you toggle between flood (for actual fog or rain) and spot (for distance visibility on clear nights). This versatility matters because the wrong beam pattern in the wrong conditions creates glare or washes out your view.
Mount these on crash bars or fork lowers for optimal positioning. Look for units with independent switching so you can run one in flood mode and one in spot mode simultaneously. This creates a layered lighting effect that improves depth perception without blinding oncoming traffic.
Wire these with a relay. Seriously. I've watched too many riders tap directly into their existing circuits and end up with voltage drops that affect everything from fuel injection to ABS function. Don't be that person troubleshooting electrical gremlins on the side of the highway.
Beam Pattern Type |
Best Use Case |
Typical Range |
Mounting Position |
|---|---|---|---|
Flood |
Fog, rain, urban riding |
30-50 feet wide |
Fork lowers, low crash bars |
Spot |
Highway, rural roads, clear conditions |
200-400 feet forward |
Crash bars, fairing brackets |
Combo (Flood + Spot) |
Mixed conditions, touring |
Balanced coverage |
Engine guards, mid-height mounts |
Selective/Switchable |
Riders who encounter varied conditions |
Adjustable on demand |
Any auxiliary mount point |
3. Modular Spotlight Systems
These bolt-on kits use interchangeable LED modules that snap into a base mount, allowing you to swap between different beam angles or colors without rewiring. You might run wide-angle modules for city riding, then swap to narrow spots for highway trips. The modularity also means you can replace a single burned-out LED array instead of the entire light assembly.
Most systems include handlebar-mounted switches with dimming capability. Installation is straightforward on bikes with existing auxiliary light mounts. Check your alternator specs before adding more than 60 watts of auxiliary lighting. Running your electrical system at capacity shortens battery life and can leave you stranded if your regulator fails. I learned this the expensive way.
4. Daytime Running Light Strips
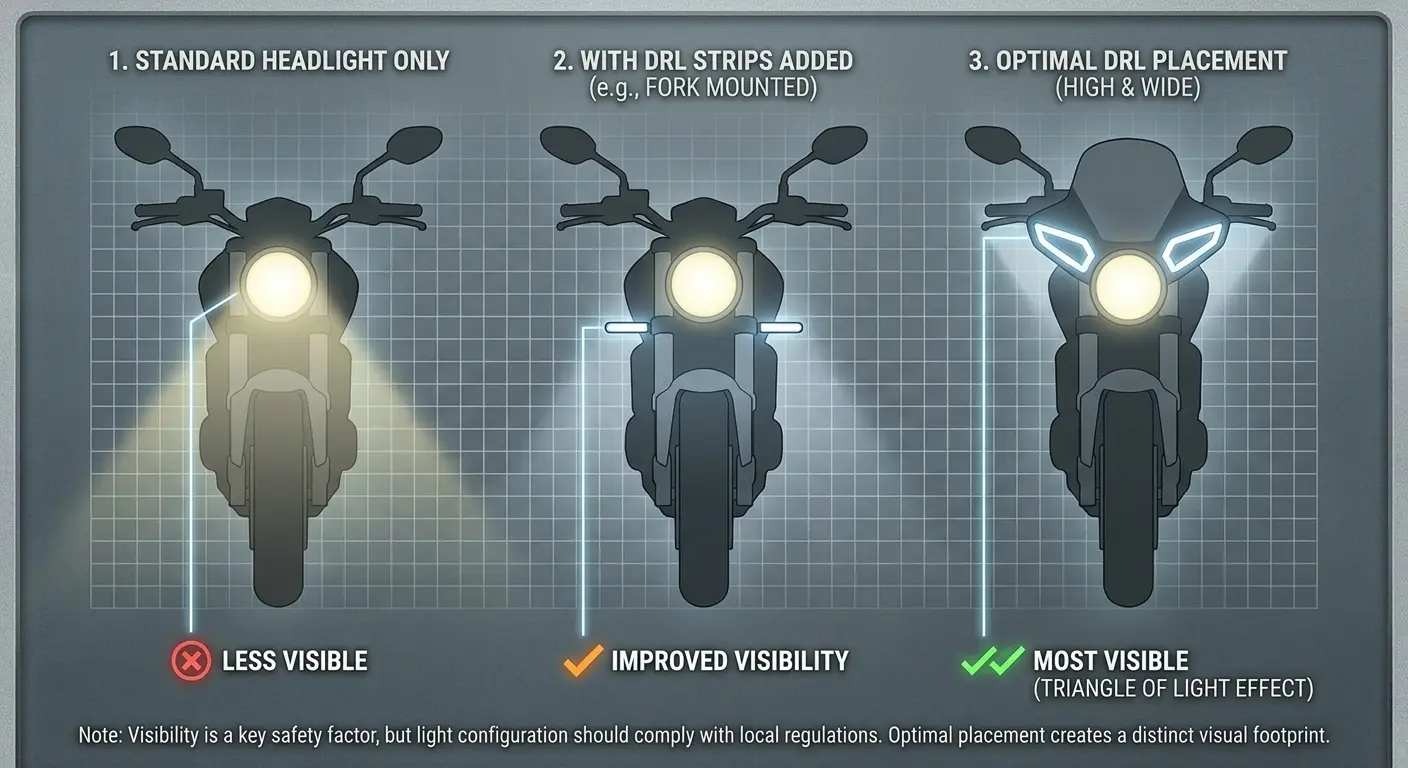
These thin LED strips mount to your front fairing, fork tubes, or frame rails and run continuously when your bike is on. They dramatically improve daytime conspicuity, which matters because most motorcycle accidents happen in broad daylight when drivers claim they "didn't see" the rider.
The strips draw minimal power (around 3-5 watts per strip) and use a distinct light signature that catches peripheral vision better than a single round headlight. Some models integrate with your turn signals to create a sweeping animation. Positioning matters more than brightness here. Mount them where they create a unique visual profile that doesn't blend into car headlights.
Side note: if you're running a phone mount for navigation (I use Rokform's perch mount), these lights actually help you see your screen better at night without creating glare. The combination of visible positioning and accessible navigation creates a safety multiplier that's hard to quantify until you experience it.
Functional Accent Lighting (Not Just for Show)
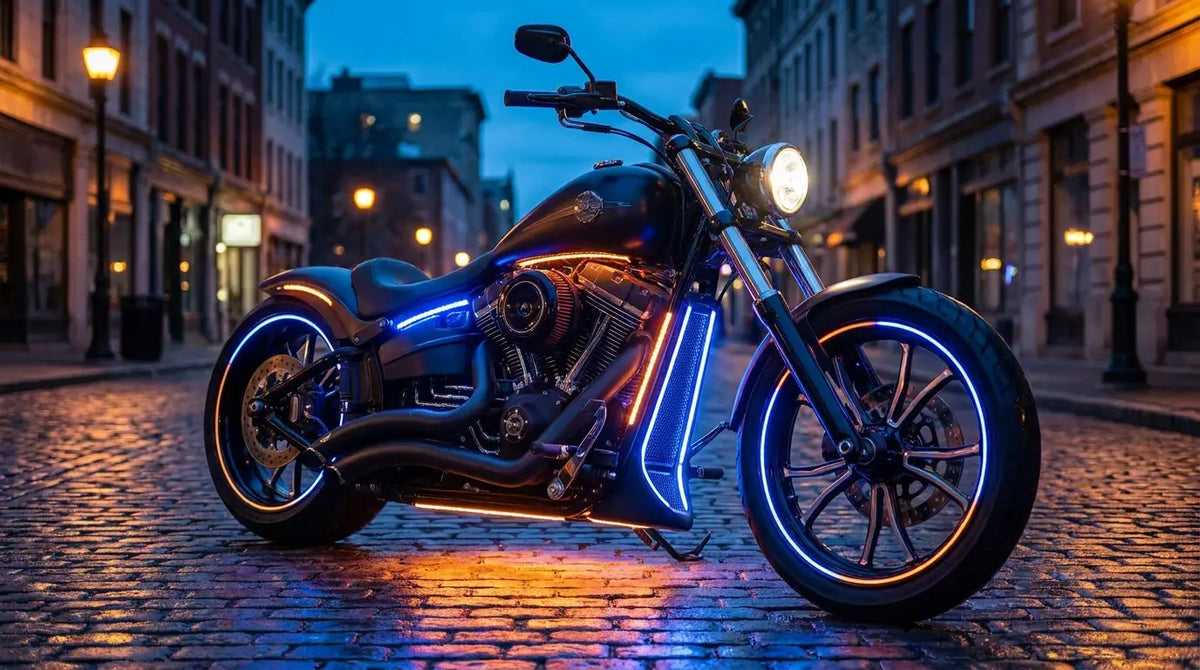
Okay, so here's where most people get it wrong. They slap LEDs everywhere because it looks cool in parking lots. I'm examining accent lighting that serves a secondary function beyond aesthetics, whether that's ground illumination for safer footing at night, visibility from specific angles, or creating a larger visual footprint in traffic.
These options work best when integrated thoughtfully rather than applied everywhere at once. Choose placement and color that enhances your bike's presence without creating light pollution or draining your electrical system unnecessarily. Underglow can look incredible, but it should also make you safer or more functional on the road.
5. Engine Guard Illumination Bars
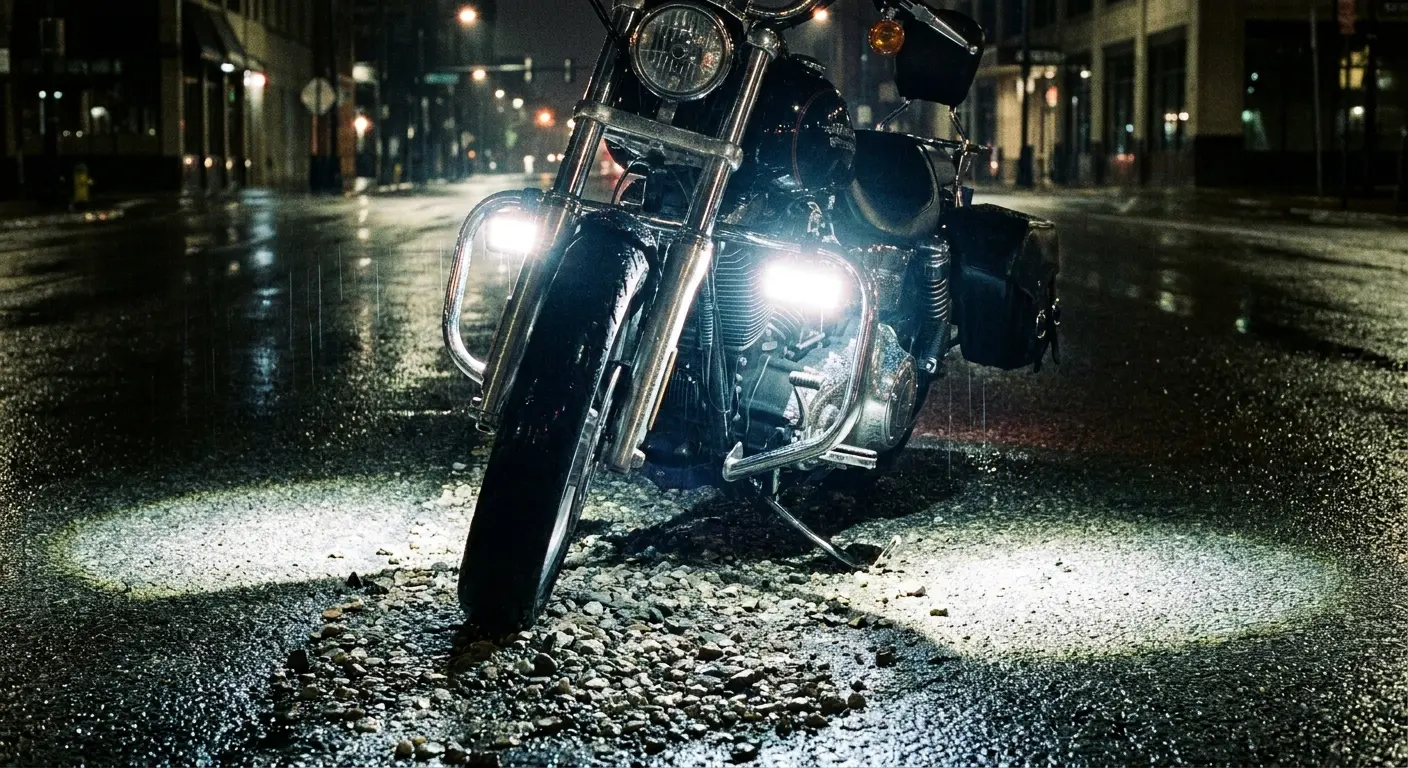
These mount to crash bars or engine guards and point downward, creating a pool of light around your bike when stopped. The practical benefit? Seeing where you're putting your feet in dark parking lots or on uneven terrain. They also make your bike appear wider to approaching traffic, which can discourage cars from trying to squeeze past in tight spaces.
Choose white or amber for maximum utility. Red looks cool but provides less actual illumination. Wire these to your running light circuit or use a dedicated switch. Waterproofing matters here since these lights sit low and catch road spray. I've killed units within months because the seals couldn't handle constant moisture exposure.
6. Fork Tube LED Wraps
These flexible LED strips wrap around your fork tubes and create vertical light columns that move with your suspension. They improve side visibility at intersections, which is where most left-turn collisions occur. The wrapping process requires careful measurement to avoid interference with fork seals or brake lines.
Use high-quality adhesive-backed strips rated for vibration and temperature extremes. The effect is subtle when moving but highly visible when stopped at lights. Some riders report that the moving light columns catch driver attention more effectively than static accent lights.
Wire these to your parking lights so they're always on when riding. The last thing you want is another switch to remember when you're already managing clutch, throttle, and brakes in traffic.
7. Wheel Well Accent Strips
Mounted inside your fender or swingarm, these illuminate the area around your wheels without creating underglow that might be illegal in your area. They provide enough light to inspect your chain or tire condition during roadside checks. The strips need to be rated for high heat if mounting near exhaust components.
Silicone-coated strips handle vibration and moisture better than bare PCB types. Consider controllable RGB strips if you want to match your bike's color scheme for shows but switch to white for functional use.
Here's what the instructions won't tell you: routing wires through the swingarm pivot without creating pinch points is a pain. Take your time. A wire that rubs against a sharp edge will eventually short out and potentially start a fire.
8. Frame-Mounted Glow Tubes
These rigid LED tubes mount to frame rails, creating clean lines that follow your bike's architecture. They provide more structural stability than flexible strips and often include integrated mounting brackets. The tubes work well for creating an underglow effect that's legal in most areas because they're not directly visible (you see the ground illumination, not the light source itself).
Choose tubes with diffused lenses to avoid hot spots. Some models include chase patterns or music-reactive modes, though these features are more novelty than necessity. Focus on getting the mounting height right (around 6-8 inches off the ground) for optimal light spread.
This is where having a solid phone mount matters. I've been using Rokform's handlebar mount for two years, and when you combine good lighting with reliable navigation, night riding actually feels manageable instead of terrifying.
LED Type |
Installation Difficulty |
Vibration Resistance |
Best Application |
Average Lifespan |
|---|---|---|---|---|
Adhesive Strips |
Easy |
Moderate |
Temporary setups, interior bags |
1-2 years |
Silicone-Coated Strips |
Easy to Moderate |
High |
Wheel wells, exposed areas |
3-5 years |
Rigid Tubes |
Moderate |
Very High |
Frame rails, engine guards |
5-7 years |
Flexible Wraps |
Moderate to Difficult |
High |
Fork tubes, curved surfaces |
2-4 years |
Safety-First Signal and Brake Enhancements
Alright, moving on to the stuff that actually keeps you alive. Standard turn signals and brake lights barely meet minimum legal requirements and often get lost in the visual noise of modern traffic. These upgrades focus on increasing the urgency and clarity of your signaling through motion, intensity, or positioning.
Several studies show that dynamic lighting (sequential or flashing patterns) reduces reaction time for following drivers. The options here range from simple plug-and-play additions to integrated systems that require minor electrical work. Every safety light should prioritize function over form, though getting both is entirely possible.
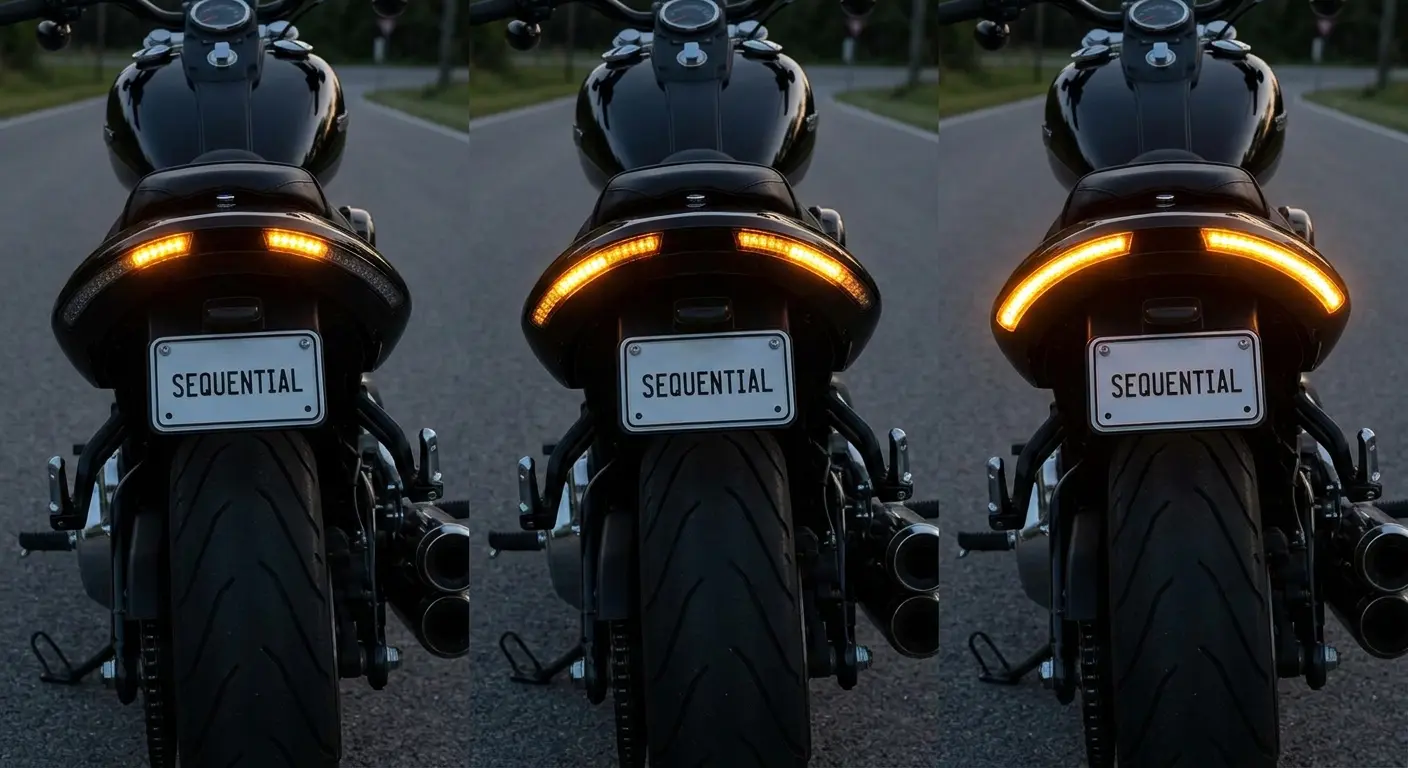
9. Sequential Turn Signal Strips
These create a sweeping animation that draws the eye more effectively than a blinking light. The sequential pattern provides directional information even before a driver consciously processes what they're seeing. Most kits replace your existing turn signals or add supplemental strips to your fairing or saddlebags.
Installation varies by bike but usually involves splicing into your turn signal wiring and adding a control module. The module sequences the LEDs while maintaining the correct flash rate required by law. Some systems integrate with your brake lights to create a sweeping pattern during braking as well.
Check local regulations because some jurisdictions restrict sequential patterns to certain colors or positions. I've heard of riders getting hassled by cops in states with vague lighting laws, so verify before you install.
I've been running Rokform's motorcycle stem mount setup to keep navigation visible without compromising my view of traffic. The combination of improved signaling and accessible navigation reduces the cognitive load of riding in heavy traffic.
10. Integrated Tail Light Brake Flashers
These modules make your brake light pulse rapidly several times before going solid when you hit the brakes. The flashing pattern triggers an instinctive attention response in following drivers, measurably reducing rear-end collision risk.
Most units install inline with your existing brake light wiring and require no permanent modifications. The flash pattern runs for 3-5 seconds before staying solid, which keeps it legal in areas that prohibit continuously flashing brake lights. Some advanced models vary the flash intensity based on how hard you brake.
This is one of the highest-value safety upgrades you can make for under $50. The installation takes maybe 20 minutes with basic hand tools, and the potential to avoid even one rear-end collision makes it worth ten times the investment. Get this before you buy anything else. Indian owners get their own shortlist in my Indian motorcycle accessories roundup.
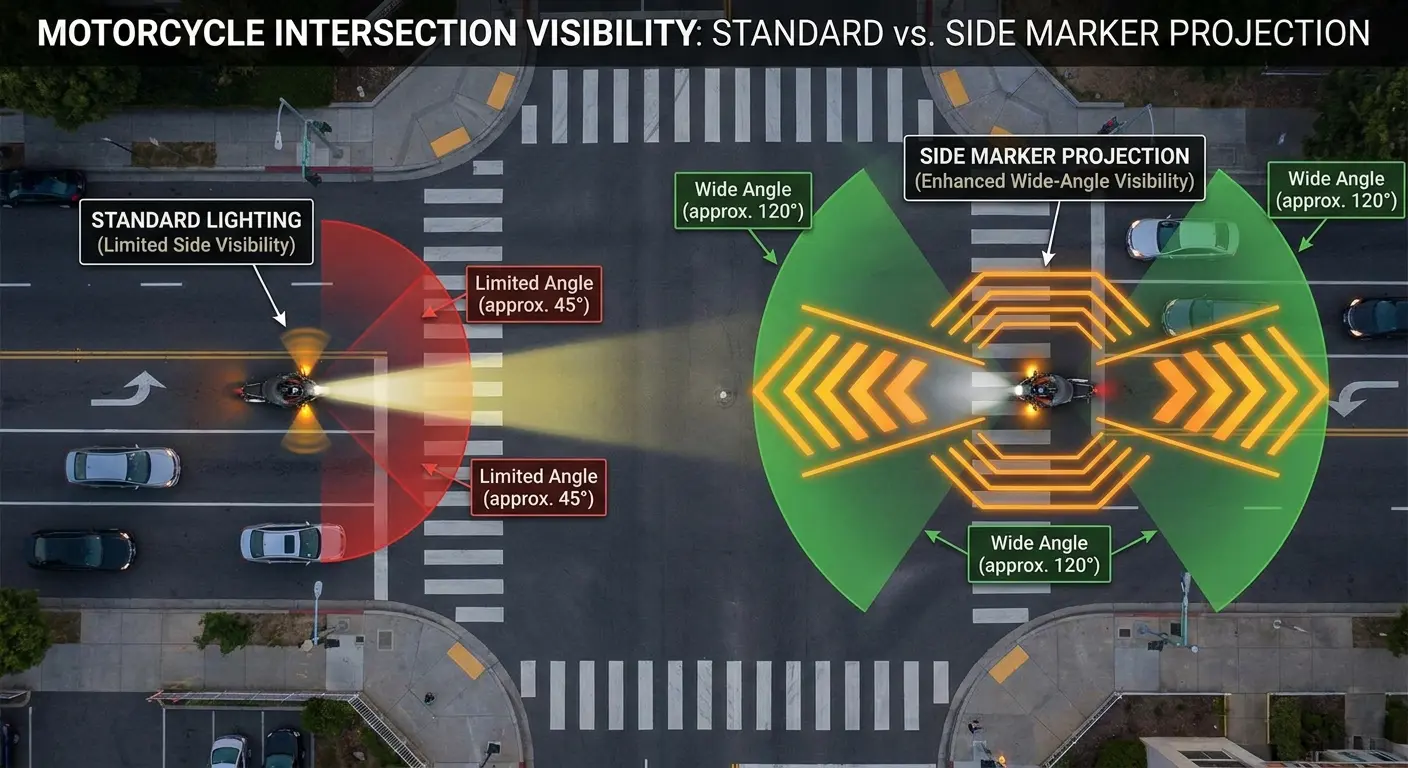
11. Side Marker Projection Lights
These small LED units mount to your frame or bodywork and project light sideways, making you visible to cross-traffic at intersections. They're particularly effective in urban environments where buildings or parked cars block sightlines.
Wire these to your running lights and position them at or above axle height for maximum visibility. Some models project a motorcycle icon or warning symbol onto the ground beside your bike. While this seems gimmicky, it actually helps drivers judge your width and position.
Choose amber or white for best visibility. Red side markers can be confused with brake lights from certain angles, which defeats the purpose of adding them in the first place.
12. Helmet-Mounted Brake Indicators
These wireless LED strips attach to the back of your helmet and illuminate when you brake, adding a brake light at driver eye level. They use accelerometer sensors to detect deceleration and don't require any wiring to your bike.
The high mounting position means your brake signal is visible even when a car is directly behind you and can't see your tail light. Battery life runs 8-12 hours of riding, and they charge via USB. Make sure the adhesive mount is secure enough to handle highway speeds.
Some models integrate with turn signals through handlebar-mounted wireless switches. The technology works surprisingly well, though I recommend carrying a spare battery or charging cable on long trips. I've forgotten mine more times than I've used it, which is my own fault.
Utility Lighting for Maintenance and Camping
Now for the boring but essential stuff. These are the lights you don't think about until you need them, then wonder how you managed without them. I've spent years testing lighting that doesn't make your bike look cooler but makes your life easier when you're wrenching on the roadside or setting up camp.
The focus here is on portability, battery life, and versatility. Many riders invest heavily in visibility and accent lighting while relying on their phone's flashlight for actual work. These options provide proper task lighting that leaves your hands free and your phone battery intact.
13. Magnetic Work Light Pods
These compact LED pods stick to any metal surface on your bike, providing hands-free illumination for roadside repairs. The magnetic base is strong enough to stay put during work but releases easily when you're done. Most models include a hook or hanging loop as backup mounting options.
Look for units with adjustable brightness and a red light mode for preserving night vision. Battery-powered versions using 18650 cells offer the best runtime-to-size ratio.
Keep one in your tool roll and another in your saddlebag. The ability to position light exactly where you need it beats any headlamp for detailed work. I've changed clutch cables, adjusted chains, and diagnosed electrical gremlins using nothing but a magnetic work pod and basic tools.
14. Saddlebag Interior LED Strips
These adhesive-backed strips mount inside your saddlebags or top case and illuminate automatically when you open the lid. They run off small batteries or tap into your bike's electrical system. The value becomes obvious the first time you're digging through a packed bag at night looking for your rain gear.
Installation is simple: clean the mounting surface, stick the strip along the top edge of the bag interior, and route the power wire to the latch mechanism or a magnetic switch. Some riders use motion-activated strips that turn on when they reach into the bag. Choose warm white LEDs to avoid the harsh blue tint that makes everything look the same color.
Real talk: I've dropped three phones before I got a decent mount and proper lighting sorted. Now I run Rokform's power bank for devices and utility lighting for extended trips. Having both power management and proper illumination transforms multi-day adventures from frustrating fumbles in the dark to organized, efficient stops.
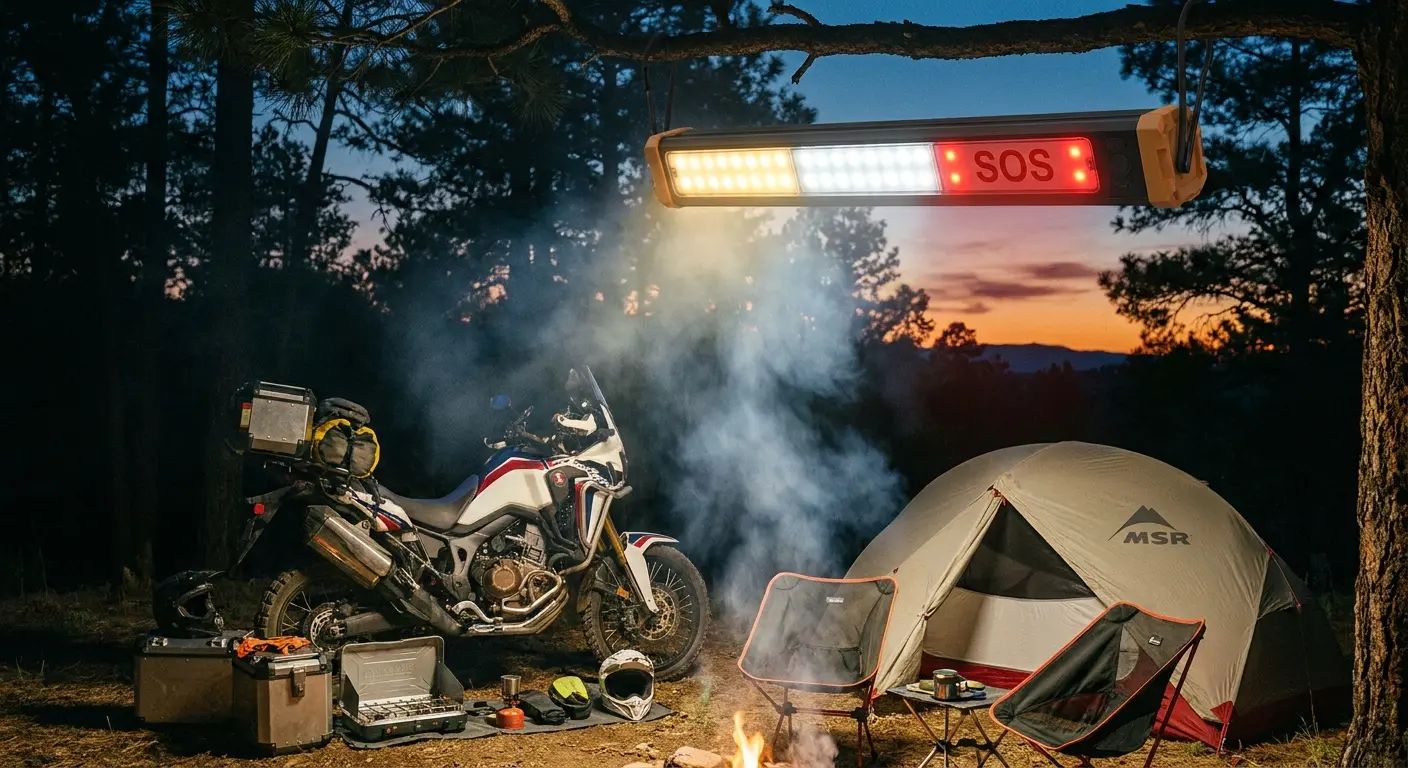
15. Multi-Function Camp Light Bars
These portable LED bars serve as camp lights, emergency signals, and bike illumination depending on the mode. Most include white flood, red night vision, and flashing SOS patterns. The bar design provides 360-degree illumination when hung from a tree or tent, or directional light when propped up.
Look for models with built-in power banks so they can charge your devices. Waterproof ratings matter here (IPX6 minimum). Some versions include magnetic mounts or carabiner clips for versatile positioning.
Runtime varies widely, but quality units should provide 4-6 hours on high and 20+ hours on low settings. I've used these for everything from late-night bike maintenance to reading maps to lighting up campsites that would otherwise require building a fire just to see what you're cooking.
16. Underbody Inspection Lights
These low-profile LED strips mount under your bike specifically for inspecting the underside without crawling around with a flashlight. They're particularly useful for checking for oil leaks, loose bolts, or damage after riding rough roads.
The strips should be impact-resistant and fully waterproof since they mount in the splash zone. Wire them to a dedicated switch so they're not draining power during normal riding. Some riders mount these permanently and use them as functional underglow that doubles as inspection lighting.
Position them to illuminate critical areas (oil pan, exhaust hangers, suspension linkage) rather than creating an even glow. Strategic placement means you can spot problems before they strand you 200 miles from the nearest dealer.
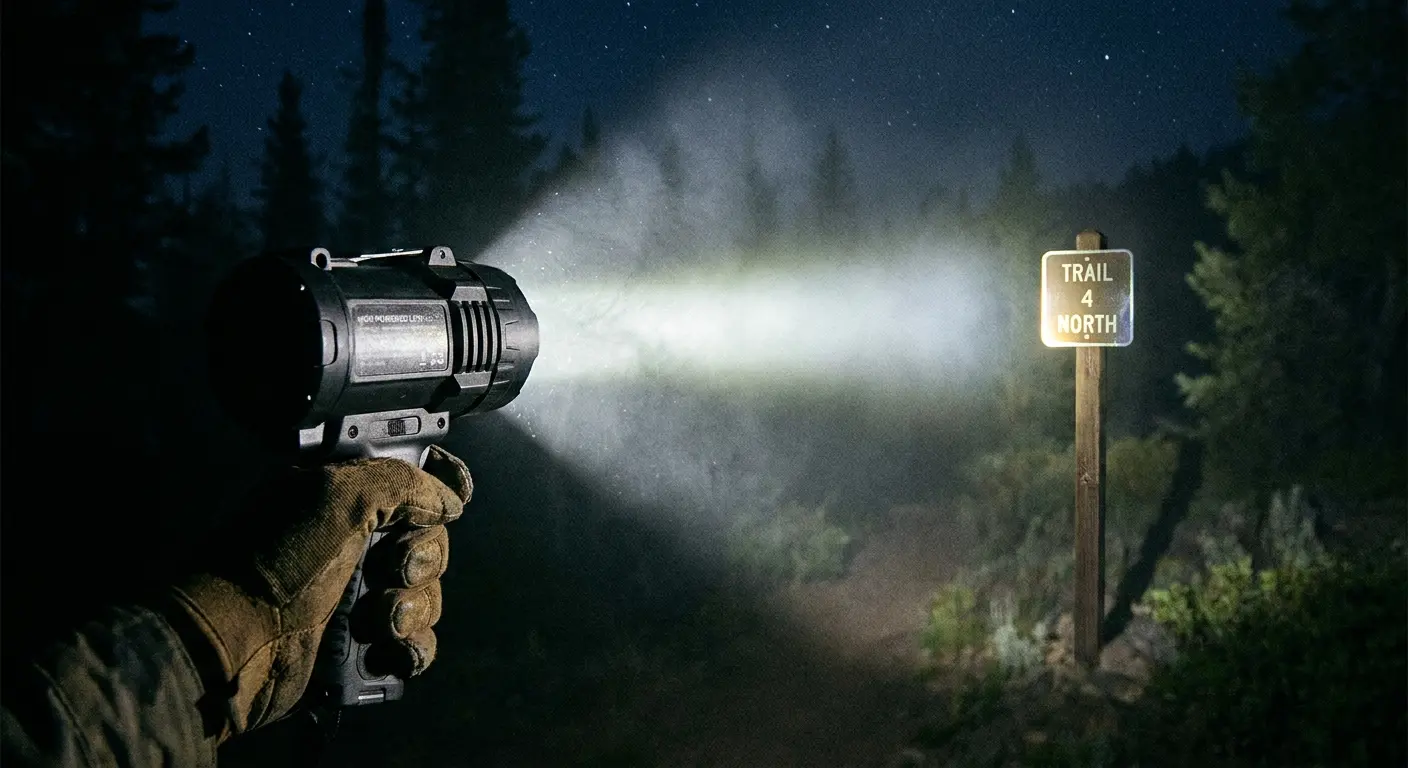
17. Battery-Powered Portable Spotlights
These handheld LED spotlights provide serious throw distance for illuminating road signs, checking trail conditions ahead, or signaling for help. Choose models with at least 1000 lumens and a focused beam. The best versions include a lower-power flood mode for close-up work and a strobe mode for emergencies.
Rechargeable models using USB-C charging integrate better with your existing gear. Look for spotlights with a pistol grip or lantern-style handle that's easy to operate with gloves on.
Keep this in your luggage for those moments when you need to see what's making noise in the bushes at your campsite or verify the address on a rural delivery. The peace of mind from having serious illumination on demand is worth the space it takes up.
18. USB-Rechargeable Handlebar Task Lights
These small LED lights clamp to your handlebars and provide focused illumination for reading maps, checking GPS units, or working on your bike at night. They're particularly useful for adventure riders who regularly stop to verify routes or make adjustments.
The clamp mount allows quick repositioning without tools. Most models include multiple brightness levels and red light modes. Battery life ranges from 3-8 hours depending on the setting.
The advantage over helmet-mounted lights is that the beam stays where you point it rather than following your head movements. Some versions include magnetic bases so you can remove them and stick them to your tank or toolbox. When you've got your phone mounted with a solid stem mount, having dedicated task lighting that doesn't interfere with your screen visibility makes a huge difference.
I've spent years testing phone mounts that hold up to the vibration, weather, and impacts that come with serious riding. That same engineering mindset applies to how you mount and power your LED lights. Poor mounting leads to flickering, water intrusion, and lights that shake loose on rough roads.
If you're adding auxiliary lighting or utility LEDs, make sure your mounting solution is as robust as the lights themselves. The difference between LED lights that last and ones that fail comes down to proper installation and quality connections. I've watched too many riders invest in premium lighting only to have it fail because of inadequate wiring or mounts that can't handle vibration.
Final Thoughts
Start with visibility upgrades that address your specific risk factors (commuting in traffic, night riding, rural roads with wildlife), then add functional lighting that supports how you use your bike. Don't chase aesthetics until you've handled the safety basics.
The riders who get the most from their lighting investments are the ones who plan their electrical capacity, use proper installation techniques, and choose systems that serve multiple purposes. Whether you're improving your conspicuity with daytime running lights or adding work lights for roadside maintenance, make your riding safer and more practical.
Before you buy anything else, get these three:
Brake flasher module ($35)
Auxiliary fog lights ($120)
One magnetic work light ($25)
That's $180 and covers 80% of real-world needs. Everything else on this list is gravy.
Build your lighting system methodically. Address visibility first, add safety enhancements second, then incorporate the accent and utility options that match your riding style. Your electrical system has limits, and exceeding them creates more problems than any amount of extra lighting can solve.
Here's my actual setup: Denali D4 fogs, a $35 brake flasher from Amazon, cheap LED strips in my saddlebags, and a magnetic work light I bought at Harbor Freight. Total investment: about $400. Has it made me safer? Absolutely. Do I look like a Christmas tree? Maybe a little. Do I care? Not even slightly.
Start with the brake flasher and fog lights. Add the rest as your budget allows. And for god's sake, use a multimeter and do the wiring right. Nothing ruins a good ride faster than troubleshooting electrical problems on the side of the highway.
Ride safe. Be visible. Don't cheap out on wire.

