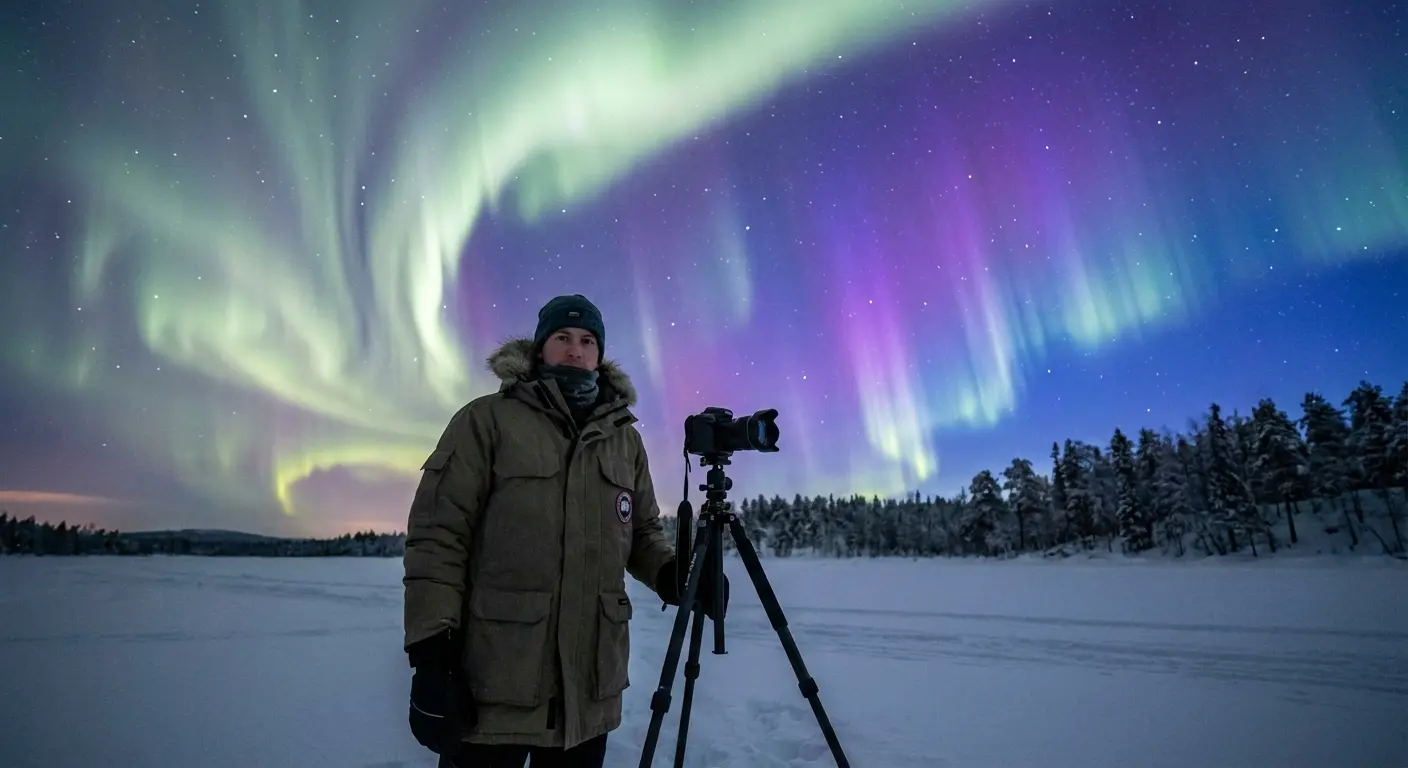
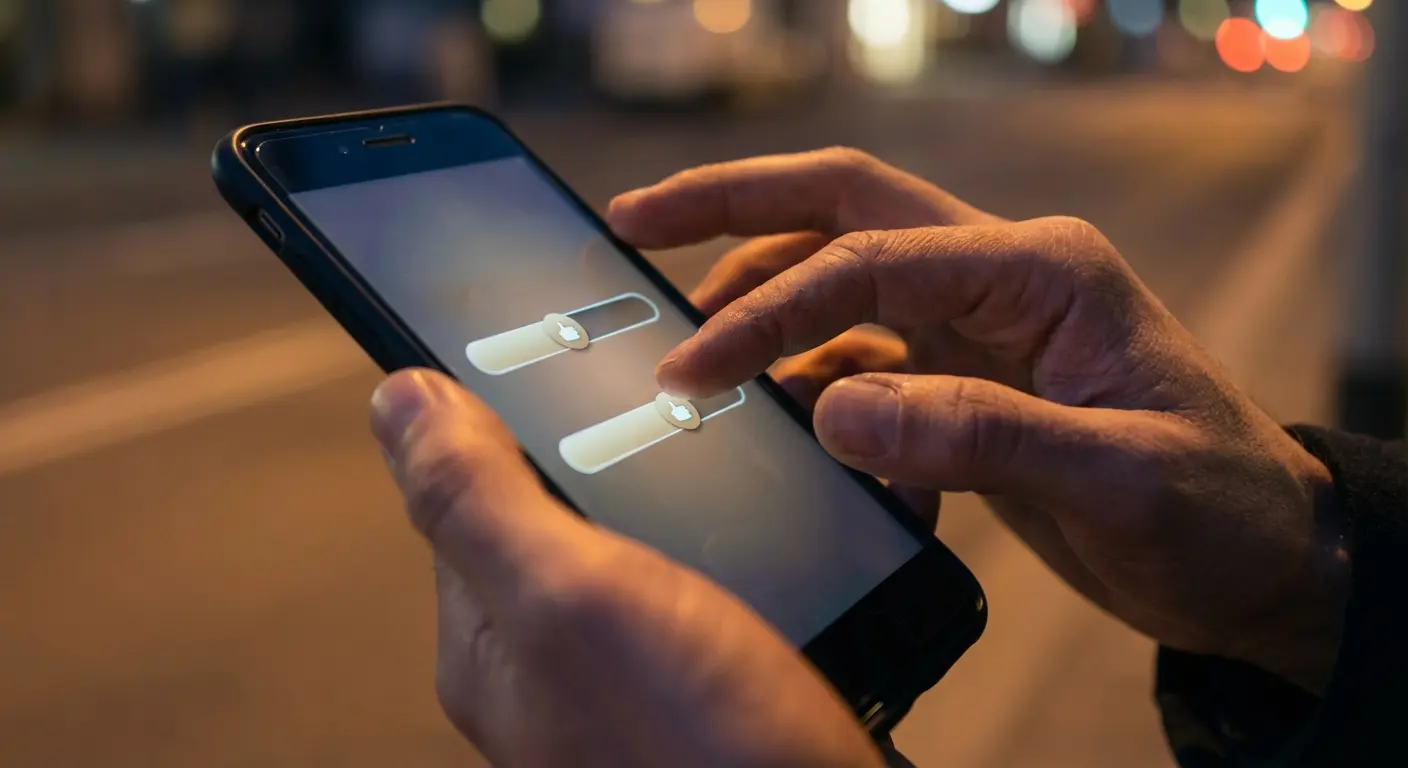
I stood outside Fairbanks last February, staring at what looked like absolutely nothing. Gray smudges across the northern horizon. Maybe some faint movement if I squinted. My Icelandic guide laughed and handed me his phone. "Look at the screen."
Holy shit.
Brilliant emerald curtains. Purple edges. Structures and patterns I absolutely could not see with my naked eyes, even though I was staring right at them.
Your phone isn't just documenting the aurora. It's revealing wavelengths and colors your eyes physically cannot process in real time. While human vision struggles in low light, modern smartphone sensors excel at accumulating photons over extended exposures, transforming faint gray wisps into vibrant displays of green, purple, and red. According to aurora photography experts, your phone's camera sensor is more sensitive to light than the human eye, able to "soak up" light over several seconds while your eyes only see what's there in that instant.
Learning how to use your phone to see the northern lights isn't about settling for inferior equipment. It's about accessing capabilities your biology simply doesn't have.
Table of Contents
Why Your Phone Camera Beats Your Eyes in Low Light
Preparing Your Phone Before You Chase the Aurora
Camera Settings That Actually Matter
Composition Techniques for Aurora Photography
Apps That Help You Predict and Capture the Lights
Post-Processing Without Losing Authenticity
Common Mistakes That Ruin Your Shots
Final Thoughts
Why Your Phone Camera Beats Your Eyes in Low Light
The Science Behind What You're Actually Seeing
Let's get into the biology, because it matters.
The rod cells in your retina are the ones responsible for night vision. They're excellent at detecting movement and shapes in darkness, but they're essentially colorblind when photon levels drop below a certain threshold. Completely useless for color. That's why faint auroras appear as gray or white bands to your naked eye, even when they're emitting brilliant greens and purples.
Your phone's camera sensor doesn't have this limitation. Modern smartphones with Night Mode (available on iPhone 11 and later models) automatically use longer exposure times to gather light, allowing the camera to capture aurora details that remain invisible to human vision according to NOAA recommendations for aurora viewing.
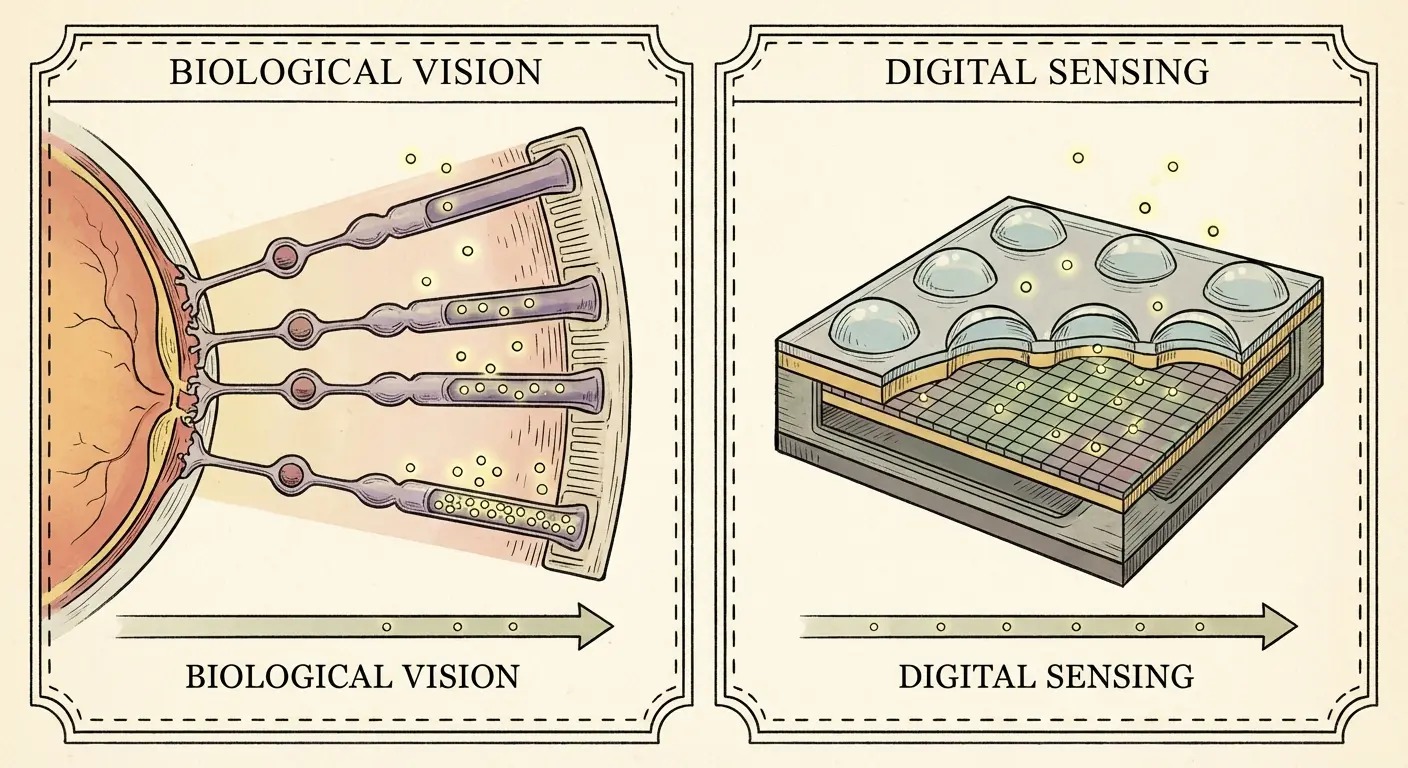
The sensor accumulates photons over several seconds, sometimes up to 15 or 20 seconds, building up a complete picture of the light spectrum present in the scene. Your eyes process visual information in real time, about 24 frames per second. There's no accumulation. No building up of light data. What you see in that instant is all you get.
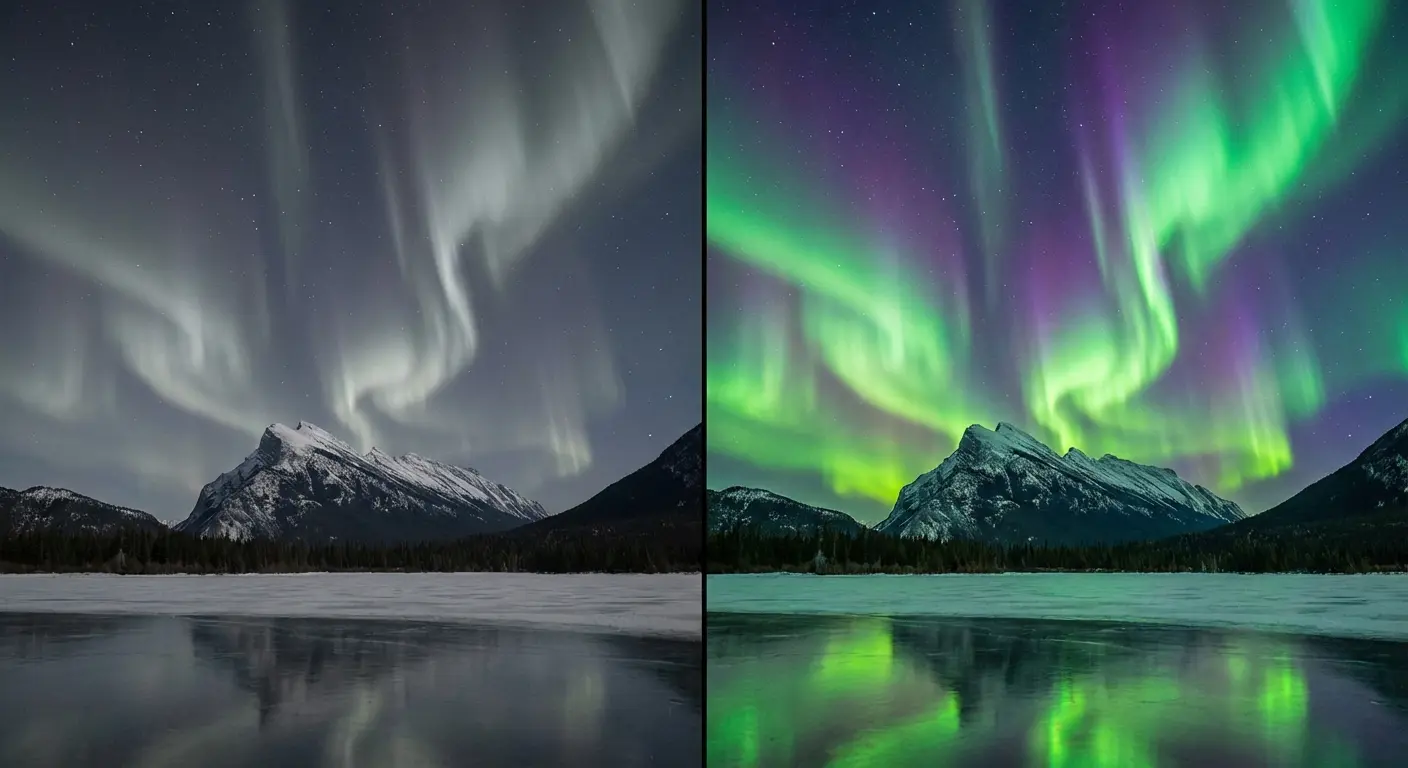
Think about standing under a KP 3 aurora display in rural Iceland. To your naked eye, you see subtle gray-white bands shifting slowly across the northern horizon. Interesting, but not the vivid spectacle you expected. You raise your phone, frame the same section of sky, and take a 6-second exposure.
When you check the screen, the image reveals brilliant emerald green curtains with hints of purple along the lower edges, structures and colors that were physically present but invisible to your eye's rod cells. Your phone hasn't manufactured this display. It has revealed what was already there by accumulating photons your eyes process too quickly to perceive in color.
So yeah, understanding how to use your phone to see the northern lights fundamentally changes the viewing experience. You're not compromising by using technology. You're enhancing your perception beyond what human biology allows.
When Disappointment Meets Reality (and Your Phone Saves the Moment)
We've all heard the stories. Someone travels thousands of miles to see the northern lights, stands in the freezing cold for hours, and sees... faint gray wisps. The disappointment is crushing. They wonder if they did something wrong, if they chose the wrong location, if the forecast was inaccurate.
Real talk? They probably saw exactly what they should have seen with human eyes at that KP level. The problem isn't the aurora. It's the expectation mismatch.
The recent November 2024 geomagnetic storms demonstrated this phenomenon dramatically. According to FOX 9's coverage, geomagnetic storm conditions reached G4 (severe) levels, with the aurora extending as far south as central Mexico. Yet even during these intense displays, viewers in southern latitudes reported that "the aurora may not be visible to the naked eye" while "smartphone cameras can reveal the colors."
Your phone becomes essential, not optional. When mastering how to use your phone to see the northern lights, consider investing in advanced iPhone photography techniques that can enhance your aurora capture capabilities even further.
Checking your phone screen during viewing enhances the experience rather than distracting from it. You're seeing the true color and structure that your eyes can't process. Think of it as a real-time translation service, converting wavelengths your biology can't interpret into visual information you can appreciate.
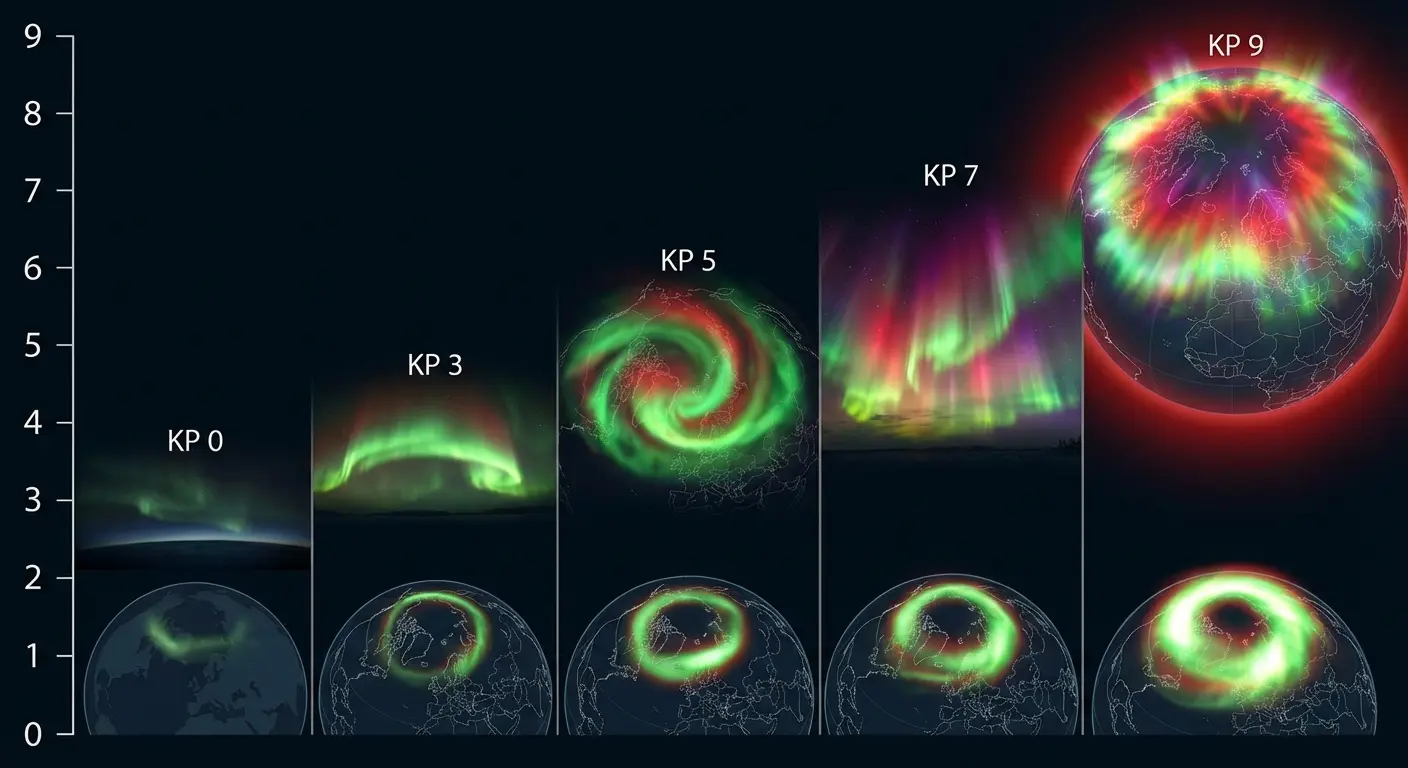
KP Index |
What Your Eyes See |
What Your Phone Reveals |
Viewing Strategy |
|---|---|---|---|
KP 0-2 |
Usually nothing, or extremely faint glow on horizon |
Subtle green bands, possible structural detail |
Check phone every 15 minutes; activity may build |
KP 3-4 |
Faint gray-white wisps, subtle movement |
Vibrant green curtains, defined structures, possible purple |
Use phone to confirm activity and composition before shooting |
KP 5-6 |
Visible gray-green bands, clear movement |
Intense greens, purples, reds; detailed corona structures |
Both eyes and phone show spectacular displays |
KP 7-9 |
Vivid colors visible to naked eye, rapid dancing |
Extremely bright, saturated colors across full spectrum |
Phone captures details even naked eye misses at peak intensity |
Below KP 4, your phone is revealing a display your eyes simply can't see in full color. At KP 5 and above, both your eyes and your phone will show you spectacular displays, though your phone will still capture details and colors your eyes miss.
Understanding this relationship between KP index and visibility changes everything about how you approach aurora viewing. You stop feeling disappointed when you see gray bands, because you know your phone is about to show you what's really there.
Preparing Your Phone Before You Chase the Aurora
Storage and Battery Management in Extreme Cold
Cold murders lithium-ion batteries. Not slowly. Dramatically.
We're talking about a chemical reaction that slows as temperature drops, reducing available capacity by 30-50% in sub-zero conditions. Your phone's battery percentage indicator becomes unreliable because it's calibrated for normal operating temperatures, not Arctic conditions.
Last time I was in Fairbanks at -15°F, I pulled out my phone at 80% battery. Twenty minutes later? Dead. Not "low battery warning." Just dead. Black screen. The best aurora of my life is happening, and I'm holding a $1000 paperweight.
The battery didn't drain that quickly. The cold caused the lithium-ion cells to temporarily lose capacity, and the percentage indicator couldn't accurately reflect the reduced performance. Had I kept the phone in an interior pocket between 30-second shooting sessions and used a remote trigger, that same 80% charge would have lasted the entire two-hour viewing window.
For extended aurora photography sessions, consider pairing your phone with a magnetic wireless power bank that attaches securely and keeps your device charged throughout the night.
Pre-Trip Battery Management Checklist:
[ ] Charge phone to 100% before departing
[ ] Charge portable battery pack to full capacity
[ ] Enable airplane mode to reduce power drain
[ ] Disable automatic app updates and background refresh
[ ] Lower screen brightness to 30-40%
[ ] Turn off location services for non-essential apps
[ ] Keep phone in interior jacket pocket (body heat) between shots
[ ] Store portable battery inside jacket, not in camera bag
[ ] Test battery performance in cold at home (place in freezer for 10 minutes)
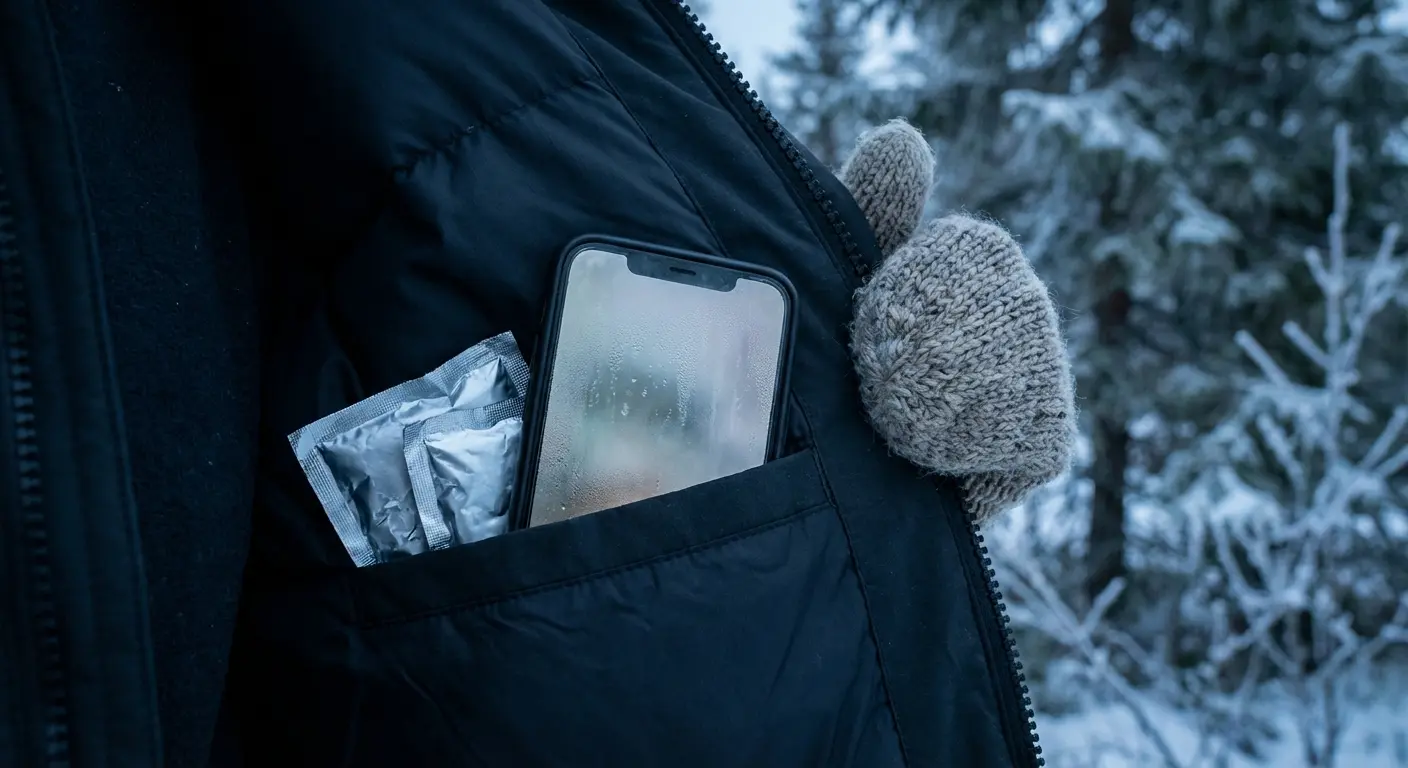
[ ] Bring chemical hand warmers to place near phone and battery pack
Once your battery's dead, you're done. No fixing it in the field. So don't let it die.
Clearing Space and Backing Up Before You Go
Running out of storage mid-display ranks among the most frustrating failure modes in aurora photography. You're watching the most spectacular display of your life, you raise your phone to capture it, and you get the dreaded "Storage Full" message.
Shooting in RAW or high-resolution mode (which I'll recommend later) requires significantly more space than typical phone photography. A single RAW file can eat 25-50 MB, compared to 2-5 MB for a standard JPEG. If you're shooting a two-hour aurora session and taking 100+ photos, you're looking at 2.5-5 GB of storage minimum.
Before you leave for your aurora chase, delete app caches, old downloads, and duplicate photos. Back up your existing photo library to cloud storage or a computer, then remove it from your phone. Do this while you have WiFi and time to verify your backups, not when you're standing in the dark with frozen fingers.
Uncomfortable truth: cloud backup doesn't help you in remote locations with no cell service. That "Optimize iPhone Storage" feature that keeps low-resolution versions on your device and full-resolution in iCloud? It requires connectivity to retrieve those full-resolution files. In the field, you need local storage. Period.
Installing and Testing Apps While You Have WiFi
The learning curve for manual camera controls is too steep to tackle in the field when the aurora is active and your fingers are freezing. Your hotel room or home is the place to make mistakes, not the viewing site.
Download and familiarize yourself with aurora forecast apps and manual camera apps before you're in a remote location with limited or no connectivity. Open them, navigate through the interfaces, adjust settings, and take test shots in a dark room. You'll discover usability issues you definitely don't want to encounter when the aurora is dancing overhead.
Testing these apps in darkness reveals which interfaces are intuitive and which require you to squint at tiny buttons. Some apps have excellent manual controls but terrible low-light interface design, with dark gray buttons on black backgrounds that become invisible when your screen brightness is lowered to preserve battery.
The total download size for all these apps can exceed 500 MB. Do this before you're in the field. Downloading over cellular data in remote areas (if you even have signal) is slow, expensive, and drains your battery.
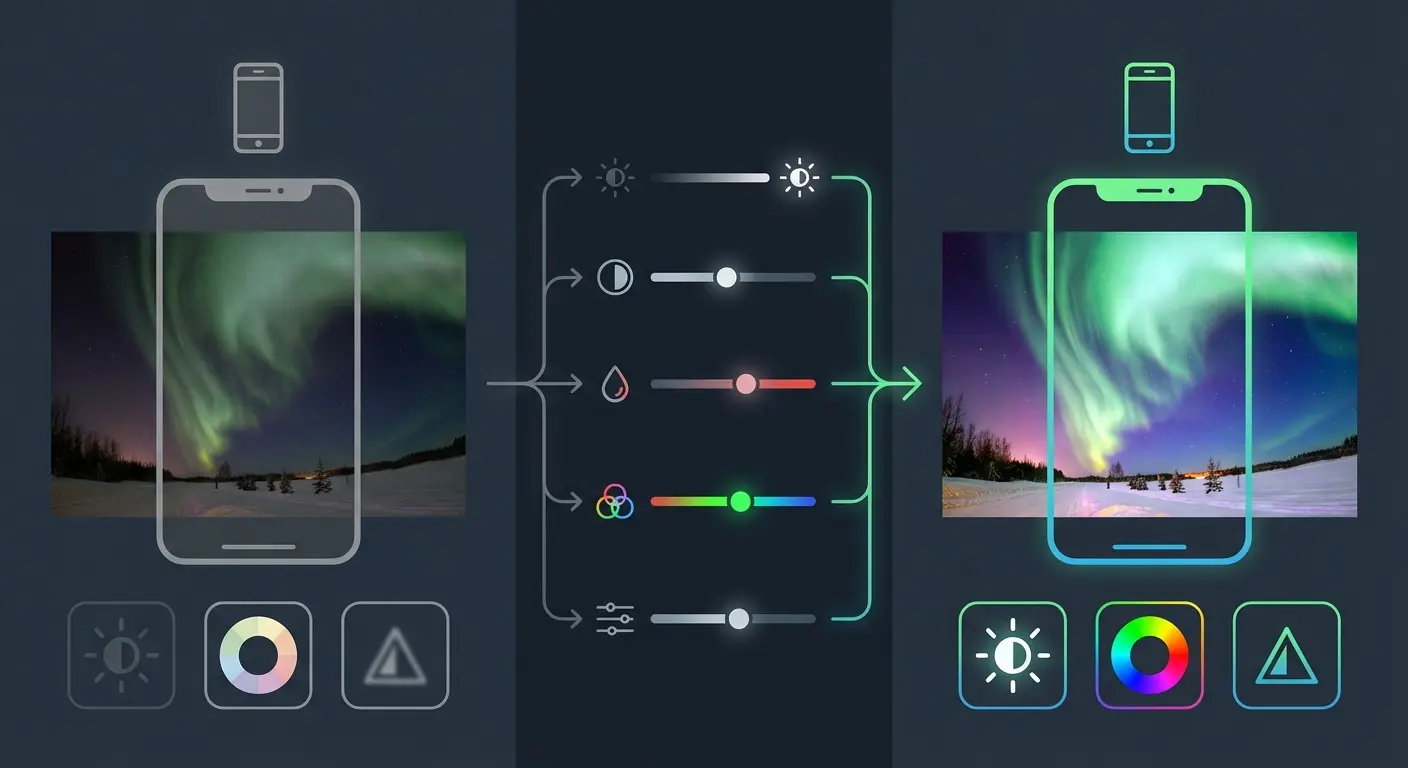
Camera Settings That Actually Matter
Manual Mode Is Non-Negotiable
Your phone's automatic mode will fail for aurora photography. The AI doesn't recognize what it's looking at. It sees a mostly dark frame with some bright areas and makes a guess, usually the wrong one. Either it overexposes the aurora to a blown-out blob of white, or it underexposes everything to black trying to preserve highlight detail.
Manual mode gives you direct control over ISO, shutter speed, and focus. These three parameters determine whether you capture a stunning aurora display or a blurry, noisy mess.
Good news: you can't break your phone by adjusting settings. Experimentation is safe. The controls feel counterintuitive at first (why would you want to manually set something the phone can do automatically?), but they become intuitive quickly once you understand what each parameter does.
ISO controls sensor sensitivity. Higher ISO means brighter images but more noise (grain).
Shutter speed controls how long the sensor collects light. Longer exposures mean brighter images but more motion blur.
Focus determines what distance the lens is sharp at. For auroras, you want infinity focus.
These three settings work together. Change one, and you'll likely need to adjust the others to compensate. That's why automatic mode struggles. The phone doesn't understand the relationship between these parameters in the context of aurora photography.
The ISO Sweet Spot for Your Specific Phone
Higher ISO isn't always better. Every phone sensor has a threshold where noise becomes unacceptable, and you need to know yours before you're in the field.
According to aurora photography guidelines, starting at ISO 800-1600 provides optimal results for most smartphone sensors, though you can increase it if the aurora is faint, keeping in mind that higher ISO introduces more noise (graininess) into the photo.
Testing your phone's ISO performance before your trip takes 15 minutes and saves hours of frustration. Go outside on a clear night, point your phone at stars or street lights, and take test shots at ISO 800, 1600, 3200, and 6400. Transfer the images to a computer or view them at full size on your phone. Zoom in to 100% and examine the noise levels.
You'll notice that at some point (different for every phone model) the noise overwhelms the detail. That's your upper limit. For most modern smartphones, ISO 3200 is the practical maximum. Older phones might show unacceptable noise at ISO 1600. Newer flagship models might handle ISO 6400 reasonably well.
The myth that newer phones always perform better at high ISO isn't entirely accurate. Sensor size, pixel size, and image processing algorithms all play roles. A three-year-old phone with a larger sensor might outperform a brand-new budget model with a tiny sensor, despite the newer model having more megapixels.
Shutter Speed, Exposure Time, and the Movement Problem
Auroras move. Sometimes slowly, sometimes rapidly. Your shutter speed needs to account for this movement while gathering enough light to create a properly exposed image.
Photography experts recommend setting shutter speed between 5 to 15 seconds for aurora photography, as this allows enough time to capture the moving lights but not so long that stars blur into trails, with 10 seconds being the practical maximum before movement artifacts become problematic.
Longer exposures (8-15 seconds) gather more light but can blur fast-moving auroras into indistinct smears. Shorter exposures (2-4 seconds) freeze structure but may appear darker. The balance depends on aurora activity levels.
A Japanese tour guide in Canada's Northern Territories recently advised visitors that "the best way to see the lights is through your phone" (Wes Siler's Newsletter), emphasizing that starting with three to four second exposures, then adjusting based on blur, produces better results than defaulting to maximum exposure times.
Counterintuitive reality: sometimes a darker, sharper image is more compelling than a brighter, blurred one. Viewers forgive underexposure more readily than they forgive blur. You can brighten a dark image in post-processing, but you can't unblur a blurry one.
During active displays with rapidly dancing curtains, drop your shutter speed to 3-4 seconds. You'll sacrifice some brightness, but you'll preserve the structure and definition that makes auroras visually compelling. During slower-moving displays, you can extend to 10-15 seconds and capture both brightness and detail.
Watch your phone screen as you adjust. Take a test shot at 10 seconds, review it, then try 6 seconds, then 4 seconds. The aurora activity will tell you what works. There's no universal "correct" setting, only what works for the specific display you're photographing at that moment.
Focus and the Infinity Problem
Autofocus hunting in darkness is the single most common technical failure in aurora photography.
Your phone's autofocus mechanism searches for contrast edges to lock onto. In a dark sky with diffuse aurora, there aren't any clear edges. The focus pulses back and forth, never locking, and finally gives up and takes the shot at whatever distance it landed on, usually about 10 feet, rendering both the aurora and stars as blurry, out-of-focus blobs.
I've ruined three aurora shoots by forgetting to lock focus. Three. I'm not proud of it, but at least you can learn from my frozen-fingered mistakes.
Manual focus is the solution. Set focus to infinity (or as close as your phone allows) before you start shooting. Everything in an aurora scene is effectively at infinite distance. The aurora occurs 60-200 miles above Earth's surface, and stars are obviously infinitely far away for practical purposes.
Some phones don't allow true manual focus. The workaround: focus on a distant light source (the moon works perfectly if it's visible, or a star, or even a distant building light), lock that focus, then recompose for your aurora shot. That focus setting approximates infinity and will keep both aurora and stars sharp.
Verify focus is locked before you start your shooting session. Take a test shot, zoom in on a star, and check if it's a sharp point of light or a blurry blob. If it's blurry, adjust focus and test again. Spending two minutes on this verification saves you from discovering later that all 50 of your photos are out of focus.
Composition Techniques for Aurora Photography
Foreground Elements That Add Context Without Distraction
The most compelling aurora photos include foreground elements: trees, mountains, structures, ice formations, rather than just sky. These elements provide scale, anchor the viewer's eye, and create depth in what would otherwise be a flat image.
Silhouettes work beautifully for aurora photography. A line of pine trees along the horizon, rendered as black shapes against the green aurora, creates immediate visual interest. You don't need to illuminate the foreground; the contrast between dark earth and bright sky tells the story.
Illuminated foregrounds require more planning. If you want detail in your foreground (texture in rocks, definition in a building) you'll need ambient light (moonlight works well) or artificial light (a flashlight or headlamp). The challenge is balancing foreground and sky exposure, which often requires bracketing or HDR techniques beyond basic smartphone capabilities.
Scout locations in daylight and remember where promising foregrounds are located when you return in darkness. That interesting rock formation you saw at 2 PM becomes impossible to find at 11 PM without GPS coordinates or clear landmarks.
Vertical vs. Horizontal Framing for Different Aurora Structures
Aurora behavior dictates orientation.
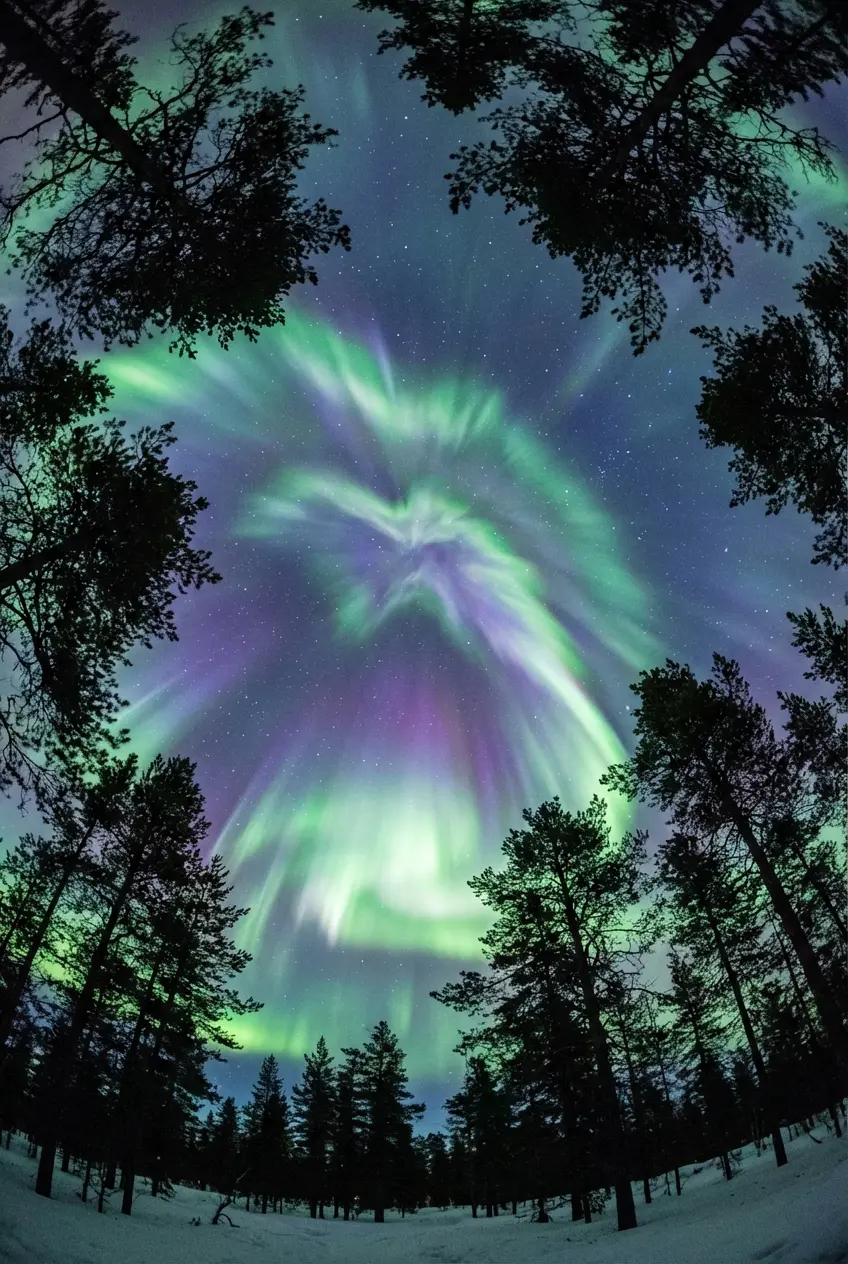
Corona displays (those spectacular formations that appear directly overhead with rays converging at a central point) demand vertical framing. Horizontal framing cuts off the convergence point and loses the dramatic effect.
Arc formations along the horizon work better with horizontal framing. You're capturing width rather than height, showing the extent of the aurora band stretching across the northern sky.
Phone screens make vertical shooting feel more natural since we hold phones vertically most of the time. This can limit composition options. Train yourself to rotate your phone and consider horizontal framing, even when it feels awkward.
Taking both orientations is often the best strategy. Shoot vertical, shoot horizontal, then decide later which composition works better. Storage is cheap; missed compositions aren't recoverable.
Social media platform preferences matter if you plan to share your photos. Instagram stories and TikTok favor vertical format. Instagram feed posts and Facebook work with either. Twitter/X displays both reasonably well. Knowing where you'll share helps you prioritize which orientation to shoot first when time is limited.
The Rule of Thirds Still Applies (Even in Chaos)
Placing the horizon on the lower or upper third line creates more dynamic images than centering it. This fundamental composition principle doesn't stop working just because you're photographing something as chaotic as an aurora.
Your phone's grid overlay feature helps. Enable it in camera settings. Those lines dividing your frame into thirds represent where human eyes naturally look first in an image.
For aurora photography, placing the horizon on the lower third emphasizes the sky and aurora. Placing it on the upper third emphasizes foreground elements. Neither is "correct." The choice depends on what you want to emphasize.
When you're cold, excited, and rushing, the grid overlay becomes a visual anchor. You can quickly check if your horizon is level and if key elements fall on those third lines, even when you're too distracted to think carefully about composition.
Apps That Help You Predict and Capture the Lights
Aurora Forecast Apps Worth Your Phone Storage
Understanding KP index predictions matters more than blindly following app notifications. Aurora predictions are probabilities, not certainties. An app showing KP 4 with 70% confidence means there's a 30% chance nothing happens.
My Aurora Forecast and Aurora Alerts rank among the most reliable options. Both provide real-time KP index updates, push notifications when activity increases, and cloud cover overlays showing whether you'll have clear skies.
I learned this the hard way in northern Norway. My forecast app showed KP 4 predicted with 70% confidence. The app's aurora oval visualization showed green coverage extending to my latitude. Excited, I drove two hours to a remote location, only to find completely overcast skies. The app showed aurora probability but didn't emphasize that 100% cloud cover makes viewing impossible regardless of KP index.
More effective approach: check KP predictions first, then immediately cross-reference with detailed cloud cover maps and local weather forecasts. Only when both aurora activity AND clear skies align should you commit to the chase. The aurora might be active above those clouds, but your phone can't photograph what it can't see.
Planetary KP index tells you overall geomagnetic activity levels. Local viewing conditions (light pollution, cloud cover, moon phase) determine whether you'll see anything. Solar wind speed indicates how quickly charged particles are hitting Earth's magnetosphere. Faster speeds often correlate with more intense displays.
Aurora oval visualizations look impressive but don't account for your specific location's viewing conditions. They show where aurora might be visible, not where it will be visible to you specifically.
Beyond aurora apps, explore the best productivity apps to help organize your aurora chase itinerary and location scouting notes.
Manual Camera Apps That Unlock Your Phone's Potential
Third-party camera apps don't improve your phone's hardware, but they do give you access to controls that might be buried or limited in your stock camera app.
ProCam and Camera+ for iOS provide extensive manual controls with intuitive interfaces. Manual Camera and Camera FV-5 for Android offer similar functionality. These apps justify the download or purchase when your native camera app doesn't provide adequate manual control.
Newer iPhone and Samsung models have excellent native manual controls. If you're using an iPhone 11 or later, or a Samsung Galaxy S20 or later, the stock camera app probably provides everything you need. Third-party apps become valuable for phones more than two years old or budget Android models with limited native controls.
The interface matters as much as the features. An app with comprehensive manual controls but terrible UI design becomes unusable in the field. Test these apps at home in darkness. Can you adjust ISO without squinting at tiny buttons? Can you change shutter speed while wearing gloves? These practical considerations determine whether an app is genuinely useful or just feature-rich on paper.
Star Walk and Sky Mapping for Context and Planning
Star mapping apps help you understand what you're seeing beyond just the aurora. Sky Guide, Star Walk 2, SkySafari, and Stellarium identify constellations appearing in your aurora photos, help you find true north (important for predicting where aurora activity will appear), and show how the Milky Way or moon position might complement or compete with aurora visibility.
True north matters because auroras appear in the northern sky (in the Northern Hemisphere). If you're not sure which direction is north, you might be looking at the wrong section of sky entirely. Star mapping apps use your phone's compass and GPS to show you exactly where to look.
Moon phase affects aurora visibility significantly. A full moon brightens the sky, reducing contrast and making faint auroras harder to see. A new moon provides the darkest skies and best viewing conditions. Check moon phase before planning your aurora chase. You want as little moonlight as possible.
These apps add depth to your experience beyond just the aurora itself. You're not just photographing green lights; you're capturing the aurora in context with specific constellations, the Milky Way, or planetary positions. That context makes your photos more interesting and helps you remember the specific night and location.
Post-Processing Without Losing Authenticity
What Your Sensor Actually Captured vs. What You Think You Saw
RAW files look flat and dark straight out of camera. Some processing is necessary to reveal what your sensor captured. The question is where to draw the line between enhancement and fabrication.
Adjusting exposure, contrast, and white balance to match what the sensor captured constitutes legitimate editing. Your phone captured real photon data; you're revealing it clearly. Adding colors that weren't present, or compositing multiple images without disclosure, crosses into problematic manipulation.
Look, this is a spectrum, not a binary. Different photographers draw the line differently. Some consider any saturation adjustment to be manipulation. Others see it as revealing colors the sensor captured but displayed too subtly in the default rendering.
Your phone captured real data. Processing is about revealing it clearly, not inventing it. If your sensor recorded green wavelengths at a certain intensity, adjusting the green channel to display that intensity accurately is enhancement. Cranking green saturation until the aurora looks neon is fabrication.
The test: could someone standing next to you with different equipment have captured similar colors? If yes, your processing is probably reasonable. If no, you've likely crossed into fabrication.
Mobile Editing Apps That Don't Require a Laptop
Lightroom Mobile and Snapseed provide professional-grade editing capabilities directly on your phone. You don't need a laptop to process aurora photos effectively.
Specific adjustments that improve aurora photos: lifting shadows to reveal foreground detail, adjusting highlights to prevent blown-out aurora cores, tweaking white balance to accurate color representation, and adding clarity or texture to enhance structure.
Over-editing announces itself. Cranking saturation until colors look artificial, adding too much contrast until you lose tonal gradation, or sharpening until you see halos around objects. These are signs you've gone too far.
Good editing is invisible. If someone's first thought is "nice Photoshop," you've overdone it.
Start with small adjustments. Move a slider 10-20 points, evaluate the result, then decide if you need more. It's easier to add more adjustment than to undo excessive editing.
Compare your edited version to the original RAW file periodically. Have you enhanced what was there, or have you created something that wasn't? This comparison keeps you honest.
Organizing and Selecting Your Best Shots
You'll take dozens or hundreds of photos during an aurora display. Most won't be worth keeping. Culling your images is part of the creative process, not just housekeeping.
Check for focus first. Delete anything blurry immediately. There's no point evaluating composition or color if the image is out of focus. This single step typically eliminates 30-40% of aurora photos.
Evaluate composition next. Did you capture the aurora structure you were attempting? Is the horizon level? Are foreground elements positioned effectively? Delete images with poor composition.
Be ruthless about near-duplicates. You don't need 15 photos of the same aurora formation with slightly different exposure settings. Pick the best one or two and delete the rest.
Selection matters beyond just storage. Sharing your best work rather than overwhelming people with quantity demonstrates curation and judgment. Nobody wants to swipe through 50 similar aurora photos. They want to see your three best shots.
Common Mistakes That Ruin Your Shots
Touching Your Phone During Exposure
Camera shake causes more blurry aurora photos than focus problems. Any movement during a multi-second exposure creates blur. Your hand isn't as steady as you think, especially when cold.
Tapping the shutter button introduces shake. The physical act of pressing the screen moves the phone slightly, and that movement shows up in the final image.
Solutions: use your phone's timer function (2 or 10 second delay), use volume buttons instead of screen tap, or use voice commands if your camera app supports them. The timer is most reliable. You tap the button, the phone waits 2 seconds for vibrations to settle, then captures the image.
Leaning your phone against something feels secure but often isn't. A rock or tree trunk might seem stable, but small movements from wind or your own body shifting nearby can translate into camera shake. If you're using this method, verify stability by watching your phone screen for several seconds before triggering the shutter.
Keeping Your Phone Stable Without a Tripod
Many aurora chasers don't carry tripods. They're bulky, cold to handle, and require planning. Improvised stabilization becomes necessary.
Propping your phone against rocks, trees, or car hoods works if you're careful. Use your jacket or bag as a cushion to prevent scratching and to fine-tune the angle. Find stable surfaces in the environment: flat rocks, fence posts, or vehicle hoods.
These approaches have limitations. Composition options are restricted by whatever stable surfaces happen to be available. Adjusting angles is difficult. You can't easily pan or tilt without finding a new surface.
Deciding when a tripod is worth bringing depends on how serious you are about aurora photography. If you're taking a few snapshots for social media, improvised stabilization works fine. If you're trying to capture portfolio-quality images, a tripod becomes essential.
For the most stable aurora photography setup, pair your phone with a magnetic tripod phone mount that provides secure attachment and precise positioning adjustments.
The Mounting Problem Nobody Talks About
Keeping your phone accessible, protected, and mountable while wearing heavy gloves, standing in darkness, and trying to respond quickly to aurora activity creates a specific challenge most people don't anticipate until they're in the field.
Standard phone cases aren't designed for this use case. Fumbling with your phone in the cold leads to drops, missed shots, and frustration. I've tried balancing my phone against a frozen rock, wedging it into snow, and holding it against my car's hood. Each attempt required removing my gloves, adjusting the angle multiple times, and hoping it doesn't slide during the exposure.
Magnetic mounting systems solve this specific pain point. Whether you're mounting to a vehicle surface, a dedicated magnetic tripod adapter, or a handlebar mount, the system eliminates fumbling and keeps your phone secure in sub-zero conditions. Quick attachment and detachment mean you can move between handheld viewing (checking your phone screen to see what colors are present) and stable mounted shooting without removing gloves or struggling with mechanical fasteners.
The difference becomes obvious during active aurora displays when you need to reposition quickly. Auroras shift across the sky, and what was perfectly framed two minutes ago might now be cutting off the most interesting section. Being able to grab your phone, reposition, and reattach in seconds (all while wearing gloves) changes the entire shooting experience from frustrating to fluid.
Chimping Instead of Shooting
Reviewing every photo immediately after taking it (called "chimping" in photography) causes you to miss ongoing aurora activity. Displays change rapidly, the best moments are often brief, and you can't recreate them.
Aurora activity comes in waves. You'll see a burst of intense movement and color, then a lull, then another burst. Reviewing photos during the bursts means you're staring at your screen instead of watching the sky or capturing the peak moments.
Review during lulls in activity. When the aurora fades to a faint glow, that's when you check your recent shots, adjust settings if needed, and prepare for the next wave. During active displays when structure is rapidly changing, keep shooting.
The anxiety of not knowing if you're getting good shots is real. Building confidence in your settings helps. Take a few test shots early in the session, review them carefully, adjust settings until you're getting properly exposed, sharp images, then trust those settings and stop reviewing constantly.
You can evaluate your photos later. You can't photograph moments that have passed.
Giving Up Too Early
Aurora displays often start slowly, build to peak activity, then fade. Many people leave during the slow start or after the first wave, missing the best displays that come later.
Typical aurora timing patterns show activity often peaks between 10 PM and 2 AM local time, though this varies by location and season. Activity comes in waves rather than steady displays. You might see 20 minutes of faint activity, then 10 minutes of spectacular displays, then another lull, then another peak.
Staying for at least an hour increases your chances of seeing strong activity. Two hours is better. Three hours gives you the best odds of catching peak displays.
Staying comfortable during long viewing sessions requires planning. Layer clothing so you can adjust as you warm up from moving around or cool down from standing still. Bring hot drinks in a thermos. Find wind-protected locations. Even a slight breeze dramatically increases heat loss and discomfort.
Your phone's ability to reveal faint activity early in the evening helps you know whether to stay or whether it's genuinely not happening. If your phone shows nothing even with long exposures and high ISO, the aurora probably isn't active. If your phone reveals faint green bands that your eyes can't see, activity is building and you should stay.