


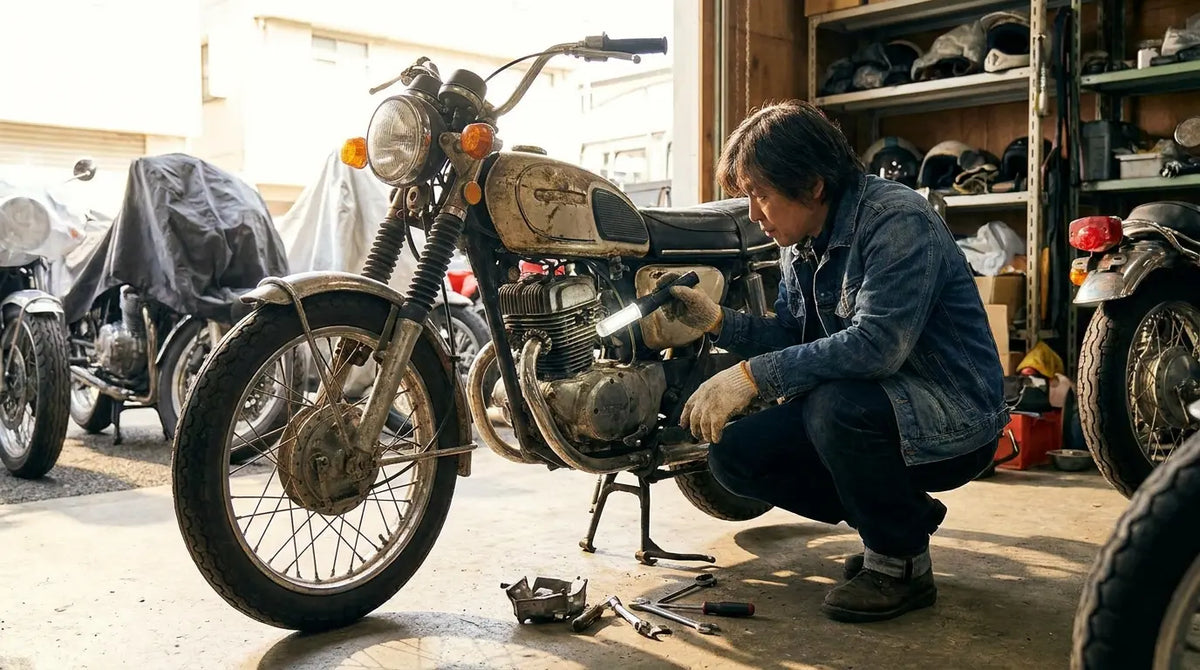
Three weeks ago, middle of February, I walked away from a Yamaha R6 with perfect service records.
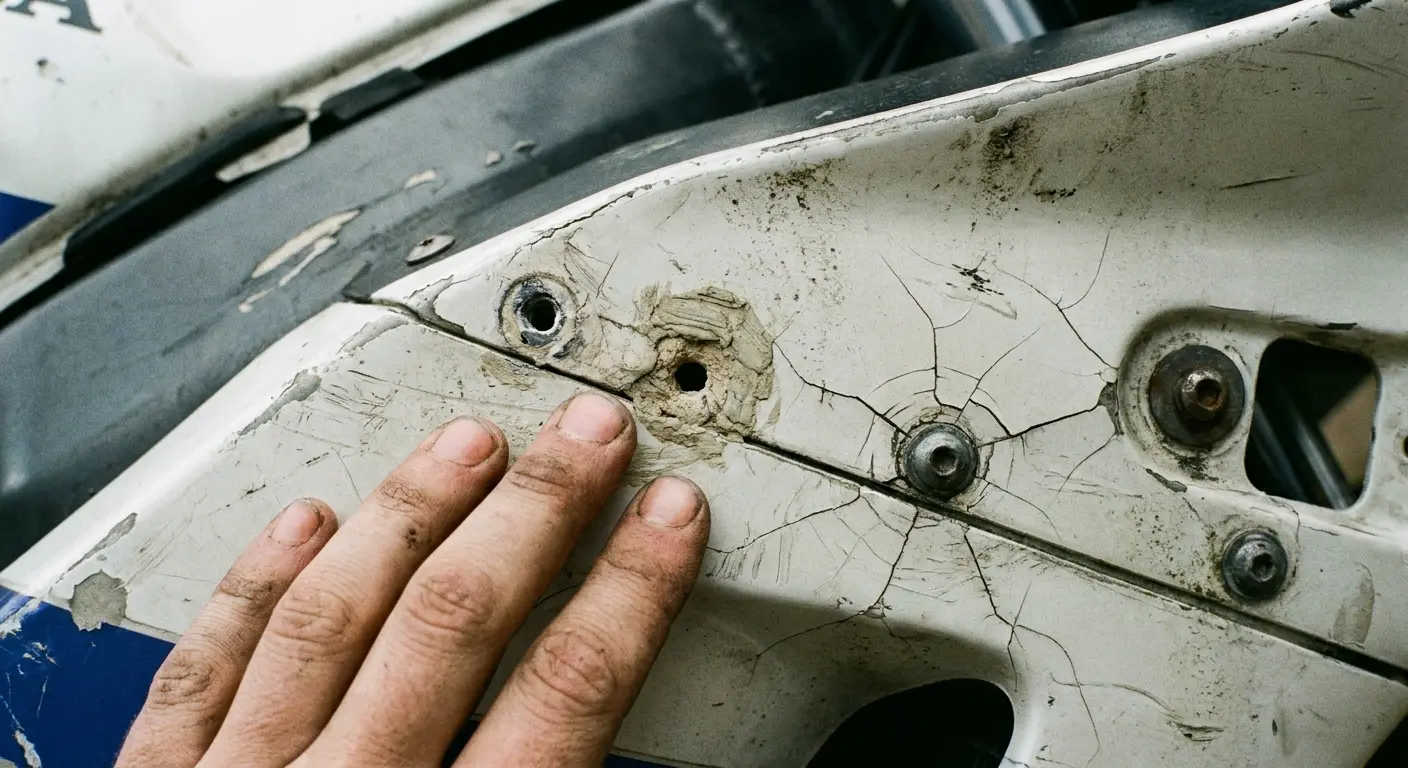
The seller had everything. Dated receipts, organized in a binder, three years of oil changes documented like a maintenance diary. But when I ran my hand along the upper fairing, I felt something wrong. Three filled holes near the windscreen. He'd tried mounting a GoPro first, then a phone holder, then finally a GPS unit before giving up. Each attempt left a hole. Each hole had cracked the plastic around it.
The repair? $1,200 for new fairings. Not mentioned anywhere in those perfect records.
That's what this is actually about. The drill holes, the spliced wires, the modification scars that reveal how someone really treated their bike. Because you're not just buying a motorcycle. You're buying every decision the previous owner made, good and bad. The stuff service records won't tell you.
Table of Contents
Why Modification Scars Tell You More Than Service Records
Reading Frame Damage That Sellers Won't Mention
The Phone Mount Problem and What It Reveals About Ownership
Electrical Systems: Where Shortcuts Come Back to Haunt You
Tire Wear Patterns That Expose Riding Habits
Suspension Components Nobody Thinks to Inspect
How to Verify Actual Mileage Beyond the Odometer
Test Riding for Problems That Only Show Up Under Load
Documentation Gaps That Should Make You Walk Away
Price Negotiation Based on Real Repair Costs
Why Modification Scars Tell You More Than Service Records
Service records can be faked. Receipts can be printed.
But a drilled fairing doesn't lie.
I've looked at bikes with zero service records that were clearly maintained better than bikes with three-ring binders full of receipts. How? The physical evidence doesn't lie. When you're looking at a used motorcycle, most buyers focus on mileage and maintenance history. That's backward thinking. The physical evidence of how someone modified their bike tells you everything about their mechanical aptitude and respect for the machine.
Physical modifications leave permanent evidence that paperwork can't erase. A seller can organize maintenance receipts into a perfect chronological display, but they can't undo structural damage from poorly executed customizations. You need to read these modification scars the way a detective reads a crime scene.
Spotting Amateur Drilling and Mounting Attempts
Fairings with multiple drill holes? They're telling you a story.
Someone tried to mount something (usually a phone holder or GPS unit), didn't get it right the first time, and kept drilling. Each hole is a stress point. Each stress point is a crack waiting to happen.
You'll find these holes near the tank, on the windscreen, along the top triple clclamp. Some sellers fill them with epoxy or use color-matched paint to hide them. Run your finger across the surface. You'll feel the inconsistency even if you can't see it.
Why does this matter? Because someone who drills randomly into their fairings without considering structural integrity probably took the same approach to everything else. They're not thinking about vibration, wind load, or material fatigue. And you're about to inherit the consequences of that thinking.
Adhesive Residue as a Character Reference
Sticky residue from removed decals, old mounting tape, or failed adhesive mounts reveals impatience.
Quality mounting solutions don't leave residue. Cheap ones do.
Check the tank sides, the upper fairing near the handlebars, and the tail section. If you see ghosting from old stickers or feel tackiness under your palm, you're looking at someone who prioritized convenience over care. The adhesive itself isn't the problem (though it's annoying to clean). The problem is what it represents: quick fixes, temporary solutions, and a lack of long-term thinking about the bike's condition.
Wire Splicing and Electrical Tape Nightmares
Pop the seat. I'm serious, do this on every bike.
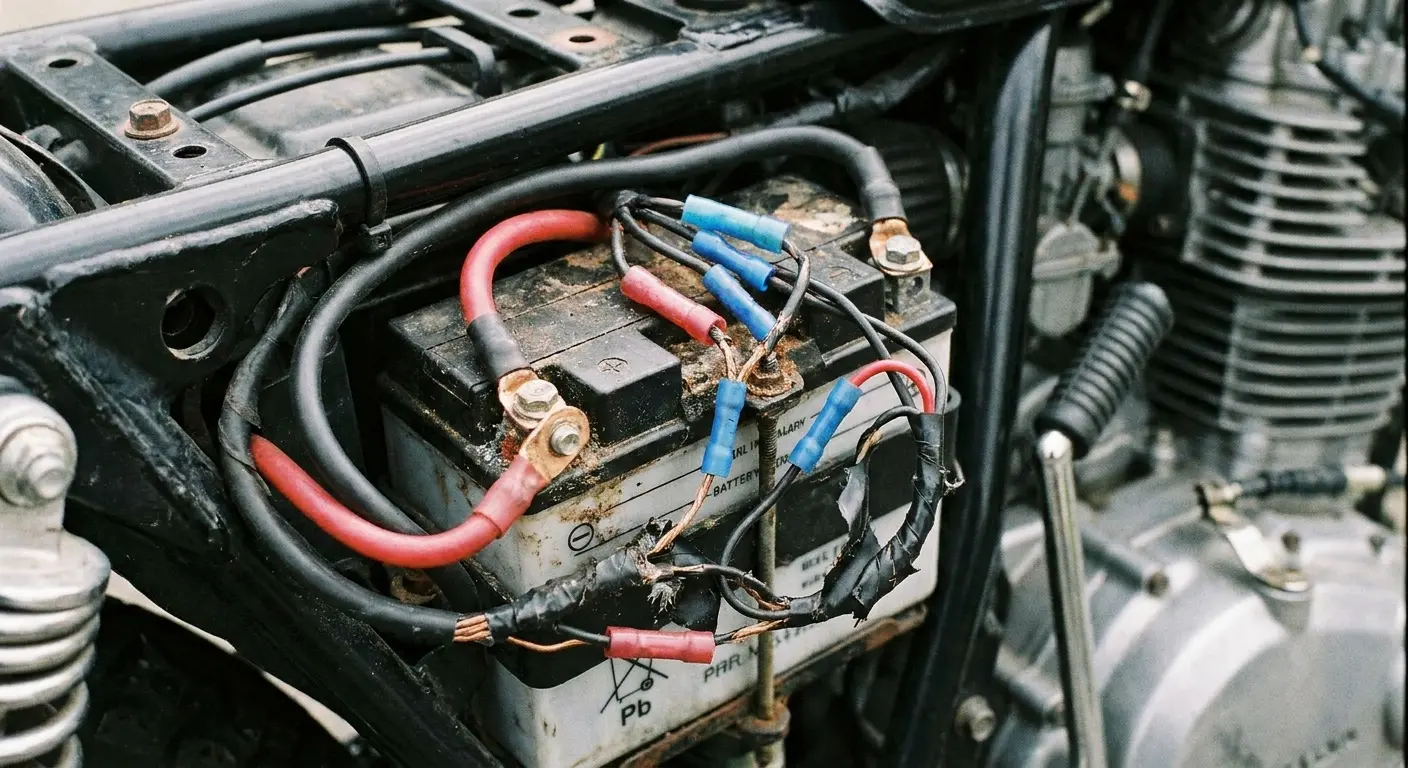
Last month I found a rat's nest of wiring under a Ninja's seat that looked like someone had performed surgery with a butter knife. Butt connectors, electrical tape, and what I can only describe as hope holding the whole thing together. The seller swore the bike ran fine.
Sure it did. Until it didn't.
Proper electrical work uses heat shrink tubing, soldered connections, and wire loom protection. Amateur work uses twist caps, electrical tape, and prayer. If you see wires spliced into the main harness with butt connectors wrapped in tape, walk away. That's not just poor craftsmanship. That's a future electrical fire or a mysterious power drain that'll leave you stranded.
Electrical systems are cumulative. One bad connection creates resistance. Resistance creates heat. Heat degrades connections further down the line. By the time you notice the problem, you're looking at a full harness replacement.
Reading Frame Damage That Sellers Won't Mention
Frames don't always show damage in obvious ways.
Sellers know this. You need to know it better.
Structural integrity determines whether a used motorcycle is safe to ride or a liability waiting to happen. Frame damage often hides beneath paint, behind fairings, or in areas that require specific knowledge to inspect properly. Most casual buyers miss these signs entirely, which is exactly what dishonest sellers count on.
Frame Inspection Point |
What to Look For |
Red Flag Indicators |
Estimated Repair Cost |
|---|---|---|---|
Main frame mounting points |
Paint cracks, bolt hole elongation |
Deformed metal around bolts, multiple paint layers |
$800-$2,500 |
Subframe welds |
Hairline cracks, rust staining |
Visible gaps in welds, previous repair grinding |
$400-$1,200 |
Steering head area |
Paint consistency, weld quality |
Color mismatch, rough texture on welds |
$600-$1,800 |
Swingarm pivot |
Wear patterns, bearing play |
Excessive side-to-side movement, scoring on pivot bolt |
$300-$900 |
Frame tubes |
Uniform diameter and shape |
Bulging, flattening, or waviness in tubes |
$1,500-$4,000+ |
Mounting Bracket Stress Points
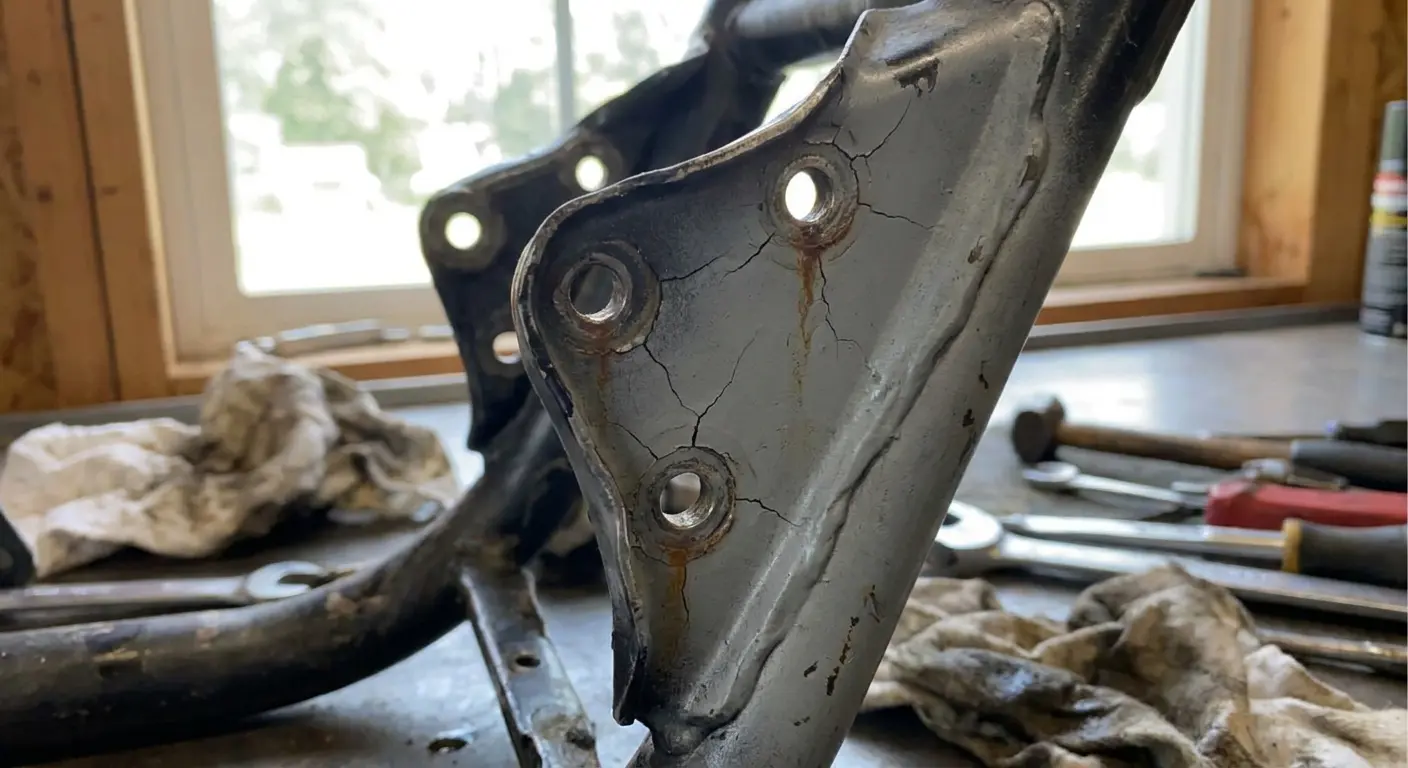
Every aftermarket accessory that bolts to the frame creates a stress concentration.
Luggage racks, crash bars, auxiliary light mounts. They all pull on the frame in ways it wasn't designed to handle. Look at the mounting points. Is the paint cracked around the bolts? Can you see slight deformation in the metal? These are signs that someone over-torqued bolts or loaded the bike beyond its capacity.
Frame tubes should be uniform in diameter and shape. If you see any bulging, flattening, or waviness, the frame has been stressed. This isn't always from a crash (though that's the obvious cause). Overloading a bike with gear and riding it hard can bend a frame over time.
Paint Inconsistencies That Hide Repairs
Frame paint should be consistent in texture and color across all tubes and welds.
Any variation means repair work.
Run your hand along the frame rails. You're feeling for differences in paint thickness. Spray can touch-ups feel different than factory powder coating. They're rougher, sometimes slightly raised. Check welds carefully. Factory welds are uniform and clean. Repair welds are often ground down and painted over. You'll see slight depressions or smoothed areas where someone tried to hide the work.
I bought a Ducati Monster once (back in 2018, before prices went completely insane) that had beautiful paint on the left side of the frame. The right side felt slightly different under my palm. Turned out the previous owner had lowsided it, bent the frame, and had it straightened and repainted. He never mentioned it. The paint told me what he wouldn't.
The Subframe Tell
Subframes crack.
They crack at the welds, especially near the passenger peg mounts and under the seat. Remove the seat and look at the subframe welds with a flashlight. You're looking for hairline cracks, rust staining (which indicates moisture intrusion at a crack), or signs of previous welding repair.
Subframe damage happens when bikes are dropped at speed, when passengers are too heavy, or when someone uses tie-downs incorrectly. It's common, it's often hidden, and it's expensive to fix properly.
The Phone Mount Problem and What It Reveals About Ownership
Phone mounts seem innocent.
They're not.
The way someone mounted their phone reveals their entire approach to motorcycle ownership. Did they research proper mounting solutions? Did they consider long-term effects? Or did they grab the cheapest option and drill holes wherever seemed convenient? These decisions cascade through every aspect of bike maintenance and care.
Permanent Mounting Damage to Fairings
Ball mount systems require drilling.
Sellers remove the mount but leave the holes. Sometimes they plug them. Sometimes they don't. These holes compromise fairing integrity. Fairings are designed to flex in specific ways during a crash to absorb energy. Drill holes change how they flex. They create crack initiation points.
You'll find these holes most commonly on the top triple clamp area, the tank sides, or the upper fairing near the handlebars. Even if they're filled, they're still there. The plastic around them is stressed. And stress cracks don't always show up immediately. They appear three months after you buy the bike, spreading from that filled hole like a spiderweb.
Adhesive Mount Aftermath
Adhesive mounts seem better because they don't require drilling.
They're actually worse in some ways.
The strong adhesives needed to hold a phone securely at highway speeds bond to the paint or plastic at a molecular level. When someone removes them, they often take paint or gelcoat with them. You'll see lighter patches, rough texture, or clear areas where the finish is gone.
Some owners try to hide this with touch-up paint or vinyl wraps. Look for color mismatches or edges where wrap material is lifting. These are signs of cover-up work.
Vibration Damage to Electrical Components
Here's why I'm obsessed with phone mounts. I've seen three bikes in the last year with cracked instrument clusters from vibration damage.
Not from crashes. From some $15 Amazon phone mount that turned their phone into a percussion instrument at highway speeds.
The phone's camera stabilizer failed, sure. But the real damage was the constant vibration working its way through every electrical connection on the front end. If the mount was attached to or near any electrical components (which it often is, given where people mount phones), those components experienced increased vibration stress. Connectors loosen. Solder joints fatigue. Circuit boards crack.
You won't see this during a test ride. You'll discover it three months later when your dash starts flickering or your fuel injection system throws random codes.
What Mount Choice Tells You About Decision Making
Someone who chose a quality mounting solution (properly installed with consideration for the bike's structure) probably made quality decisions elsewhere.
Someone who drilled random holes or slapped on the cheapest adhesive mount probably didn't.
You're not just buying a motorcycle. You're buying the accumulated decisions of everyone who owned it before you. Phone mounts are a window into that decision-making process. When you eventually need to mount your own phone, consider solutions like the Rokform Pro Series Motorcycle Perch Mount that use existing mounting points without drilling into fairings or creating permanent damage. The magnetic and twist-lock systems mean you're not dealing with adhesive residue that degrades paint or leaves sticky marks.
Electrical Systems: Where Shortcuts Come Back to Haunt You
Electrical problems are expensive, time-consuming, and often intermittent.
That makes them perfect for sellers to hide.
Used motorcycles frequently suffer from electrical modifications done by previous owners who lacked proper training or equipment. These modifications create cascading failures that won't manifest during a quick test ride but will plague you for months after purchase.
Electrical System Inspection Checklist
☐ Battery terminals: Check for multiple wire connections, corrosion, and connection method quality
☐ Under-seat area: Remove seat and inspect all visible connectors for corrosion (green/white buildup)
☐ Main harness: Look for spliced wires, butt connectors, or electrical tape repairs
☐ Accessory wiring: Trace any aftermarket accessories to their power source
☐ Fuse box: Check for oversized fuses or bypassed fuse positions
☐ Ground connections: Verify all ground wires are securely attached and corrosion-free
☐ ECU area: Look for aftermarket devices plugged into ECU or sensor connections
☐ Front connectors: Inspect all connectors near headlight and instrument cluster
☐ Relay condition: Check for aftermarket relays and verify proper installation
☐ Wire loom protection: Confirm wires are protected from abrasion and heat sources
Accessory Tap Points and Power Draws
Every accessory draws power. Heated grips, auxiliary lights, phone chargers, GPS units.
They all pull from the electrical system.
The question isn't whether accessories are installed. It's how they're powered. Proper installations use relay systems and fused circuits tied directly to the battery. Amateur installations tap into existing circuits, overloading them and creating voltage drops across the entire system.
Pop the seat and look at the battery terminals. Are there multiple wires connected? How are they connected? Ring terminals and proper crimps are good signs. Alligator clips or twisted wire connections are red flags.
Corroded Connections and Water Intrusion
Motorcycles live outside. Water gets into electrical connections.
That's normal. What 's not normal is failing to protect against it.
Check every connector you can access. Look for green or white corrosion on pins. Feel for stiffness when you try to wiggle connectors (they should move slightly but not be loose). Pay special attention to connectors near the front of the bike. These take the most water spray. Also check under the seat, where water pools if the bike is stored outside.
If you're buying in Florida or anywhere near the coast, check twice as hard for corrosion. That salt air is murder on electrical connections. West coast bikes usually have sun-faded plastics but clean frames. Midwest bikes are the opposite, rust everywhere but the plastics look decent.
Corrosion spreads. One bad connection creates resistance, which creates heat, which accelerates corrosion in nearby connections. By the time you see it, the problem is usually extensive.
ECU and Sensor Modifications
Some owners tune their bikes by modifying the ECU or installing aftermarket fuel controllers.
This isn't inherently bad. But it needs to be done right.
Ask about any performance modifications. If the seller mentions a tune or fuel controller, ask who did the work. Dealer or reputable shop? Good. Buddy in his garage? Problem. Check for aftermarket parts in the airbox, near the throttle bodies, or attached to the ECU itself. If you see devices you don't recognize, research them before buying. Some are quality components. Others are cheap tune modules that can damage engines.
The Battery as a Diagnostic Tool
Batteries reveal electrical system health.
A bike with electrical problems kills batteries quickly. Check the battery date code. If it's less than a year old on a bike that's several years old, ask why it was replaced. Dead battery? Normal. Multiple batteries in two years? Electrical problem.
Also check the battery terminals for excessive corrosion or signs of repeated disconnection. Some owners disconnect the battery between rides to prevent drain. That's a sign of a parasitic draw they couldn't fix. I learned this the hard way with a CBR that went through three batteries in eighteen months before I finally traced it to a poorly installed alarm system.
Tire Wear Patterns That Expose Riding Habits
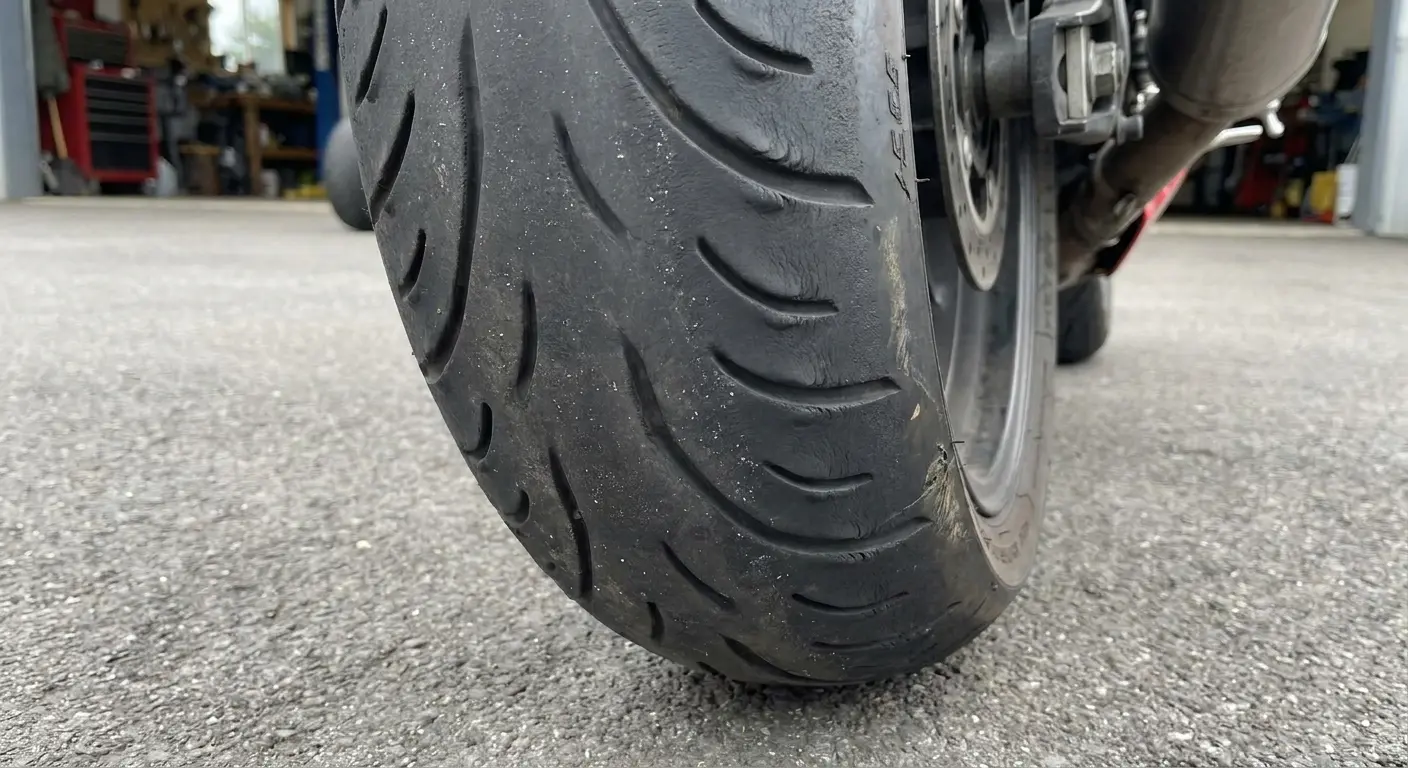
Tires wear. How they wear tells you everything about how the bike was ridden.
I inspected a Kawasaki Ninja 650 with only 6,000 miles on the odometer. The tires showed severe edge wear with the center tread still looking nearly new. The seller claimed he used it for commuting. But edge wear that aggressive meant canyon carving or track days. I checked the brake pads next and found them worn down to the backing plates. The fork seals were leaking. The rear shock had lost its damping. This bike had been ridden hard, and the low mileage was misleading. The real cost of ownership would be $2,000 in deferred maintenance within the first few months.
Center Wear and Highway Miles
Tires worn flat in the center with good tread on the edges mean highway miles. Straight-line riding at constant speeds.
This seems good. Highway miles are easy miles. But they're also boring miles, which means the rider might have neglected the bike out of disinterest. Check maintenance records carefully. Highway riders sometimes treat their bikes like appliances, change the oil when the light comes on, ignore everything else.
Also consider that highway miles mean sustained high speeds, which stress engines and transmissions differently than mixed riding. If the bike has high mileage and center-worn tires, budget for valve adjustments and transmission service.
Edge Wear and Aggressive Cornering
Tires worn to the edges with good center tread mean aggressive riding.
This rider pushed the bike into corners hard.
Aggressive riding isn't automatically bad. Skilled riders can corner hard without damaging their bikes. But it does mean higher stress on suspension components, brake systems, and chassis. Look extra carefully at fork seals, rear shock condition, and brake pad wear. These components work harder under aggressive riding and wear out faster.
Thing is, you can't always tell if the previous owner was skilled or just reckless. The tire wear looks the same either way.
Uneven Wear and Suspension Problems
One tire more worn than the other, or irregular wear patterns across a single tire, indicate suspension problems.
Cupping (scalloped wear patterns) means the suspension isn't controlling the tire properly. This could be worn shocks, incorrect preload, or damaged fork internals. Wear on one side of the tire more than the other suggests alignment issues or bent components. This is serious. It means the bike doesn't track straight, which affects handling and safety.
Tire Age Versus Tread Depth
Tires expire.
The rubber compounds degrade over time, regardless of tread depth. Check the DOT date code on the tire sidewall. Tires older than five years should be replaced, even if they look fine. Tires older than seven years are dangerous. I also ranked the best motorcycle tires if the ones on it are done.
If the bike has old tires with good tread, the bike hasn't been ridden much. That brings its own problems. Seals dry out, fluids degrade, and batteries die on bikes that sit. Low miles aren't always good miles.
Suspension Components Nobody Thinks to Inspect
Suspension wears out gradually.
That makes it easy to ignore and easy for sellers to avoid mentioning. Most buyers focus on obvious components like engines and brakes while completely overlooking suspension condition. This oversight costs them thousands in repairs within months of purchase. Suspension components wear silently, degrading handling and safety without creating dramatic symptoms that would alert casual riders.
First five bikes I looked at, I never checked the steering head bearings. Then I bought one with shot bearings and spent $600 learning that lesson. Now I check everything.
Fork Seal Leaks and Internal Wear
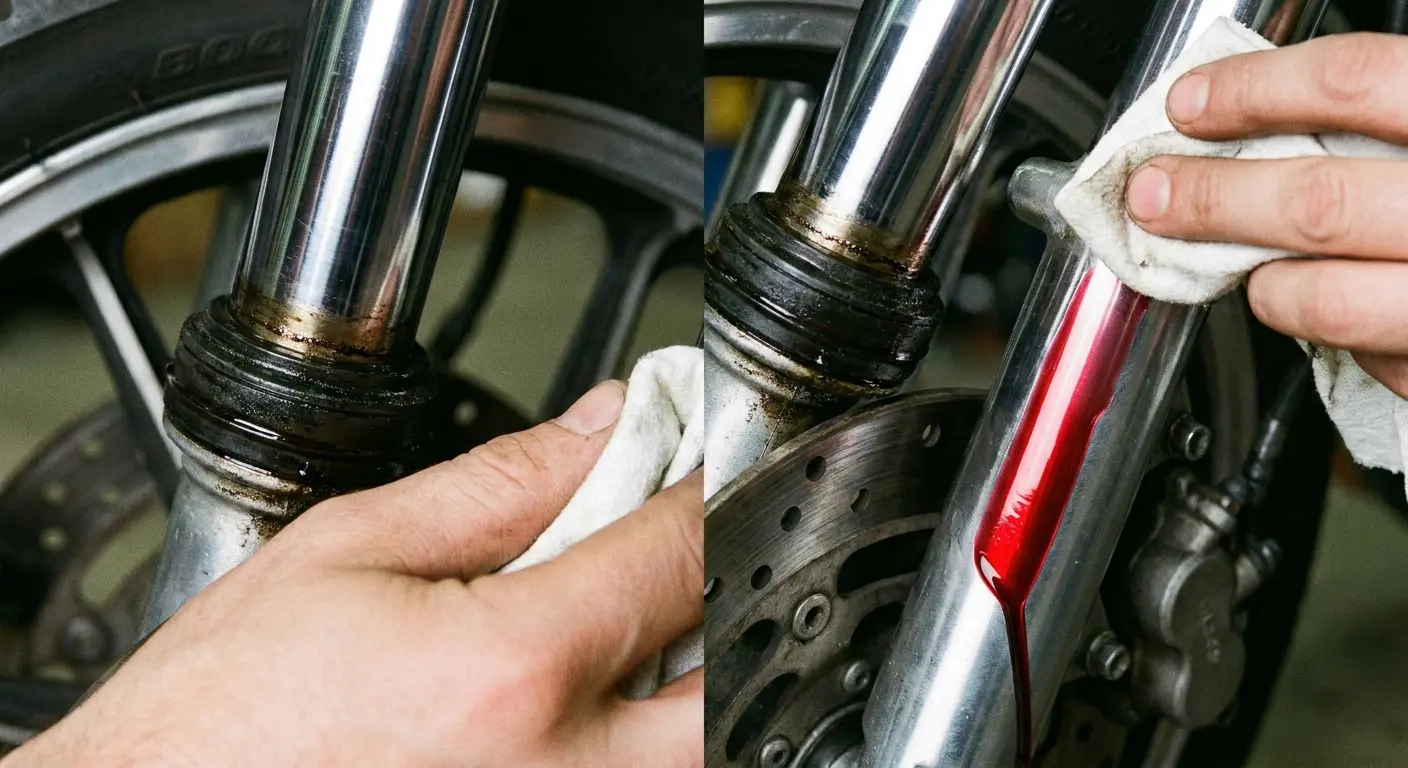
Fork seals leak. You'll see oil on the fork tubes below the seals.
Some leaks are minor. Others indicate internal damage.
Wipe the fork tubes clean with a rag. Compress the forks several times by pushing down on the handlebars. Release and wait thirty seconds. Check for fresh oil. A thin film of oil might just be a seal that needs replacement. Oil running down the fork tube means the seal is completely failed. Oil with a milky appearance means water intrusion, which means internal corrosion.
But here's what most buyers miss: even if the seals aren't leaking, the fork internals might be worn out. Push down on the handlebars and listen. Clunking, clicking, or grinding sounds mean internal wear. The bushings are shot, and you're looking at a full rebuild.
Rear Shock Linkage Bearings
The rear suspension linkage has multiple bearings that wear out.
They're hidden under the swingarm and easy to ignore.
Grab the rear wheel and try to move it side to side. Any play in the suspension linkage means worn bearings. You shouldn't feel any movement that isn't part of the suspension's normal travel. Also check for grease around the linkage pivots. Dry pivots mean the bearings haven't been serviced. Motorcycle linkages need regular greasing. If it hasn't been done, the bearings are probably corroded.
Linkage bearing replacement requires special tools and takes hours of labor. Budget at least $500 for this work if you detect problems. Yeah, I know, checking linkage bearings sounds about as fun as reading your insurance policy, but it'll save you from discovering this expensive surprise three weeks after you buy.
Spring Sag and Preload Settings
Suspension should be set up for the rider's weight.
Most used bikes aren't.
Check the rear shock preload setting. If it's cranked all the way up or all the way down, the previous owner either didn't know how to set it or was the wrong size for the bike. Incorrect preload accelerates wear on suspension components. It also means you'll need to have the suspension set up properly after purchase, which costs money.
Ask the seller their weight. If they're significantly heavier or lighter than you, factor in suspension setup costs or potential spring changes.
Steering Head Bearing Check
Steering head bearings wear out and create handling problems.
Most buyers never check them.
Lift the front wheel off the ground (center stand or ask a friend to help). Turn the handlebars slowly from lock to lock. They should move smoothly without notches or tight spots. Notchy steering means the bearings are worn into detents. This is dangerous. It affects handling at speed and makes the bike want to fall into turns.
With the front wheel still off the ground, push and pull on the fork lowers. You're checking for play in the steering head. Any movement means the bearings need adjustment or replacement.
How to Verify Actual Mileage Beyond the Odometer
Odometers lie. Or rather, sellers make them lie.
You need other ways to verify mileage.
Odometer fraud remains common in the used motorcycle market because it's difficult to detect and significantly increases sale prices. Smart buyers cross-reference multiple indicators to confirm stated mileage matches actual use.
Service Interval Components
Motorcycles have components that get replaced at specific mileage intervals.
These components tell the truth about mileage.
Check the chain and sprockets. A worn-out chain on a bike with 8,000 miles doesn't make sense unless the bike was abused or the chain was never maintained. Chains typically last 15,000 to 25,000 miles with proper care. Look at the brake pads. Front pads wear faster than rear pads. If the fronts are original equipment on a bike with 20,000 miles, something's wrong. Brake pads typically need replacement every 10,000 to 15,000 miles.
Check the air filter. A filthy air filter on a bike with recent low mileage means the odometer doesn't match reality.
Wear Points That Don't Lie
Certain parts of a motorcycle wear in proportion to use.
They can't be easily replaced to hide mileage.
Look at the foot peg rubber. Worn-through pegs mean significant miles. The rubber wears slowly, and most owners don't think to replace it before selling. Check the handlebar grips. They compress and smooth out with use. New grips on a low-mileage bike might be normal. Original grips that are smooth and compressed on a low-mileage bike indicate higher actual miles.
Examine the seat. Leather or vinyl seats show wear patterns that correspond to mileage. Cracking, fading, and compression all indicate use. Some sellers replace seats, so factor that in.
ECU Data and Diagnostic Information
Modern motorcycles store data in the ECU.
This data includes actual running hours and sometimes even mileage.
Ask if you can have the bike diagnosed at a dealer or shop with the proper diagnostic equipment. The ECU will show engine hours. You can calculate approximate mileage from hours based on average speed. Some bikes also store fault codes and data logs that include mileage stamps. These can't be easily altered without specialized equipment and knowledge.
If the seller refuses to let you have the bike diagnosed, that's a red flag. There's no legitimate reason to refuse unless they're hiding something. Actually, scratch that. There's one legitimate reason: they don't want to waste time if you're not serious. But if you offer to pay for the diagnostic and they still refuse? Walk away.
Title and Registration History
Request the title history through the DMV or a service that provides vehicle history reports.
Some states record mileage at each title transfer or registration renewal. Compare the mileage recorded on previous transactions with the current odometer reading. If the numbers don't make sense chronologically, you've found odometer fraud.
Also check for title brands. Salvage, rebuilt, or flood titles don't always show up in casual conversation with sellers. These significantly affect value and insurability.
Test Riding for Problems That Only Show Up Under Load
A test ride around the block tells you almost nothing.
You need to stress the bike to find real problems.
I test rode a Honda CBR600RR that felt perfect during the first five minutes of easy riding. Then I found an empty stretch of road and did a full-throttle pull through second and third gear. At 8,000 RPM, the handlebars started shaking so bad I thought I was going to lose it. I chopped the throttle, heart pounding, and immediately headed back to the seller.
Turns out the steering head bearings were shot, creating instability under acceleration. The seller claimed he never noticed because he never pushed the bike hard. That repair would have cost me $400 plus the risk of crashing. That wobble at 8,000 RPM? That's not just annoying. That's a tank-slapper waiting to happen at 80 mph when you're passing a semi. The $400 repair would've been cheap compared to the hospital bill.
Cold Start Behavior
Ask to see the bike started cold.
Arrive early or ask the seller not to warm it up before you arrive. Cold starts reveal problems that warm starts hide. Listen for unusual noises, watch for excessive smoke, and note how long it takes to start.
Fuel-injected bikes should start quickly even when cold. Carbureted bikes might need choke, but they should still fire up within a few seconds. Extended cranking or rough running indicates problems with fuel delivery, ignition, or engine condition.
Let the bike idle for several minutes. Watch the temperature gauge. It should rise smoothly without spiking. Listen for rattles, ticks, or knocks that might disappear once the engine warms up and oil pressure builds.
Clutch Engagement and Slipping
The clutch should engage smoothly in the middle of the lever travel.
Engagement at the very end of the travel means a worn clutch.
Once you're riding, accelerate hard in each gear. The engine RPM should match the acceleration. If the engine revs but the bike doesn't accelerate proportionally, the clutch is slipping. Slipping clutches need replacement soon. That's $500 to $1,000 depending on the bike. Factor this into your offer.
Also note any juddering or grabbing during clutch engagement. This indicates warped plates or contaminated friction material. The clutch smelled like a burned match when I pulled in after that test ride on a Suzuki SV650 last year. Seller swore it was fine. Two weeks later the new owner was replacing the clutch pack.
Transmission Shifting Quality
Shift through every gear multiple times.
Shifting should be positive and clean without false neutrals or grinding. Hard-to-find neutrals indicate clutch drag or transmission wear. Occasional false neutrals (especially between first and second) are common on some bikes but still indicate wear.
Listen for whining from the transmission. Some gear whine is normal, but loud whining that changes with speed indicates worn bearings or gears. Try to find neutral while stopped with the engine running. It should be easy. If you have to rock the bike back and forth or make multiple attempts, the clutch isn't fully disengaging.
Braking Performance and ABS Function
Find a safe place to test the brakes hard.
You need to feel threshold braking and ABS activation if the bike has it.
Brake hard from 40 mph if possible. The bike should stop straight without pulling to either side. Pulling indicates stuck calipers, worn rotors, or suspension problems. If the bike has ABS, you should feel the system activate under hard braking. Pulsing through the lever and pedal is normal. If you don't feel ABS activation, the system might not be working.
After hard braking, check the rotors. They should be smooth and uniform. Warped rotors cause pulsing through the controls during normal braking.
High-Speed Stability
Get the bike up to highway speed if you can do so safely and legally.
You're checking for wobbles, weaves, or vibrations.
The bike should track straight with minimal input. Any wandering or instability suggests tire problems, suspension issues, or frame damage. Vibrations that appear at specific speeds indicate wheel balance problems or worn bearings. Vibrations that worsen with speed suggest more serious issues with the engine or transmission.
Slow-Speed Handling and Balance
Ride slowly through a parking lot. Make tight turns.
Do a U-turn in both directions.
The bike should feel balanced and neutral. Heaviness on one side or difficulty turning in one direction indicates suspension problems or frame damage. Also check how the bike feels at a stop. It should balance easily. Bikes that want to fall over or feel unstable when stopped might have bent forks or frame damage.
Documentation Gaps That Should Make You Walk Away
Missing paperwork isn't just inconvenient.
It's a warning sign about the bike's history and the seller's honesty.
Documentation provides verifiable proof of ownership, maintenance history, and legal status. Gaps in this documentation often indicate problems the seller doesn't want you to discover.
Title Issues and Ownership Verification
The seller must have a clear title in their name. Period.
No exceptions.
If the title is in someone else's name, you're dealing with a third party. This opens you up to legal problems. The person selling might not have legal right to sell the bike. Check that the VIN on the title matches the VIN on the bike. Check both the frame VIN and the engine VIN if your bike has both. Any mismatch is a deal-breaker.
Also verify the seller's ID matches the name on the title. You're confirming they're legally authorized to sell.
Service Records and Maintenance History
Complete service records aren't just nice to have.
They're evidence that the bike was maintained properly.
Major services should be documented. Valve adjustments, timing belt or chain replacements, and brake fluid changes are critical maintenance items. If the bike is due for these services or past due, factor the cost into your offer. Missing records don't automatically mean the work wasn't done. But they mean you can't verify it was done. That's risk you're taking on.
Be especially concerned about missing records for major repairs. If the bike has obviously been repaired (new parts, paint work, etc.) but the seller has no documentation, ask why. The answer matters.
Recall Completion Documentation
Motorcycles have recalls.
Sellers are supposed to have recalls completed before selling.
Check the NHTSA website for open recalls on the specific year and model. If recalls exist, ask the seller for proof they were completed. Uncompleted recalls can affect safety and sometimes prevent registration. Some recalls are serious enough that you shouldn't ride the bike until they're fixed.
Dealers typically complete recalls for free, but you'll need to schedule the work and be without the bike. Factor this inconvenience into your decision.
Modification Documentation and Parts Receipts
If the bike has significant modifications, you want documentation.
This proves the parts are legitimate and shows what was done.
Receipts for performance modifications are especially important. They show what was installed and ideally who did the work. This helps you verify the quality of the modifications and gives you recourse if problems arise. Documentation for suspension work, engine modifications, or electrical system changes should include dyno sheets, setup specifications, or installation notes. Without this information, you're guessing about what was actually done.
Missing documentation for visible modifications suggests the work was done cheaply or by someone who didn't know what they were doing.
Price Negotiation Based on Real Repair Costs
Market value doesn't matter if the bike needs $3,000 in repairs.
Your negotiation power comes from identifying specific problems and calculating actual fix costs.
Successful negotiation requires transforming inspection findings into concrete financial data that justifies your offer. Sellers respond to documented evidence, not vague concerns about bike condition. Building a detailed cost breakdown based on actual parts prices and labor rates gives you leverage that emotional appeals never will.
Calculating Parts and Labor Costs
Don't guess at repair costs.
Look them up.
For every problem you've identified, get actual parts prices from OEM suppliers or quality aftermarket sources. Then research labor times using service manuals or by calling shops. Labor rates vary by region, but $100 to $150 per hour is typical for motorcycle work. Multiply the labor hours by the rate and add parts costs. That's your real repair cost.
Document everything. Create a spreadsheet if needed. You want specific numbers when you negotiate, not vague estimates. I keep a notes app on my phone where I log every issue I find during an inspection with estimated costs. When it's time to make an offer, I've got everything right there.
Prioritizing Safety Issues Versus Cosmetic Problems
Not all problems carry equal weight in negotiation.
Safety issues (brake problems, tire condition, suspension damage, frame damage) should be fixed before you ride the bike. These costs come directly off your offer price or the seller fixes them before sale. Cosmetic issues (scratched plastics, faded paint, worn grips) are negotiable but carry less weight. They affect resale value but not immediate safety or function.
Maintenance items (oil changes, chain adjustment, brake pad replacement) fall in the middle. They need to be done soon but aren't emergencies. Use them as negotiation points but be reasonable. I don't care about scratched plastics (I'm going to drop it in a parking lot anyway) but frame damage? That's a walk-away.
Presenting Your Offer With Evidence
When you make your offer, show your work.
Don't just throw out a lower number.
Walk the seller through what you found. Show them the problems. Explain the repair costs with your documented parts and labor prices. This isn't confrontational. It's factual. Most sellers genuinely don't know about some problems. They're not trying to hide things. They just don't have your level of mechanical knowledge. Educating them helps them understand why your offer is lower than their asking price.
Some sellers will offer to fix problems instead of reducing price. This can work, but get the repairs done before you exchange money. Don't accept promises of future repairs.
Walking Away When Numbers Don't Work
Sometimes the math doesn't work.
The bike needs more repair than it's worth.
If your calculated repair costs plus your offer price exceed the value of a clean example of the same bike, walk away. You're better off spending more money on a better bike than buying someone else's problems. Also walk away if the seller won't negotiate reasonably. Some sellers are emotionally attached to their bikes and won't accept market reality. That's their problem, not yours.
You'll find another bike. There are always more motorcycles for sale. Look, I get it. You're excited about the bike and you want to believe the seller. But trust what the bike shows you, not what the seller tells you.
Final Thoughts
The best bike I ever bought had scratched fairings, 18,000 miles, and needed new tires.
But the frame was straight, the maintenance was documented, and the seller answered every question honestly. I rode it for four years without a single unexpected repair. The worst bike I looked at had 3,000 miles and looked showroom perfect. I walked away in ten minutes after finding filled drill holes, sketchy electrical work, and a seller who got defensive when I asked questions.
You'll know you found the right bike when you can walk away from the inspection with a clear picture of exactly what you're buying. Not a perfect bike, but an honest one. Maybe it needs new tires and a chain. Fine. You know that. You've accounted for it. You're not going to find out three weeks later that the clutch is slipping or the frame has a crack someone hid with a sticker.
That's the difference between buying a used motorcycle and buying someone else's problem. The inspection tells you which one you're looking at.

