


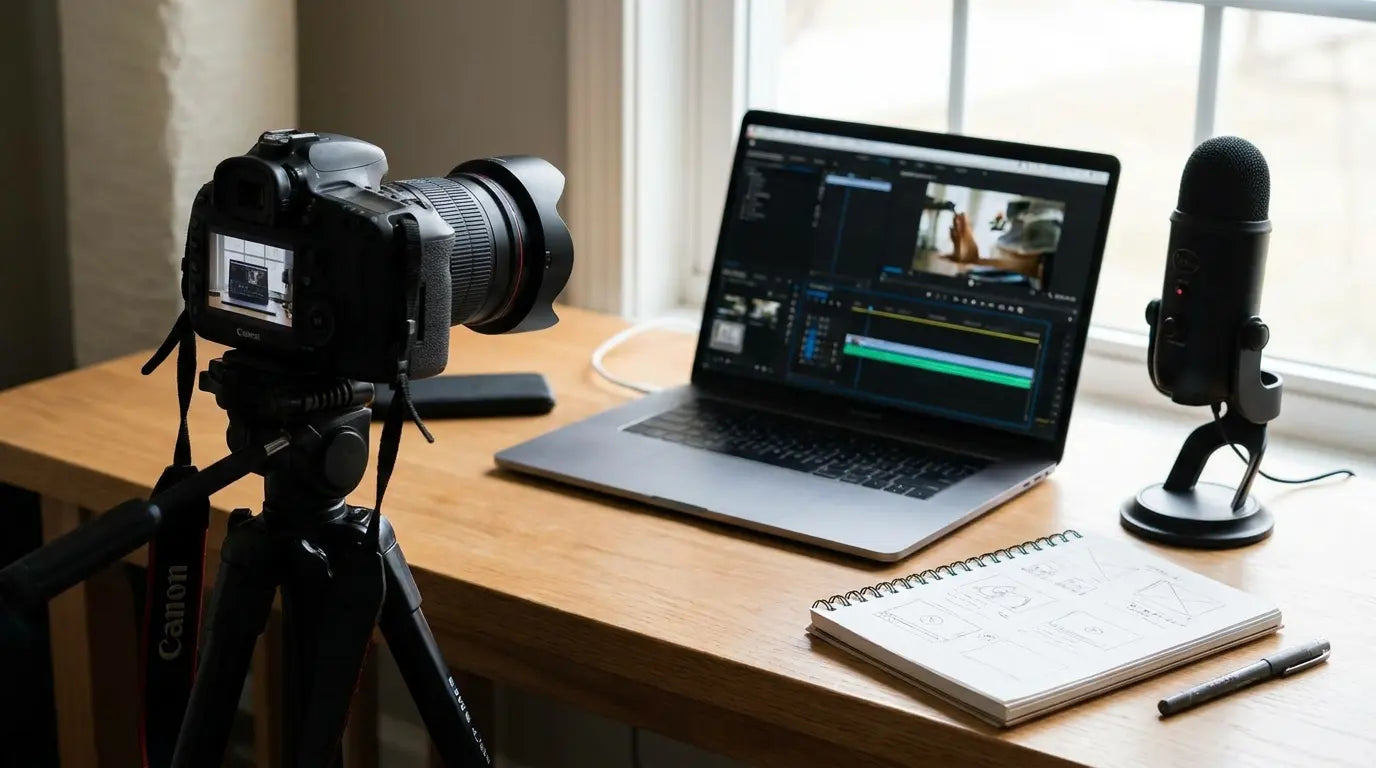
Look, I've watched probably 50 YouTube tutorials about starting a channel. They all say the same stuff about thumbnails, algorithms, upload schedules. That's fine. But you know what actually killed my first two channel attempts? My phone fell off a cheap mount mid-recording and I lost 40 minutes of footage I couldn't recreate.
Sounds stupid, right? But here's what nobody mentions when they're selling you their YouTube success blueprint: most channels die because making videos becomes a massive pain in the ass, not because the creator ran out of ideas or couldn't crack the algorithm.
I'm talking about the unglamorous stuff that happens between "I have a great idea" and actually hitting publish. Your phone falls during take three because you trusted the wrong mount. Your audio has this weird buzz you didn't catch until editing. Your storage fills up mid-shoot and you have to stop everything.
These aren't just annoying. They're momentum killers that pile up until creating content feels harder than it should be. When you're figuring out how to start a YouTube channel, nobody mentions that your mount's grip strength matters more than your thumbnail design during month three when you're fighting to stay consistent.
Table of Contents
Why Most YouTube Guides Skip the Pre-Launch Infrastructure
Choosing Your Content Format Based on Gear Limitations (Not Trends)
The Mobile-First Production Setup That Actually Scales
Audio Solutions That Don't Require a Studio
Mounting Systems and Why Cheap Ones Cost You More
Building a Sustainable Upload Rhythm Before You Film Anything
The First 10 Videos Strategy That Nobody Uses
When to Upgrade Equipment (and What to Ignore)
Protecting Your Production Gear in Real-World Conditions
TL;DR
Look, here's what actually matters if you want to still be making videos six months from now:
Your gear's physical limitations should dictate your initial content format, not whatever's trending
Mobile setups scale better than camera rigs for most new creators (and I say this as someone who wasted money on a camera)
Your workflow matters more than equipment quality in your first 50 videos
Mounting stability directly impacts whether you'll maintain your upload schedule (learned this the expensive way)
The first 10 videos should focus on refining your production system, not going viral
Why Most YouTube Guides Skip the Pre-Launch Infrastructure
Every guide you'll find focuses on niche selection and thumbnail psychology. That's not useless advice, but it's incomplete. Before you optimize for clicks, you need systems that let you create consistently without burning out or breaking equipment.
When you're learning how to start a YouTube channel, most guides jump straight to content strategy while ignoring the physical reality of production. Your phone needs to stay mounted for 20 minutes straight. Your audio needs to record cleanly in a space you don't control. Your files need somewhere to go when your storage hits capacity mid-shoot.
Here's what happened to me without proper infrastructure. I filmed what I thought was a great video about productivity apps. The audio had this constant buzz I didn't catch during recording because I was filming next to my PC. Had to reshoot everything. Then my mount slipped halfway through take three, and I lost the best footage. By the time I dealt with that, my phone storage was full and I had to stop, transfer files, restart the whole thing.
Each failure adds another layer of frustration. Each problem makes the next video harder to start. By video five, you're not fighting algorithm problems. You're fighting the memory of how annoying video four was to produce.
Equipment failures create psychological barriers that strategy can't fix. When your setup fails repeatedly, you stop trusting it. That lack of trust makes you hesitate before filming. Hesitation turns into "I'll do it tomorrow." Tomorrow turns into next week. Next week turns into a dead channel.
The thing is, channels don't fail because creators run out of ideas. They fail because production becomes unsustainably difficult. When every video requires problem-solving around equipment limitations, creating content transforms from energizing to exhausting.
I'm not saying you need to buy expensive gear. I'm saying you need to understand what your current equipment can reliably do and build your production process around those capabilities. That means testing your mount under actual filming conditions before you trust it with important footage. It means recording test audio in your planned filming location to identify problems before they ruin takes. It means having a file management system before your storage becomes a crisis.
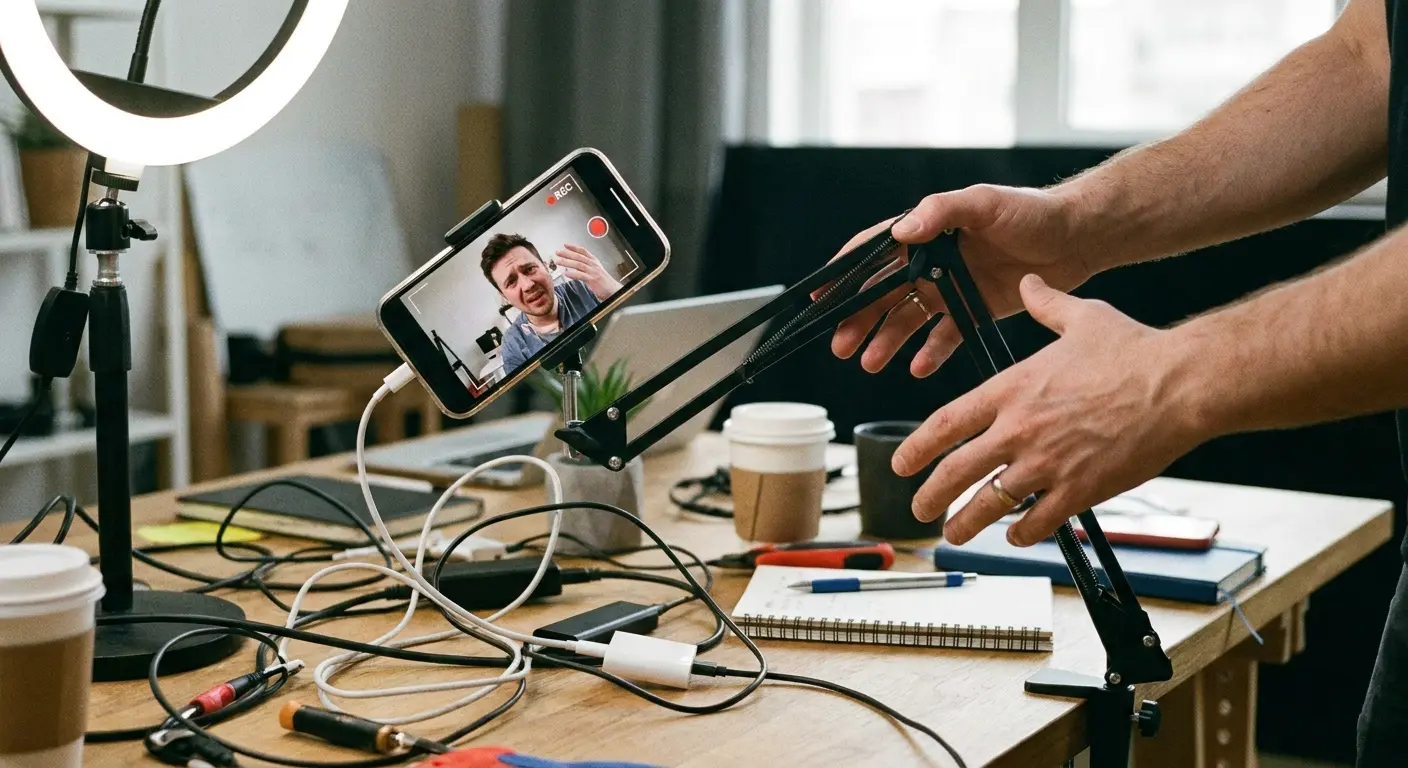
Infrastructure work feels boring compared to content planning. But boring infrastructure is what separates creators who post 50 videos from creators who post five and disappear. Your ability to show up consistently depends more on solving production logistics than mastering content strategy, particularly in the critical first six months when habits either form or fall apart.
Choosing Your Content Format Based on Gear Limitations (Not Trends)
Trending formats change monthly. Your phone's capabilities don't. Starting with what your current equipment can reliably produce matters more than chasing whatever's performing well this quarter.
Understanding how to start a YouTube channel means recognizing that your initial format should match your gear, not your aspirations. You might want to create cinematic B-roll montages, but if your phone overheats after 10 minutes of 4K recording and you don't own a gimbal, that format will break your consistency before you reach video ten.
I learned this trying to make vlog-style content for my second channel. Looked cool when other creators did it. My phone couldn't handle it. Between the overheating, the shaky footage, and the constant battery anxiety, I spent more time managing equipment than actually creating content. Switched to simple talking-head videos and suddenly I could actually maintain a schedule.
Content format decisions should start with an honest equipment audit. What can your phone record reliably for the length of a complete video? What mounting solutions do you own that work without constant adjustment? Which recording environments give you acceptable audio without additional equipment?
Those constraints aren't limitations. They're guardrails that prevent you from committing to unsustainable production methods. The creator who chooses talking-head content because their phone shoots stable footage on a basic mount will outlast the creator attempting complex vlog-style content with equipment that can't support it.
Content Format |
Minimum Equipment Required |
Stability Needs |
Will It Make You Quit? |
|---|---|---|---|
Talking Head |
Phone, basic mount, external mic |
Low (fixed position) |
Probably not (this is the "just start" format) |
B-Roll Heavy |
Phone, gimbal, multiple mounts |
High (movement) |
Yes, by video 3 |
Screen Recording |
Computer, recording software, occasional camera |
None (digital) |
Only if you hate editing |
Tutorial/Demo |
Phone, overhead mount, decent lighting |
Medium (fixed angles) |
Maybe (setup time adds up) |
Vlog Style |
Phone, handheld grip, wireless mic |
Medium (walking) |
Depends on your patience |
Outdoor Action |
Phone, rugged case, action mounts |
Very High |
Almost definitely |
Talking Head Videos With Minimal Setup
Your phone probably shoots better video than you think. The limitation isn't resolution anymore. It's stability and framing consistency.
Talking-head content requires the least equipment and offers the most production reliability. Position your phone three feet away at eye level, frame yourself against a simple background, and you've got a repeatable setup that takes 90 seconds to arrange.
The key word is repeatable. Can you recreate the exact same shot tomorrow? Next week? If your setup requires moving furniture, adjusting multiple lights, or finding specific natural light conditions, you've built friction into your process that will eventually stop you from filming.
My buddy Jake started a personal finance channel last year. He set up his phone on a desk mount 3 feet away, positioned at eye level. Films in front of a blank wall during afternoon hours when natural light from a side window provides consistent lighting. This setup takes him maybe 90 seconds to arrange and produces identical framing across 50 videos. When he tried filming in his living room with "better" backgrounds, setup time jumped to 15 minutes as he rearranged furniture, adjusted multiple angles, and dealt with inconsistent evening lighting. He went back to the simple setup and has maintained his weekly schedule ever since.
Talking-head videos work for tutorials, commentary, educational content, reviews, and opinion pieces. The format's simplicity isn't a creative limitation. It's a sustainable foundation that lets you focus on content rather than production logistics.
B-Roll and Movement-Heavy Content
This format demands different stability solutions. Handheld footage looks amateur unless you're intentionally going for vlog aesthetics, and even then, shaky footage tests viewer patience fast.
Movement introduces complexity at every level. Walking shots require stabilization. Panning movements need smooth execution. Vehicle mounting demands secure attachment points that won't fail during motion. Outdoor activities require weatherproof protection and mounts that handle vibration.
Each movement type has specific equipment requirements. Gimbal stabilizers smooth out walking footage but add weight, require battery management, and take time to balance. Handheld grips improve stability over raw phone-in-hand shooting but can't match gimbal performance. Fixed mounts on moving vehicles need serious grip strength and vibration dampening.
Before committing to movement-heavy content, test your equipment under real conditions. Walk around your neighborhood filming test footage. Mount your phone in your car and drive over typical roads. The test footage will reveal whether your current gear can handle the movement your content requires or whether you need upgrades before attempting this format consistently.
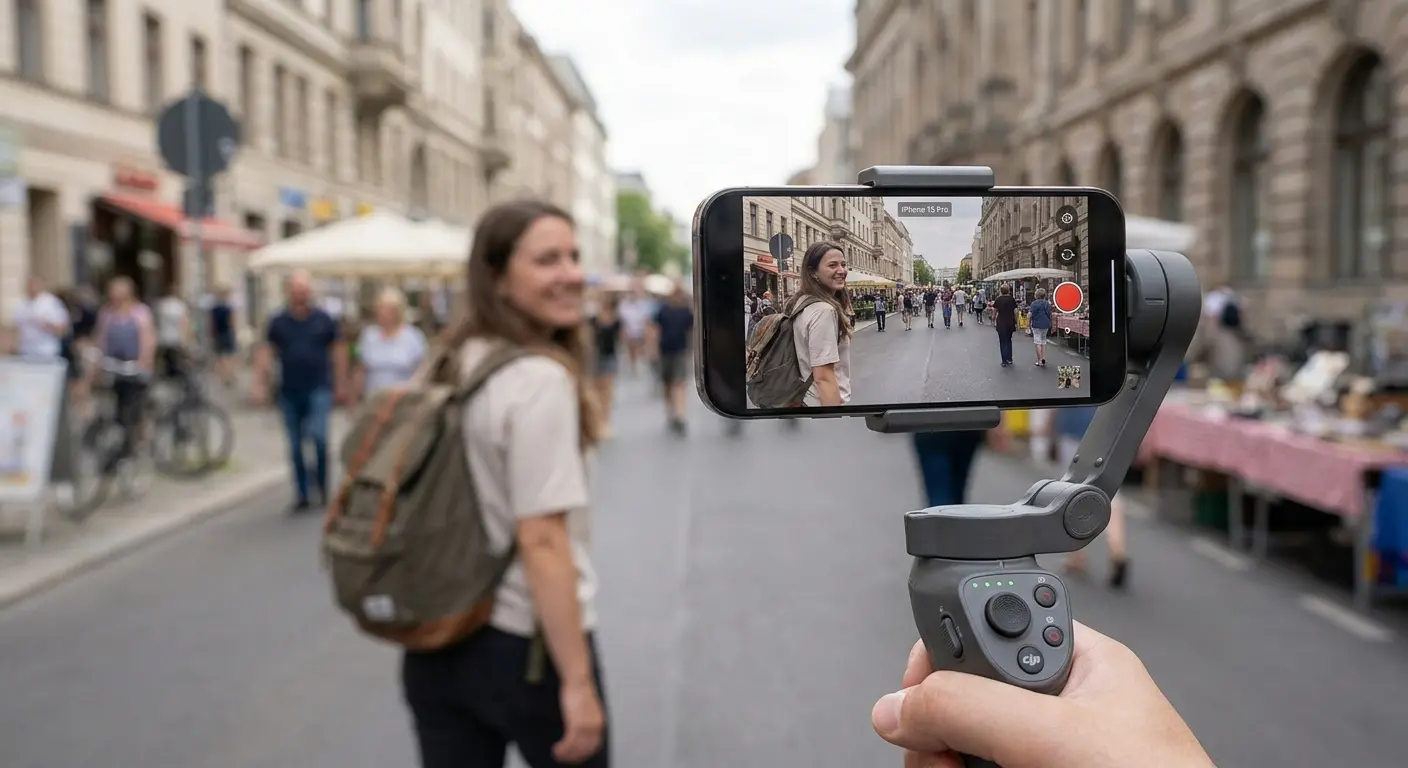
Movement content can look impressive, but impressive footage that takes three hours to capture isn't sustainable for weekly uploads. Match your format ambitions to your equipment reality, or prepare for production problems that kill your consistency.
(Side note: I tried using a gimbal for about two weeks. Spent more time making sure it was balanced than actually filming. Probably user error, but still. It made filming feel like a chore, so I stopped.)
Screen Recording and Tutorial Content
This format has the lowest equipment barrier but the highest editing demand. Your phone becomes secondary to your computer setup.
Screen recording eliminates most physical production challenges. No mounting concerns, no lighting requirements, no audio environment problems. You're capturing digital content that exists in controlled conditions.
The tradeoff comes in post-production. Screen recordings require more editing attention to maintain viewer engagement. You need to zoom in on important interface elements, add cursor highlights, cut out dead time, and often supplement with voiceover or camera footage to add personality.
Software options range from free built-in tools to professional recording suites. For Windows, Xbox Game Bar handles basic recording. Mac users have QuickTime. Both work adequately for straightforward screen capture. OBS Studio offers more control and works across platforms without cost.
Recording settings matter more than software choice. Capture at your display's native resolution, but consider that 4K screen recordings create massive files that slow down editing. 1080p captures everything viewers need to see while keeping file sizes manageable.
Screen recording works well for software tutorials, gaming content, design process videos, and any content where what's happening on your screen matters more than your face. The format's editing demands are real, but the production reliability makes it worth considering if your content fits this approach.
The Mobile-First Production Setup That Actually Scales
Cameras intimidate people into overthinking. Phones don't. That psychological difference matters more than the spec sheet comparison.
When figuring out how to start a YouTube channel, the mobile-first approach removes barriers that stop most creators before they begin. Your phone is already with you. You know how to use it. The interface is familiar. These aren't small advantages.
Mobile production scales naturally as your channel grows. You can film anywhere without hauling dedicated camera gear. You can edit on the same device you filmed with. You can upload directly to YouTube without transferring files between devices. Each of these conveniences reduces friction in your production workflow.
The limitations are real. Phones overheat during extended recording sessions. Battery life becomes critical during longer shoots. Storage fills up quickly with video files. Thermal throttling can stop recording mid-take when your phone gets too hot.
But these limitations are predictable and manageable. You learn your phone's recording limits through experience. You plan around them. You bring backup power. You manage storage proactively. These are simpler problems than learning a new camera system.
Essential Mobile Accessories That Matter
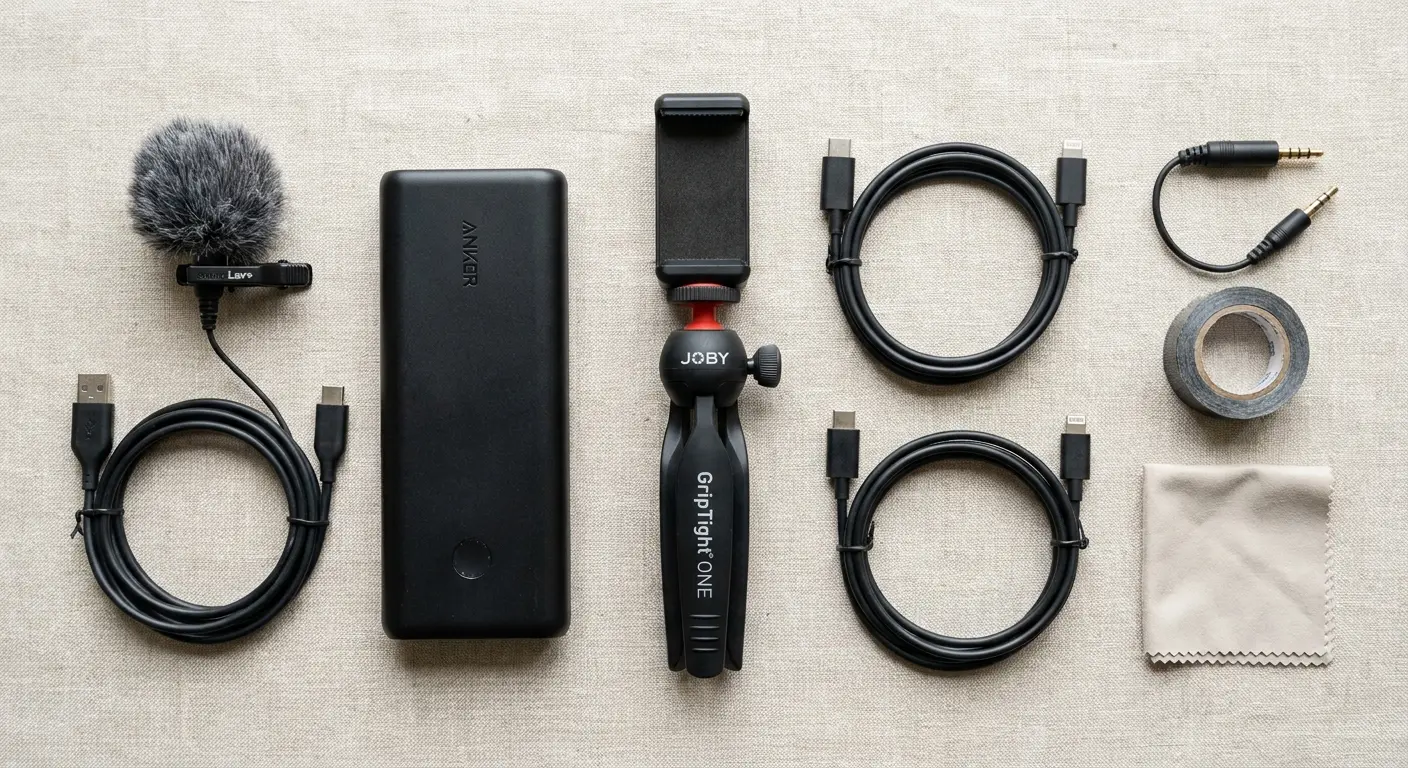
Three accessories separate functional mobile production from frustrating attempts: mounts, external audio, and backup power. Everything else is optional until you've proven you need it.
Mounts determine whether your phone stays where you put it or crashes mid-recording. The difference between a $15 mount and a $40 mount is the difference between constant readjustment and set-it-and-forget-it reliability. Cheap mounts use weak springs that lose tension. Quality mounts use materials that maintain grip strength across hundreds of mounting cycles.
I switched to Rokform's magnetic mount system after my third cheap Amazon mount failed during a recording. Yeah, it cost more upfront (around $40 for the mount), but I haven't had to re-film a video because my phone fell since switching. The Rokform Universal Phone Mount uses magnetic attachment strength that handles movement and vibration without slipping. The magnetic system means faster setup and breakdown compared to clamp-style mounts, which matters when you're filming multiple locations in a single session.
External audio matters because phone microphones capture everything equally. Your voice, the air conditioning, traffic outside, your computer fan. An external microphone focuses on what you want recorded and rejects what you don't. Even a $30 lavalier mic dramatically improves audio quality compared to phone mics.
Backup power prevents the scenario where you're 80% through filming and your battery hits 15%. Battery anxiety makes you rush through remaining takes. Rushing produces worse footage. A battery case or external power bank eliminates that anxiety entirely.
Mobile Production Readiness Checklist
Before filming your next video, verify:
Phone storage has at least 10GB free space for recording
Battery charged to 80% minimum (or backup power pack ready)
Mount tested with phone weight and confirmed secure
External microphone connected and audio levels checked
Recording app settings verified (resolution, frame rate, format)
Backup mounting option available if primary mount fails
File transfer method ready (cable, card reader, or cloud)
Phone in Do Not Disturb mode to prevent notification interruptions
Lens cleaned and free of fingerprints or debris
Test recording completed and reviewed for audio/video quality
Storage and File Management Before You Need It
Running out of storage mid-shoot kills momentum worse than any technical failure. You can't edit footage you couldn't save.
4K video at 60fps consumes roughly 400MB per minute. A 10-minute video requires 4GB of storage. If you're filming multiple takes, that number doubles or triples. Storage fills faster than you expect, and the problem gets worse because you're also storing edited videos, project files, and everything else on your phone.
The solution requires proactive management, not reactive scrambling. Before filming, check available storage. Transfer or delete old footage you've already edited. Keep at least 10GB free as a buffer. That buffer prevents the scenario where you're mid-shoot and suddenly can't save the file.
Cloud storage sounds convenient until you're trying to upload 20GB of footage on a slow connection. Local storage (external SSD, computer hard drive) transfers faster and doesn't depend on internet reliability. Establish a post-filming routine: transfer footage to local storage, verify the transfer completed successfully, then clear phone storage for the next session.
File naming conventions matter more than you think. "Video_2024_01_15_take3.mov" tells you nothing three months later. "FinanceBasics_Budgeting_Intro_Take3.mov" tells you exactly what that file contains. Spend five seconds naming files properly during transfer, save 20 minutes searching for footage during editing.
Audio Solutions That Don't Require a Studio
Viewers forgive mediocre video quality. They won't tolerate bad audio. Your audio setup matters more than your camera choice.
Audio problems cause viewer drop-off more consistently than visual issues. Viewers will watch slightly blurry footage if the content is valuable. They won't watch crystal-clear footage if the audio has constant background noise, inconsistent volume, or unclear speech.
The good news: acceptable audio quality doesn't require expensive equipment or acoustic treatment. It requires understanding what makes audio bad and avoiding those problems.
Bad audio comes from three sources: background noise (AC units, traffic, computer fans), poor microphone placement (too far from your mouth, wrong angle, clothing rustle), and room acoustics (echo, reverb from hard surfaces). You can address all three without building a studio.
Background noise requires source elimination, not sound treatment. Turn off the AC while filming. Close windows during traffic hours. Move away from noisy appliances. These are free solutions that work immediately.
Microphone placement matters more than microphone quality. A $30 lavalier mic positioned six inches from your mouth will outperform a $200 microphone positioned three feet away. Get the mic close to your sound source. That's the fundamental rule of audio recording.
Room acoustics improve with soft surfaces that absorb sound rather than reflecting it. You don't need acoustic panels. You need carpet, furniture, curtains, and clothes. These items already exist in most spaces. Film in rooms that have them.
Lavalier vs. Shotgun for Mobile Recording
Each microphone type solves different problems. Choosing wrong means re-recording footage you thought was finished.
Lavalier microphones clip to your clothing and sit close to your mouth. They capture consistent audio regardless of how you move or where you face. They're ideal for talking-head content, interviews, and any situation where you're speaking directly to camera. The tradeoff: they're visible (unless you hide them under clothing), they pick up clothing rustle, and cable management becomes an issue with wired versions.
Shotgun microphones mount to your phone and use directional pickup patterns to focus on sound in front of the camera while rejecting sound from the sides and rear. They work well for B-roll with ambient sound, outdoor content, and situations where you can't wear a lavalier. The tradeoff: they require consistent positioning relative to your sound source, they pick up handling noise if mounted on moving equipment, and they're more susceptible to wind noise outdoors.
Mic Type |
When I Actually Use It |
The Annoying Part |
Worth It? |
|---|---|---|---|
Wired Lav |
Talking head videos at my desk |
Cable gets caught on everything |
Yeah, $25 well spent |
Wireless Lav |
When I'm walking around |
Batteries die at worst times, expensive |
Only if you're doing vlog content |
Shotgun |
B-roll with ambient sound, wider shots |
Wind noise ruins outdoor footage |
Your call, not for me |
Phone Mic |
When I forget to charge my lav |
Sounds like you're in a tunnel |
Only for throwaway B-roll |
Your content format should dictate microphone choice, not the other way around. If you're filming talking-head videos at a desk, a wired lavalier makes sense. If you're walking through locations while narrating, wireless becomes necessary. If you're capturing product demos with occasional narration, a shotgun mic works better.
Recording Environment Optimization You Can Do Today
You don't need acoustic panels. You need to understand which rooms in your space already have decent audio characteristics.
Walk through your available filming spaces and clap once, sharply. Listen to what happens after the clap. If you hear a long echo or reverb, that room will make your audio sound hollow and unprofessional. If the sound dies quickly, that room has enough sound absorption to work for recording.
Rooms with carpet, furniture, curtains, and soft materials absorb sound naturally. Bathrooms, kitchens, and empty rooms with hard floors and bare walls reflect sound and create echo. The difference is immediately audible.
My friend Sarah initially recorded tech reviews in her home office with hardwood floors and bare walls. The echo made every video sound hollow. Instead of buying acoustic treatment, she moved recording to her bedroom with carpet, a bed, and a closet full of hanging clothes. The soft surfaces absorbed echo naturally. She positioned her setup with the closet behind her and the bed to one side, creating enough sound absorption to eliminate the hollow quality. Total cost: zero dollars. Time to implement: 10 minutes. The audio improvement was immediately noticeable in viewer comments.
If you're stuck recording in a room with poor acoustics, bring soft materials into the space temporarily. Hang blankets on stands behind and beside you. Pile couch cushions out of frame. Put a comforter over your desk. These solutions look ridiculous but work effectively.
The goal isn't studio-quality audio. The goal is clear, intelligible speech without distracting echo or background noise. That standard is achievable in most spaces with minimal effort.
Mounting Systems and Why Cheap Ones Cost You More
A failed mount doesn't just drop your phone. It breaks your filming rhythm, damages equipment, and kills the confidence you need to shoot in varied locations.
Mount failure creates cascading problems. The immediate problem is a potentially damaged phone. The secondary problem is lost footage if the fall happened mid-recording. The tertiary problem is the psychological barrier that forms after you've watched your phone hit the ground because your mount failed.
That psychological barrier is real and persistent. After a mount failure, you don't trust your setup. You constantly check whether the mount is still secure. You film conservatively, avoiding angles or positions that might stress the mount. You second-guess your equipment instead of focusing on content.
Cheap mounts fail in predictable ways. The springs weaken after repeated use. The adhesive loses grip in temperature changes. The clamps strip their threads. The ball joints develop slop and won't hold position. Each failure mode creates unreliability that gets worse over time.
Quality mounts cost more upfront but eliminate these failure modes. The materials maintain their properties across hundreds of use cycles. The attachment mechanisms provide consistent grip strength. The adjustment points stay tight and don't drift during recording.
For creators who need mounting reliability across different environments, the Rokform Pro Series Phone Case integrates with a magnetic mounting ecosystem that provides secure attachment without the failure points of mechanical clamps or adhesive systems. The magnetic interface means you can quickly move between different mount types without readjusting grip mechanisms.
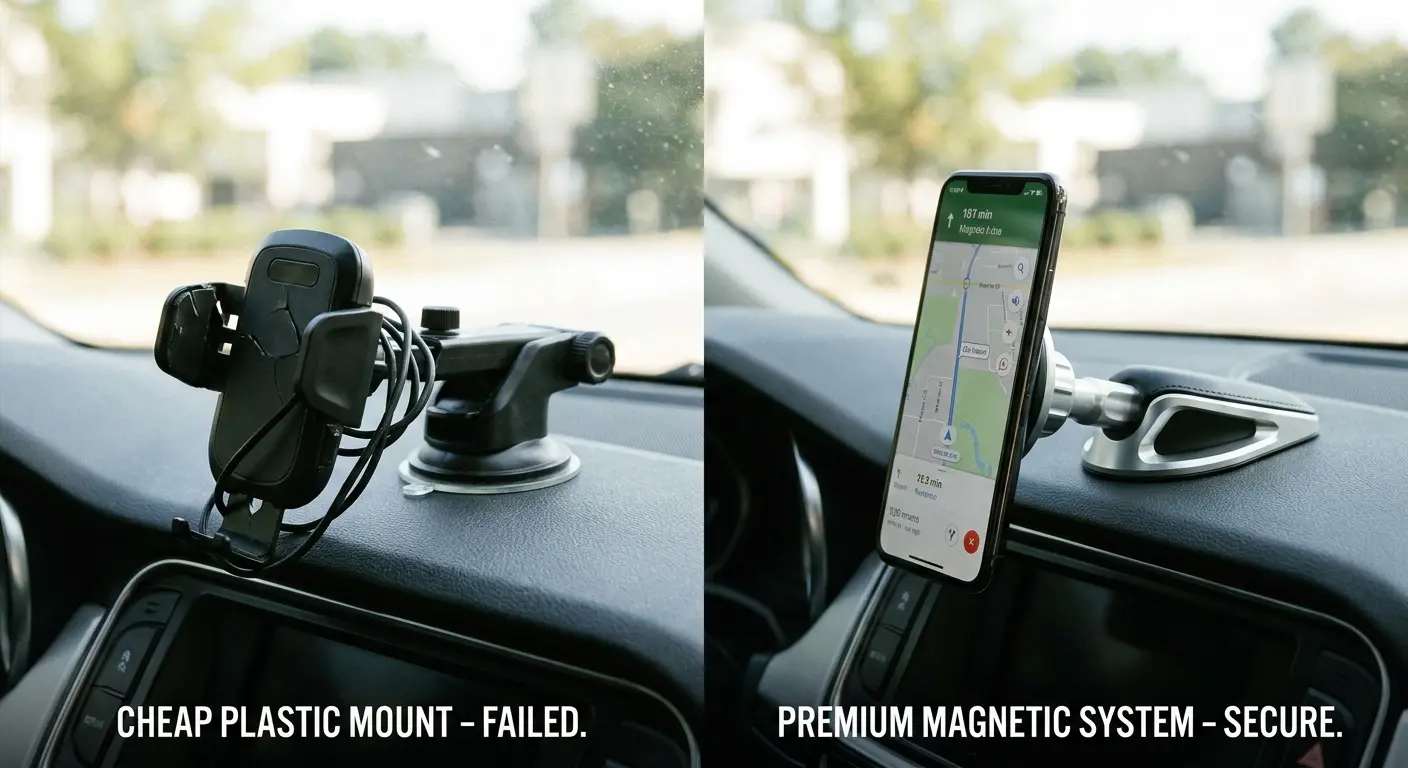
Magnetic vs. Clamp vs. Adhesive Mounting
Each mounting method has specific use cases where it excels and situations where it fails catastrophically.
Magnetic mounts use strong magnets (usually rare-earth neodymium) to hold your phone against a metal plate or magnetic case. They offer the fastest attachment and removal, making them ideal for situations where you're frequently repositioning your phone. The strength of magnetic mounts varies dramatically by quality. Weak magnets won't hold your phone during movement or vibration. Strong magnets provide grip that rivals mechanical clamps.
The limitation of magnetic mounts is that they require either a magnetic case or a metal plate attached to your phone or case. Once you have that component, magnetic mounts work across multiple mounting locations with the same phone. The versatility is significant.
Clamp mounts use mechanical pressure to grip your phone. Spring-loaded arms, threaded clamps, or tension-based grips squeeze your phone from multiple sides. They work with any phone regardless of case, which is their primary advantage. The disadvantage is slower attachment, potential for slipping if the clamp loosens, and wear on the clamping mechanism over time.
Quality clamp mounts maintain consistent pressure across hundreds of use cycles. Cheap clamp mounts lose tension as the springs weaken or the adjustment mechanisms develop play. By the time you notice the degradation, you're already dealing with an unreliable mount.
Adhesive mounts bond to surfaces using either permanent or removable adhesive. They provide extremely secure attachment once properly installed but require careful surface preparation and time for the adhesive to cure fully. Adhesive mounts work well for semi-permanent installations where you're not frequently moving the mount.
The failure modes of adhesive mounts are temperature-related. Adhesive loses bond strength in extreme heat or cold. If you're mounting in a vehicle that sits in summer sun or winter cold, adhesive reliability becomes questionable. Surface preparation matters enormously. Any oil, dust, or moisture on the mounting surface compromises the bond.
Vehicle Mounting Without Compromising Safety
Car content is popular. Car accidents from distracted mounting attempts are not worth any video.
Vehicle mounting introduces legal, safety, and stability considerations that don't exist with stationary setups. Your mount needs to hold securely during acceleration, braking, turns, and rough roads. It can't obstruct your view of the road or interfere with vehicle controls. It needs to stay in place during temperature extremes and vibration.
Dashboard mounts place your phone within easy viewing range but can obstruct your forward view if positioned poorly. Windshield mounts offer better positioning flexibility but face legal restrictions in some jurisdictions. Vent clip mounts are convenient but often lack the stability needed for smooth video footage.
The stability requirements for vehicle filming are higher than most other mounting scenarios. Road vibration, engine vibration, and vehicle movement create constant motion that your mount must either dampen or resist. Footage shot with an inadequately secured mount shows every bump and vibration, making the video unwatchable.
Test your vehicle mount thoroughly before filming anything important. Drive your normal routes at normal speeds. Review the footage. If you see excessive shake or vibration, your mount isn't adequate for vehicle filming. Either upgrade the mount or add vibration dampening between the mount and phone.
Never adjust your phone or mount while driving. Set everything before you start moving. If you need to make adjustments, pull over safely. The footage isn't worth the risk.
Building a Sustainable Upload Rhythm Before You Film Anything
Upload consistency beats video quality for channel growth. Your production system needs to support rhythm, not perfection.
Most advice about how to start a YouTube channel focuses on your first video, but real success comes from building systems that support your fiftieth video just as easily. That requires planning before you film your first video.
Consistency compounds. The algorithm favors channels that upload regularly. Viewers form habits around regular upload schedules. Your own production skills improve faster with consistent practice. All of these benefits require maintainable rhythm.
Maintainable rhythm means you can keep your upload schedule during normal life disruptions. Work gets busy. You get sick. Family obligations arise. Your production system needs buffer and flexibility to handle these predictable disruptions without breaking your upload consistency.
The creators who maintain consistency for years aren't more disciplined or more motivated. They've built systems that don't require heroic effort for every video. Their workflow is efficient enough that creating content fits into their available time. Their production process is reliable enough that they're not constantly problem-solving equipment issues.
Batching vs. Sequential Production
How you organize your filming sessions determines whether you can maintain weekly uploads or struggle to post monthly.
Batching involves filming multiple videos in concentrated sessions, creating a content buffer that smooths out production inconsistencies. You might film four videos in one weekend, then spend the following weeks editing and publishing them on schedule. This approach works well if you have irregular availability or if your setup requires significant preparation time.
The advantage of batching is schedule stability. Life disruptions don't immediately impact your upload schedule because you have buffer content ready. The disadvantage is that batching requires sustained energy for extended filming sessions and careful planning to prevent all your batched content from looking identical.
Sequential production means creating one video at a time from concept to publish. You film video one, edit it, publish it, then start video two. This approach offers more flexibility and prevents content from becoming stale, but it creates vulnerability to disruptions. If something prevents you from filming this week, you miss your upload deadline.
Most creators who last use a hybrid approach. They maintain a small buffer (two or three videos ahead of schedule) through occasional batching, but they work on videos sequentially rather than trying to batch everything. This provides schedule protection without requiring marathon filming sessions.
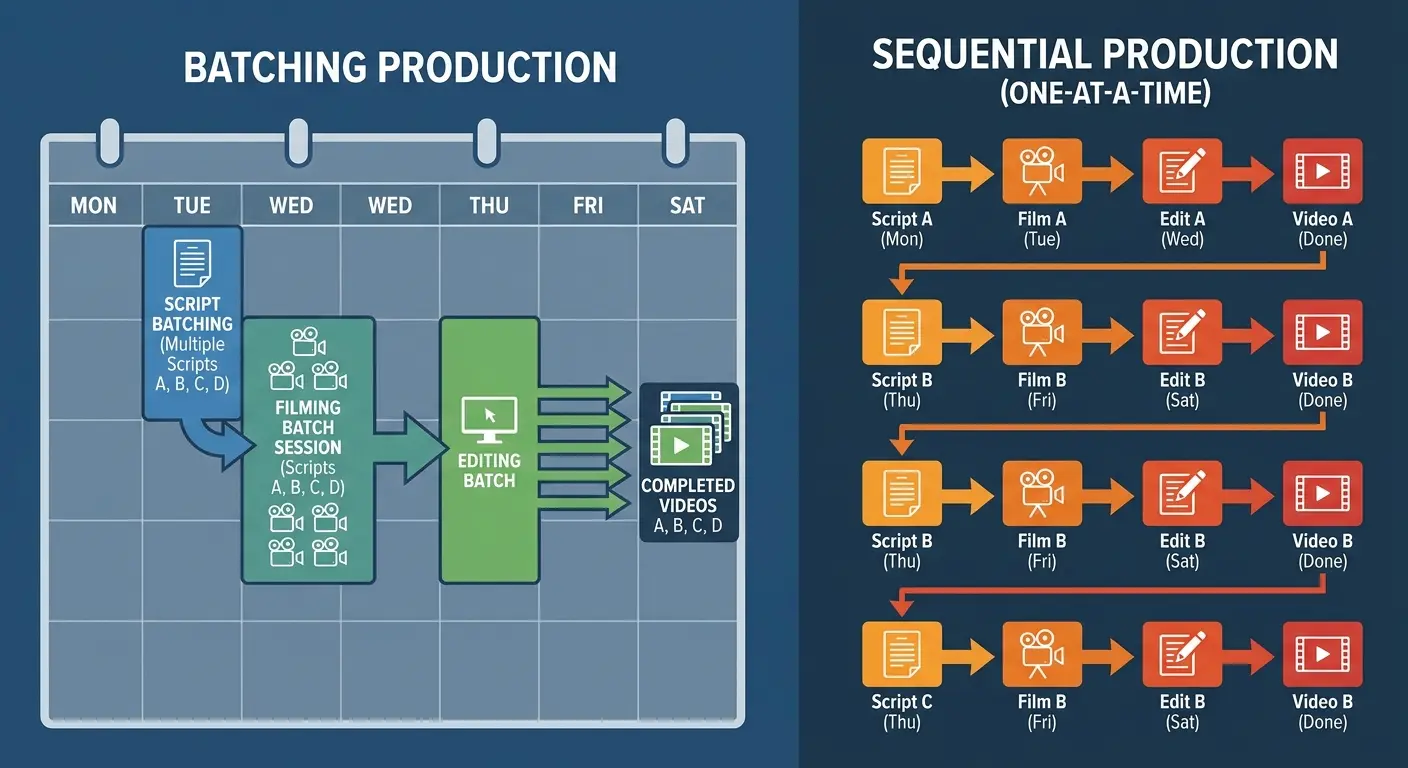
The Content Buffer That Saves Your Channel
Three videos ahead of schedule is the difference between a temporary break and a dead channel.
A content buffer protects your consistency during inevitable life disruptions. When you have buffer content, getting sick doesn't mean missing uploads. Having a busy work week doesn't break your schedule. The buffer absorbs disruptions that would otherwise kill your momentum.
Building initial buffer requires front-loading work before you start publishing. Film and edit three videos before you publish video one. This feels counterintuitive because you want to start publishing immediately, but the buffer is what makes long-term consistency possible.
Maintaining buffer requires discipline. When you finish editing a video, don't publish it immediately just because you're excited about it. Add it to your buffer and publish according to your schedule. The buffer only works if you actually use it as a buffer rather than publishing everything as soon as it's ready.
Buffer content should be evergreen rather than timely. Videos that reference current events or trending topics lose value quickly. Videos that address persistent problems or teach fundamental skills remain relevant indefinitely. Stock your buffer with evergreen content that can publish any time without feeling dated.
What happens when life depletes your buffer? You have two options: reduce your upload frequency temporarily to rebuild the buffer, or push through and try to maintain frequency while rebuilding. Neither option is ideal, but both are better than abandoning your channel entirely. The buffer's existence gives you options when problems arise.
The First 10 Videos Strategy That Nobody Uses
Your first videos shouldn't chase virality. They should refine your production system until creating content feels routine instead of heroic.
The purpose of your first 10 videos is system development, not audience building. You're learning how long each production phase actually takes. You're identifying equipment problems before they become critical . You're refining your workflow until the process becomes repeatable.
This reframing removes pressure from early content. You're not trying to go viral. You're not trying to perfect your on-camera presence. You're building production competence that will support hundreds of future videos.
Each of your first 10 videos teaches you something about your system's weaknesses. Your mount slips during video three. Your audio has background noise in video five. Your editing takes twice as long as expected in video seven. These discoveries are valuable because they reveal problems you can fix before they become habits.
Most creators approach early videos as if each one needs to be perfect. They spend excessive time on individual videos, trying to achieve quality they're not yet capable of producing efficiently. This approach leads to burnout before they reach video 20.
The alternative approach treats early videos as system testing. Each video should be complete and publishable, but the goal is consistent output rather than exceptional quality. You're building the habit of finishing and publishing, which matters more than polishing any individual video.
Documenting What Works and What Breaks
Each video teaches you something about your system's weaknesses. Ignoring those lessons means repeating the same problems for months.
After completing each video, spend 10 minutes documenting what happened. What took longer than expected? What equipment caused problems? Where did you get stuck or frustrated? What would you change for the next video?
This documentation doesn't need to be elaborate. A simple text file with bullet points works fine. The value is in capturing observations while they're fresh rather than trying to remember what went wrong three videos ago.
Post-Production Review Template
After completing each of your first 10 videos, document:
Video #: _____ Upload Date: _____
Time Breakdown:
Planning/scripting: _____ hours
Setup and filming: _____ hours
Editing: _____ hours
Thumbnail creation: _____ hours
Total production time: _____ hours
Equipment Issues:
What failed or caused problems?
What slowed down the process?
What worked better than expected?
Workflow Bottlenecks:
Which phase took longer than planned?
Where did you get stuck or frustrated?
What would you change for next time?
Skills/Knowledge Gaps:
What did you need to look up or learn?
What took multiple attempts to get right?
Action Items for Next Video:
_____
_____
_____
Patterns emerge across multiple videos. If editing consistently takes twice your estimated time, your editing workflow needs optimization. If setup always takes 20 minutes longer than planned, your setup process needs simplification. If your mount fails every third video, you need a better mount.
These patterns are only visible if you're tracking them. Without documentation, you'll repeat the same problems indefinitely because you won't recognize them as patterns.
Iterating Your Setup Based on Real Failures
Theory doesn't matter. What actually broke during filming does.
Your first mount failure teaches you what adequate grip strength feels like. Your first audio problem teaches you what background noise sounds like during recording. Your first storage crisis teaches you how quickly video files consume space.
Each failure provides specific information about what to fix. Don't make changes based on hypothetical problems you haven't encountered. Fix the problems that actually happened to you.
I spent 12 hours editing my first video, perfecting every cut transition and color grading each shot individually. The video performed moderately well. For video two, I spent 14 hours editing, adding motion graphics and complex transitions. Performance was nearly identical. By video five, I implemented a strict 4-hour editing limit: rough cut in 2 hours, audio polish in 1 hour, final review in 1 hour. I used a color grading preset, simple cuts, and minimal effects. The video performed better than the heavily edited ones, and I had energy left to film the next video. Turns out viewers cared about pacing and audio clarity, not transition sophistication.
Test your fixes quickly. If you think a different microphone position will improve audio, test it in your next video. If you believe a new mounting location will provide better framing, try it immediately. Fast iteration cycles mean you discover what works within your first 10 videos rather than still experimenting at video 50.
When to Upgrade Equipment (and What to Ignore)
Gear upgrades should solve specific problems you've repeatedly encountered, not theoretical limitations you might face someday.
Equipment upgrades make sense when current gear prevents you from creating content you want to make or when equipment failures disrupt your consistency. They don't make sense when you're chasing incremental improvements or buying gear because other creators have it.
The warning signs that justify upgrades are specific and measurable. Your phone overheats during every recording session, forcing you to film in short bursts. That's a real problem that better equipment solves. Your current content looks slightly less polished than competitor content. That's not an equipment problem, that's a technique problem.
Before upgrading, verify that new gear actually solves your problem. If your audio has background noise, a better microphone only helps if the noise is caused by microphone quality rather than recording environment. If your footage looks shaky, a gimbal only helps if the shakiness comes from movement rather than poor mounting.
Most creators upgrade too early, buying equipment for content they haven't proven they can create consistently. They buy gimbals before mastering static shots. They buy professional microphones before learning proper mic placement. They buy cameras before exhausting what their phone can do.
The equipment upgrade path should follow your proven needs, not your aspirational content plans.
Upgrading for Capability vs. Convenience
Some upgrades unlock new content possibilities. Others just make current tasks slightly easier. Know which you're buying.
Capability upgrades enable content types you genuinely cannot create with current equipment. Better low-light performance lets you film in environments that are currently impossible. Waterproof housing enables water-based content you can't safely attempt now. Longer battery life allows extended recording sessions that currently require stopping to recharge.
Convenience upgrades make existing workflows easier but don't fundamentally expand what you can produce. A second memory card means less frequent file transfers. A backup camera body means you can keep filming if your primary fails. A faster computer means quicker editing renders.
Both types of upgrades can be worth the investment, but they require different justifications. Capability upgrades should unlock content that will meaningfully change your channel. Convenience upgrades should remove friction that's actively preventing consistency.
Don't convince yourself that convenience upgrades are capability upgrades. A faster computer doesn't make you a better editor. It makes editing faster, which matters if rendering time is preventing you from maintaining your upload schedule. If it's not, the upgrade is just nice to have.
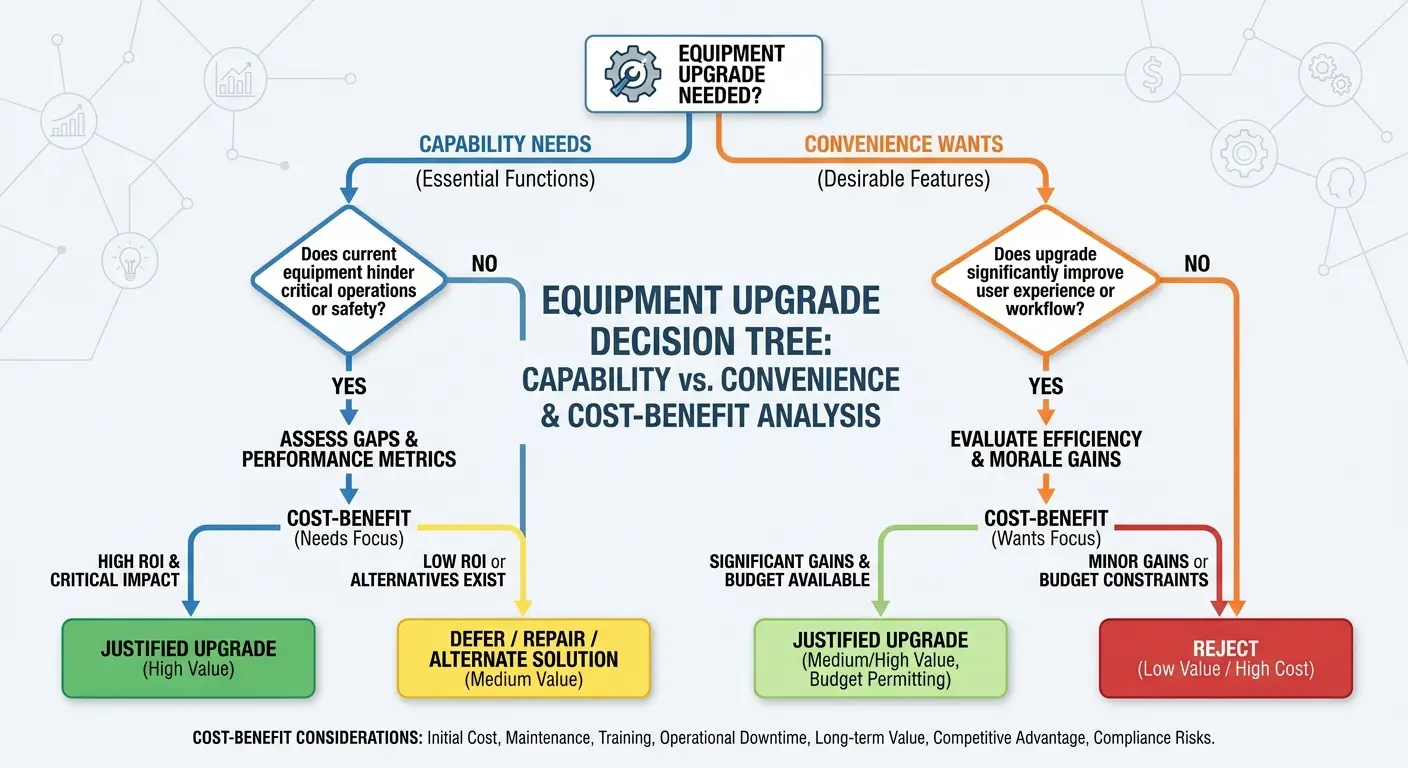
The Diminishing Returns Curve for Video Quality
The jump from terrible to acceptable is cheap. The jump from good to great is expensive. The jump from great to professional is astronomical and mostly invisible to viewers.
A $30 lavalier microphone transforms audio from terrible to acceptable. A $300 wireless system improves convenience and reliability but doesn't make your voice sound dramatically different. A $1,000 professional microphone offers marginal audio improvements that most viewers won't notice through phone speakers or laptop audio.
The same pattern applies to cameras, lighting, and every other production element. The biggest quality improvements happen at the low end of the price range. As you move up, you're paying more for smaller improvements.
Most successful YouTube channels operate in the "good enough" range rather than the professional tier. Their content succeeds because of what they say and how they say it, not because of technical production values. Viewers subscribe for value, entertainment, or personality. Production quality needs to clear a minimum threshold of not being distracting, but beyond that threshold, content matters more than polish.
This doesn't mean never upgrade. It means understanding where you are on the curve and whether moving higher makes strategic sense for your specific channel and content goals.
Protecting Your Production Gear in Real-World Conditions
Equipment that breaks can be replaced. The footage you lose when equipment fails during a once-in-a-lifetime shoot cannot.
Gear protection isn't paranoia. It's practical risk management based on how and where you actually create content. If you're filming talking-head videos at a desk, your phone faces minimal risk. If you're filming outdoor action content, your phone faces significant risk from drops, water, dust, and impacts.
Match your protection level to actual risk. Over-protecting gear makes it inconvenient to use, which creates friction that reduces how often you film. Under-protecting gear means equipment failures that stop production and potentially lose irreplaceable footage.
The psychological aspect of gear protection matters. Fear of damaging equipment can limit creative choices. You avoid certain shots or locations because you're worried about your gear. That caution is sometimes justified, but often it's holding you back from creating compelling content.
Cases and Protection for Mobile Production
Your phone is your production studio. Protecting it isn't optional, but bulky cases that interfere with mounting or filming defeat the purpose.
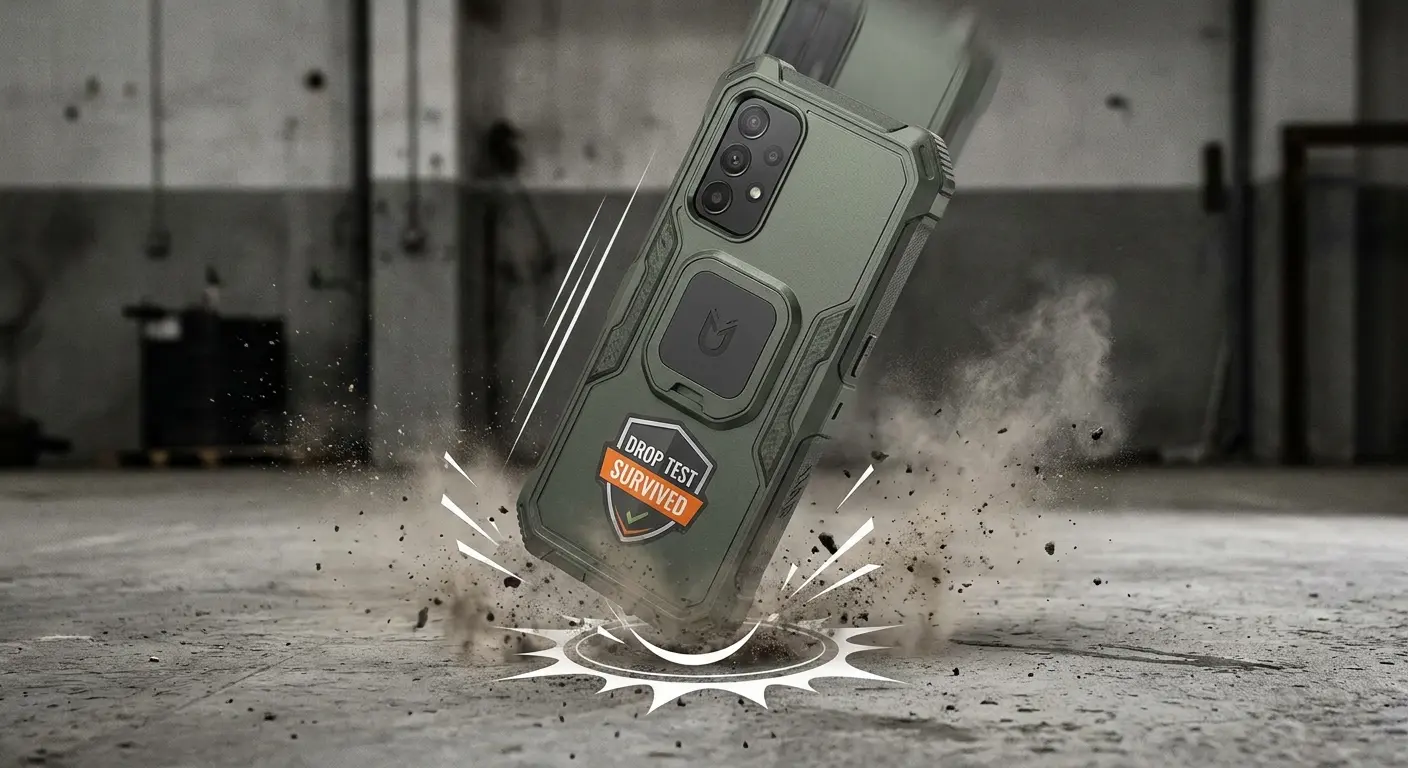
Phone cases for content creation need to balance protection with usability. Rugged cases with thick bumpers protect against drops but add bulk that affects mounting compatibility and heat dissipation. Slim cases provide minimal drop protection but maintain phone dimensions for easier mounting.
The protection level you need depends on your content type and filming environments. Desk-bound creators can use minimal protection. Outdoor creators need serious protection against drops, weather, and impacts.
Heat dissipation matters for extended recording sessions. Thick cases trap heat, which accelerates thermal throttling during 4K recording. If your phone overheats regularly, consider whether your case is contributing to the problem.
Screen protectors and lens protectors are cheap insurance against scratches that degrade image quality. A scratched lens affects every video you film until you replace the phone. A $10 lens protector prevents that problem entirely.
Backup Strategies That Actually Work When You Need Them
Backups you don't test are just expensive hard drives full of hope.
The 3-2-1 backup rule provides reliable protection: three copies of your data, on two different media types, with one copy offsite. For creators, this means keeping footage on your phone, backing up to a local drive, and maintaining cloud or offsite backup of finished videos.
Automated backups work because they don't require remembering to copy files manually. Set up automatic transfers from your phone to your computer when connected. Configure cloud backup to run overnight. Automation removes the human failure point where you forget to backup and lose footage.
Backup verification matters more than backup frequency. Files can corrupt during transfer. Drives can fail silently. Verify that your backups actually contain usable files by periodically testing restoration. Open a backed-up video file and confirm it plays correctly. That test takes 30 seconds and confirms your backup system works.
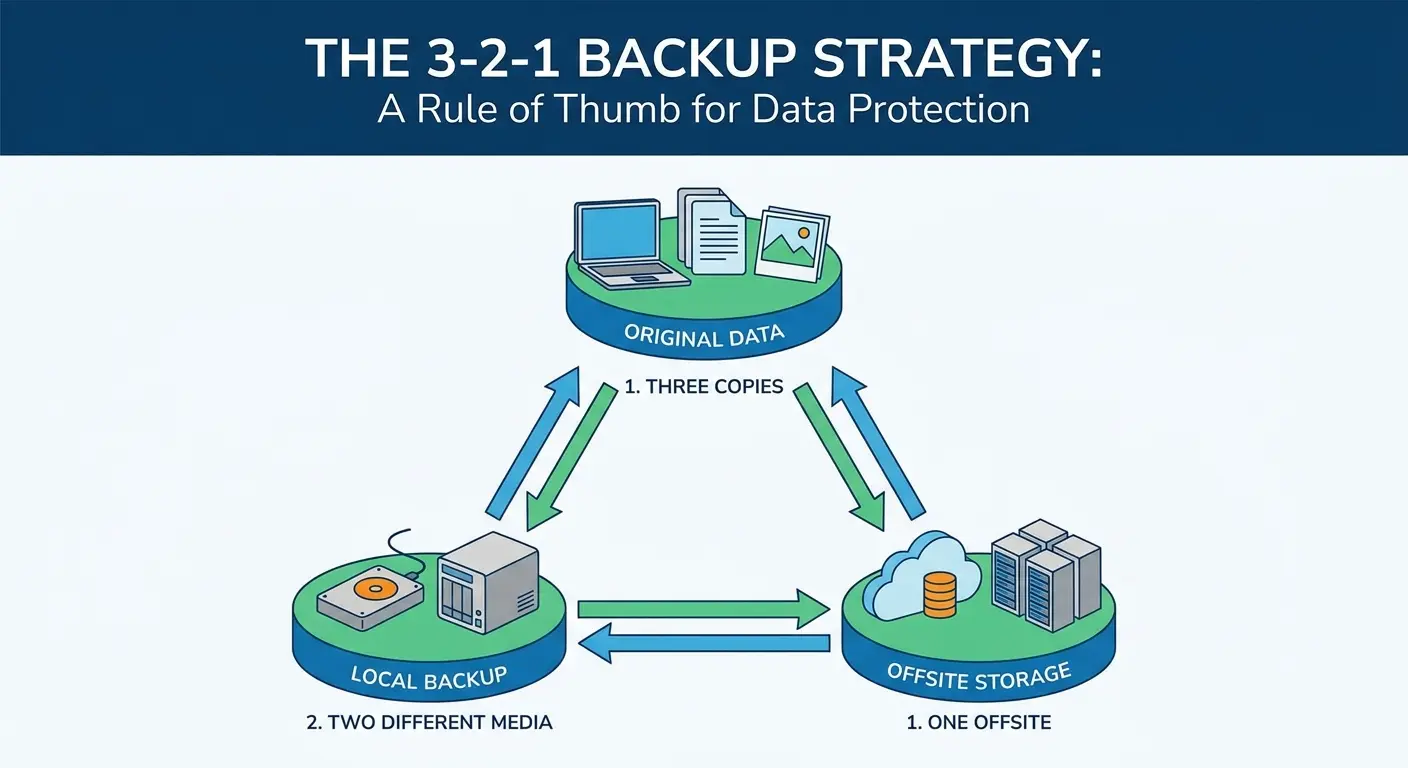
Local storage (external SSD or hard drive) should be your primary backup because transfer speeds are fast and you're not dependent on internet connectivity. Cloud storage works as secondary backup for finished videos, but uploading 50GB of raw footage on most home internet connections takes hours or days.
Backup organization prevents the scenario where you have backups but can't find the files you need. Create a consistent folder structure: Year > Month > Project Name > Raw Footage, Edited Files, Project Files. Maintain that structure across all backup locations. When you need to restore files, you know exactly where to look.
Alright, Last Thing
I can't promise your channel will blow up. I can't even promise you'll enjoy making videos. Some people try it and realize they hate being on camera, and that's fine.
But if you're going to try this, don't let a $15 mount or shitty audio be the reason you quit. That's a stupid reason to quit.
Your first ten videos will probably be rough. Mine were unwatchable. But by video 10, I could set up my shot in under two minutes, my audio was clean, and I wasn't spending three hours fixing problems that shouldn't have existed.
That's the goal. Make it easy enough that you actually do it.
The channels that last aren't running better gear or cracking some algorithmic code. They've solved the boring problems that let them show up consistently. They've built systems that work when motivation doesn't. They've protected their equipment because they can't create without it.
You don't need permission to start. You need a phone that won't fall, audio people can hear, and a workflow that doesn't require heroic effort every single time.
Everything else is refinement.
Oh, and back up your footage. Learned that one the expensive way too.
If you've got specific questions about gear or you're dealing with some weird production problem I didn't cover, leave a comment. I check them. Sometimes I even respond.
Also if you bought a Rokform mount because of this post and it works for you, let me know. I'm genuinely curious if other people have the same experience.

