


I watched a creator spend $800 on ring lights last month. Her videos still get skipped in the first two seconds.
Want to know why?
Most creators obsess over lighting rigs, trending sounds, and perfect edits while missing what actually separates watchable content from scroll-bait: stability and framing consistency. We've spent years helping people capture better footage in extreme conditions, and the principles that keep a mountain biker's POV steady at 40mph apply directly to keeping viewers locked on your 15-second clip. The difference isn't about production value. It's about how you're physically holding your phone.
Table of Contents
The Stability Problem Nobody Talks About
Framing Techniques That Override Algorithm Guesswork
Audio Capture Beyond the Built-In Mic
Editing Rhythm vs. Editing Speed
Batch Recording Without Killing Spontaneity
Mounting Solutions for Hands-Free Angles
When to Ignore TikTok's Native Tools
Testing Content Before You Commit to Trends
If You're Skimming (I Get It), Here's What Matters:
Phone stability impacts viewer retention more than most editing tricks; micro-movements trigger subconscious exits
Smart framing creates visual hierarchy that guides attention without relying on text overlays
External audio solutions eliminate the hollow echo that marks amateur content
Editing should match your content's natural pace, not TikTok's fastest performers
Pre-planning batch shoots preserves authenticity while reducing daily pressure
Hands-free mounting unlocks angles that separate your content from standard selfie-mode videos
Third-party tools often deliver better results than native features for specific use cases
Small-scale testing reveals what resonates before you scale production
The Stability Problem Nobody Talks About
Why Shaky Footage Triggers Immediate Scrolling
Your phone wobbles. Just a tiny bit. You don't even notice it because you're focused on saying your hook right and staying in frame and not looking weird.
But 40% of people scroll past in that first second.
They don't think "oh this is shaky." They just feel... off. Their brain says "low quality" before they even process what you're saying. It's subconscious and it's brutal and it's fixable.
We're not talking about obvious shake from running or walking. The subtle drift that happens when you're holding your phone at arm's length, trying to keep yourself in frame while delivering your opening line creates just enough visual instability to trigger an unconscious rejection.
Your brain hates working hard when you're scrolling. Shaky video? Your brain nopes out before you even realize you've swiped. This happens within the first 0.8 seconds, which is why your hook matters less than your stability in those opening frames.
Most creators compensate by adding more cuts, thinking rapid editing will mask the shake. This backfires because you're layering one distraction on top of another. The viewer's brain now has to process both the instability and the jarring transitions, doubling the cognitive load instead of eliminating it. When you're learning how to make TikTok videos that actually hold attention, understanding this stability foundation becomes more critical than any trending effect or filter.
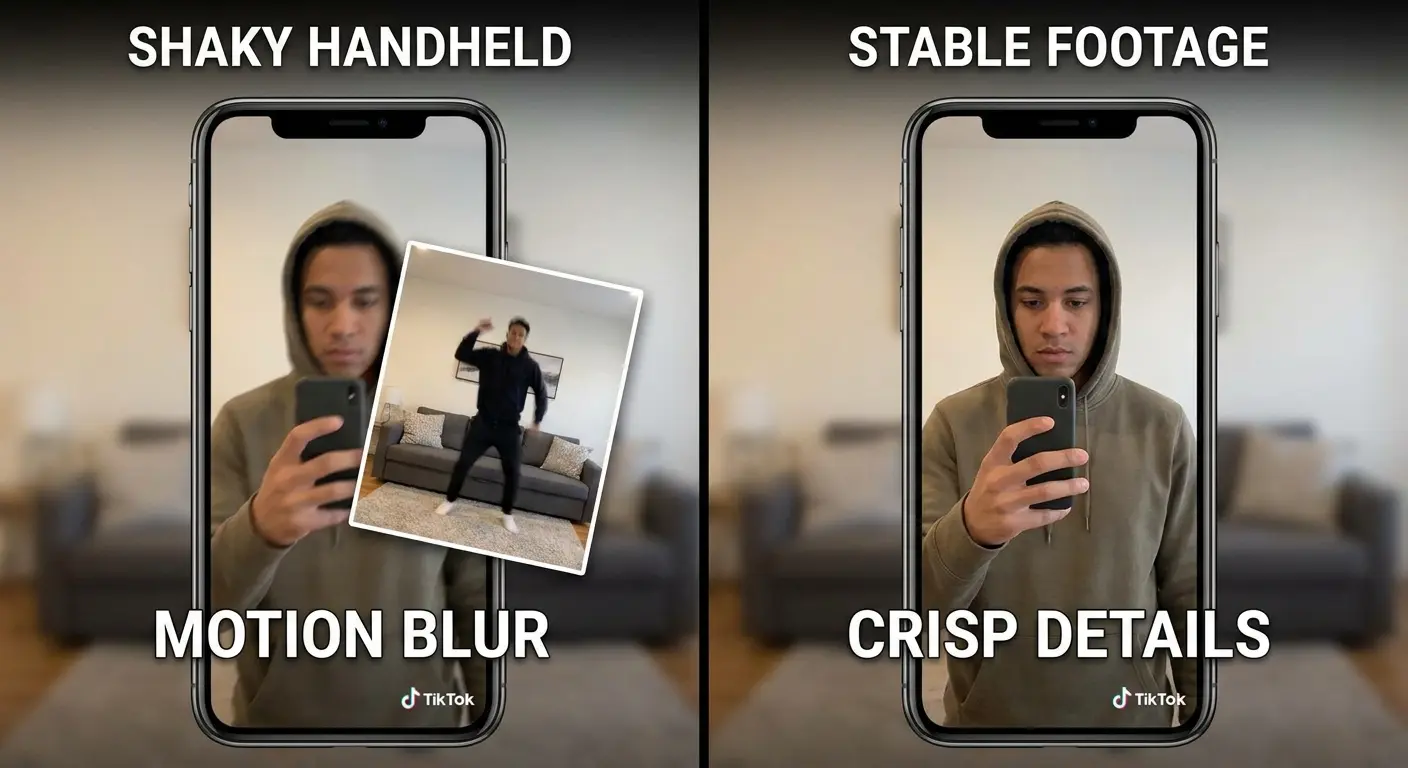
Here's what different stability issues actually cost you:
Micro-shake (subtle wobble): 40% viewer drop in first second. Quick fix? Two-hand grip with elbow anchor.
Rotation drift (phone tilting): Subconscious distrust signal. Lock wrists, rotate from waist.
Walking movement: Immediate cognitive overload. Stop moving or use gimbal.
Arm fatigue shake: Progressive quality decline. 30-second takes maximum.
Digital stabilization crop: Loss of intentional framing. Prioritize physical stability first.
The Two-Hand Technique That Actually Works
Standard advice tells creators to hold their phone with both hands, but this oversimplifies the mechanics of stable footage. The method that works involves creating a three-point stabilization system using your body. Your elbows need anchor points against your torso or a solid surface, transforming your arms from unstable extensions into a rigid structure.
Grip your phone with both hands, then lock your elbows against your ribcage. This creates a triangle of support between your hands and your core. Your upper arms become stabilizers instead of weak points. When you need to pan or tilt, the movement comes from your waist or knees, not your wrists or elbows.
Sarah (fitness creator, 47K followers) was losing viewers on her form demonstration videos despite having excellent instruction. She was holding her phone at arm's length while performing exercises, creating constant micro-shake as her muscles engaged. We switched her to a mounted setup for wide shots and the two-hand anchor technique for close-ups. Her average watch time jumped from 4.2 seconds to 11.8 seconds within a week, with no other changes to her content or posting schedule. She sent me a voice memo screaming about it.
This feels awkward at first because you're limiting your range of motion. That limitation is the point. You're trading flexibility for stability, and in TikTok's format, stability wins every time. Practice this position for 30 seconds at a time until it becomes automatic. Your shoulders will fatigue initially, but that fatigue indicates you're engaging the right muscle groups to support the phone's weight.
When Stabilization Software Makes Things Worse
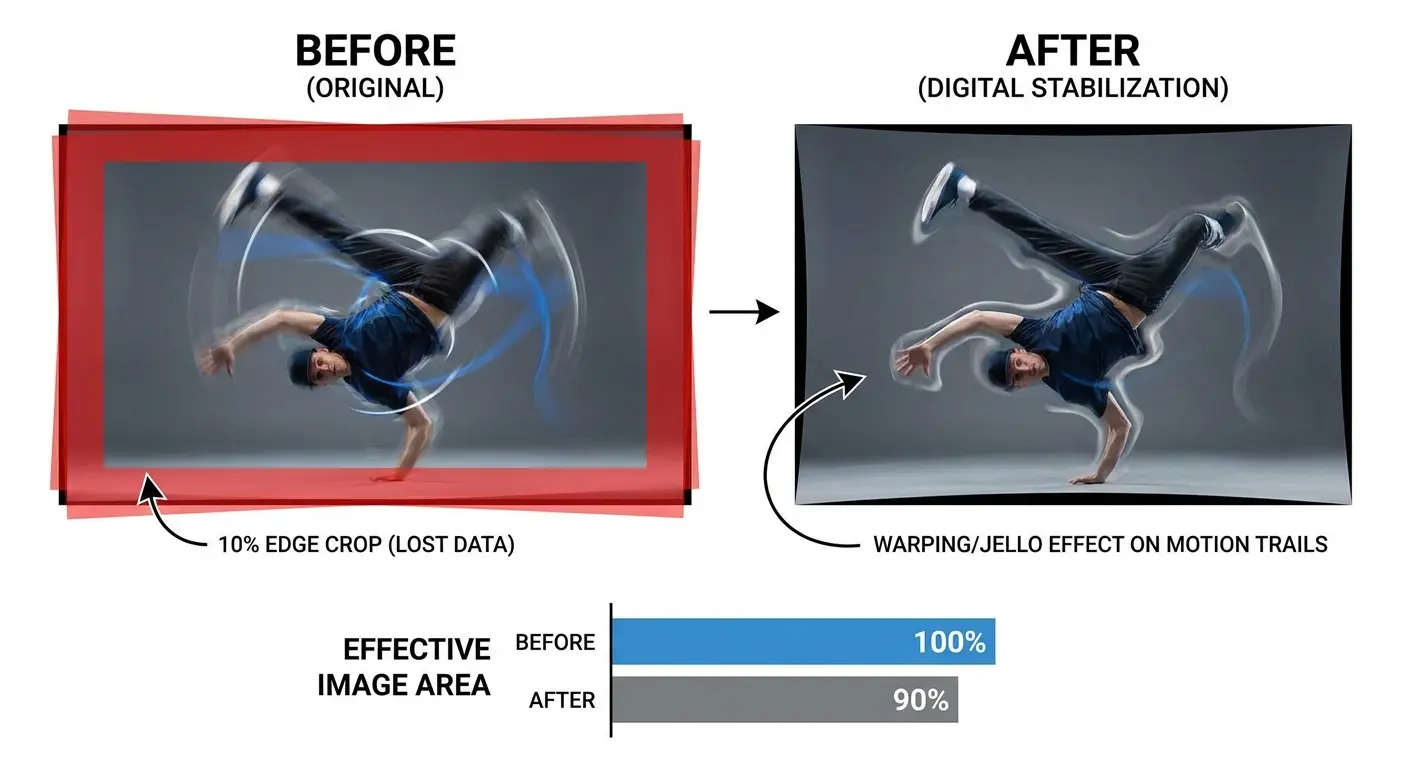
TikTok's stabilization eats 10% of your frame. Just... chops it off.
Spent time positioning yourself perfectly? Cool. The algorithm just cropped out half of what you wanted to show. You're welcome.
Digital stabilization crops your footage and applies algorithmic smoothing that can introduce artificial-looking motion. When you're shooting in TikTok's vertical format with limited resolution to spare, aggressive stabilization eats into your frame, potentially cutting off important visual elements. Stabilization software struggles with certain types of movement, particularly rotation or multi-directional motion, creating a warping effect that's more distracting than the original shake.
Stabilization also introduces a floating sensation during quick movements. Your content appears to drift or lag slightly behind your actual motion, creating a disconnect that viewers perceive as artificial. For content where energy and immediacy matter (reaction videos, dance content, or anything with sudden movements), this lag kills the impact of your timing. Understanding how to make a TikTok without over-relying on digital fixes means recognizing when your natural movement serves the content better than artificial smoothing.
Pre-Recording Stability Checklist:
☐ Test two-hand grip with elbows anchored against torso
☐ Verify phone orientation places primary mic toward voice source
☐ Check frame composition accounts for 10% edge crop if using stabilization
☐ Practice movement from waist/knees, not wrists/elbows
☐ Record 5-second test clip and review for micro-shake
☐ Confirm mounting solution is secure if using hands-free setup
☐ Disable digital stabilization for high-energy or rotation-heavy content
Framing Techniques That Override Algorithm Guesswork
The Focal Point Hierarchy System
TikTok's algorithm can't directly measure good framing, but viewer retention patterns reveal how composition affects watch time. Where you put your face matters. Where you DON'T put stuff matters even more.
Eyes move predictably: high contrast areas first, then faces, then text. If you understand this, you can basically control where people look. Sounds manipulative? It is. It also works.
Position your face or primary subject in the upper third of the frame, slightly off-center. This placement feels more dynamic than dead-center composition and leaves room below for text overlays without covering your content. The viewer's eye naturally lands on your face first, then travels down to read any text, then scans the background for context.
Background elements should support your subject without competing for attention. A cluttered background creates multiple focal points, splitting viewer attention and reducing the impact of your main message. This doesn't mean you need a blank wall. Smart background elements add depth and context, but they should be visually secondary (slightly out of focus, lower contrast, or positioned in peripheral areas). Whether you're using a dedicated tiktok video maker app or shooting natively, these framing principles remain constant across all platforms.
Negative Space as a Retention Tool
Empty areas in your frame aren't wasted space. They're breathing room that prevents visual overwhelm. When every pixel of your frame contains information or detail, viewers experience decision fatigue about where to look. Smart negative space creates visual rest areas that make your primary content easier to process.
Leave the left or right third of your frame relatively empty. This gives you space for TikTok's UI elements (profile picture, like button, comments) without those elements covering your content. More importantly, that empty space creates visual contrast that makes your subject pop.
Test this by shooting the same content twice: once with your face filling most of the frame, once with your face occupying only the right two-thirds. The version with negative space will consistently hold attention longer because it reduces visual fatigue. Viewers can process your content without their eyes constantly scanning for a place to rest.
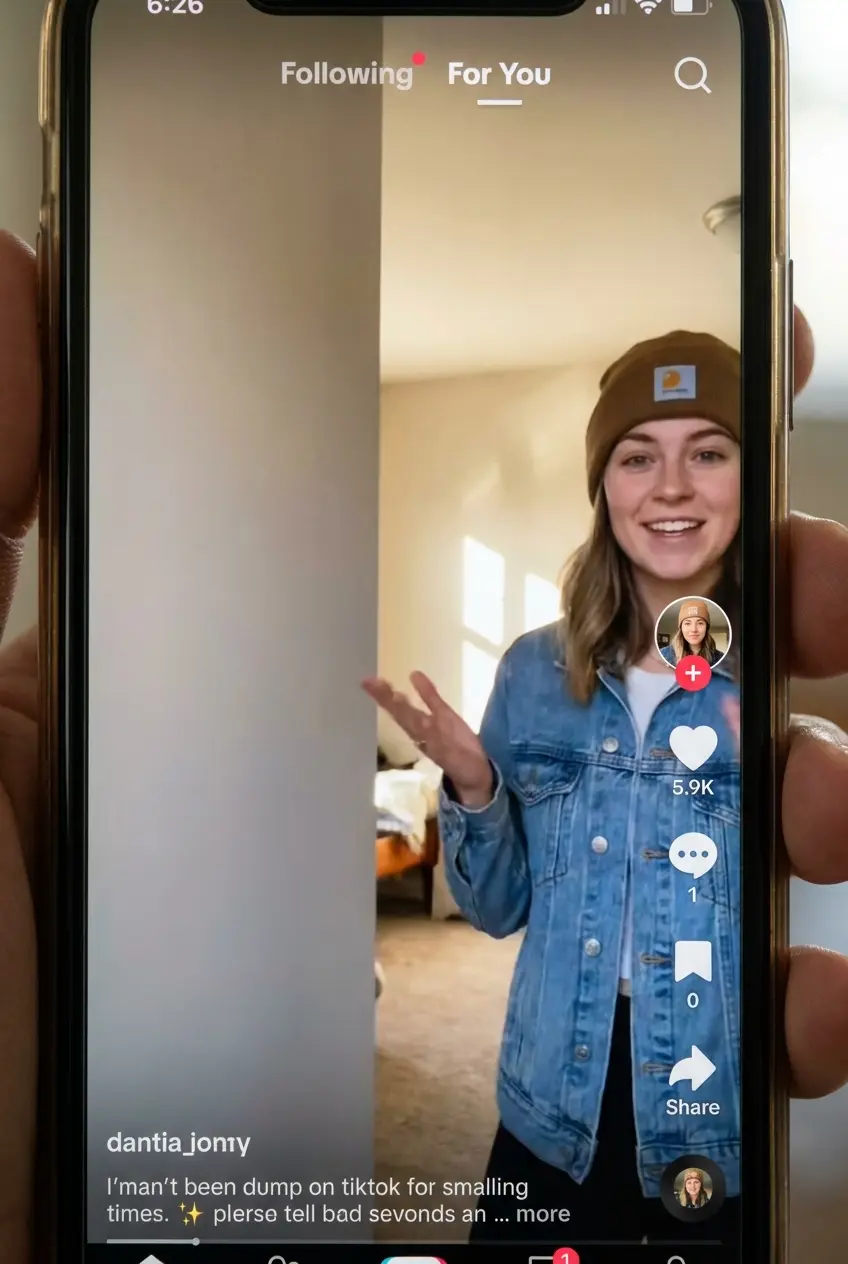
Marcus does product reviews. He tested two versions of the same unboxing video. Version A showed him centered in frame with the product box filling most of the screen space around him. Version B positioned him in the right two-thirds with deliberate negative space on the left third. Version B received 34% higher completion rates and 2.3x more shares, despite identical scripting, lighting, and editing. The negative space gave viewers' eyes somewhere to rest and made the UI elements feel less intrusive.
Side note: I once saw someone try to cram their face, the product, three text overlays, and a background full of posters into one frame. My eyes didn't know where to look first, so they just... didn't. I scrolled. Sometimes less is actually more.
Depth Layering for Vertical Format
Vertical video eliminates the wide horizontal plane that traditional cinematography uses to create depth. You need to build depth on the vertical axis instead, using foreground, middle ground, and background elements stacked top to bottom. This technique adds visual interest and prevents the flat, dimensionless look that makes content feel amateur.
Place an object in the extreme foreground (bottom 20% of frame), position yourself in the middle ground (center 60%), and ensure visible background elements in the top 20%. This vertical stacking creates layers that add dimensionality to your shot.
The foreground element can be as simple as the edge of a table, a plant, or your hands holding something. It doesn't need to be in focus. That slight blur in the immediate foreground signals to viewers that there's depth to the image, making the overall composition feel more professional and intentional.
Audio Capture Beyond the Built-In Mic
The Room Tone Issue Killing Your Audio
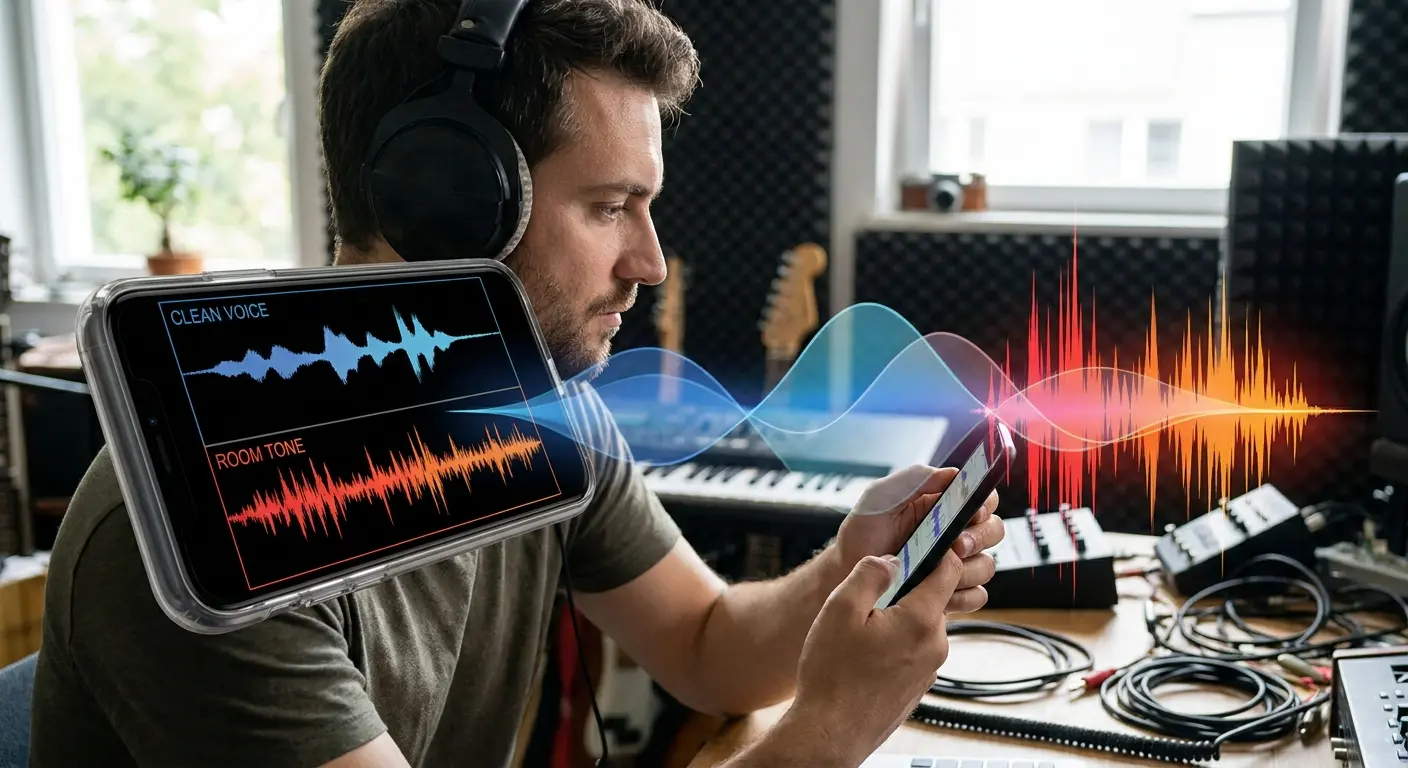
Phone microphones capture everything within roughly 10 feet with minimal discrimination between your voice and ambient noise. This creates a hollow, echoey quality that immediately signals low production value. Room tone (the subtle background noise present in any space) becomes amplified in phone recordings, creating an audio signature that viewers associate with amateur content.
Record a five-second clip in your usual filming location and play it back with headphones. You'll hear the room's reverb, the hum of appliances, traffic from outside, and dozens of other sounds you don't consciously notice while filming. Your audience hears all of it too, and that audio clutter reduces how professional your content feels.
The quickest fix involves moving closer to your phone. Halving the distance between your mouth and the microphone quadruples the ratio of your voice to background noise. This means recording at 3 feet instead of 6 feet dramatically improves audio clarity without any equipment changes. When you're figuring out how to make tiktok content that sounds as good as it looks, proximity to your recording device matters more than most creators realize.
Directional Recording Without External Mics
Phone microphones aren't truly omnidirectional despite capturing sound from all angles. Understanding your phone's microphone placement lets you optimize audio capture by positioning yourself relative to those microphones. Different phone models place microphones in different locations (bottom edge, back panel, near the camera), and knowing where yours are located allows you to angle your phone for better voice capture while minimizing background noise pickup.
Find your phone's microphone locations (usually marked by small holes on the device edges). When filming, orient your phone so these microphones point toward your mouth and away from major noise sources. If your primary mic is on the bottom edge, holding your phone horizontally in selfie mode points that mic away from you, capturing more room noise than voice.
Vertical orientation with the phone's bottom edge closer to you (even if you're not holding it at chest level) improves voice capture significantly. This positioning detail seems minor but creates noticeable audio improvement that compounds across dozens of videos.
Look, here's what different audio problems actually cost you and how to fix them:
Hollow echo: Caused by room reverb and hard surfaces. Move closer to your phone (3ft max), add soft materials. No equipment needed.
Background hum: HVAC, appliances, traffic. Orient mic away from noise source, record during quiet hours. No equipment needed.
Muffled voice: Phone mic pointed away. Use vertical orientation with bottom edge toward you. No equipment needed.
Inconsistent levels: Varying distance from mic. Mark floor position, maintain consistent distance. Just need tape or a marker.
Wind noise outdoors: Air moving across mic. Use phone case as windbreak, angle away from breeze. No equipment needed or just a basic case.
Reverb in large rooms: Sound bouncing off walls. Record in smaller space or add fabric/furniture to absorb sound. Blankets and cushions work.
The Lapel Mic Solution for Specific Content Types
Certain content formats benefit dramatically from lapel microphones while others see minimal improvement. Tutorial content, educational videos, and anything requiring clear verbal instruction justifies the investment in a basic wireless lapel mic. But dance videos? Forget the fancy mic. You're using TikTok's audio anyway.
Wireless lapel mics under $50 deliver professional-sounding audio for talking-head content. They clip to your shirt collar, capturing your voice directly while rejecting most ambient noise. The difference is immediately apparent: clear, present audio that sounds like you're speaking directly into the listener's ear.
This investment makes sense only if you're creating content where your spoken audio is the primary element. Product reviews, how-to
This investment makes sense only if you're creating content where your spoken audio is the primary element. Product reviews, how-to guides, storytelling content, or anything where viewers need to hear every word clearly justifies the upgrade. For other content types, focus your effort and budget elsewhere. When you make tiktok videos that rely heavily on narration or dialogue, audio quality becomes as important as visual stability.
Editing Rhythm vs. Editing Speed
Matching Cuts to Content Pace
The fastest-edited TikToks aren't always the most successful. Editing rhythm should match your content's natural energy and information density. Quick cuts work for high-energy content or rapid-fire information delivery, but they exhaust viewers when applied to content that needs breathing room.
Count the cuts in successful videos within your content category. Educational content typically holds shots for 3-4 seconds, allowing viewers to process information before moving to the next point. Entertainment content cuts faster, often every 1-2 seconds, maintaining energy and preventing boredom. Aspirational or aesthetic content holds even longer, sometimes 5-7 seconds per shot, letting viewers absorb the visual.
Your editing should match these established patterns because they reflect what your audience expects and can comfortably process. Cutting faster than your content category's norm creates anxiety. Cutting slower risks losing attention. Find the rhythm that successful creators in your space use, then match it before experimenting with variations.
The Three-Beat Rule for Transitions
Standard cuts (no transition effect) work for 90% of your edits. When you do use a transition effect, keep it under one second. Anything longer makes the transition itself become content, pulling focus from your actual message.
And don't even get me started on people who use 47 transitions in a 15-second video. Stop it. Just stop.
Transitions need enough time to register visually but not so much time that they become the focus. The three-beat rule provides a framework for transition timing that works across content types. A beat represents roughly one-third of a second, meaning most transitions should complete within one second. This timing allows the viewer's brain to process the change without dwelling on the transition itself.
The exception involves intentional transitions that serve a narrative purpose (showing time passing, changing locations, or revealing a transformation). These transitions can extend to 1.5-2 seconds because they're communicating information, not just connecting shots. The key distinction: is your transition decorative or functional? Functional transitions can be longer. Decorative ones should be nearly invisible. When you make tiktok video content with purpose, every element including transitions should serve the story you're telling.
Audio-Driven Editing for Higher Retention
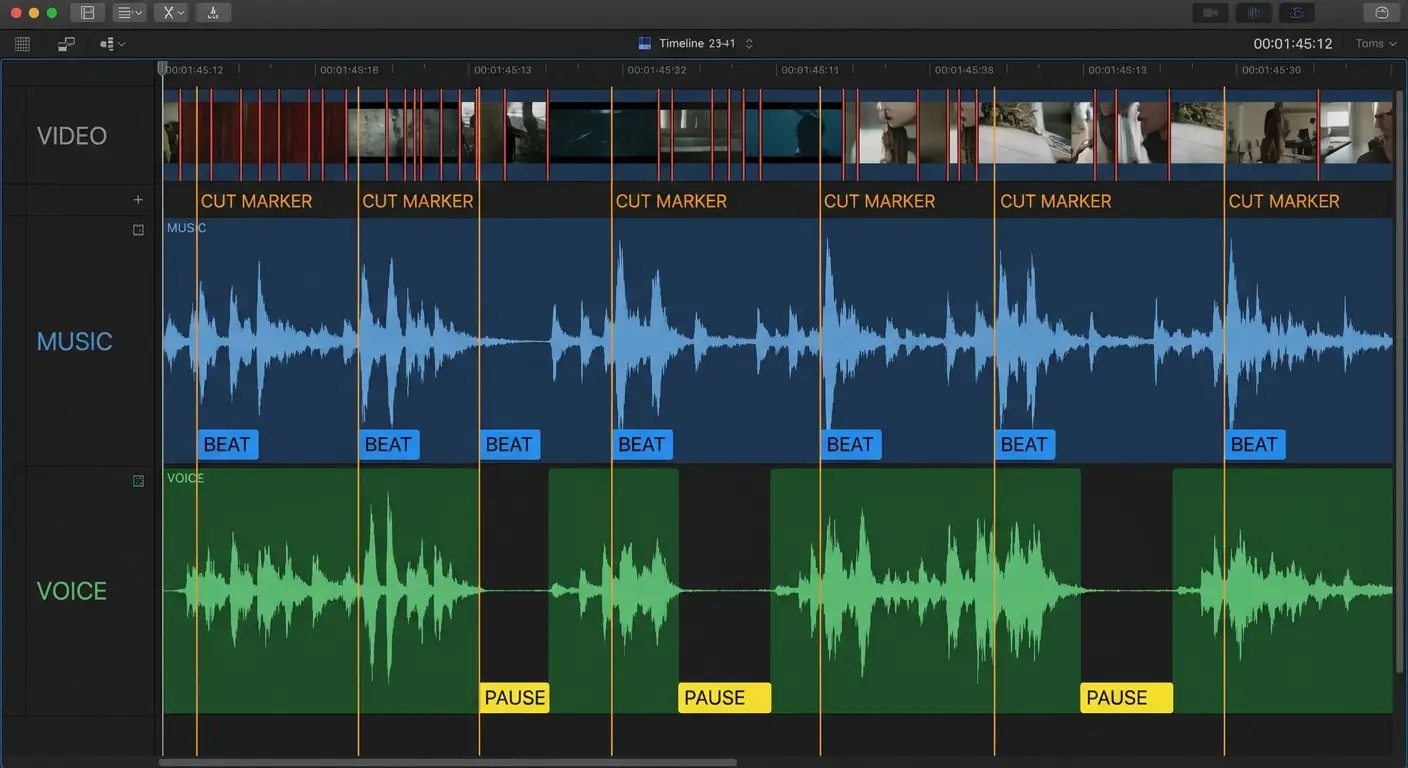
Editing to your audio track rather than arbitrary timing creates natural rhythm that viewers subconsciously recognize as professional. This technique involves placing cuts on musical beats, at the end of spoken phrases, or during natural pauses in your audio. The resulting edit feels smooth because the visual changes align with audio cues that the viewer's brain is already processing.
Load your audio track first, then place cuts at natural audio markers. If you're using music, cuts should land on the beat or at the start of new musical phrases. For spoken content, cut during breaths or at the end of complete thoughts, never mid-word or mid-sentence.
This approach requires more time during editing but delivers noticeably smoother results. Your cuts feel motivated by the content rather than random, and viewers stay engaged because the visual rhythm matches the audio rhythm they're hearing.
Batch Recording Without Killing Spontaneity
The Session Structure That Preserves Energy
Batch recording multiple videos in one session saves time but often results in flat, repetitive content that lacks the energy of spontaneous creation. The solution involves structuring your batch sessions to maintain variety and freshness across multiple takes. This means changing your physical setup between videos, taking genuine breaks to reset your energy, and varying your content types within a single session rather than recording 10 versions of similar content.
Record no more than five videos per session, and vary the content type for each one. Shoot one tutorial, one reaction video, one trend participation, one original concept, and one product-focused piece. This variety prevents your energy and delivery from becoming repetitive across videos.
Between each video, physically move to a different location in your space or change your setup significantly. This reset helps you approach each video as a fresh creation rather than the fifth iteration of the same task. Your energy and authenticity remain high because each video feels like a new project rather than part of an assembly line. When you make tiktok content in batches, this variation strategy keeps your output from feeling manufactured.
Pre-Planning vs. Over-Scripting
Knowing your video's structure and key points differs from memorizing a script word-for-word. Pre-planning involves outlining the beats you need to hit while leaving room for natural delivery and spontaneous moments. Over-scripting creates robotic delivery that viewers immediately recognize as inauthentic.
Write bullet points, not scripts. Each bullet should represent a key point or transition, but not the exact words you'll use. This approach gives you structure while preserving the natural speech patterns and occasional imperfections that make content feel genuine.
Your bullet points might look like: "Intro problem > personal experience > solution step 1 > solution step 2 > results > call to action." This outline keeps you on track without forcing you to remember specific phrasing. You'll naturally find the right words when you're speaking to the camera, and that spontaneity reads as authentic.
Batch Recording Session Template:
Pre-Session (15 minutes):
Review bullet points for all 5 videos
Set up base filming location with proper lighting
Test audio levels and phone stability
Prepare any props or products needed
Queue up music or trending sounds if applicable
Recording Block (60-75 minutes):
Video 1: High-energy content (tutorial, product launch) - 10 min
Break: Physical movement, water, location change - 5 min
Video 2: Mid-energy content (reaction, trend participation) - 10 min
Break: Review footage, adjust setup - 5 min
Video 3: Original concept or storytelling - 10 min
Break: Full reset, different location - 5 min
Video 4: Lower-energy content (process, behind-scenes) - 10 min
Break: Final energy check - 5 min
Video 5: Text-heavy or B-roll compilation - 10 min
Post-Session (10 minutes):
Back up all footage
Note which videos felt strongest
Schedule editing time within 24 hours
Building a Shot List That Accounts for Fatigue
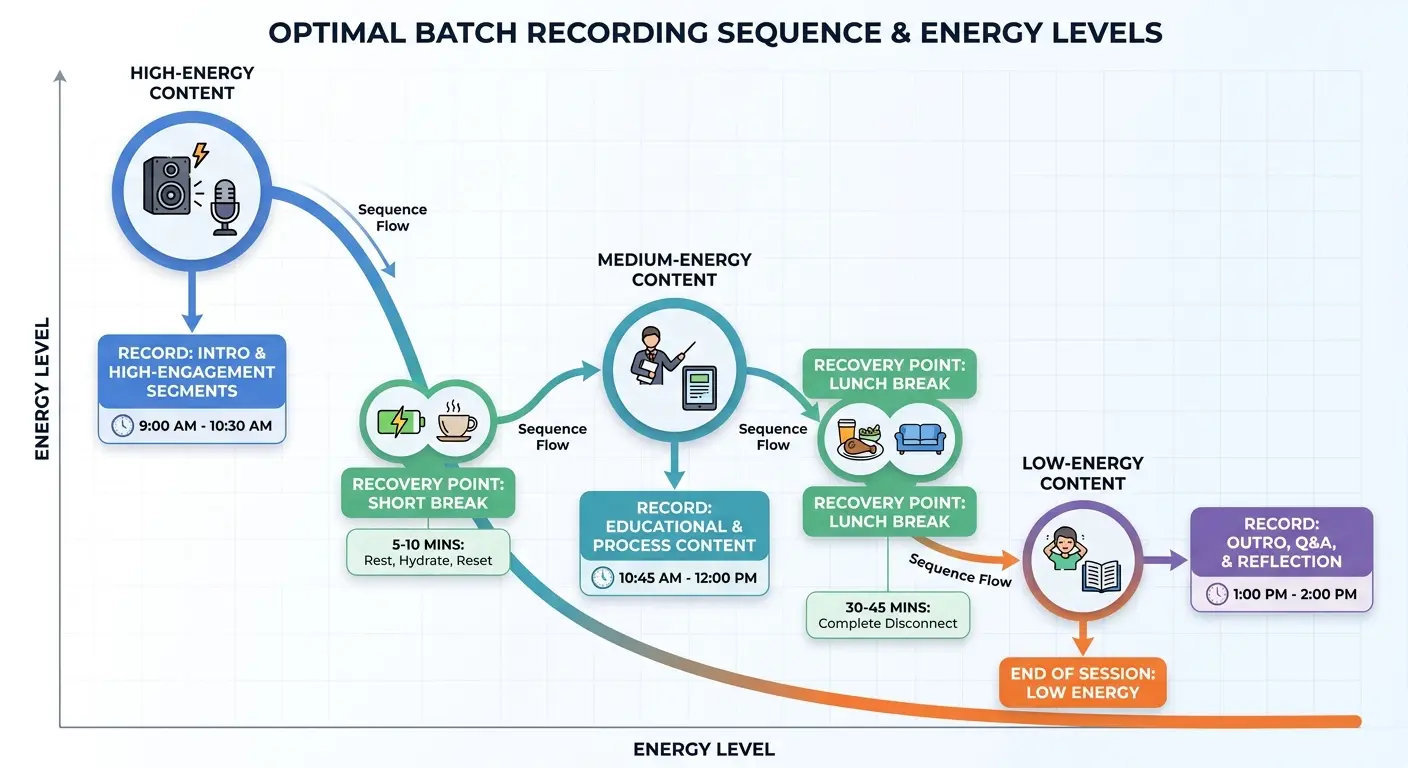
Your energy and creativity decline over the course of a recording session, so shooting order matters. Starting with your most demanding content while you're fresh and ending with simpler videos as fatigue sets in maximizes the quality of your batch. This strategy also involves recognizing which content types require peak energy (high-enthusiasm product launches, complex tutorials) versus which can succeed with lower energy (behind-the-scenes content, process videos, reflective commentary).
Shoot your most demanding content first. Videos requiring high energy, complex explanations, or multiple takes should happen when you're mentally fresh. Save simpler content (B-roll compilation, text-heavy videos with minimal talking, or repurposed content) for the end of your session when fatigue has reduced your performance quality.
Jessica does food content. She was batch recording six recipe videos every Sunday. By video four, her enthusiasm visibly dropped, and her explanations became rushed and less clear. We restructured her sessions to shoot three complex recipes first (while her energy was high), take a 30-minute break with actual food and rest, then shoot three simple "quick tip" videos that required less performance energy. Her completion rates across all six videos equalized, and comments about her seeming "tired" or "over it" disappeared completely.
This sequencing protects your best content from the decline in energy and focus that naturally occurs during extended recording sessions. You're working with your biology rather than against it, ensuring each video gets the appropriate level of energy and attention it requires.
Mounting Solutions for Hands-Free Angles
Why Holding Your Phone Limits Creative Options
Your arm's length determines 90% of your shots when you're holding your phone. This creates a repetitive visual style across your content because you're always roughly the same distance from the camera, always at roughly the same angle. Viewers recognize this limitation subconsciously, and it contributes to the sameness they feel when scrolling through content.
Handheld filming restricts you to angles and distances determined by arm's length and the physical limitations of holding a device while performing. This constraint becomes particularly limiting for demonstration content, process videos, or any situation where you need both hands free to interact with objects or perform tasks.
Mounting your phone opens angles that differentiate your content immediately. Overhead shots for cooking or craft content, low-angle shots that create visual drama, or eye-level shots that feel more like conversation than performance all become possible when you're not constrained by holding the device. When asking yourself "how do i make a tiktok video that stands out visually," the answer often involves freeing your phone from your hands.
Magnetic Mounting for Quick Position Changes
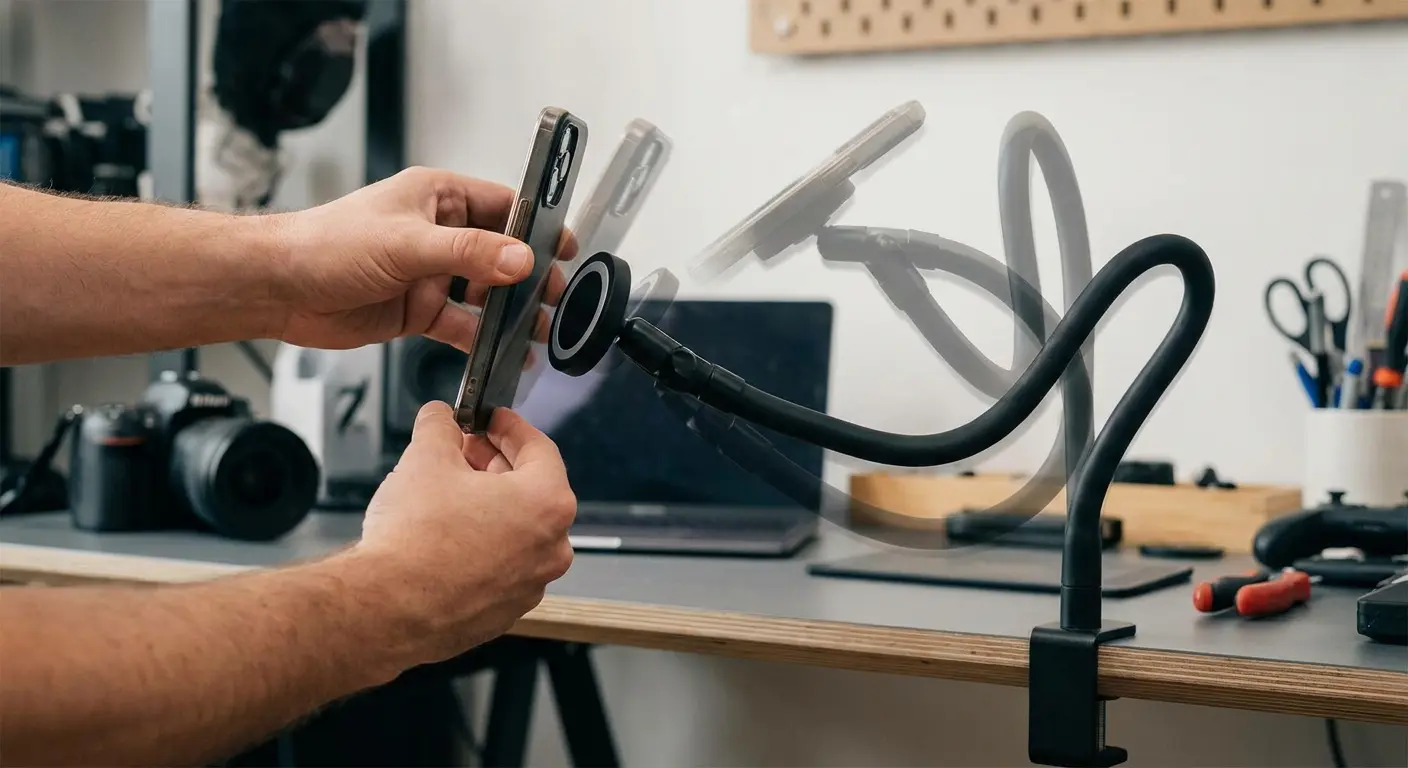
Traditional tripods and mounts require threading, tightening, and adjustment time that interrupts creative flow during recording sessions. Magnetic mounting systems allow instant phone attachment and removal, enabling rapid position changes without breaking your momentum. This speed matters particularly during batch recording sessions where you're capturing multiple angles of the same content or switching between different setups.
We've built our entire product line around magnetic mounting because the speed advantage compounds across dozens of videos. Snap your phone onto a mount, record your shot, pull it off, reposition the mount, snap it back on. This process takes seconds instead of the minute-plus required for traditional mounting systems.
Speed during recording matters because it preserves your energy and creative momentum. When you can quickly test three different angles for the same content, you're more likely to find the best option. When mounting and unmounting takes significant time, you settle for the first adequate angle rather than exploring better options. Our magnetic phone mounts transform how efficiently you can work through a shot list while maintaining the flexibility to experiment with positioning.
POV Mounting for Demonstration Content
Chest-mounted or head-mounted positions capture your hands and work surface while keeping your face out of frame. This works perfectly for content where the process matters more than your on-camera presence. Viewers see exactly what you're doing from a natural perspective that feels like they're standing in your position.
Point-of-view mounting positions the camera to capture what you're seeing and doing, creating an immersive perspective that works exceptionally well for process-driven content. This angle shows viewers exactly what you're working on without your body blocking the view, making it ideal for tutorials, cooking content, crafting videos, or any demonstration where hand movements and detailed work need to be clearly visible.
The challenge with POV mounting involves maintaining stable footage during movement. Your body's natural motion translates directly to camera movement, which can create the shake issues we discussed earlier. Using a chest mount system designed for action sports provides the stability needed for POV content while keeping your hands completely free to work.
When to Ignore TikTok's Native Tools
Third-Party Editing Apps for Specific Effects
TikTok's built-in editing tools cover basic needs but lack the precision and control that certain content types require. Third-party apps offer advanced color grading, more sophisticated transition options, better text animation, and finer control over timing and effects. The decision to edit externally depends on your content's complexity and your needs.
CapCut (owned by TikTok's parent company) provides significantly more control than TikTok's native editor while maintaining compatibility with TikTok's format and requirements. The app offers keyframe animation, advanced color correction, and multi-layer editing that TikTok's built-in tools can't match.
Export your finished video from CapCut, then upload it to TikTok rather than editing within the app. You'll lose the slight algorithm boost that some creators believe comes from using native tools, but you'll gain precise control over every aspect of your edit. For content where quality and polish matter more than posting speed, this trade-off makes sense.
Color Grading Impact on Perceived Quality
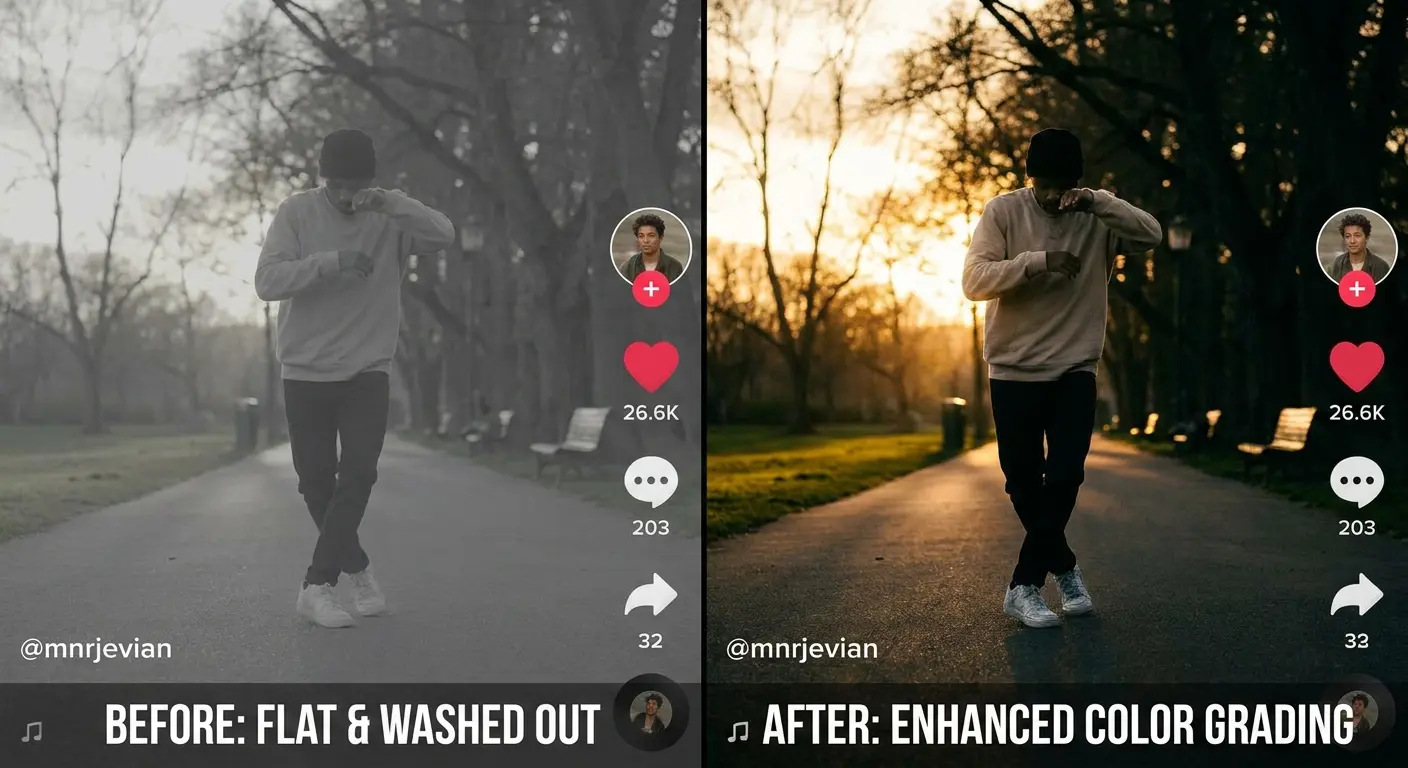
Your phone's automatic color processing tries to optimize every shot independently, which creates inconsistent looks across your content. One video appears warm and saturated, the next looks cool and muted, even though you filmed them in the same location on the same day.
Color grading separates amateur footage from professional-looking content more than most creators realize. Phone cameras capture flat, sometimes inconsistent color that benefits from adjustment and enhancement. Basic color grading involves adjusting exposure, contrast, saturation, and color temperature to create a consistent look across your content.
Create a custom preset in your editing app that adjusts exposure, adds slight contrast, and enhances colors to your preference. Apply this preset to every video before making adjustments. This baseline ensures visual consistency across your content, making your profile look cohesive and intentional when viewers scroll through your previous videos.
When Native Tools Actually Win
Trend participation and reaction content should be created and edited within TikTok. Speed matters more than polish for these video types, and any algorithm advantage from native creation provides real value. You're competing with thousands of other creators jumping on the same trend, so posting quickly increases your visibility.
TikTok's algorithm potentially favors content created entirely within the app, though the platform doesn't officially confirm this. Beyond algorithmic considerations, native tools offer speed and convenience that matter when you're creating timely content responding to trends or current events.
Original content, evergreen tutorials, and brand-building videos justify external editing. These videos will continue attracting views for weeks or months, so the extra time spent on quality editing pays dividends through extended lifespan and higher perceived value.
Testing Content Before You Commit to Trends
The Minimum Viable Video Approach
Post a simple, one-take version of your concept before investing hours in editing and production. If the simple version gets strong engagement, you know the concept works and can create a polished version. If it flops, you've lost 10 minutes instead of two hours.
Creating fully produced videos to test concepts wastes time and energy when a simple version would reveal whether the concept resonates. The minimum viable video approach involves stripping your idea down to its core elements and posting a basic version to gauge audience response. This strategy lets you test multiple concepts quickly, identify what works, then invest full production effort into proven ideas rather than guessing which concepts deserve your best work.
This feels counterintuitive because we're trained to put our best work forward. But TikTok's algorithm and audience behavior reward frequency and consistency over perfection. A simple video that posts today beats a perfect video that posts next week, and the data from that simple video informs whether the perfect version is worth creating.
Analyzing Performance Metrics That Actually Matter
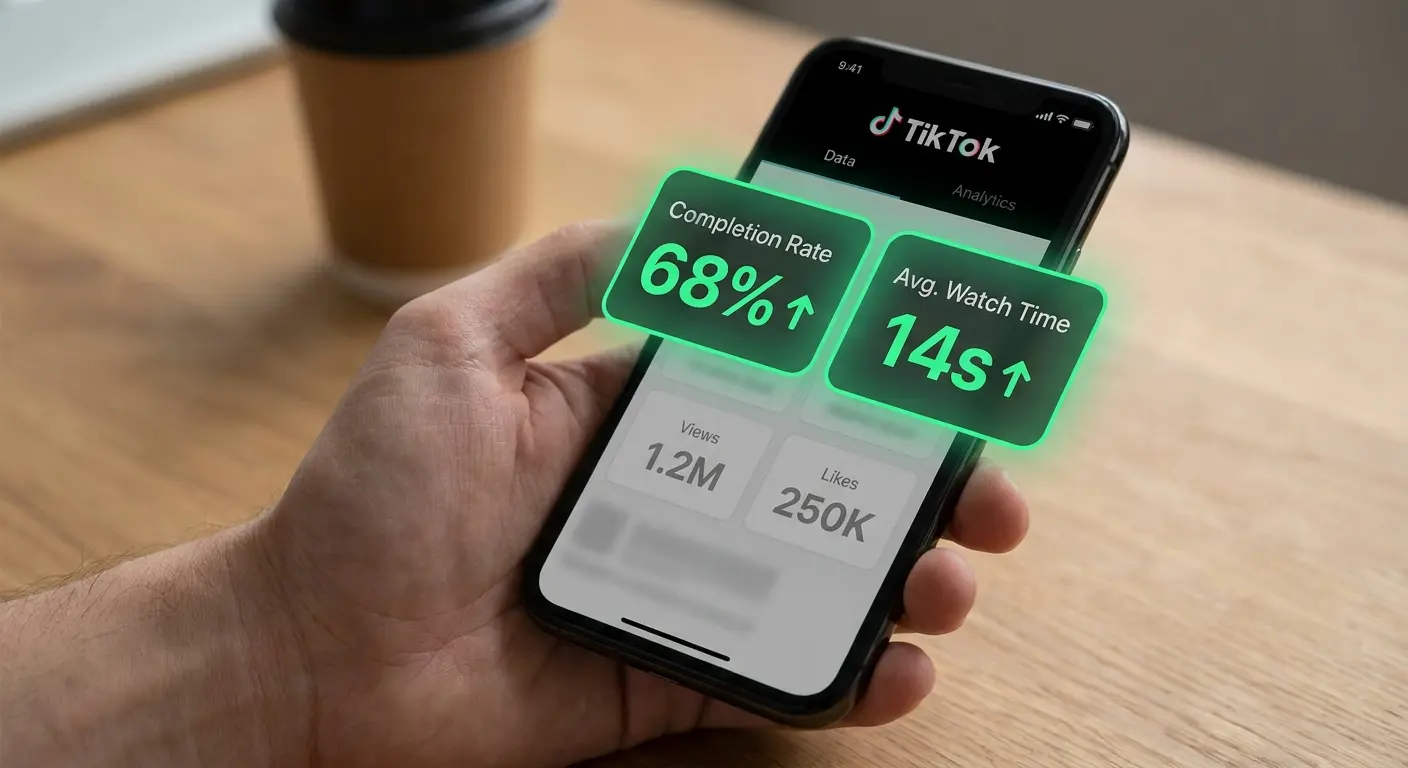
Completion rate matters more than total views. A video with 1,000 views and 80% completion rate performed better than a video with 10,000 views and 20% completion rate. The first video kept viewers engaged. The second one attracted clicks but failed to deliver value.
TikTok provides numerous metrics, but most creators focus on the wrong numbers. Total views and likes feel important but reveal less about content quality than completion rate, average watch time, and shares. These deeper metrics indicate whether viewers found your content valuable enough to watch completely and share with others.
Check your analytics 48 hours after posting rather than obsessively monitoring in real-time. TikTok's algorithm continues pushing videos that demonstrate strong engagement, so early performance doesn't predict final results. Videos can explode days after posting if they maintain high completion rates and shares during their initial distribution.
Building a Testing Schedule That Informs Strategy
Test one variable per week for a month. Week one, post at different times while keeping content format consistent. Week two, vary video length while maintaining your posting time. Week three, test different hooks while keeping length and timing constant. Week four, experiment with different content formats at your proven time and length.
Random posting produces random results. A structured testing schedule involves deliberately varying one element at a time (posting time, content format, video length, topic) while keeping other variables constant. This controlled approach reveals which changes actually impact performance versus which are irrelevant to your audience.
This structured approach isolates what actually drives your results. You'll discover that some widely-recommended practices don't work for your audience while other overlooked factors significantly impact your performance. This personalized data beats generic TikTok advice because it reflects your situation rather than broad averages.
Final Thoughts
Making TikTok videos that hold attention requires rethinking what most creators take for granted. Phone stability, smart framing, and audio quality create the basics that editing techniques and trending sounds build upon. When you control these fundamentals, you're not fighting against technical limitations while trying to create engaging content.
Here's what nobody tells you: better content doesn't always mean more complex content.
Sometimes it means holding your phone steadier, positioning yourself more smartly in frame, or choosing not to use that trending sound if it doesn't serve your message. I've watched thousands of creators struggle with advanced techniques while ignoring the simple stability and framing issues that undermine every video they make.
Your phone is capable of producing professional-quality content right now. The gap between what you're creating and what you could be creating rarely involves buying new equipment. It involves understanding how small technical decisions compound into major quality differences that your audience processes subconsciously but responds to consistently.
Yes, I'm writing 3,500 words about how to hold your phone. Yes, I know how this sounds. And yes, it actually matters.
Start with stability. Master framing. Get your audio clean. Everything else is refinement.

