


You know Reels matter. You've read that a thousand times. What bugs me about most Reel tutorials is they're written like you have unlimited time to film. "Just do 47 takes until it's perfect!" Cool, except some of us have jobs and lives and can't spend three hours getting one 15-second clip right.
This guide is different. We're focusing on the boring mechanical stuff that actually saves time. The setup tricks, the gear that prevents you from redoing takes, the workflow hacks that let you batch content without looking like a robot. Because honestly? The "creative strategy" advice is useless if your footage is shaky and your audio sounds like you're filming in a bathroom. Learning how to make Instagram reels efficiently starts with mastering these technical foundations, not with following some complicated content calendar.
What we're covering
(and what you can skip if you're in a hurry):
The Stabilization Problem Nobody Talks About (most important if you batch film)
Audio Capture Is Where Most Reels Die Quietly (30-second fix that makes you sound 10x better)
Lighting Setups That Work in Real Spaces (not some influencer's ring-light studio)
The Angle Math That Makes or Breaks Vertical Video
Shooting in Segments vs. Single Takes
The Gear You're Holding Wrong (probably)
Batch Filming Without Looking Like You Batch Filmed
Editing on Mobile vs. Desktop
Export Settings That Preserve Quality
Final Thoughts
TL;DR
(for people who are busy, which is everyone):
Your footage is shaky because you're holding your phone wrong or using a tripod that takes 5 minutes to adjust. Magnetic mounts attach to stable surfaces in seconds and beat handheld tripods every time.
Your audio sucks because phone mics pick up everything you don't want. Get a $20 lavalier mic, clip it to your shirt, done.
Natural light is inconsistent and will ruin your batch filming sessions. One LED panel ($50-150) solves this forever.
Vertical video isn't just rotated horizontal video. You need different framing or it looks weird.
Segment shooting gives you editing flexibility. Single takes feel authentic but leave zero room for mistakes.
How you physically hold your phone matters more than which phone you're holding.
Batching content is obvious unless you plan transitions and variety into the shoot.
Mobile editing is fast but limited. Desktop gives control. Hybrid approach is usually the move.
Instagram compresses everything anyway. Export at the right resolution and bitrate so your Reel doesn't look muddy after compression.
The Stabilization Problem Nobody Talks About
Traditional tripods are kind of useless for ig reels. Unpopular opinion, I know. But here's the thing: they're designed for stationary photography, not quick angle changes in weird locations. The real problem? Setup friction.
When you need to reposition between takes, you're collapsing legs, moving the tripod, extending legs again, releveling your phone. That eats three to five minutes per adjustment. Doesn't sound like much until you realize that delay kills your momentum. You lose your train of thought. You forget what you were going to say. The energy dies.
Magnetic mounting systems eliminate this friction by attaching to surfaces in seconds. You find a metal surface, slap your phone onto the mount, you're filming. Need a different angle? Grab your phone, move to the next mount, attach. Ten seconds total.
This speed difference is make-or-break for whether you'll actually film when inspiration hits or talk yourself out of it because setup feels like too much work.
My friend Sarah does fitness content, and she was literally stopping mid-workout to mess with her tripod. Killed her heart rate, made her sweaty, and the footage looked like crap because she was frustrated. She needed three angles: front view for form check, side view for depth demonstration, close-up for muscle engagement. With a traditional tripod, she'd stop between each set, adjust the legs, reposition, relevel. Three to five minutes of setup eating into her rest periods.
I showed her magnetic mounts that attach to the gym's metal equipment frames. Now she slaps her phone onto each mount as she moves between exercises. Total transition time: under 10 seconds per angle change. She captures all three perspectives without disrupting her workout flow. Looked at me like "Where has this been for the last year?"
Mounting Solution |
Best Use Case |
Setup Time |
Stability Rating |
Price Range |
|---|---|---|---|---|
Traditional Tripod |
Static shots on flat surfaces |
2-3 minutes |
Medium (wobbles on uneven ground) |
$30-$200 |
Magnetic Mount |
Metal surfaces, quick repositioning |
5-10 seconds |
High (solid surface dependent) |
$25-$60 |
Suction Mount |
Car dashboards, smooth glass |
30-45 seconds |
High (when properly sealed) |
$20-$50 |
Clamp Mount |
Handlebars, poles, edges |
45-60 seconds |
High (secure grip) |
$15-$40 |
Gimbal Handheld |
Walking shots, smooth movement |
1-2 minutes (plus charging) |
Very High |
$100-$300 |
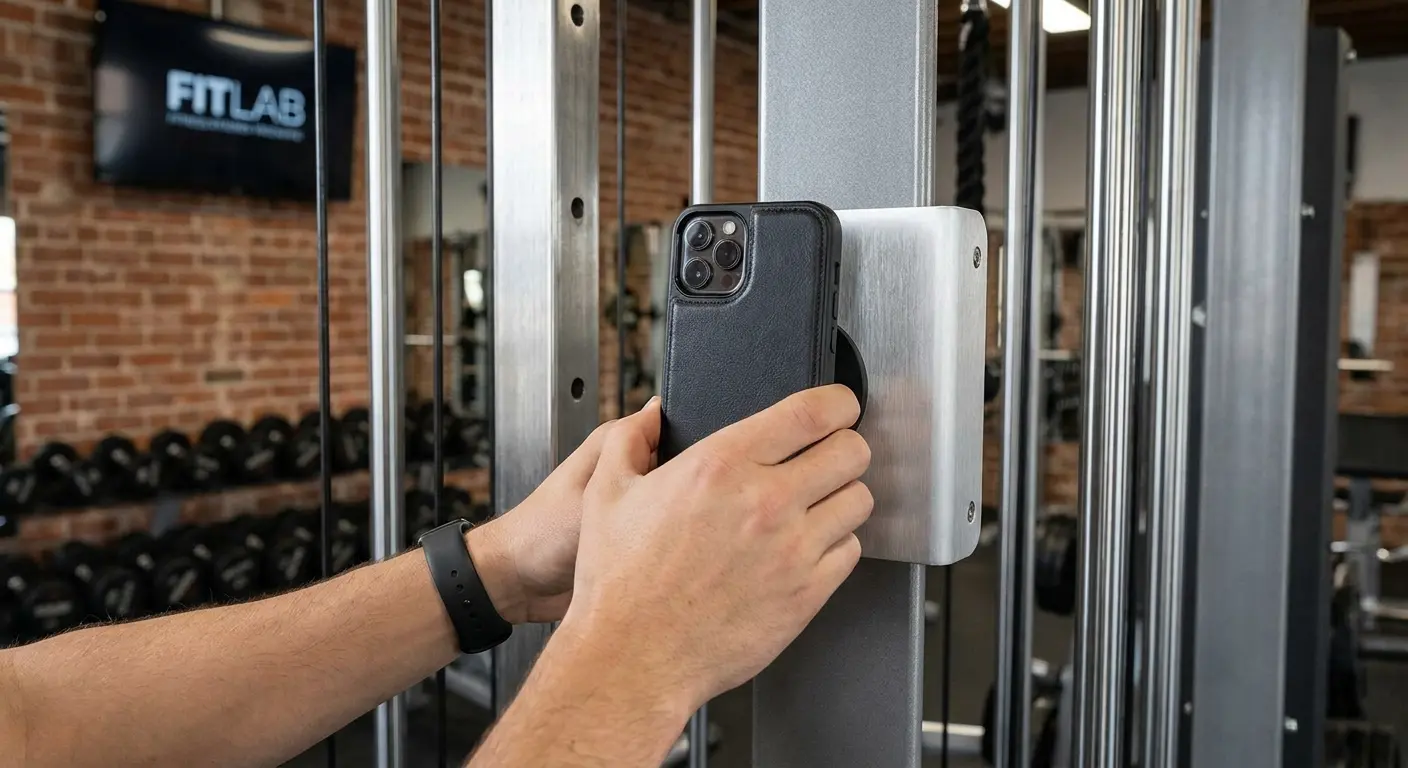
Magnetic Mounting Systems Change Setup Speed
The mounting surface is more important than tripod quality. A cheap magnetic mount on a solid metal pole gives you better stability than a $150 tripod on uneven ground. Metal gym equipment, refrigerators, metal shelving, car hoods, even metal door frames become instant mounting points.
Repositioning between workout sets takes two seconds instead of collapsing and re-extending tripod legs. This is huge for cooking content when you need overhead then side angle while food is actually cooking. You can't pause a searing steak to fiddle with tripod adjustments.
Handheld Stabilization Without Gimbals
Body mechanics can get you decent stabilization without dropping hundreds on a gimbal. Tuck your elbows into your ribs. Use both hands on your phone. Move from your hips, not your arms. Walk slowly with bent knees to absorb bounce. Hold your breath during static shots to eliminate torso movement from breathing.
Won't match gimbal smoothness but it gets rid of that jittery shake that screams amateur. You know what separates shaky footage from stable? Usually it's not your phone. It's how you're holding the damn thing.
Handheld Stabilization Checklist (Pre-Recording):
Position both hands on phone (one on each side or one supporting bottom)
Tuck elbows firmly against ribcage
Check posture: shoulders back, core engaged
For static shots: take breath, exhale halfway, hold
For walking shots: bend knees slightly, take smaller steps
Move from hips and torso, not arms and wrists
Do a 3-second test recording to check for visible shake
Review test footage before committing to full take
Audio Capture Is Where Most Reels Die Quietly
Bad audio makes people scroll. Period.
Your brain can tolerate shaky footage. It can deal with imperfect lighting. Hell, it can even handle you being slightly out of focus. But muddy, echoey, wind-destroyed audio? That's visceral. You can't ignore it the way you can ignore visual imperfections. It's like nails on a chalkboard. Your brain just nopes out immediately.
Phone mics are omnidirectional and pick up everything equally. Your voice, the refrigerator hum, traffic three blocks away, wind, the neighbor's dog. Everything registers at similar volumes. You end up with this muddy audio soup where your voice competes with background noise instead of standing out from it.
External mics solve this by focusing on your voice and rejecting ambient sound. A lavalier mic clipped six inches from your mouth picks up your voice 15-20 decibels louder than background noise. The proximity creates separation. Your voice becomes the dominant element, background noise drops to barely noticeable levels.
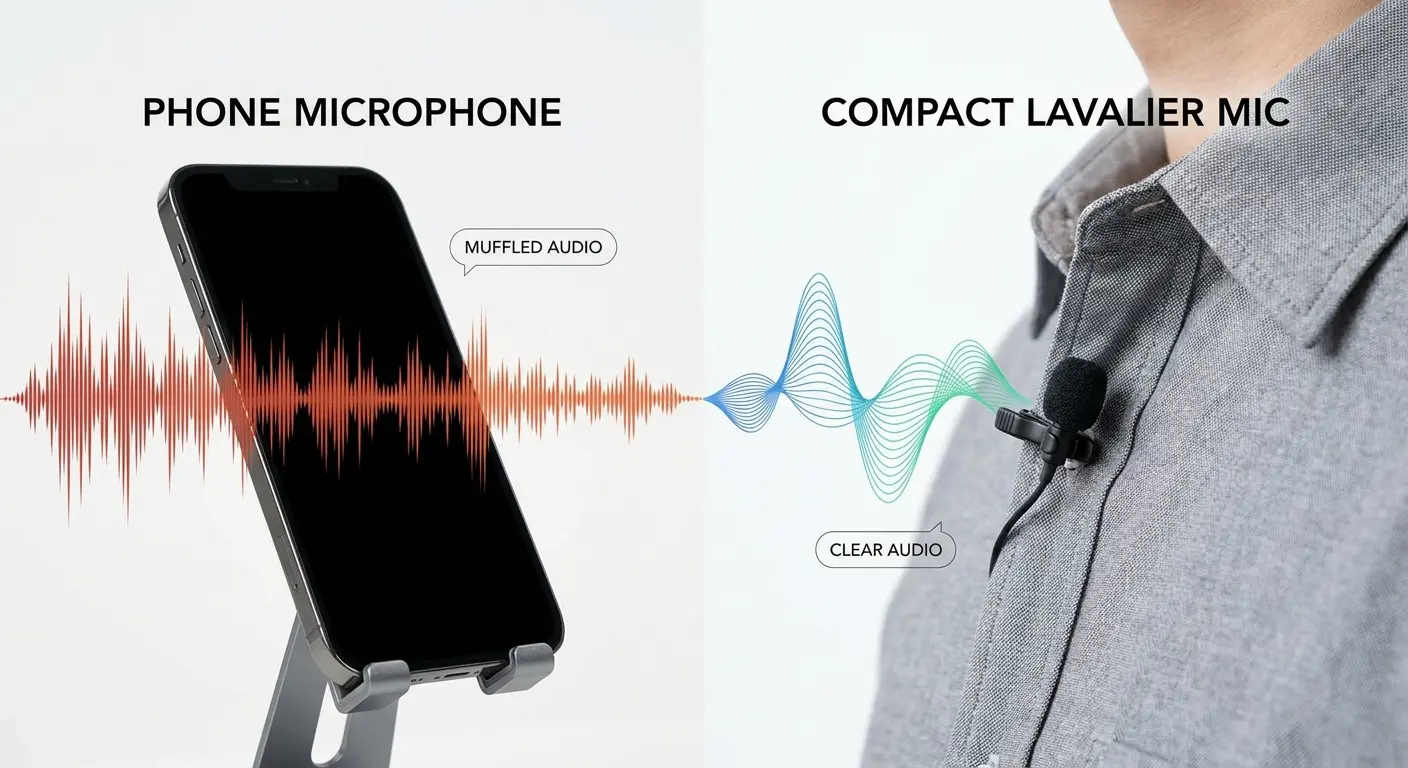
Let me break down your mic options without making this a spec sheet:
Built-in phone mic? Only works if you're in a silent room. So basically never.
Wired lavalier? Twenty bucks, clips to your shirt, makes you sound like you know what you're doing. Works great for stationary content where you're not moving around much.
Wireless lavalier? Same thing but you can move around. Worth it if you're doing workout content or room tours where you need to walk and talk. Runs $100-$250 but the freedom is worth it.
Shotgun mics are overkill unless you're filming outside in wind or at a noisy event. They're highly directional, which is great for interviews or cutting through background noise. $60-$200 range.
Wired earbuds? Honestly, they work in a pinch. Not amazing but better than your phone's mic. If you're just starting out and don't want to buy gear yet, use what you have.
Lavalier Mics for Close-Range Dialogue
Clip it to your shirt, sit it inches from your mouth. The proximity is what makes your voice louder than background noise. Wired lavs are cheap ($20-$50) and work fine for stationary content. Wireless lavs ($100+) give you movement freedom for active shots where you're walking around or demonstrating something physical.
Position it six to eight inches below your chin, not right under your mouth. Directly under your mouth catches breath sounds and plosives. Those hard P and B sounds that pop. Below the chin captures clear voice without the mechanical artifacts.
I know a real estate agent who tried filming property walkthroughs with her phone's built-in mic. House was near a busy street. Every take was ruined by traffic noise bleeding through walls and windows. She switched to a $35 wired lavalier clipped to her collar. Same location, same traffic outside, but the lav's proximity to her mouth meant her voice registered 15-20 decibels louder than the background noise. The traffic became barely noticeable ambient sound instead of the dominant audio element. She went from zero usable takes to completing a five-room walkthrough in one session.
Wind Noise and Room Echo Fixes
Wind destroys outdoor audio unless you use foam windscreens or position yourself so wind hits your back. Foam windscreens break up airflow before it hits the microphone diaphragm. Without a windscreen, face away from wind direction. Your body blocks most of the wind from hitting the mic.
Hard indoor surfaces create echo. Tile, hardwood, bare walls bounce sound around the room. Your voice hits the wall, reflects back, and the mic picks up both the original sound and the delayed reflection. Sounds hollow, like you're filming in a bathroom.
Soft furnishings absorb sound. Carpet, curtains, furniture, even piles of clothes dampen reflections. Film in rooms with these elements for cleaner audio. Stuck in a hard-surfaced room? Hang blankets on walls or place pillows around your filming area. The difference is immediate.
Here's the thing though: you can't fix muddy audio in post. Noise reduction plugins help slightly but can't recreate clarity that wasn't captured. Get it right during filming with proper instagram video audio technique.
Lighting Setups That Work in Real Spaces
Natural light is inconsistent. Clouds roll in, the sun moves, golden hour lasts 30 minutes. You film three takes that look gorgeous, then the sun shifts behind a building and your fourth take is completely different exposure. Batch filming becomes impossible because lighting changes every 20 minutes.
A single adjustable LED panel gives you consistent light whenever you need it. You control brightness, color temperature, and direction. Morning, afternoon, evening, overcast, sunny. Doesn't matter. Your lighting stays identical across all takes.
I know, I know. Another thing to buy. But hear me out. This is one of those purchases that actually saves you time and frustration. You'll use it constantly.
The 45-Degree Rule and Diffusion
Position your light source at a 45-degree angle. Above and to the side of your face. This creates subtle shadows that define your features. Flat, front-facing light washes out your face and eliminates dimension. You end up looking two-dimensional.
The 45-degree angle creates gentle shadows under your cheekbones, nose, and chin. These shadows add depth and make your face more visually interesting.
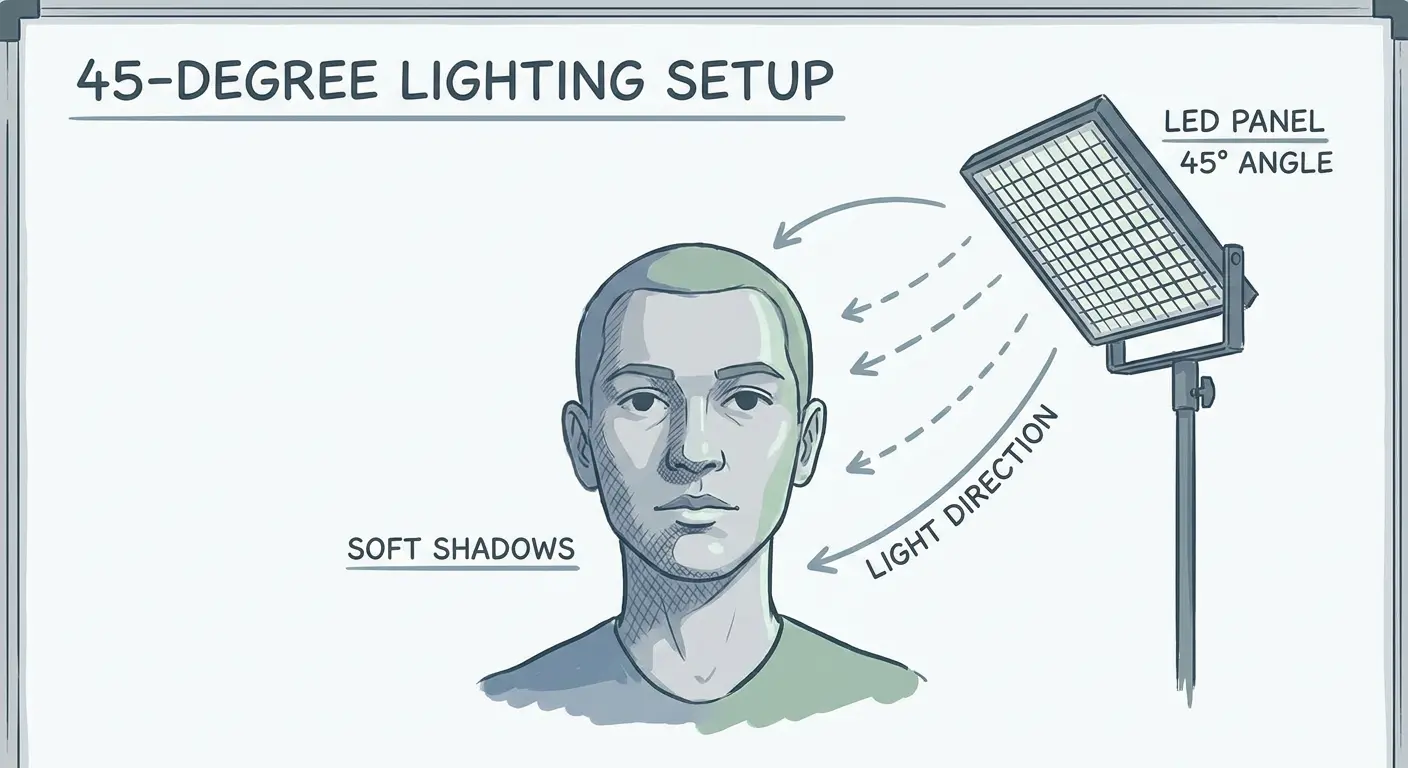
Diffusion material between your light source and your face spreads the light and softens it. White fabric, parchment paper, whatever. Hard light creates harsh shadows with sharp edges. Diffused light creates soft shadows with gradual transitions. Buy diffusion panels or tape a white bedsheet over your window. Both work.
Most creators overlight. They blast their face with so much light that details wash out and skin looks unnaturally bright. Aim for enough light to expose your face clearly without washing out details. Your eyes should have visible catch lights (reflections of the light source) but your skin shouldn't look blown out.
Adjustable LED Panels for Consistency
A single LED panel that adjusts brightness and color temperature solves most lighting problems. Panels in the $50-$150 range are portable, battery-powered, bright enough for most reels video content. You don't need a full three-point lighting setup. One well-positioned light beats three poorly positioned lights.
Color temperature is important. 5000-5500K looks like daylight. 3200K looks like indoor tungsten bulbs. Match your LED panel to your ambient light or intentionally choose warmer (3200-4000K) for cozy feel or cooler (5500-6500K) for energetic feel.
A product reviewer I know films unboxing videos in her home office. Morning recordings looked warm and well-lit from the east-facing window. Afternoon recordings in the same spot looked harsh and washed out when direct sun hit. Evening recordings were too dim and required her to crank up ISO, introducing grain.
She added a single $89 LED panel with adjustable color temperature. Now she dials in 5000K at 60% brightness for morning consistency, 5500K at 80% for afternoon to counter the harsh sun, and 4500K at 100% for evening shoots. Her lighting looks identical across all time slots. Viewers can't tell which videos were filmed when.
Understanding how to make a reel on instagram with consistent lighting transforms your production quality overnight.
The Angle Math That Makes or Breaks Vertical Video
Horizontal framing doesn't translate to vertical. You can't just rotate your camera 90 degrees and expect the same composition to work. Vertical video demands tighter framing because you have less horizontal space. Background becomes less important, subject focus becomes critical.
Camera slightly above eye level is universally flattering. It slims your face, defines your jawline, and makes your eyes appear larger. Six to twelve inches above eye line is the sweet spot. Higher than that and you start looking down at the camera awkwardly.
Slightly below eye level gives you an imposing or energetic feel. Six to twelve inches below makes you look powerful or dynamic. Works well for motivational content, workout demonstrations, or any content where you want to project confidence and energy.
Eye-level is neutral and conversational. Use it for casual, friendly content where you want to feel approachable rather than authoritative.
Rule of Thirds in Vertical Framing
Place your eyes in the top third of frame, not center. Centered framing feels static and leaves no room for text overlays or visual interest. Your head fills the entire frame with no breathing room.
Offset framing (subject slightly to one side, eyes in top third) feels dynamic and leaves room for text overlays, graphics , or just visual space that makes the composition more interesting. The negative space balances the frame instead of making everything feel cramped.
Leave about 10% of frame height as headroom. Too much headroom and you look small in the frame. Too little and your head feels crammed against the top edge. Ten percent creates comfortable spacing.
Test your framing before filming full takes. Record three seconds, review it, adjust if needed. Fixing framing takes five seconds now or forces you to reshoot later when you realize your eyes are centered instead of in the top third. Those five seconds save ten minutes of reshooting.
Vertical Framing Setup Template:
Before You Hit Record:
Camera height: [Eye level / 6-12" above / 6-12" below] (circle one based on content type)
Subject position: Eyes in top third of frame? [Yes / No]
Headroom check: Approximately 10% of frame height above head? [Yes / No]
Horizontal position: [Centered / Offset left / Offset right]
Background check: Distracting elements visible? [Yes / No] (adjust if yes)
Test recording duration: 5 seconds minimum
Review checklist: Framing correct? Stable? Good composition? [Yes / No]
If No to any review item: Adjust and retest before filming full content
Shooting in Segments vs. Single Takes
Single takes feel authentic but require nailing everything in one go. Mess up a word at the 40-second mark of a 60-second reel maker video? Start over. The spontaneity is real, but so is the pressure. Works brilliantly for reactive content, spontaneous moments, or when you're capturing something that can't be recreated.
Segment shooting gives you flexibility. Redo sections without reshooting the entire Reel, adjust pacing in post, cut out mistakes. Film your hook, then your three main points as separate clips, then your call-to-action. Each segment can be perfect without requiring the entire sequence to be flawless in one continuous take.
Use single takes for spontaneous content where the rawness adds authenticity. Use segments for educational content, tutorials, or scripted pieces where precision is more important than spontaneity.
Here's what I do: mix both within the same Reel. Single-take intro feels genuine and hooks viewers, segmented body delivers your points cleanly, single-take outro brings back that personal connection. The variety in pacing keeps viewers engaged.
For creators who film on the move, whether commuting or traveling, understanding the best car phone mounts can keep your segmented shooting stable across different recording locations throughout your day.
Transition Techniques That Hide Cuts
Jump cuts work if they're intentional. Quick, obvious cuts create energy and pace. Viewers expect them in how to make reels content. Don't try to hide them unless you're going for seamless flow.
Cutting on action (mid-gesture or mid-movement) feels more seamless than cutting on stillness. If you're pointing at something, cut as your hand moves into frame. The motion distracts from the cut. If you're turning your head, cut mid-turn. Movement masks the edit.
Whip pans between segments create dynamic transitions. Point camera at subject, quickly pan to wall or floor (creating motion blur), cut during blur, pan from wall or floor to next subject. The blur hides the cut completely.
Use objects passing in front of camera to mask cuts. Walk past camera, cut while you're blocking the lens, continue walking in next clip. Hand wipe transitions work the same way. Wave hand across lens, cut during the motion, continue motion in next clip.
The Gear You're Holding Wrong
How you physically hold your phone affects stability and whether you'll drop it mid-shot. Most people grip their phone with one hand on the side, which is unstable. Your hand gets tired, the phone wobbles, and you're one unexpected sneeze away from dropping your device.
Two-handed grips distribute weight and reduce shake. Your arms can stay tucked into your body, which further stabilizes the shot. The phone becomes an extension of your stable core rather than a wobbly appendage.
Phone cases with built-in grips or finger loops give you more control. You have something to hold onto beyond the smooth, slippery edges of modern phones. Cases with mounting points let you quickly switch between handheld and mounted shooting without removing the case or fumbling with adapters.
You know what separates shaky footage from stable? Usually it's not which device you're holding. It's how you're holding the damn thing. A $300 phone held properly beats a $1200 phone held poorly.
Two-Handed Grips for Stability
Hold your phone with both hands, one on each side, thumbs on back for support. This distributes weight evenly and keeps the phone steady. Your elbows can stay tucked into your body, creating a stable triangle between your hands and torso.
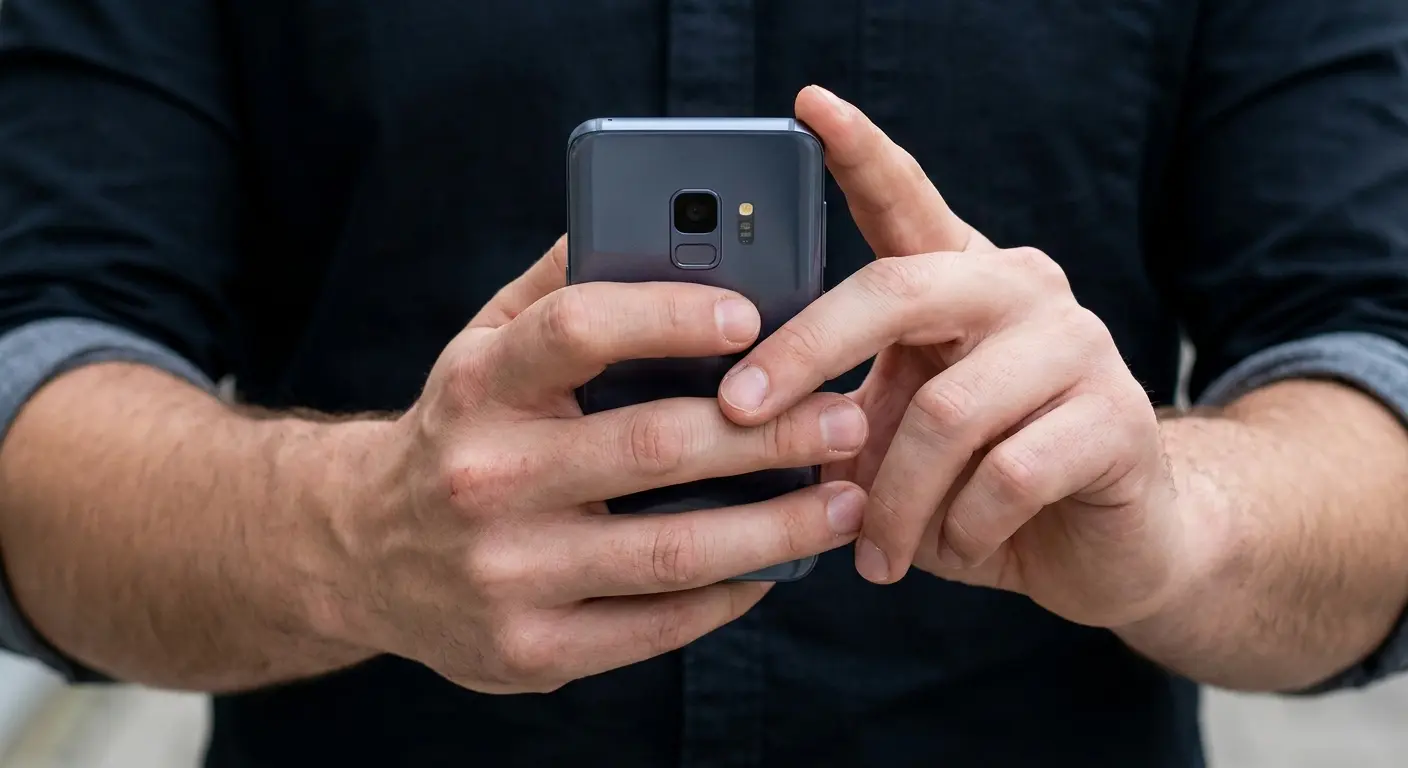
Another option is holding your phone with one hand on bottom (supporting weight) and other on side (controlling angle). Bottom hand carries the load, side hand steers. Works well for lower angles or when you need to adjust framing quickly.
Both approaches are more stable than single-handed grip. Test both, see which feels more natural for your hand size and shooting style. Mastering how to make reels on instagram starts with this fundamental grip technique.
Cases with Grips and Mounting Points
Phone cases with built-in finger loops or grip rings give you something to hold onto. Your finger slides through the loop, phone can't fall even if you lose grip. Reduces tension in your hand because you're not white-knuckling the device.
Cases with mounting points (like Rokform's twist-lock system) let you quickly switch between handheld and mounted shooting. Twist, it locks, you film. Need handheld for next shot? Twist, it releases, you're holding it. This speed is huge when filming in multiple locations or switching between mounted and handheld within the same session.
The mounting compatibility also means you're not buying separate cases for different mounting systems. One case works with magnetic mounts, bike mounts, car mounts, whatever your shooting scenario requires. That versatility compounds the time savings across all your instagram reels editing sessions.
Batch Filming Without Looking Like You Batch Filmed
Batch filming saves time but viewers can tell if every Reel has the same background, lighting, and outfit. The efficiency is obvious. Five Reels with identical backgrounds, same shirt, same lighting setup scream "I filmed all of these in one sitting."
The solution is planning variety into your batch session. You're still filming multiple Reels in one session, but you're building in changes that create the illusion of separate filming days.
Film in different locations within the same space. One Reel in front of blank wall, another in front of bookshelf, another in kitchen. All within your home but they read as different settings to viewers. The background change signals different context even though you filmed everything in 90 minutes.
Location and Outfit Variety
Changing your shirt creates the illusion of different filming sessions. You don't need a full wardrobe change. Swap your blue shirt for gray shirt between Reels three and four. Viewers subconsciously register the change as temporal distance.
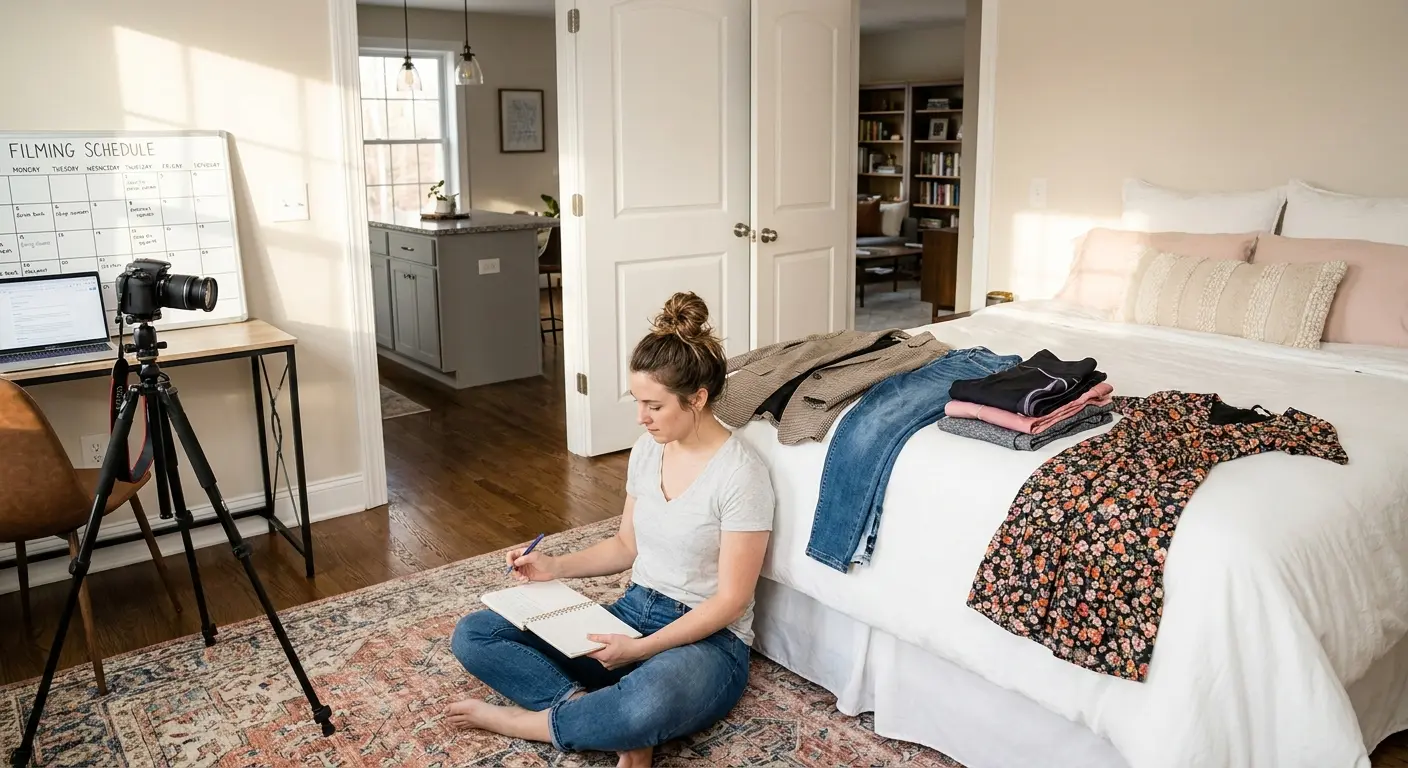
Film one how to create a reel video in front of blank wall, another in front of bookshelf, another in kitchen. Move a plant into frame for one, remove it for next. These small environmental changes prevent the assembly-line feel.
Batch three Reels, change shirt, batch three more. Takes two minutes to change clothes but adds days of perceived time between posts when you release them.
Lighting and Delivery Style Variations
Move your camera slightly left or right between setups. Change light position from 45 degrees to straight-on for different mood. Vary your tone and energy. Be upbeat and fast-paced for one, calm and measured for another.
Stand for one Reel, sit for another. Face camera straight-on for one, angle yourself 15 degrees for another. These variations in your physical presence and delivery create distinction between pieces even when filmed back-to-back.
The goal isn't to trick viewers. It's to avoid the monotony that comes from identical setups repeated five times. Variety maintains interest and prevents your content from blending together in viewers' minds.
Editing on Mobile vs. Desktop (The Hybrid Approach)
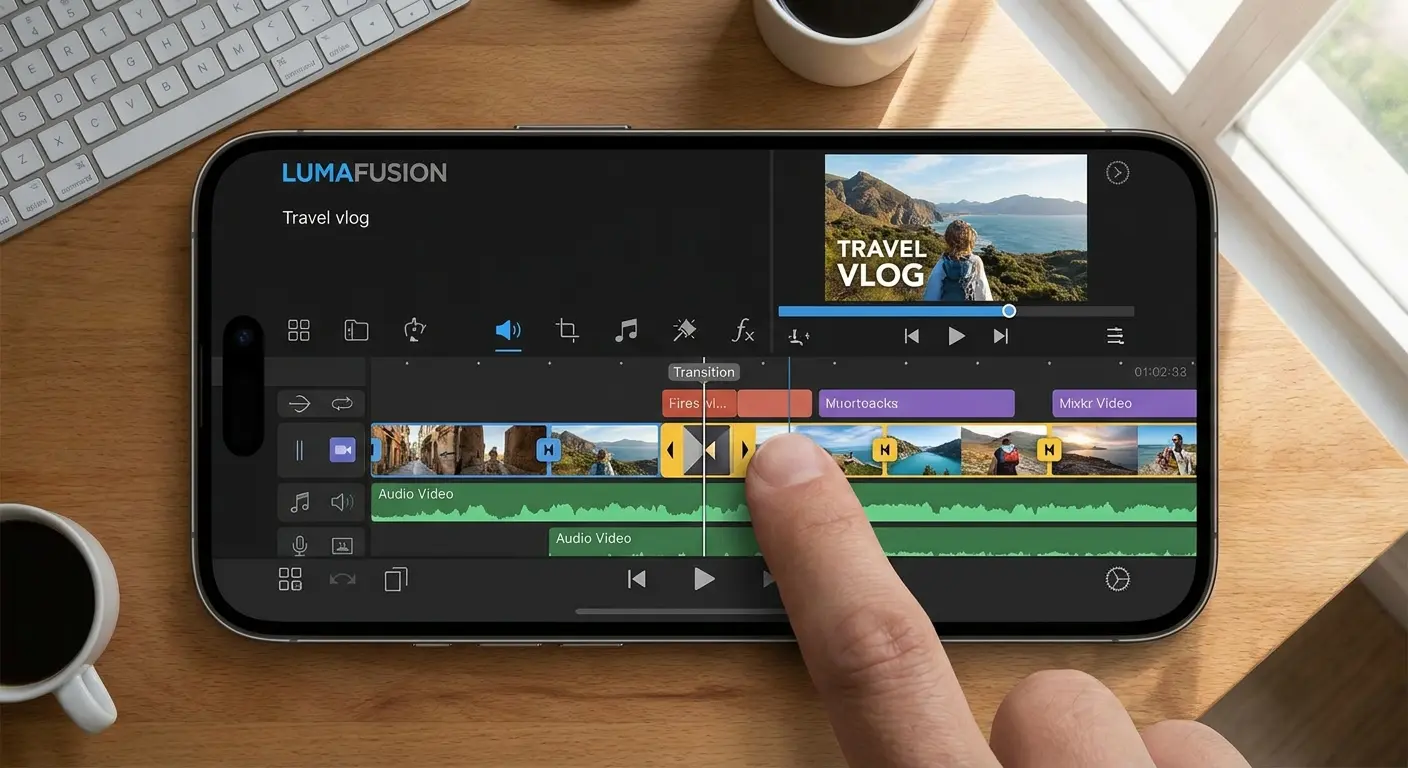
Mobile editing is fast and accessible but limited by small screens and processing power. You're editing on a 6-inch display, which makes precise cuts difficult. Scrubbing through timeline is less accurate. Color grading on phone screen doesn't translate to how it looks on desktop or TV.
Desktop editing gives you bigger screen, more powerful software, better control over color grading and audio. You can see your entire timeline, make frame-accurate cuts, and process effects that would choke a phone processor.
The hybrid approach is doing rough cuts on mobile then finishing on desktop. This splits the workflow based on what each platform does best. Mobile for speed and convenience, desktop for precision and quality.
The Hybrid Workflow
Film on phone. Footage is already there. Import to mobile editing app (CapCut, InShot, whatever you prefer). Do rough cut: trim clips, arrange order, add basic text. Takes 10-15 minutes. You can do this on your couch, in bed, wherever.
Transfer project to desktop. Most editing apps let you export project files or at least export a high-quality version you can refine. Fine-tune cuts, adjust color and exposure, clean up audio, add more sophisticated effects if needed. Takes another 15-20 minutes.
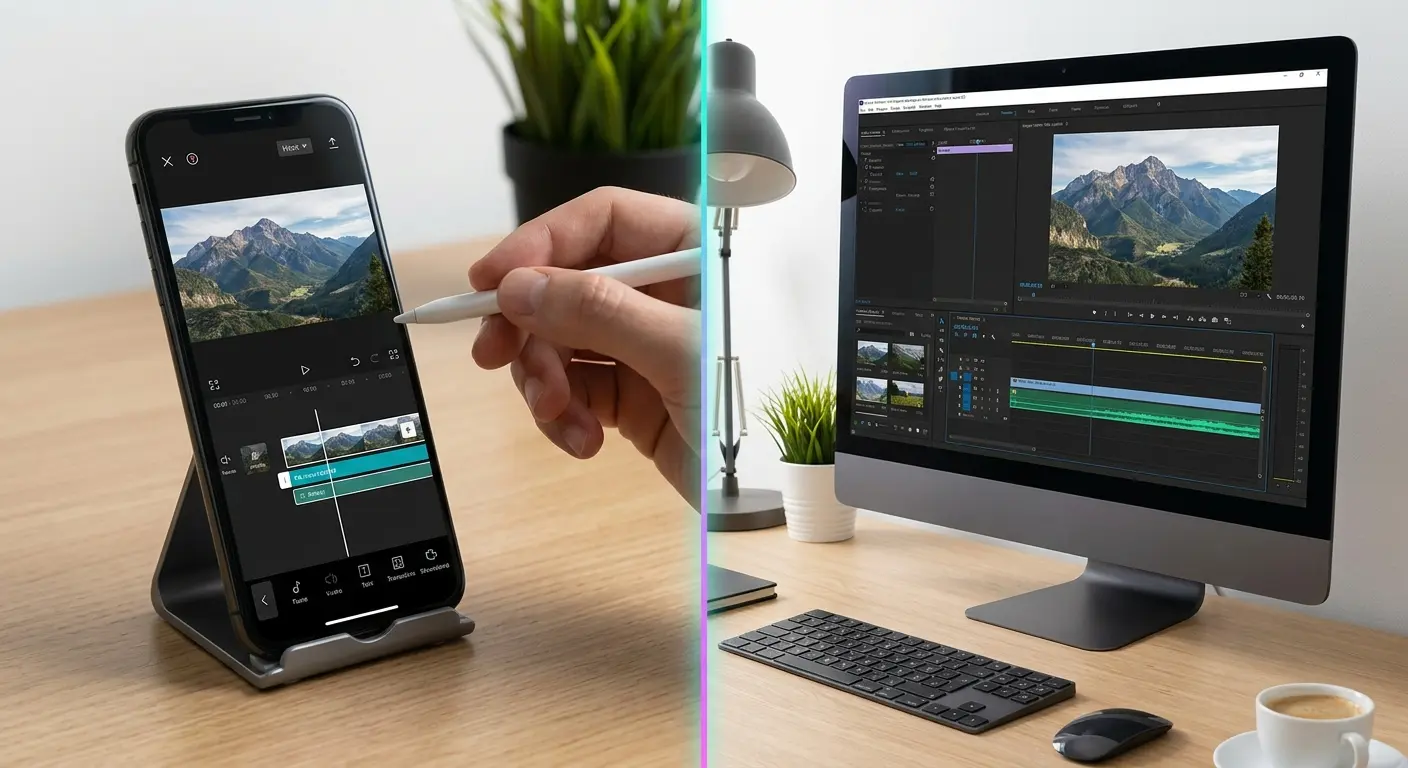
Total editing time is similar to doing everything on one platform, but you get mobile convenience for rough work and desktop precision for finishing. The workflow matches the task to the tool instead of forcing one tool to do everything.
This approach works especially well for instagram reels video content where you need quick turnaround but don't want to sacrifice quality. Rough cut on phone during lunch break, finish on desktop that evening.
Export Settings That Preserve Quality
Instagram compresses every video. That compression is non-negotiable. What you control is how much quality you preserve before Instagram's compression kicks in. Exporting at wrong resolution or bitrate means you're starting with degraded footage, then Instagram degrades it further.
Film and export at 1080x1920. That's Instagram's native resolution for Reels. Filming at 4K then downscaling can improve quality slightly (downsampling reduces noise), but the difference is marginal. Filming at 1080p and exporting at 1080p is simpler and gives nearly identical results.
Use bitrate of at least 10 Mbps. Instagram recommends minimum 5 Mbps for 1080p, but that's bare minimum. Exporting at 10-15 Mbps gives better results after Instagram's compression. You're giving the algorithm more data to work with, so the compressed result retains more detail.
Resolution, Bitrate, and Codec
Reels are displayed at 1080x1920 pixels (9:16 aspect ratio). Export at this exact resolution. Don't export at 720p and hope Instagram upscales well. Don't export at 4K and hope Instagram downscales well. Match the native resolution.
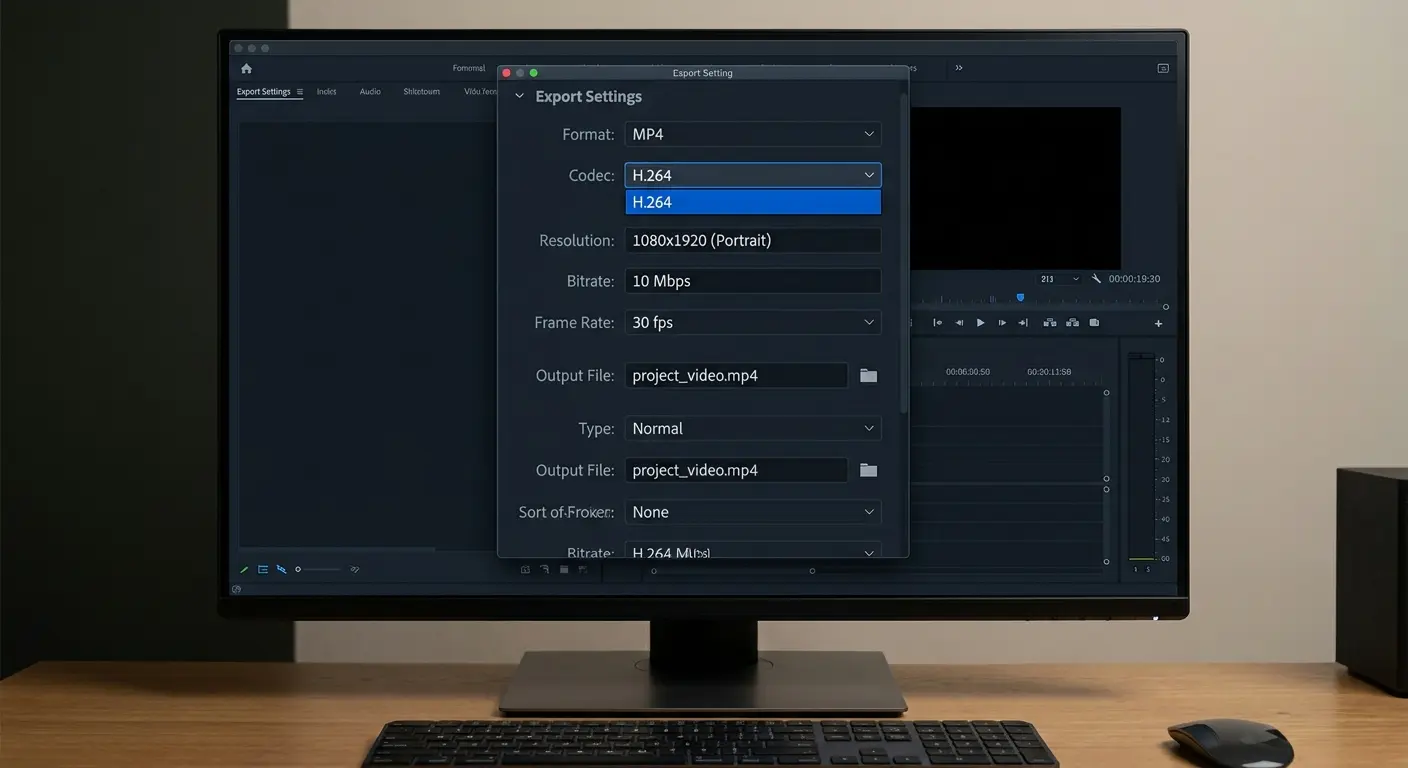
H.264 is the most compatible codec. Instagram prefers it. H.265 (HEVC) offers better compression but can cause compatibility issues. Stick with H.264 unless you have a specific reason to use something else.
Frame rate should match what you filmed. If you filmed at 30fps, export at 30fps. If you filmed at 60fps, export at 60fps (though Instagram will display at 30fps, filming at 60 gives you slow-motion options).
Avoid over-sharpening or over-saturating during export. Instagram's compression exaggerates these adjustments. What looks slightly sharpened on your screen becomes artificially crisp after compression. What looks vibrant becomes oversaturated. Keep adjustments subtle.
Preview your exported file before uploading. Watch it on your phone. Check for compression artifacts, color shifts, or audio sync issues. Catching problems now saves you from posting degraded content.
You've spent time setting up shots and editing footage. The last thing you want is your phone slipping off a mount mid-take. Rokform's magnetic mounting system solves the friction problem. Their cases lock onto mounts in seconds. Check out their RokLock system if you're tired of gear that slows you down.
Final Thoughts
Here's the thing about making Reels that nobody wants to admit: the workflow that works for the influencer with a ring light studio and a video editor probably won't work for you.
You need to figure out where YOUR process falls apart. Is it shaky footage? Audio that sounds like garbage? Lighting that changes every 20 minutes? Fix those specific things. Don't try to copy someone else's entire setup.
Most advice focuses on strategy. What to say, how to hook people, which trends to jump on. That stuff is important, but it assumes your production quality isn't making people scroll. If I can't hear you or your footage is giving me motion sickness, your clever hook doesn't matter.
Start with the mechanics. Get your setup dialed in so filming becomes the easy part. Once the technical barriers are gone, you can focus on the creative decisions that make people stop scrolling. Master how to make reels on instagram from a technical standpoint first, then layer in the creative elements.
The creators who consistently produce quality reels video content aren't necessarily more creative or more strategic. They've just eliminated the friction points that slow everyone else down. Their mounts attach faster. Their audio is clean on first take. Their lighting doesn't change halfway through a batch session. These small efficiencies compound.
I spent three months using a $150 tripod before I realized I was spending more time setting it up than actually filming. Felt like an idiot when I discovered magnetic mounts. Ten seconds. That's all it takes now.
Fix your stabilization. Get your audio right. Control your lighting. Frame for vertical properly. Choose segment or single-take based on content type. Hold your phone correctly. Plan variety into batch sessions. Use the right editing workflow. Export at proper settings.
None of this is complicated. It's just specific. The difference between struggling to produce one reel creator video per week and comfortably producing five isn't talent or time. It's eliminating the small technical problems that make filming feel harder than it needs to be.
Your situation might be different. Maybe you've got the audio figured out but your lighting is inconsistent. Maybe your framing is perfect but you're still fighting with shaky footage. Start with whatever's holding you back right now. Fix that one thing. Then move to the next.
Is this the "right" way? Who knows. But it works. And honestly, that's what counts when you're trying to batch three Reels between meetings and picking up the kids.

