


Every YouTube Shorts guide says the same thing: use trending sounds, edit fast, hack the algorithm. Fine. But they're all ignoring the actual problem.
Your content looks like crap because of how you're physically holding and recording it. Not your editing. Not your hooks. Your actual setup. Nobody wants to hear about tripods and stability. But here's the thing: shaky footage will kill your video before anyone even hears what you're saying.
I ignored this for months. Kept thinking I could fix shaky footage in post, or that my content was good enough that people wouldn't notice. They noticed. My retention sucked until I finally dealt with the boring stuff: how I was actually holding and mounting my phone.
Everyone tells you to worry about equipment last. That's backwards. I did it backwards for months and my Shorts looked like I filmed them during an earthquake. Your mounting system, audio capture, and lighting setup create the baseline quality that everything else builds on. Without that foundation, you're trying to compensate for technical problems with creative brilliance, which is exhausting and usually unsuccessful.
Table of Contents
The Overlooked Foundation: Why Your Physical Recording Setup Defines Your Shorts Success
Mounting Solutions That Free Your Hands Without Sacrificing Frame Control
Audio Capture Strategies for Shorts (Because Built-In Mics Won't Cut It)
Lighting Configurations That Work in Real Environments, Not Just Studios
Framing Techniques That Account for Vertical Format Psychology
The First Three Seconds: Structuring Your Hook Around Viewer Scroll Behavior
Editing Rhythm That Matches How People Actually Consume Vertical Video
Text Overlay Placement and Timing (Not Just What You Say, But Where It Appears)
Thumbnail Strategy for Shorts (Yes, They Still Matter)
Publishing Cadence and the Batch Recording Method
When to Prioritize Equipment Upgrades vs. Content Volume
Solving the Stability Problem While Shooting on the Move
TL;DR
Your phone needs to be mounted, not hand-held. Get a cheap external mic because your phone's mic makes you sound like you're in a tunnel. Point a light at your face (a window works).
Frame yourself way tighter than feels natural. Hook people in the first second, not three seconds, ONE second, or they're gone. Edit faster than you think you should, cutting out every breath and pause.
Batch record 5-10 Shorts in one sitting so you're not setting up equipment every day. Only upgrade equipment when you can name the specific problem it solves. And if you're shooting in different locations, get a magnetic mount system (I use Rokform) so you're not fumbling with clamps.
The Overlooked Foundation: Why Your Physical Recording Setup Defines Your Shorts Success
Most creators obsess over hooks and trends while their footage looks shaky as hell. Here's why that happens.
If you're hand-holding your phone, your framing shifts between every take. You don't notice while you're recording. It's obvious when you watch it back. People can't explain why your video feels off. They just know something's wrong, and they scroll.
Stability isn't just about avoiding blur. It's about creating a repeatable setup that lets you focus on performance instead of fumbling with your device between takes. When your phone is mounted securely, you can review footage immediately, adjust positioning without losing your frame, and maintain the same shot composition across an entire batch recording session.
The best script in the world won't save footage that looks unstable or inconsistently framed. I learned this after making about 30 Shorts that all had slightly different angles because I kept repositioning my hand between takes.
Here's what actually changes when you fix your setup (I tracked this over 50 Shorts):
Setup Element |
Impact on Production |
Time Saved Per Session |
Quality Improvement |
|---|---|---|---|
Secure mounting system |
Eliminates frame drift between takes |
15-20 minutes |
Consistent framing across all Shorts |
External audio capture |
Reduces post-production noise cleanup |
10-15 minutes |
Professional sound quality |
Controlled lighting |
Minimizes color correction needs |
5-10 minutes |
Consistent skin tones and exposure |
Batch recording workflow |
Reduces setup/teardown cycles |
30-45 minutes |
Visual coherence across content |
That 'time saved' column is real. I used to spend 45 minutes setting up for each recording session. Now it takes 5 minutes because everything stays consistent.
Why Hand-Holding Your Phone Limits Your Content Quality
Try this: hold your phone at arm's length for 30 seconds while talking naturally. Can't do it, right? Your arm starts shaking. You become hyper-aware of holding the phone instead of what you're actually saying. Now imagine doing that for 10 takes.
Your arm gets tired, the angle shifts slightly between takes, and you're constantly aware of holding the device instead of focusing on what you're saying. This creates a feedback loop where your attention splits between content delivery and device management.
The shake isn't always obvious blur. It's this low-level instability that makes people uncomfortable. They don't know why your video feels wrong. They just scroll away.
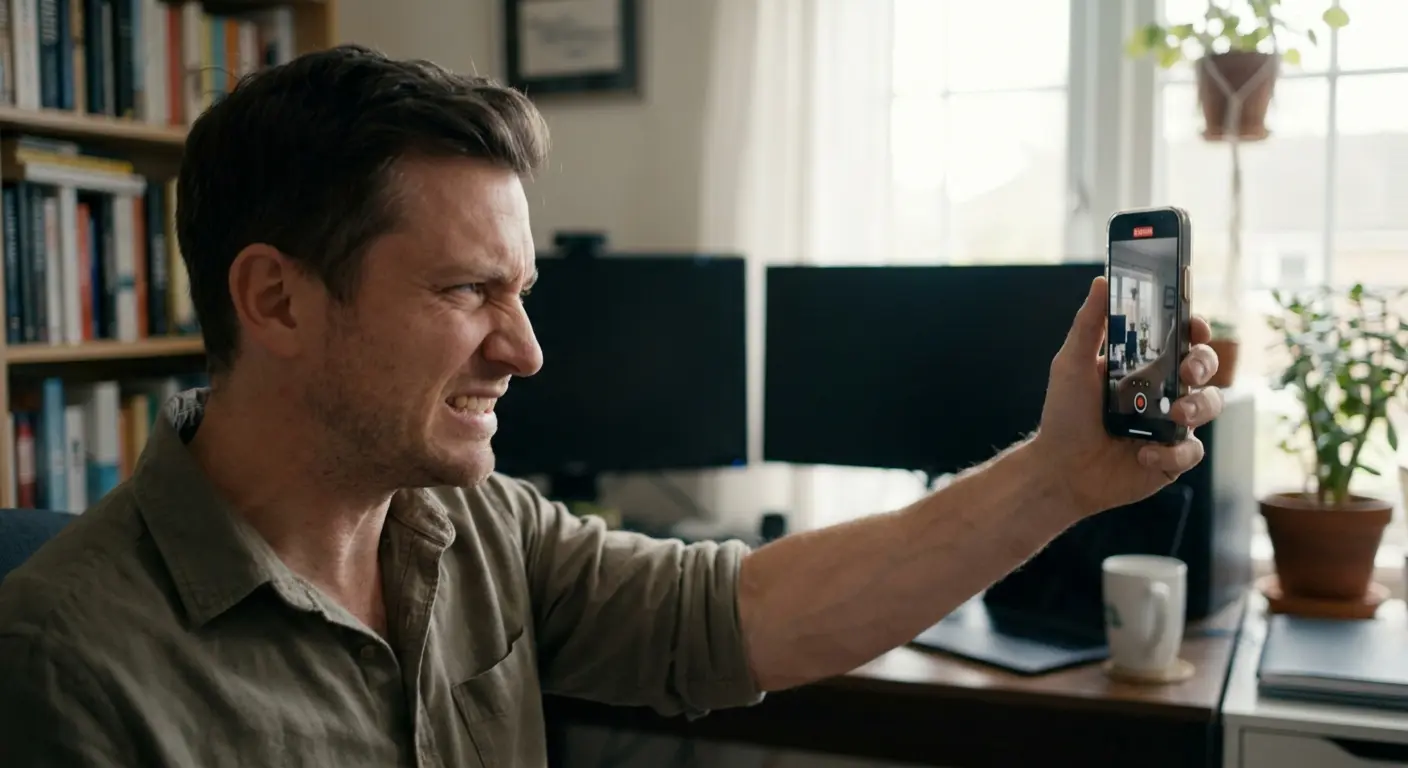
My friend does fitness Shorts. He was holding his phone in one hand while demonstrating exercises. You could see his arm shaking, not from the workout, from holding the damn phone. Looked ridiculous. He finally got a cheap tripod and his retention doubled.
Between sets, he needs to check his form, review the previous take, and maintain the same camera angle for the next exercise. Hand-holding forced him to either guess at the framing or waste time repositioning.
With a mounted setup, he can step into the exact same frame position for each exercise, creating visual consistency that makes his multi-exercise Shorts feel professionally produced rather than cobbled together. Consistency matters more in short videos than traditional YouTube videos. Viewers might binge ten of your Shorts in a row, and if each one has a different angle or framing style because you're hand-holding, it creates visual chaos that undermines your brand recognition.
Mounting Systems That Actually Make Sense for Vertical Content
Most tripods are built for horizontal video. They're annoying for Shorts. You need something that stays vertical, adjusts quickly, and doesn't weigh ten pounds when you're moving between locations.
Magnetic mounting systems solve the accessibility problem. You can attach and detach your phone in seconds, which matters when you're doing multiple takes or switching between different shot setups throughout a recording session. Desk mounts work well for talking-head content but limit your ability to shoot B-roll or demonstrate physical products.
You need flexibility to move your setup without disassembling everything. This is where you need to think beyond traditional video production tools and consider solutions built specifically for mobile content creation. Reducing friction in your production process means you can focus on creating rather than configuring equipment.
Mounting Solutions That Free Your Hands Without Sacrificing Frame Control
The right mounting solution isn't about buying the most expensive gear. It's about matching your mounting system to your specific shooting scenarios. Talking-head Shorts require different setups than product demonstrations, which require different solutions than outdoor action content.
Which mounting approaches work for which content types and why versatility matters more than rigidity? A mounting system should let you switch between setups quickly without tools or complicated adjustments. This flexibility means you can batch-record different Short styles in a single session instead of dedicating separate days to different content types.
I made this checklist after forgetting to lock my phone's orientation and recording an entire session sideways. Learn from my stupidity:
Pre-Recording Setup Checklist:
☐ Phone charged to at least 80% battery
☐ Mounting system positioned at correct height for content type
☐ Vertical orientation locked and confirmed
☐ Test attachment/detachment cycle for quick reviews
☐ Backup mounting surface or tripod accessible
☐ Quick-release mechanism functioning smoothly
☐ Camera app settings configured (resolution, frame rate)
☐ Adequate clearance for any planned movement or gestures
Magnetic vs. Clamp-Based Systems
Clamp mounts are secure but slow. Every time you want to check your footage, you're unscrewing clamps. Do this 20 times in a recording session and you've wasted 10 minutes just attaching and detaching your phone. It's death by a thousand paper cuts.
Magnetic systems (especially those with strong rare-earth magnets) offer instant attachment and removal. You can pop your phone on and off the mount between takes to review footage without losing your position. This matters more than you'd think when you're trying to maintain creative momentum. Yeah, I was worried about magnets messing with my phone too. Turns out that's mostly BS with quality systems. I've used magnetic mounts for six months and had zero issues.
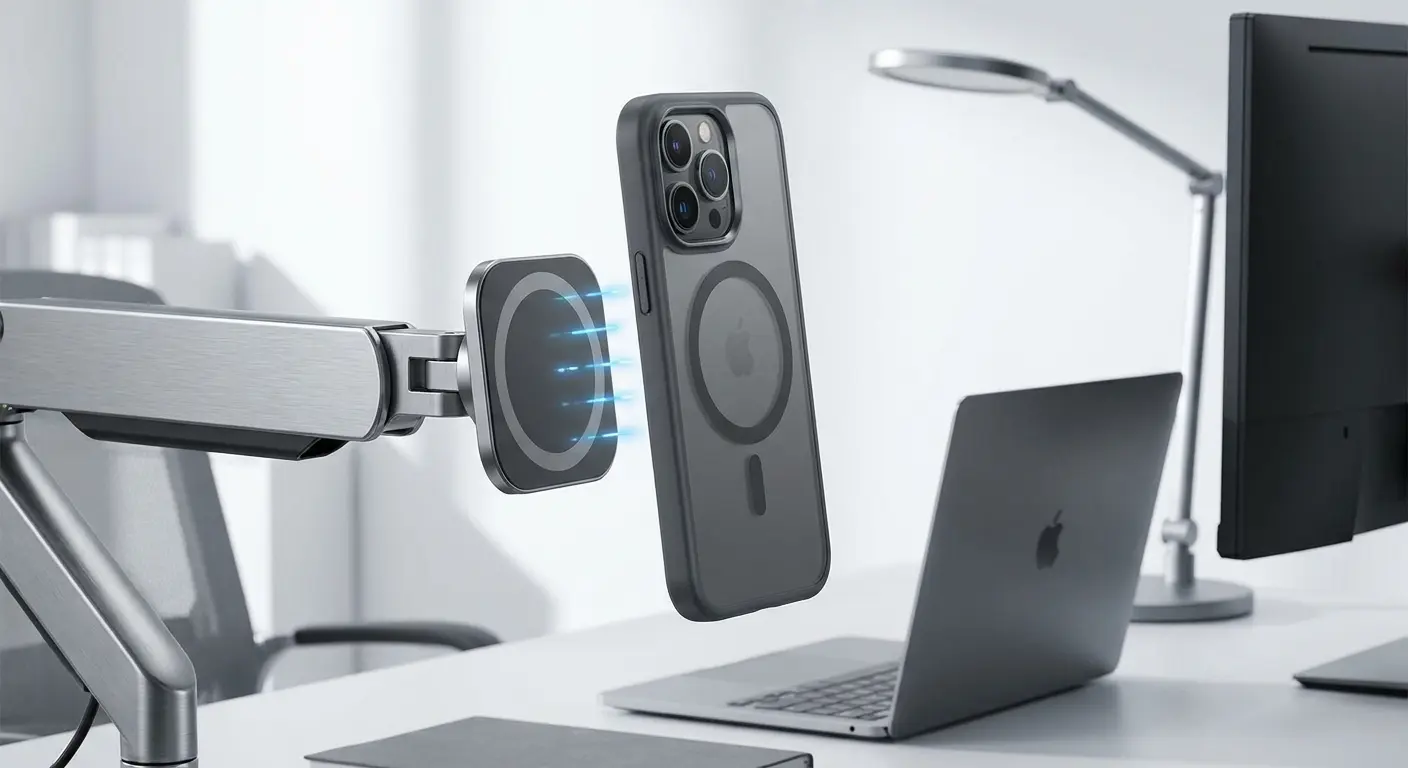
The Rokform Pro Series Mounting System uses precisely engineered magnets that provide secure hold without interfering with your phone's internal components. You get instant attachment and removal, which transforms your workflow when you're shooting multiple takes or reviewing footage between recordings.
Adjustability Requirements for Different Short Formats
Portrait orientation should be your default position, but you need the ability to tilt and rotate for specific shots. Product demonstrations often benefit from slight downward angles, while talking-head content works best at eye level.
Content Type |
Optimal Angle |
Height Position |
Adjustment Frequency |
|---|---|---|---|
Talking-head Shorts |
Eye level or slightly above |
5-6 feet from ground |
Minimal (set once per session) |
Product demonstrations |
15-30 degrees downward |
4-5 feet from ground |
Moderate (per product) |
Cooking/food content |
45-60 degrees downward |
3-4 feet from ground |
High (per cooking step) |
Fitness/movement |
Eye level, wider frame |
4-5 feet from ground |
Low (set for full body capture) |
Unboxing/reviews |
Slight downward angle |
4 feet from ground |
Moderate (per item reveal) |
Height adjustment matters more than most creators realize. Shooting from slightly above eye level is generally more flattering, but you need the flexibility to lower your angle for certain content types without rebuilding your entire setup. Horizontal arm extension lets you achieve different shot widths without moving your entire mounting system. This is particularly useful when you're shooting in tight spaces or need to frame yourself differently for varied content.
Portability Considerations for Location Shooting
Studio setups are great until you need to shoot somewhere else. Your mounting system should break down small enough to fit in a bag without requiring protective cases or complicated reassembly. Weight matters when you're moving between locations. Heavy tripod systems might provide stability, but they discourage you from shooting in diverse environments because the setup hassle isn't worth it.
Quick-release mechanisms let you transition from mounted shooting to handheld B-roll without losing time. This flexibility means you can capture supplementary footage during the same session without planning separate shooting days.
Audio Capture Strategies for Shorts (Because Built-In Mics Won't Cut It)
Your phone's mic is garbage. It picks up everything: your voice, the AC humming, cars outside, your neighbor's dog. Everything gets recorded at basically the same level, so your voice disappears into mud.
People will watch potato-quality video. But bad audio? They're gone immediately. I don't know why this is, but it's true. Audio matters more than video quality and nobody wants to believe it.
External microphones don't just reduce background noise. They provide consistent audio quality across different shooting locations, which matters when you're batch-recording Shorts in various environments. Audio consistency helps maintain your brand identity just as much as visual consistency does. When someone watches multiple shorts video from your channel, they should experience the same audio quality across all of them.
Why Built-In Phone Mics Create Distance in Your Content
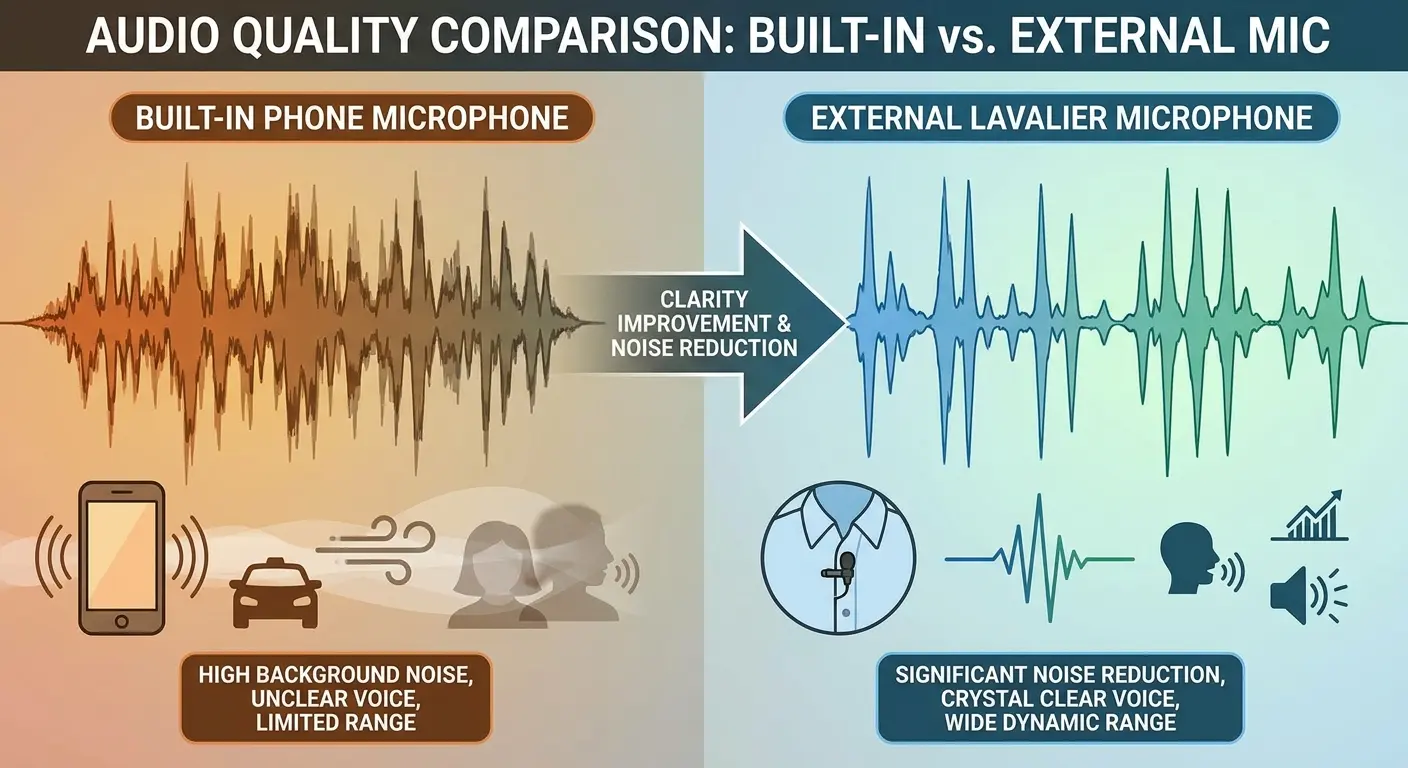
Phone microphones are designed for calls, not content creation. They're optimized for intelligibility at the expense of warmth and presence, which makes your voice sound thin and distant. The physical distance between your phone and your mouth changes constantly when you're shooting Shorts. This creates volume inconsistencies that viewers notice, even if they don't consciously register what's wrong.
Built-in mics can't isolate your voice from ambient sound. Every air conditioner hum, traffic noise, and room echo gets captured at nearly the same level as your speech, creating a muddy audio profile that feels amateurish.
Lavalier Microphones for Talking-Head Shorts
Wired lavaliers provide the cleanest audio but tether you to your phone. This works fine for stationary content but limits your movement and creates cable management issues during shooting. Wireless lavalier systems eliminate the cable problem but introduce potential connectivity issues and battery management. You need to monitor battery levels and ensure stable connection throughout your recording session.
I know a business coach who records in her office. She got a $50 wireless lav mic, clips it to her collar. Now she can walk around, point at her whiteboard, pick up props, all while her voice stays clear even when her AC kicks on. Before the mic, half her takes were unusable because of background noise.
This freedom of movement makes her content feel dynamic while maintaining professional audio quality that built-in mics couldn't match, especially when her air conditioning kicks on mid-recording. Placement matters more than microphone quality. A budget lavalier positioned correctly (about six inches below your chin, clipped to your collar) will outperform an expensive mic placed poorly.
Directional Microphones for Environmental Content
Shotgun-style microphones mount directly to your phone and provide focused audio capture in the direction you're pointing. This works well for Shorts that include environmental context or product demonstrations. Directional mics reduce off-axis noise, which means sounds coming from the sides or behind the microphone are naturally attenuated. This helps isolate your subject without requiring post-production noise reduction.
Wind protection becomes critical for outdoor shooting. Even light wind creates unusable audio with unprotected microphones, so foam or fur windscreens are non-negotiable for location work. Investing in proper windscreens saves hours of audio cleanup later.
Lighting Configurations That Work in Real Environments, Not Just Studios
You don't need Hollywood lighting. You need to understand that light direction matters. Face a window and you look good. Sit with a window behind you and you're a dark silhouette. It's that simple.
Natural light is free and flattering, but it's inconsistent and location-dependent. Artificial lighting gives you control but requires setup time and equipment investment. Hybrid approaches give you flexibility without turning every shoot into a production ordeal.
The key insight? Lighting consistency matters more than lighting perfection. Viewers don't need Hollywood-quality illumination, but they do notice when your face is properly lit in one Short and shadowy in the next. Consistent lighting helps establish your visual brand and makes your content feel more professional across your entire catalog.
Window Light Positioning for Natural-Looking Shorts
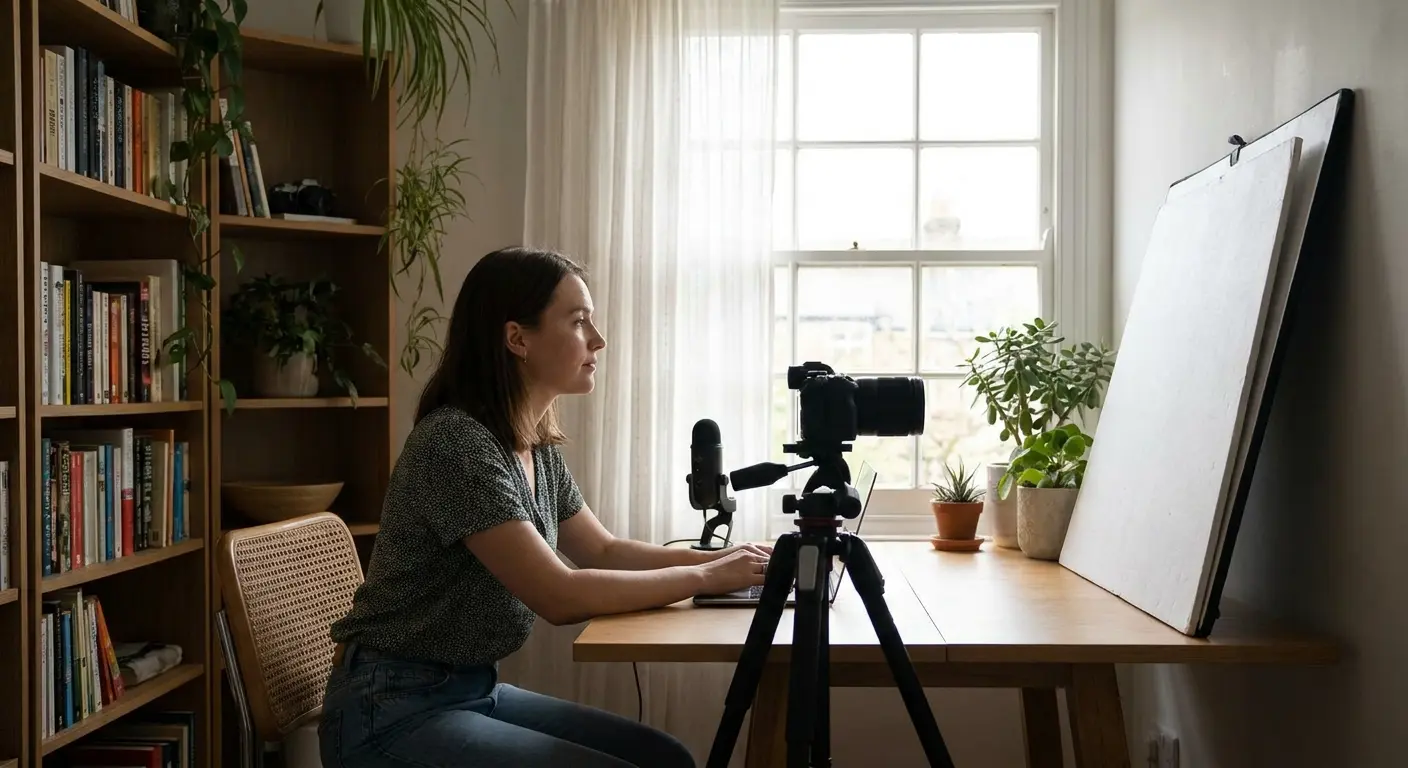
Facing a window provides soft, flattering light that doesn't look artificial. The larger the window, the softer the light, which minimizes harsh shadows and skin texture. Side lighting from windows creates more dimension than direct frontal light. Position yourself at a 45-degree angle to the window for natural-looking illumination that still maintains some shadow detail.
Time of day affects light quality dramatically. Midday sun through windows creates harsh, unflattering light, while morning and late afternoon provide softer illumination that's easier to work with.
Artificial Lighting That Doesn't Scream "Studio Setup"
Ring lights are everywhere now, and honestly? They're a dead giveaway. You can see that circular reflection in people's eyes and it screams 'I'm a content creator!' Sometimes you want to look more natural than that. Panel lights or softboxes provide more natural-looking illumination without the telltale ring reflection.
Color temperature consistency matters more than light intensity. Mixing warm and cool light sources creates color casts that are difficult to correct in post-production, so stick with one color temperature throughout your setup. Dimmable lights give you flexibility to adjust intensity based on ambient conditions.
What works in a dark room will be too bright in a space with significant window light, so adjustability prevents you from needing multiple light fixtures. This is particularly important when you're creating short videos in different locations throughout the day.
Bounce and Fill Techniques Using Everyday Objects
White walls, ceilings, and foam boards can redirect light to fill in shadows without adding more light sources. This costs nothing and creates softer, more natural-looking illumination than adding another direct light.
Reflectors don't need to be professional photography equipment. White poster board, aluminum foil on cardboard, or even a white t-shirt stretched over a frame can bounce light effectively. Positioning your fill source matters as much as the light itself. Place it opposite your main light source to fill in shadows without creating competing light directions that confuse the viewer's eye.
Framing Techniques That Account for Vertical Format Psychology
Vertical video isn't just sideways horizontal video. Your brain processes it differently. Where you look, what feels too close, what feels too far—it all changes.
Traditional composition rules don't translate directly to 9:16 aspect ratios, and ignoring this creates content that feels awkwardly framed even when it's technically correct. Vertical format creates a natural emphasis on faces and vertical subjects while making horizontal elements feel cramped or awkwardly framed. Working with this format preference rather than fighting it helps your content feel native to the platform.
Headroom Adjustments for Vertical Composition
Traditional video composition leaves significant headroom above the subject's head. In vertical format, this creates dead space that makes your subject feel small and distant within the frame. Get closer than feels comfortable. Your face should fill way more of the frame than in regular videos. It feels weird when you're recording. It looks normal when people watch on their phones.
The top and bottom thirds of vertical frames receive less attention than the center. Placing your eyes in the upper third of the frame (rather than the center) creates better balance and keeps your face in the viewer's natural focus area.
Subject Size and Screen Real Estate
Your face should fill more of the frame in Shorts than you'd instinctively choose. What feels uncomfortably close when you're framing the shot looks appropriately sized when viewers watch on their phones. Background elements need to be minimal because vertical format doesn't provide much horizontal space for context. Busy backgrounds create visual competition that distracts from your subject.
Product demonstrations require closer framing than you'd use in horizontal video. The narrow frame means you need to fill it with your subject rather than showing environmental context.
Movement and Stability Within Vertical Frames
Horizontal camera movement (panning) feels disorienting in vertical format because it emphasizes the frame's narrow width. Vertical movement (tilting) feels more natural and less jarring to viewers. Subject movement toward and away from the camera works better than side-to-side movement. The frame's vertical orientation creates a natural depth axis that feels more dynamic than horizontal movement.
Stability becomes more critical in vertical video because the narrow frame amplifies perceived shake. Movement that would be barely noticeable in horizontal video becomes distracting in vertical format.
The First Three Seconds: Structuring Your Hook Around Viewer Scroll Behavior
You're not competing with other videos. You're competing with someone's thumb moving up the screen. That's way harder.
People don't choose to watch your Short. They just... don't scroll past it. There's a difference. The first three seconds need to interrupt automatic scrolling behavior by introducing pattern disruption, unexpected information, or immediate value.
The hook isn't an introduction to your content. It's a pattern interrupt that breaks the scroll momentum long enough for your actual content to register. Understanding this distinction changes how you structure your opening frames.
Here's what needs to happen in your first three seconds. Not five. Not 'within the first few.' Three actual seconds:
First Three Seconds Hook Framework:
Visual interrupt (movement, color contrast, or unexpected element)
Text overlay appears within 0.5 seconds stating the payoff
Audio element (if sound is on) that creates curiosity or surprise
Your face or subject fills the frame immediately (no establishing shots)
Zero preamble, introduction, or context-setting
Immediate value statement or pattern disruption
Caption text synchronized with or slightly ahead of speech
Visual Pattern Interrupts That Stop the Scroll
Unexpected movement in the opening frame catches attention more effectively than static talking-head shots. This doesn't mean random movement—it means intentional motion that creates visual interest immediately. Color contrast against the typical Shorts feed helps your content stand out. Most Shorts use similar color palettes, so intentional color choices that differ from the norm create visual distinction.
Text appearing on screen in the first second provides immediate context and gives viewers a reason to stop scrolling. The text itself matters less than the fact that something is happening visually.
Audio Hooks That Work Without Sound
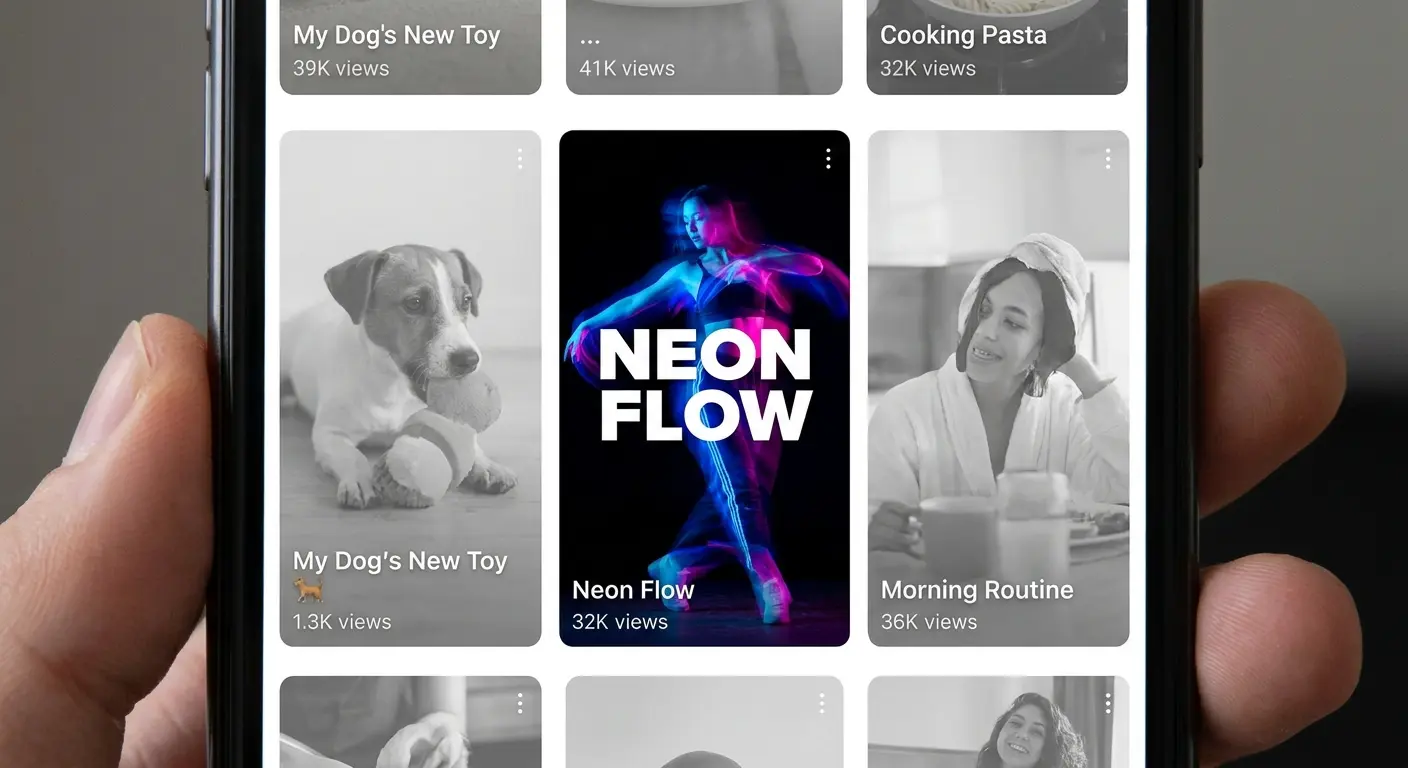
Most viewers watch Shorts with sound off initially. Your hook needs to work silently, which means relying on captions, visual storytelling, or text overlays rather than assuming viewers hear your opening line. Captions should appear immediately, not after you start speaking. The delay between your mouth moving and captions appearing creates disconnect that encourages scrolling.
Visual storytelling in the first frame should communicate your topic without requiring audio. Viewers should understand what your Short is about within one second of seeing it, whether they have sound on or not.
The Problem with Traditional Introductions
Starting with "Hi, I'm..." or "In this video..." wastes your most valuable seconds on information viewers don't care about yet. They need a reason to care before they're interested in who you are. Building up to your point might work in long-form content, but Shorts require inverted structure. Lead with your most interesting information, then provide context afterward for viewers who stuck around.
I saw a Short where the guy just starts bending a phone in half. No intro. No 'hey guys.' Just immediate phone destruction. THAT stopped my scroll. Then he explained which phone it was. If he'd started with 'Today I'm testing the durability of the Samsung...' I would've scrolled before he got to the bend test.
Establishing shots and context-setting waste time in a format where every second counts. Jump directly into your content without preamble or setup.
Editing Rhythm That Matches How People Actually Consume Vertical Video
People watch Shorts way faster than you think. What feels crazy-fast to you while editing feels normal to someone who just watched 30 Shorts in a row. Edit faster than feels comfortable.
Matching your editing rhythm to consumption patterns means cutting more aggressively than feels comfortable and eliminating pauses that would be normal in conversation. Your editing rhythm should reflect the speed at which viewers consume content, not the speed at which you naturally speak or move.
This disconnect between creation pace and consumption pace is why most creators edit too slowly. What feels rushed during editing feels appropriately paced during viewing.
Cut Timing That Maintains Momentum
Every time you pause to breathe, someone scrolls away. Cut out the breaths. Cut out the 'ums.' Cut out those half-second pauses where you're thinking. It feels unnatural when you're editing. It keeps people watching.
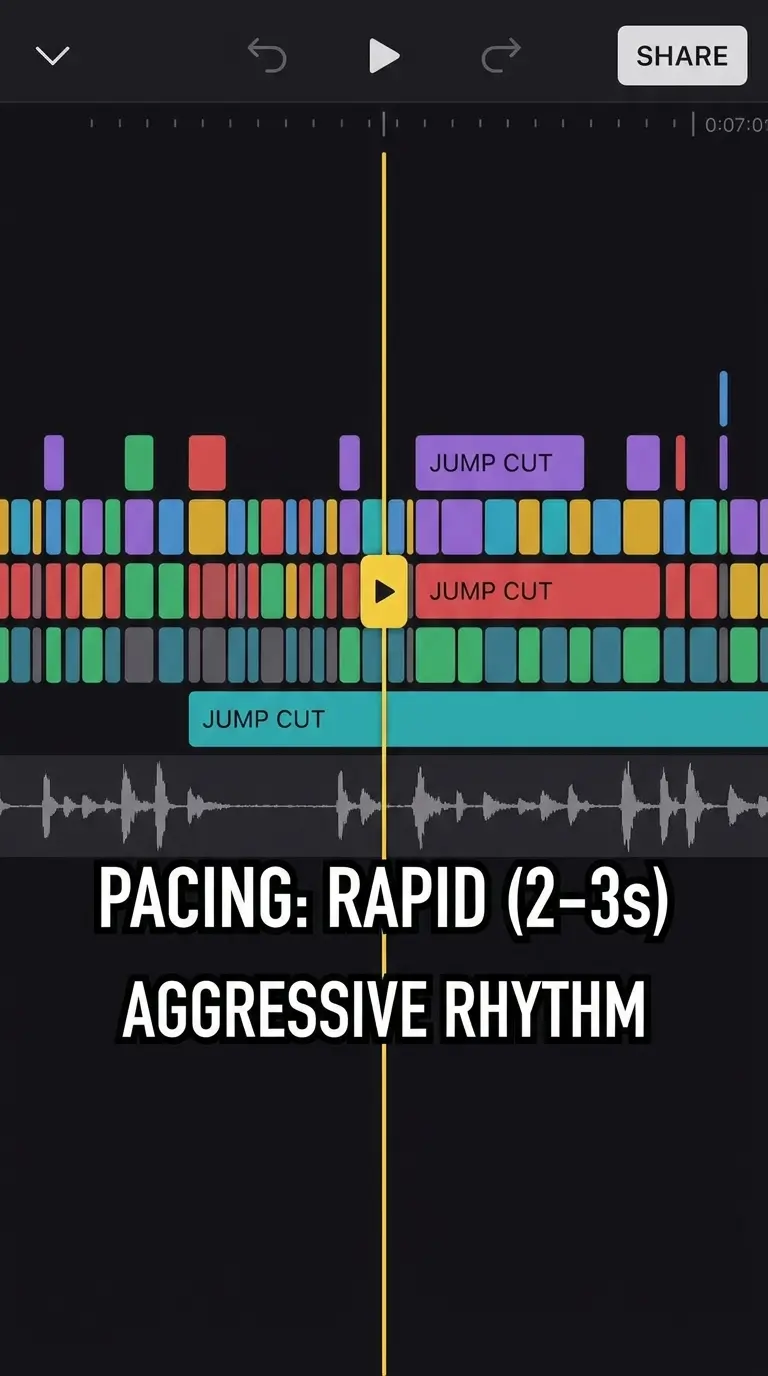
Jump cuts should happen every few seconds, not just when you make mistakes. The visual change created by jump cuts maintains engagement even when you're delivering continuous information. Transition effects slow down your content unnecessarily. Straight cuts keep momentum moving forward, while fades, wipes, and other transitions create micro-pauses that accumulate into dead time.
B-Roll Integration Without Disrupting Flow
B-roll should appear for two to three seconds maximum. Longer insertions make viewers forget what you were talking about and create disconnection from your narrative thread. B-roll needs to illustrate your exact point at the exact moment you're making it. Delayed or loosely related B-roll creates confusion rather than clarity.
Returning to your face between B-roll clips maintains connection with viewers. Extended B-roll sequences without seeing you creates distance and makes your Short feel like a compilation rather than personal content.
Pacing Adjustments Based on Content Complexity
Simple concepts can handle faster cuts because viewers don't need processing time. Complex information requires slightly longer holds on each cut to give viewers time to absorb what you're saying. Visual demonstrations need more time per cut than talking-head explanations. Viewers need to see the full action or result before you cut away, which means adjusting your rhythm based on what you're showing.
Text-heavy Shorts require longer hold times to allow reading. Calculate how long it takes to read your on-screen text, then add one second for comfortable comprehension.
Text Overlay Placement and Timing (Not Just What You Say, But Where It Appears)
Text isn't just captions. It's how you control where people look and what they remember.
Placement, timing, and styling affect whether text enhances your content or competes with it for attention. Most creators treat text as an afterthought, but strategic text use can significantly improve retention by providing visual anchors throughout your Short.
Where text should appear within the vertical frame, when it should appear relative to your speech, and how styling choices affect readability all matter more than you'd think.
Vertical Frame Zones and Text Readability
The center third of the vertical frame is where eyes naturally focus. Placing text here ensures visibility but can cover your face, which creates a trade-off between readability and personal connection. Put text at the bottom and it gets covered by YouTube's UI—the subscribe button, the description, all that stuff. I did this for weeks before I realized half my text was hidden.
Top-third placement works well for supplementary information or context that supports your main point without requiring immediate focus. Viewers can glance up to read it without losing sight of your face.
Synchronization Between Speech and Text Appearance
Text should appear slightly before you say it, not simultaneously. This gives viewers a moment to read before hearing, which reinforces the message through dual channels. Displaying entire sentences at once overwhelms viewers and creates reading burden. Revealing text in shorter phrases or individual words maintains forward momentum and controls information flow.
Text should disappear before you move to your next point. Leaving old text on screen while you're discussing something new creates confusion about what viewers should focus on.
Styling Choices That Enhance Rather Than Distract
Font size needs to be larger than you think. What looks readable on your editing screen may be too small on a phone held at arm's length. High contrast between text and background ensures readability across different viewing conditions. White text with black outline works in most situations, while colored text can become illegible depending on background content.
Animation and effects should be minimal. Elaborate text animations draw attention to the effect rather than the message, which defeats the purpose of including text.
Thumbnail Strategy for Shorts (Yes, They Still Matter)
Yeah, thumbnails still matter in Shorts. People see them for like half a second while scrolling, but that half-second matters.
Thumbnails affect click-through rates even in the Shorts feed, where they appear smaller and for shorter durations than traditional YouTube thumbnails. The difference is that Shorts thumbnails need to work at tiny sizes and communicate instantly because viewers see them for milliseconds while scrolling.
Your thumbnail is often the first frame of your video, which means you need to design your opening shot with thumbnail effectiveness in mind. This requires thinking about your content's visual branding before you start recording, not after you've finished editing.
Visual Simplicity at Small Sizes
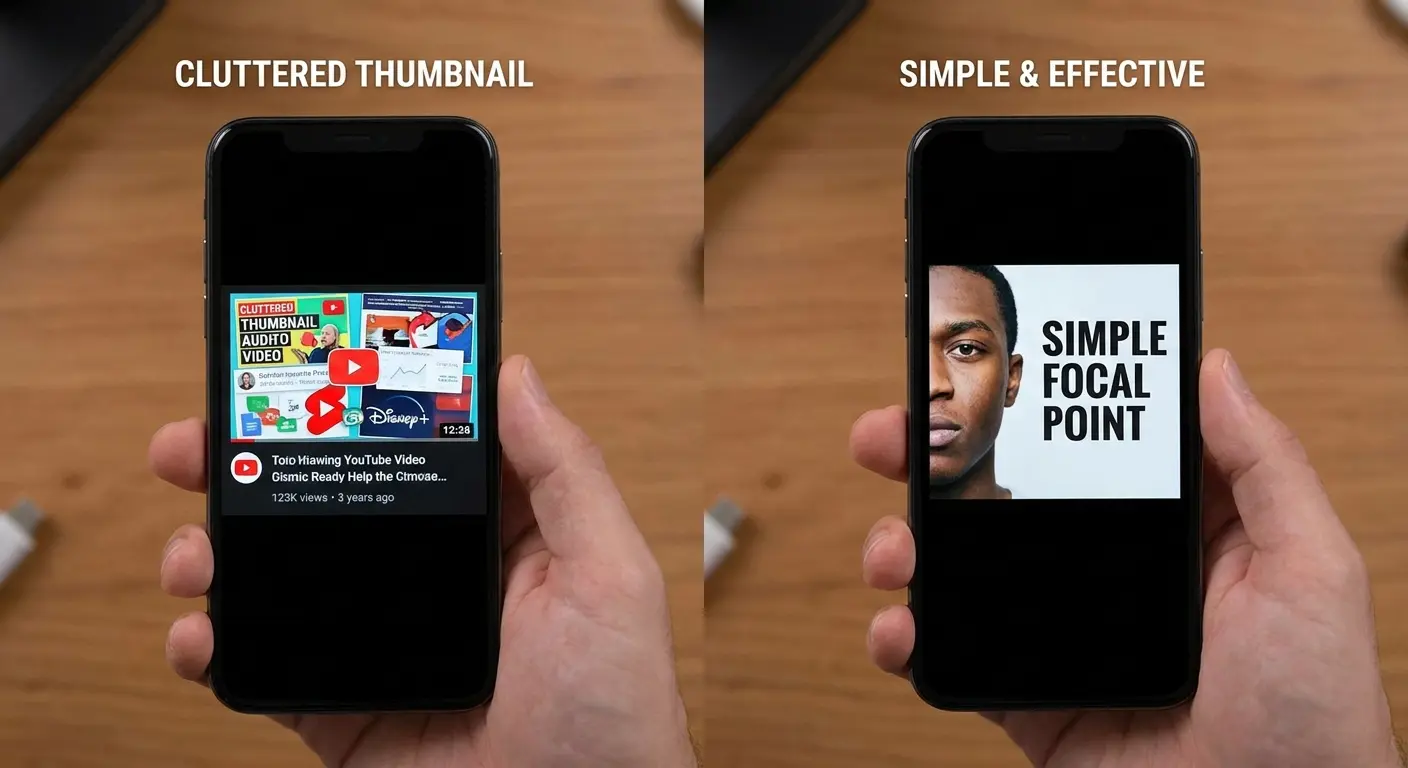
Complicated thumbnails turn into a blurry mess at Shorts size. Keep it simple: one thing, big and clear. That's it. Facial expressions register more clearly than elaborate backgrounds or multiple subjects. Close-up face shots with clear, exaggerated expressions communicate emotion and energy instantly.
Text on thumbnails needs to be minimal and large. Three words maximum, sized large enough to read on a phone screen without zooming, otherwise it's visual noise that doesn't communicate anything.
Consistency Across Your Shorts Catalog
Repeating visual elements (color schemes, framing styles, text positioning) helps viewers recognize your content instantly while scrolling. This brand recognition increases the likelihood they'll stop on your Shorts. Template-based thumbnail approaches let you maintain consistency without redesigning for every video. Establishing a visual format and filling it with content-specific elements streamlines production.
Color palette consistency helps your Shorts feel cohesive when viewers browse your channel. Wildly different thumbnail styles make your content feel scattered rather than intentional.
First Frame Optimization
Your opening frame serves as your thumbnail in most cases, which means you need to design it deliberately rather than letting it happen accidentally. Plan your first shot with thumbnail effectiveness in mind. Static first frames work better than motion blur or mid-action shots. Viewers need a clear, recognizable image that communicates your content's topic instantly.
Lighting and framing in your first frame should prioritize thumbnail clarity over cinematic aesthetics. What looks dramatic in motion may look muddy or confusing as a static thumbnail.
Publishing Cadence and the Batch Recording Method
Post consistently or don't bother. The algorithm rewards regular posting. More importantly, people start expecting content from you. Miss a few days and you're starting over.
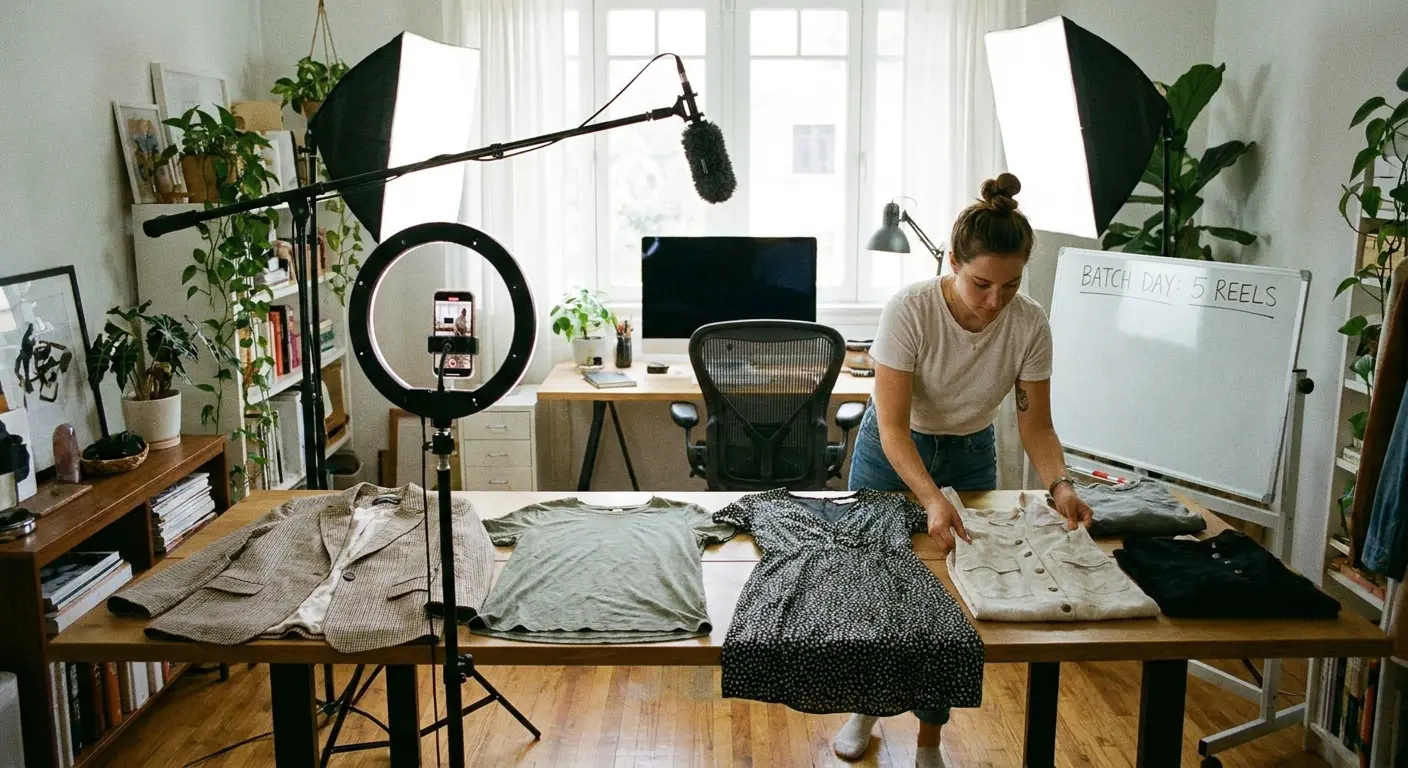
Batch recording lets you maintain consistent output without dedicating time to production every single day. Record 5-10 Shorts in one sitting. Your setup's already done. You're already in 'recording mode.' Your lighting's consistent. Why waste that by recording one Short at a time?
Recording multiple Shorts in a single session takes advantage of your setup, mental state, and creative momentum. Breaking down and rebuilding your setup for individual Shorts wastes time and energy that could go into creating more content.
Optimal Batch Sizes for Different Content Types
Talking-head Shorts can be batched efficiently because they require minimal setup changes. Recording five to ten in a single session is realistic without experiencing significant fatigue or quality degradation. Product demonstration Shorts require more setup variation and physical energy. Batching three to five in a session maintains quality without exhausting your presentation energy.
Location-based Shorts should be batched whenever you're in a specific environment. Shoot multiple concepts in the same location to maximize the value of being there.
Setup Consistency During Batch Sessions
Maintaining identical lighting, framing, and audio setup throughout a batch session ensures visual consistency across multiple Shorts. This makes your content feel professionally produced rather than haphazardly created. Wardrobe changes between Shorts in the same batch create the illusion of different recording days. This prevents viewers from recognizing that you shot everything in one session.
Background variations within the same location provide visual diversity without requiring complete setup changes. Shifting your position or angle slightly creates different looks while maintaining your core setup.
Publishing Frequency That Balances Consistency and Quality
Daily publishing provides maximum algorithm exposure but requires significant content backlog. You need at least two weeks of finished Shorts before starting a daily publishing schedule to avoid running out of content. Three to four Shorts per week offers consistency without requiring constant production. This cadence gives you time to batch-record while maintaining regular presence in viewers' feeds.
Publishing time matters less for Shorts than long-form content because the algorithm distributes Shorts over extended periods. Consistency of schedule matters more than specific posting times.
When to Prioritize Equipment Upgrades vs. Content Volume
Only buy new equipment when you can name the exact problem it solves. 'It would be cool to have' isn't a reason. 'My current mic picks up too much background noise' is a reason.
Equipment upgrades should solve specific problems you're experiencing, not just add features you might use someday. Most creators upgrade too early, spending money on gear before they've identified what's actually limiting their content quality.
Here's what nobody wants to hear: your problem probably isn't your equipment. It's that you haven't made enough videos yet. Better gear won't fix bad framing or weak hooks.
Identifying Real Bottlenecks vs. Perceived Limitations
Your phone's camera is rarely the limiting factor in Shorts quality. Stability, lighting, and audio usually need improvement before camera quality becomes relevant. Editing software limitations only matter when you're consistently hitting feature walls. Basic editing apps handle most Shorts needs effectively, and upgrading to professional software before you need advanced features adds complexity without benefits.
Storage and processing speed become bottlenecks when they slow your workflow significantly. If you're waiting more than a few minutes for exports or constantly deleting files to free space, hardware upgrades make sense.
Equipment Upgrades That Provide Immediate Quality Improvements
Audio equipment upgrades provide the most noticeable quality improvement for the investment. Moving from built-in phone mics to even basic external microphones dramatically improves production value. Lighting equipment offers clear before-and-after differences that viewers notice immediately. A single good light source provides more quality improvement than camera upgrades.
Mounting and stability equipment solves obvious problems (shaky footage, inconsistent framing) that directly affect viewer perception. These upgrades pay for themselves in reduced frustration and faster shooting sessions.
The Content Volume Argument
Your 10th Short will be way better than your first. Your 50th will be way better than your 10th. That's just reps. No amount of expensive gear shortcuts that learning curve.
Creating more Shorts with your current equipment teaches you more than creating fewer Shorts with better gear. Volume builds skills, reveals what works, and provides data about what your audience responds to. Equipment upgrades can become procrastination disguised as preparation. Researching, purchasing, and learning new gear delays content creation without guaranteeing better results.
Even ai shorts tools can't replace the learning that comes from creating volume.
Solving the Stability Problem While Shooting on the Move
If you're shooting in different places—your car, the gym, a coffee shop—you need gear that actually travels. Studio equipment doesn't work when you're moving around.
Creating Shorts in varied locations requires equipment that travels well and sets up quickly. Studio solutions don't translate to real-world environments where you're shooting in different locations throughout the day.
This is exactly why I stopped using regular tripods. I needed something that sticks to different surfaces, holds my phone steady, and fits in my pocket. Not a whole bag of equipment.
Look, I'm going to mention Rokform here because I actually use their stuff. The magnetic mount thing sounded gimmicky to me—I thought magnets near my phone would be a problem. But it's not, and being able to slap my phone onto a mount and pull it off in half a second has changed how I shoot.
Rokform's mounting systems work with their phone cases to create instant, secure attachment to metal surfaces, tripods, or vehicle mounts. This means you can shoot in your car, attach your phone to gym equipment, or mount to any magnetic surface without carrying bulky equipment.
Here's why this matters: you can pop your phone off to check your footage, then stick it right back in the same spot for the next take. No readjusting. No losing your frame. When you're doing 10 takes of the same Short, this saves you from wanting to throw your phone across the room.
I'm not messing with clamps anymore. I'm not paranoid about my phone falling. I just record.
The Rokform Rugged Case integrates seamlessly with their mounting ecosystem, providing both protection and functionality. The magnetic system is strong enough to hold your phone securely during active shooting but releases instantly when you need to check your footage. This balance between security and accessibility is what separates practical mounting solutions from gear that looks good but slows you down.
If your mount takes 10 minutes to set up, you won't use it. I didn't. I'd just hand-hold my phone because the setup wasn't worth it. That's why portability matters as much as stability—gear you don't use is worthless.
Final Thoughts
Look, you can chase trends forever. You can copy what big creators are doing. Or you can fix your actual setup so you're not fighting with shaky footage and bad audio every time you record.
The boring stuff—mounts, mics, lights—matters because it's the difference between recording feeling easy or feeling like a pain in the ass. Everyone obsesses over content strategy. Meanwhile their footage is shaky, their audio sounds like they're in a bathroom, and their framing changes between every take. Then they wonder why their retention sucks.
Fix your setup first. Mount your phone. Get a cheap mic. Point a light at your face. THEN worry about hooks and trends and all that other stuff everyone talks about.
Because trying to make up for shaky footage and bad audio with 'creative brilliance' doesn't work. I tried. It just makes you exhausted.
Your 100th Short will teach you more than this entire guide. The trick is actually making it to 100. Most people burn out by number 10 because their workflow sucks and every recording session is a frustrating mess.
Fix your setup. Make it easy to record. Then just make a lot of Shorts.
That's it. Go record something.

