


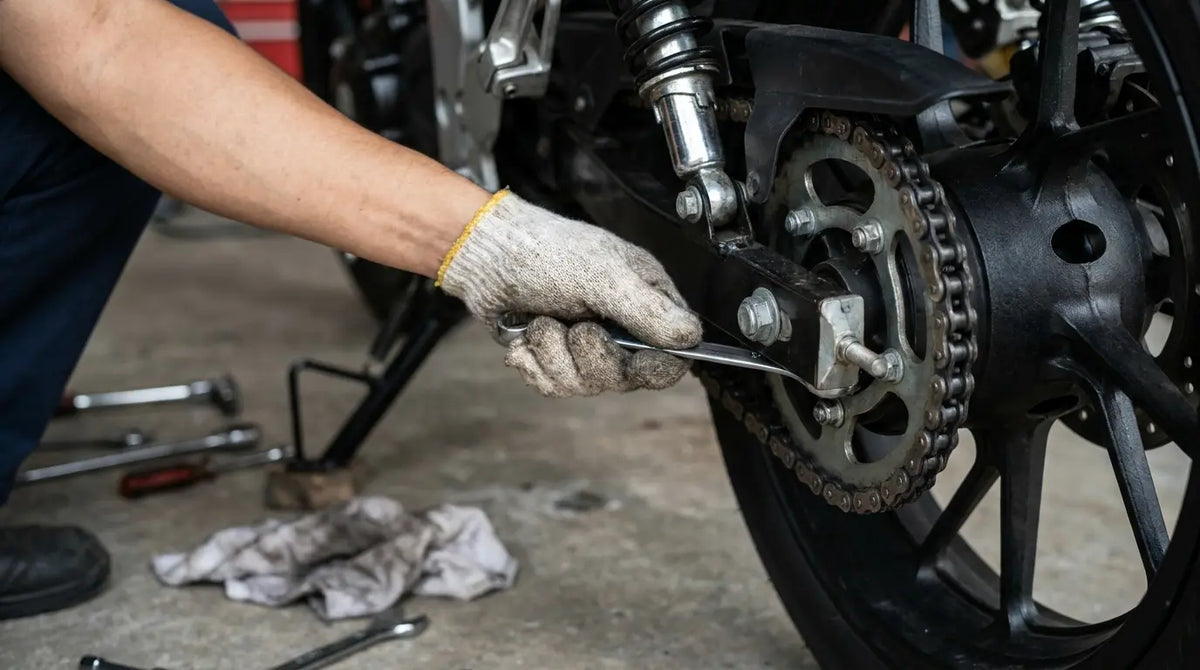
Your chain's loose again. You know it, I know it. You can hear it slapping around back there, and that noise is driving you insane.
So you'll tighten it. You'll spend 20 minutes in the garage, get it feeling right, and pat yourself on the back. Two weeks later? Loose again.
This isn't happening because you're doing it wrong. Well, okay, you might be doing it slightly wrong. But the real issue is that nobody ever explained why chains keep loosening in the first place. And if you don't understand the why, you're just going to keep repeating the same adjustment every few weeks until you die. Or until you sell the bike. Whichever comes first.
We're going to break down the overlooked physics of chain tension, the measurement errors that cost you money, and the specific points in your adjustment routine where most people unknowingly compromise their bike's performance and their safety. Whether you're wrenching in your garage or preparing for a long ride, getting this right means the difference between a drivetrain that lasts and one that fails prematurely.
Table of Contents
Why Your Chain Won't Stay Tight (And Why It's Not Your Fault)
The Measurement Mistake That's Costing You Money
Your Bike's Geometry (Yes, You Need to Care About This)
The Tools That Actually Matter (And the Ones That Don't)
Step-by-Step Adjustment That Accounts for Real-World Variables
Alignment Verification Beyond the Swing Arm Marks
When to Document Your Work and Why It Matters
Post-Adjustment Testing Most Riders Skip
TL;DR
Chain tension changes dramatically through suspension travel; measuring at the wrong point creates dangerous slack or binding
Nine times out of ten, when your measurement is off, it's because of improper bike positioning, not inaccurate tools
Swing arm marks are reference points, not gospel; double-check alignment through multiple methods
Your chain's tight spot rotates with wheel position; find it before adjusting
Axle nut torque sequence affects alignment more than adjuster positioning
Documentation prevents guesswork when issues emerge weeks later
A single test ride tells you more than ten static measurements
Why Your Chain Won't Stay Tight (And Why It's Not Your Fault)
Your chain isn't coming loose because you failed to tighten it correctly. The problem's deeper than that. Way deeper. It starts with how your suspension moves, compressing and extending, constantly changing the distance between your sprockets. Every bump. Every time you brake hard. Every time you crack the throttle. Your swing arm pivots, and that pivot changes everything about where your wheel sits relative to the front sprocket.
Most riders measure chain slack with the bike on a stand, suspension fully extended. This gives you the maximum distance between sprockets. You set your 20-40mm of slack (or whatever your manual specifies), torque everything down, and assume you're done. But watch what happens the moment you sit on the bike. Your suspension compresses under your weight. That compression reduces the distance between sprockets. Your carefully measured slack just became tension.
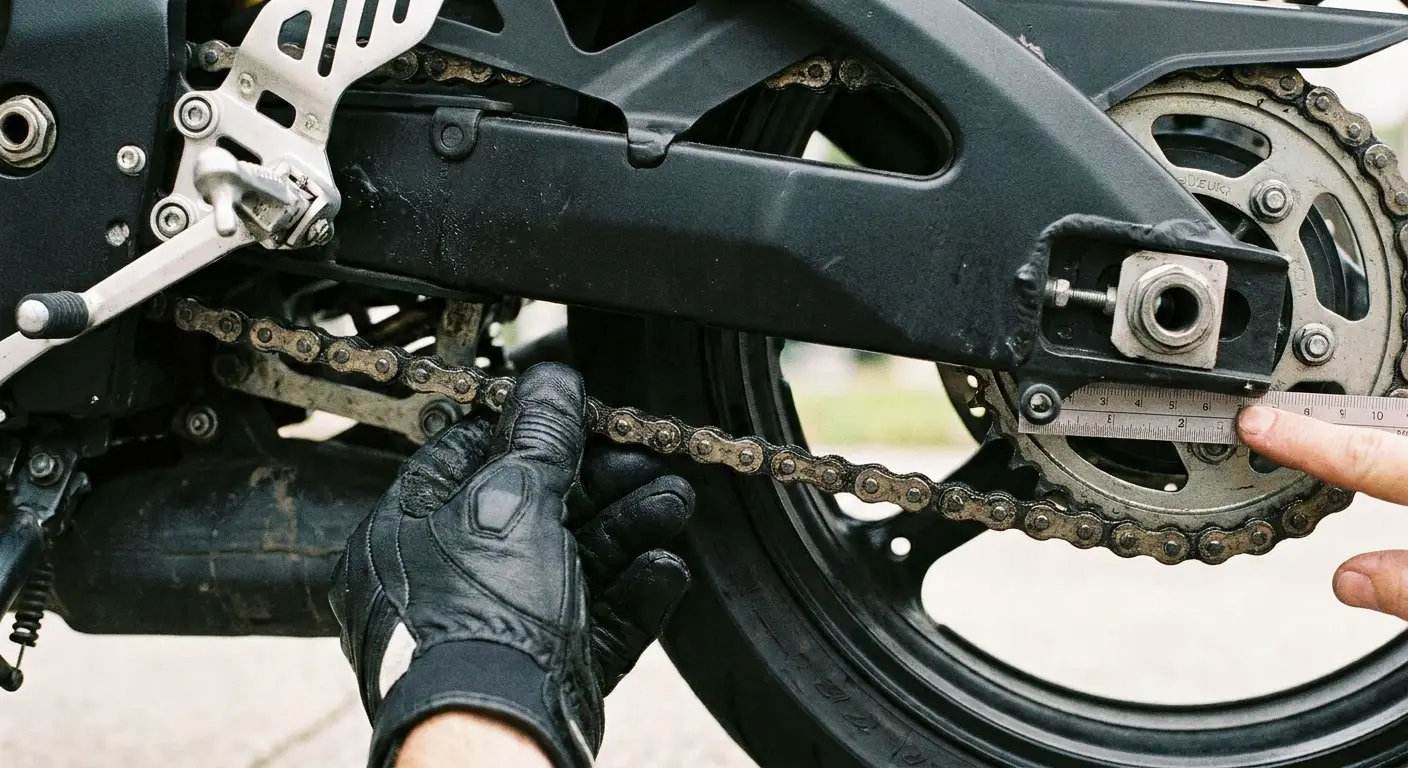
The manual tells you to measure at the "tightest point" of chain rotation, but it doesn't explain why that point exists or how to reliably find it. Your chain wears unevenly. Rollers develop flat spots. Pins stretch at different rates depending on which section spends the most time under load. As you rotate the wheel, you'll find spots where the chain pulls tighter and spots where it hangs looser. Measure at the loose spot, and you'll over-tighten. Measure at the tight spot without accounting for the others, and you'll create binding when that section comes around under load.
My buddy Chris has this problem on his Ninja 400. Commutes every day, does a track day once a month at Buttonwillow. His chain developed this tight spot. You could see it when you rotated the wheel, this one section that just didn't droop like the rest.
Turns out that section was the part of the chain that was under load coming out of turn 8, where he's on the throttle hard every single lap. After a few months of track days, that specific section of chain was stretched tighter than the rest. When it rotated to the bottom during his garage adjustment, it would bind. Made his bike lurch under hard acceleration, and he thought he had a fueling problem for weeks before he figured it out.
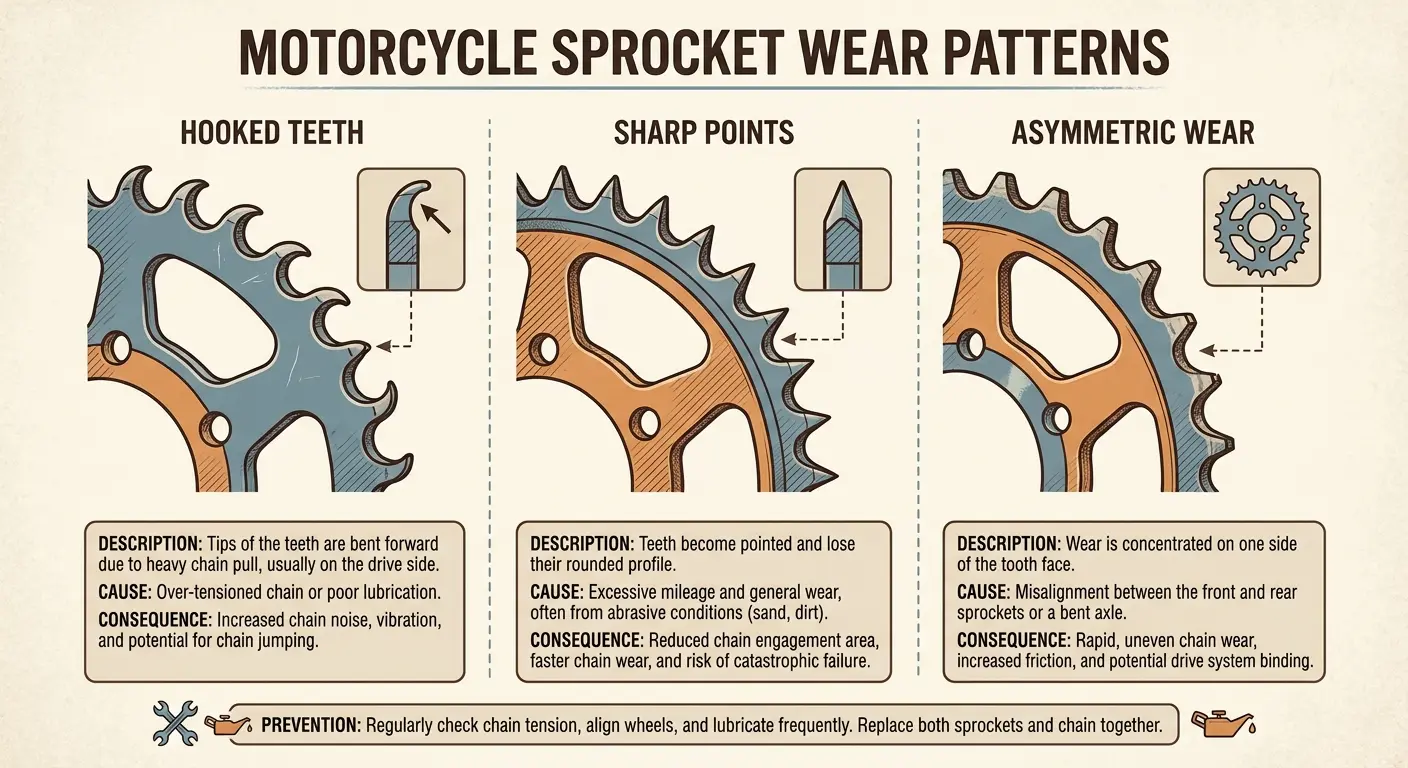
Your sprockets wear in a pattern that matches your riding style. Hard acceleration wears the drive side of the teeth. Engine braking wears the coast side. This asymmetric wear changes how the chain seats on the sprocket throughout rotation. A chain that seems properly tensioned while stationary might bind or slap depending on whether you're accelerating or decelerating.
And the adjusters? They're actively screwing with you. Every time you loosen the axle nut, the wheel can shift slightly before you snug the adjusters. Even a millimeter of movement changes your tension. Tighten the axle with the wheel in a slightly different position than where you measured, and your numbers are meaningless. You're chasing a moving target, adjusting based on measurements that became obsolete the moment you disturbed the axle.
Your chain's tension also changes with temperature. The metal expands when hot, effectively lengthening the chain. That perfect tension you set in your cold garage becomes tighter after twenty minutes of riding. Some riders compensate by setting slightly loose when cold, but this creates excessive chain slack during warmup and cool-down periods. Which is exactly what you don't want.
The Measurement Mistake That's Costing You Money
You push up on the chain's lower run, measure the vertical movement, and call it good. Makes sense, right? Except this method fails because you're introducing an undefined variable. How hard you're pushing. Push gently, and you'll measure less slack than actually exists. Push hard, and you'll compress the chain's internal clearances, giving you a false reading that shows more slack than you'll experience under riding conditions.
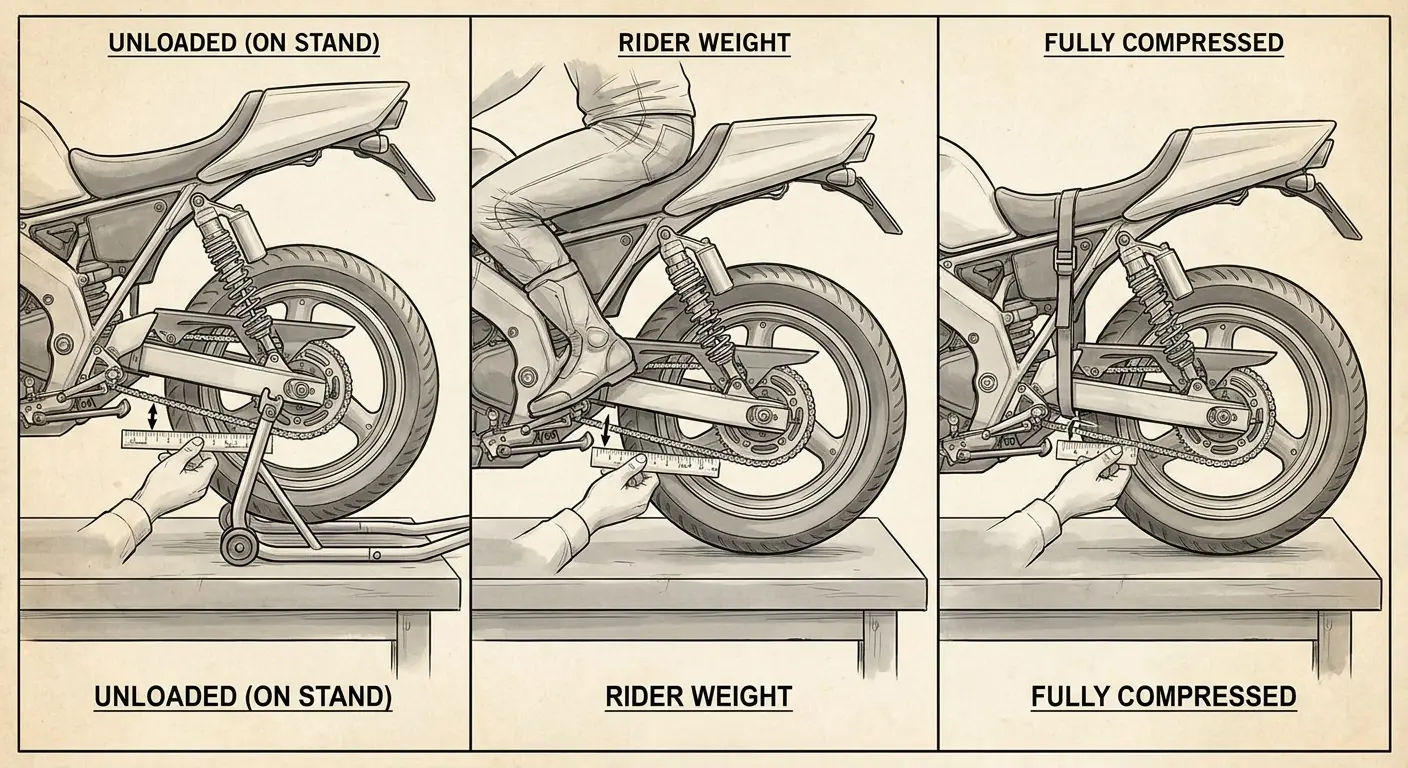
The bike's position during measurement determines everything. Riders measure on the side stand, on a rear stand, with someone sitting on the seat, or with the suspension compressed using a ratchet strap. Each position gives you a different number. Your manual probably specifies "with rider seated" or "race sag position," but most people skip this step because it requires an extra person or creative use of tie-downs. The difference between extended and compressed suspension can be 10-15mm of apparent slack. That's the difference between correct tension and a chain that's either binding or slapping.
Let me tell you what happens with each position, from worst to least-worst.
Rear stand? Forget it. You're measuring with the suspension fully extended, which is a position your bike is literally never in while riding unless you're mid-air off a jump. You might see 40-50mm of slack, which sounds reasonable until you realize that the second you sit on the bike, you're compressing the suspension by 30-40mm. Do the math. Your chain's now way too tight, potentially binding when loaded.
Side stand is almost as bad. You're getting maybe 35-45mm of slack, still doesn't reflect loaded geometry. The moment you get on and ride, everything changes.
Race sag position, now we're talking. This actually matches how your bike sits when you're on it. Usually shows 25-35mm, which reflects actual riding conditions. This is your baseline.
Rider seated is most accurate but requires assistance. Someone needs to hold the bike upright while you're on it, or you need to get creative with tie-downs. Shows 20-30mm typically, the true loaded state.
Front stand only gives you a moderate error. Better than rear stand but not ideal. You'll see around 30-40mm, partial load on rear.
You're probably measuring in the wrong location along the chain's run. The lower run between the sprockets is where most people check, usually at the midpoint. This seems logical, but it ignores how the chain's weight creates a natural sag that varies depending on the chain's condition and your bike's swing arm angle.
A worn chain sags more. A bike with a steep swing arm angle shows different sag characteristics than one with a shallow angle. The midpoint measurement becomes less reliable as these variables change.
Room temperature affects your baseline. I learned this one the hard way on my old SV650. Measured in a 40-degree garage one Sunday morning, got my chain dialed in at 32mm. Felt good about myself. After an hour of spirited riding, stopped for fuel and decided to check again out of curiosity. The chain was now heat-soaked at probably 150 degrees from friction and ambient engine heat. Measured the same spot and got 26mm.
I was confused. Did the chain somehow loosen and tighten itself? What actually happened was thermal expansion reduced the effective slack by 6mm. If I had adjusted based on the cold measurement to hit the lower end of my spec range (say, 25mm), the chain would have been binding at 19mm once hot, potentially damaging the countershaft bearing and creating excessive wear on the sprocket teeth.
Neither measurement is wrong, but they're measuring different states. Your manual's specified slack assumes a particular temperature range that it probably doesn't mention. So there's that.
The tool you use matters less than you think, but how you use it matters way more. A ruler, a specific chain tool, or even your fingers can work if you're consistent. The problem is consistency. Measure three times in a row, and you'll probably get three different numbers if you're not controlling for pressure, angle, and reference points. Your eye isn't precise enough to catch 2-3mm variations, but those variations determine whether your adjustment is correct or compromised.
Your Bike's Geometry (Yes, You Need to Care About This)
Before we get into the actual adjustment (and I promise we're getting there), you need to understand something about your swing arm. Your swing arm's angle relative to the ground changes everything about how your chain behaves. Bikes with steep angles (swing arm pointing upward toward the rear axle) experience more dramatic tension changes through suspension travel. Bikes with shallow angles see less variation. You need to know which category your bike falls into because it determines how conservative you need to be with your slack measurement.
Here's what you need to check before you touch anything:
First thing, measure your swing arm angle at race sag. This is just the angle between your swing arm and the ground when the bike's loaded like you're sitting on it. Sounds technical, but it's straightforward. This tells you how much your chain tension is going to change when you're actually riding.
Document your current suspension sag measurements, both race sag and free sag. You need these numbers.
Take photos of both sprockets from a straight-on angle. This is for wear documentation, and trust me, you'll want these later.
Check each sprocket tooth profile for hooking, pointing, or asymmetric wear. This stuff tells a story.
Test your swing arm pivot for lateral play. Should have zero detectable movement. If you feel any, we need to talk about that before worrying about chain tension.
Find and mark your chain's tightest spot with tape or a paint pen. This is critical.
Rotate the wheel through three complete revolutions, measuring slack every 90 degrees. Write down all these numbers with current mileage and date.
Check your countershaft sprocket alignment relative to engine cases. Sometimes this is adjustable, sometimes it's not, but you need to know where you're starting.
Look for any chain side-plate discoloration. This indicates previous binding, which means someone before you messed this up.
Crouch down and look at your sprockets before you start. The teeth should have a symmetrical profile, wearing evenly across their width. If you see hooking (the teeth curve in one direction), sharp points, or wear concentrated on one side, your chain's been running misaligned or over-tensioned. This wear pattern tells you that your previous adjustments were off.
You'll need to be more careful this time, and you should probably budget for new sprockets soon because a new chain on worn sprockets will wear out fast.
Check your swing arm pivot for play. Grab the swing arm and try to move it side to side. Any movement here means your pivot bearings are worn, which introduces slop into your entire drivetrain. You can set perfect chain tension, but if your swing arm is wandering laterally, your chain will wear unevenly and your alignment will drift. Fix the pivot before you worry about the chain, or you'll be repeating this job in a few weeks.
Your countershaft sprocket's position relative to the engine cases tells you whether your chain line is straight. Some bikes have adjustable countershaft positions or use spacers to dial in alignment. If your chain has been wearing on one side, or if you've changed sprocket sizes, you might need to address the countershaft position before adjusting tension. This isn't part of a standard chain adjustment, but ignoring it means you're optimizing one variable while another is actively working against you.
Rotate the wheel slowly and watch for tight spots (sections that don't droop as much), kinked links, or areas with visible wear differences. Mark the tight spot with a piece of tape or a paint pen. You'll need to measure at this point specifically, not at whatever section happens to be at the bottom when you start working.
Count the teeth on your sprockets and compare them to stock. If someone installed a larger rear sprocket or smaller front sprocket for more acceleration, your chain's working angle has changed. Bigger changes in sprocket size mean bigger changes in how the chain articulates around the sprockets. This affects wear patterns and optimal tension. You don't need to do math here, just recognize that non-stock gearing means you should pay extra attention to how the chain seats on the sprockets through its rotation.
The Tools That Actually Matter (And the Ones That Don't)
Look, I'm going to be straight with you. You need a torque wrench. I don't care if your buddy says he's been doing this by feel for 20 years. Your buddy is wrong, and his axle nut is probably loose. Everything else? We can work with.
You need a way to measure slack accurately. A ruler works. A specific chain tool with a gauge works. Your fingers can work if you calibrate them against a known measurement. The tool itself is less important than using the same tool consistently. Switching between measurement methods introduces variables you can't control for. Pick one approach and stick with it for the life of your chain.
Tool |
Necessity Level |
Why It Matters |
Acceptable Alternatives |
|---|---|---|---|
Torque wrench |
Critical |
Axle nut requires precise clamping force; under-torque causes wheel shift, over-torque damages threads |
None; this is non-negotiable |
Chain slack gauge |
Helpful |
Provides consistent measurement reference |
Ruler, caliper, or calibrated finger method |
Straight edge (3+ feet) |
Important |
Verifies wheel alignment beyond swing arm marks |
Taut string, length of angle iron, or laser level |
Proper-fit wrenches/sockets |
Important |
Prevents fastener damage during fine adjustments |
None; adjustable wrenches round off adjuster bolts |
Work light/flashlight |
Important |
Illuminates shadowed adjustment area |
Phone flashlight (but dedicated light frees your hands) |
Alignment laser tool |
Optional |
Speeds up verification but doesn't improve accuracy |
String method, straight edge, or measurement from fixed points |
Specialty chain tool |
Optional |
Convenient but doesn't enable anything other tools can't do |
Standard tools used carefully and consistently |
A quality torque wrench is non-negotiable for the axle nut. This isn't about precision for precision sake. An under-torqued axle nut can loosen during riding, which means your carefully set tension becomes meaningless as the wheel shifts. An over-torqued nut can damage threads or make future adjustments unnecessarily difficult. Your bike's manual specifies a torque value for a reason. The spec accounts for the fastener's grade, thread pitch, and the clamping force needed to keep everything stable under riding loads.
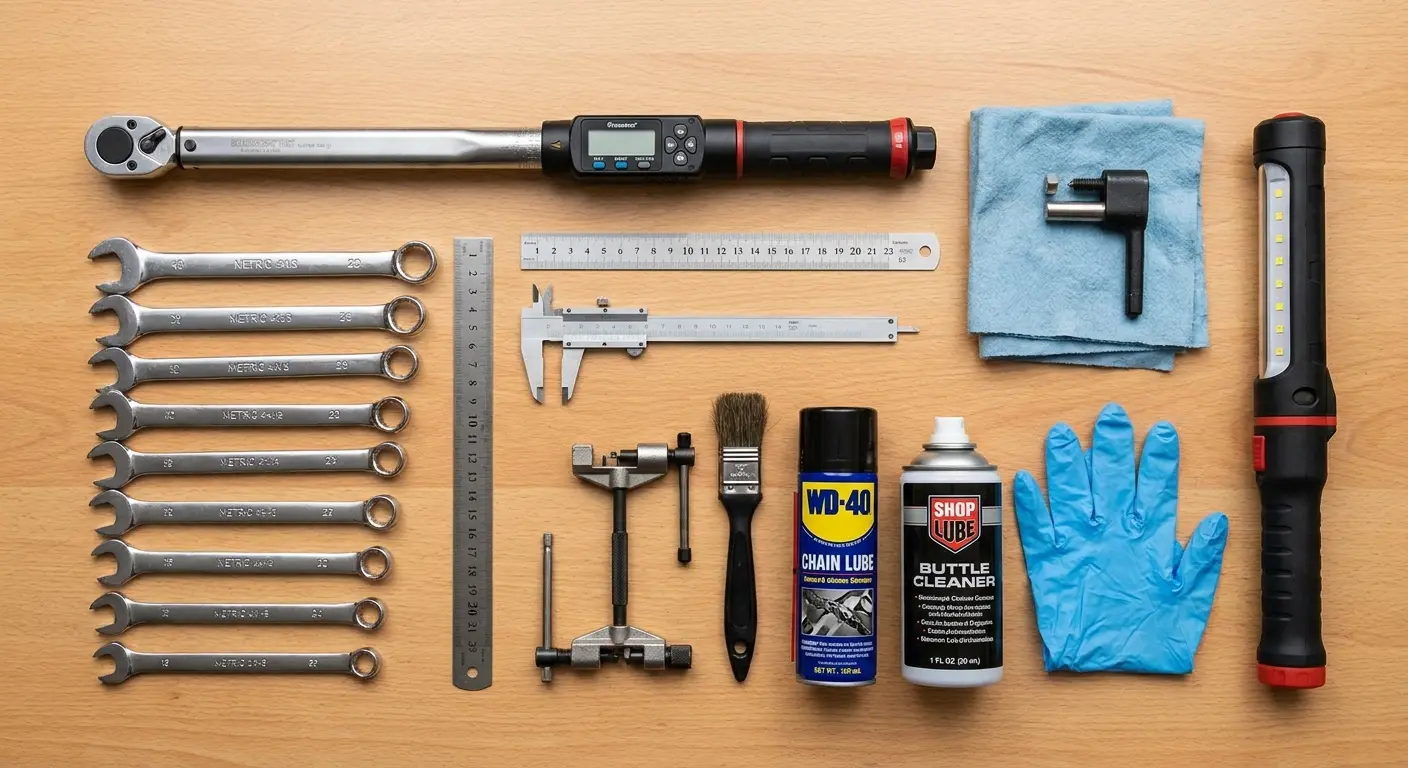
The wrenches or sockets for your adjuster bolts don't need to be special. They need to fit properly without rounding off the fastener heads. Cheap tools that fit correctly beat expensive tools that don't. If your adjusters use a 12mm wrench, use a 12mm wrench, not an adjustable wrench or pliers. You'll be moving these adjusters in small increments, and sloppy tool fit means imprecise adjustments.
A straight edge or alignment tool helps verify that your wheel is tracking straight after adjustment. You can use a specialized tool, a length of angle iron, or even a taut string running from the front sprocket back along the swing arm. The material doesn't matter. What you need is having a reference line that lets you check alignment from multiple angles. We'll get into the specific verification method later, but you need something straight and long enough to span from front to rear.
A flashlight or work light isn't glamorous, but you can't adjust what you can't see. The area around your rear axle and adjusters is usually shadowed by the swing arm and wheel. You need clear visibility to see the adjuster marks, check for burrs or damage on the threads, and verify that your adjusters are moving evenly as you turn them.
Your phone's camera can be more useful than any specialized tool. Take photos of your adjuster positions before you start, during adjustment, and after you're done. Take photos of your sprockets from multiple angles. Take a photo of your manual's specification page. This documentation costs nothing and gives you a reference if something feels wrong later. You can compare your current setup to your previous setup without relying on memory. Secure your phone to your bike while you work so you can reference photos hands-free.
Some riders swear by chain alignment tools that attach to the swing arm and use lasers or pointers. These can be helpful, but they're not necessary if you understand the verification principles. They're measuring the same thing you can measure with simpler tools. If you already own one, use it. If you don't, don't feel like you're missing something critical.
Step-by-Step Adjustment That Accounts for Real-World Variables
Okay, so here's where it gets real. This whole process, done right, takes about 45 minutes the first time. Once you've done it a few times, you're down to 20 minutes. If someone tells you they can do a proper chain adjustment in 10 minutes, they're skipping steps.
Put your bike in the position specified by your manual for measurement. This usually means race sag (suspension compressed as if you're sitting on it) or with a rider seated. If your manual doesn't specify, use race sag. You can achieve this by having someone sit on the bike, or by using a ratchet strap to compress the suspension to the appropriate amount. Your manual should list race sag measurements, typically 25-40mm of suspension compression from fully extended.
Rotate your wheel to find the chain's tight spot (the section with the least slack). This is where you'll take your measurement. If you measure at a loose spot, you'll over-tighten, and when the tight spot rotates into position under load, your chain will bind. Mark this spot if you haven't already. Some chains have a master link with a clip or plate that makes a good visual reference.
Measure your current chain slack at the tight spot. Push up on the lower chain run with moderate, consistent pressure. You're not trying to stretch the chain, just taking up the natural sag. Measure the vertical movement. Compare this to your manual's specification. If you're within spec, you might not need to adjust anything. Chains don't need to be adjusted on a schedule; they need adjustment when they're out of spec.
Here's your step-by-step once you've determined adjustment is needed:
Position bike at race sag or with rider seated. Get this right or everything else is pointless.
Rotate wheel to locate and mark tight spot. Use tape, paint pen, whatever works.
Measure slack at tight spot with consistent upward pressure. Write down the number.
Record measurement and compare to manual specification. Know your target.
If adjustment needed, photograph current adjuster positions. You'll thank yourself later.
Loosen axle nut completely (remove cotter pin/lock washer if present). I mean completely. Don't just crack it loose.
Turn both adjusters equally (one full turn right, one full turn left). Keep them even.
Measure slack after every 2-3 adjuster turns. Don't try to estimate and do it all at once.
When within spec, finger-tighten axle nut to hold position. Just snug, not torqued yet.
Verify adjuster marks show equal positions on both sides. They need to match.
Check alignment using straight edge or string method. We'll cover this next section.
Torque axle nut to specification. Use that torque wrench.
Re-measure slack after torquing (may shift slightly). Yeah, this happens sometimes.
Rotate wheel and verify smooth chain movement. Watch for binding or hopping.
Document final adjuster positions and mileage. Future you will appreciate this.
If adjustment is needed, loosen your axle nut completely. Don't just crack it loose; remove all clamping force. The wheel needs to be free to move as you turn the adjusters. Some bikes have a cotter pin or lock washer you'll need to remove first. Keep track of these parts.
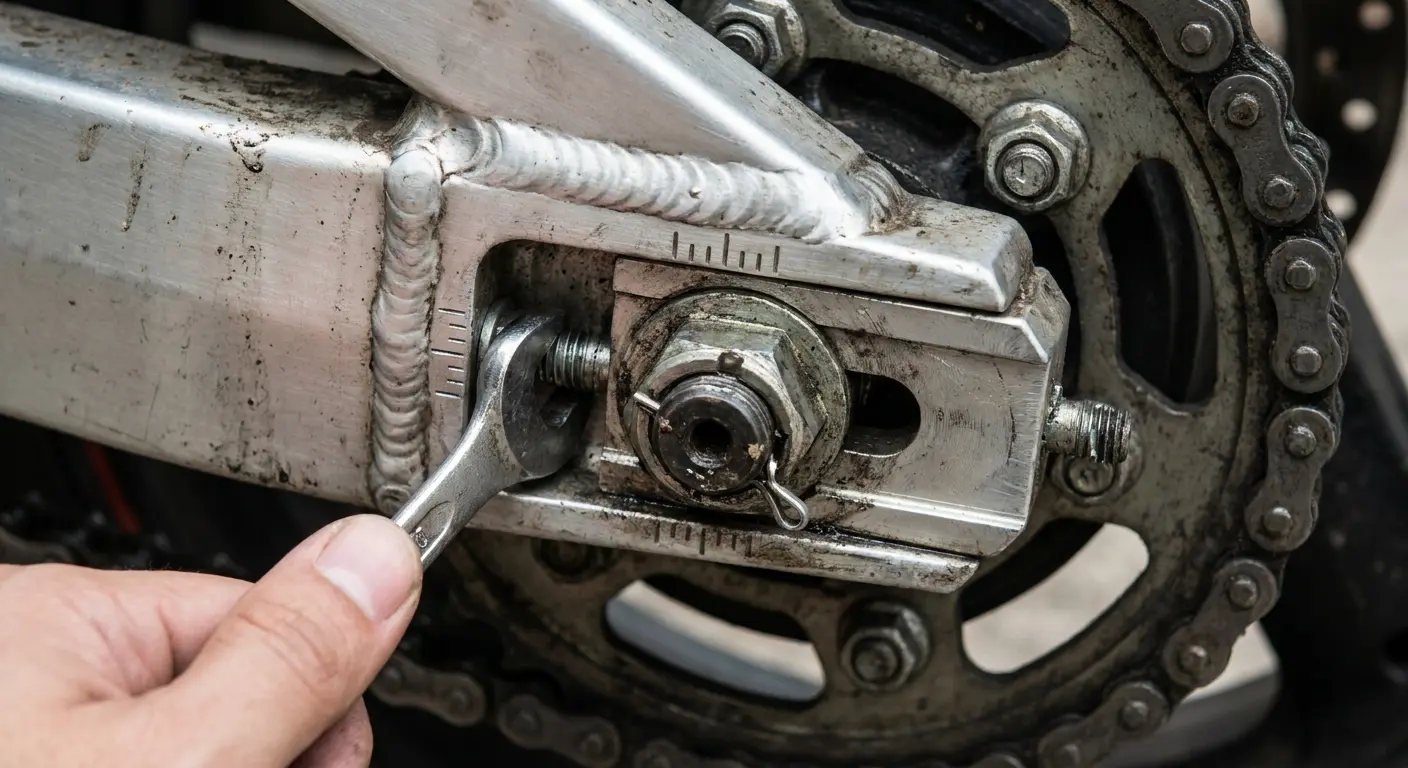
Turn both adjuster bolts equally. Most swing arms have marks or scales that show adjuster position. These are reference points to help you keep both sides even, which maintains wheel alignment. Turn the right adjuster one full turn, then turn the left adjuster one full turn. This keeps the wheel centered in the swing arm. Turning one side more than the other pulls the wheel off-center, which creates misalignment and uneven chain wear.
After every two or three turns of the adjusters, stop and measure your chain slack again. Don't try to estimate how much adjustment you need and make it all at once. Small, verified increments prevent over-correction. If you overshoot your target, you'll need to loosen the adjusters and start over, because you can't reliably reduce tension by backing off adjusters with the axle loose.
I did this exact thing on my MT-07 last year. Measured once, turned the adjusters three full rotations because I was in a hurry, ended up with a chain so tight it sounded like I was dragging a log. Had to start completely over. What should have taken 15 minutes turned into 45 minutes because I skipped the incremental verification step.
When you're within spec, snug the axle nut finger-tight (or with a wrench, just barely tight). This holds the wheel in position while you verify alignment. Don't torque it yet. You might need to make fine adjustments, and you don't want to be repeatedly torquing and un-torquing the axle.
Rotate the wheel several complete revolutions and measure chain slack at multiple points. You should see some variation, but if one spot is significantly tighter or looser than the others, your chain has a damaged section or your sprockets are worn unevenly. You'll need to set tension based on the tightest point, but this variation tells you that something else needs attention soon.
Check that your adjuster marks on both sides of the swing arm show equal positions. If one side is advanced more than the other, your wheel is cocked in the swing arm. Even if your chain tension is correct, misalignment will cause accelerated wear. Adjust the appropriate side until the marks match.
Now torque your axle nut to spec. This is critical. Torquing the axle can slightly shift the wheel position. It's rare, but it happens, especially if your swing arm slots are worn or if there's debris in the adjustment mechanism. After torquing, measure your slack one final time. If it changed significantly, you'll need to loosen the axle and fine-tune your adjusters.
Rotate the wheel and watch the chain's path. It should run smoothly without hopping or binding. If you see irregular movement, your alignment is off or you have a damaged link. Address this before riding.
Alignment Verification Beyond the Swing Arm Marks
Every forum thread tells you to just check the swing arm marks and call it good. I did that for years. Then I wondered why I was replacing chains every 15,000 miles while other people were getting 25,000. The swing arm marks are a starting point, not the finish line.
Swing arm marks get you close, but they're not precision instruments. They're stamped or engraved reference points that can vary in accuracy depending on manufacturing tolerances. You need additional verification methods to confirm your wheel is actually tracking straight.
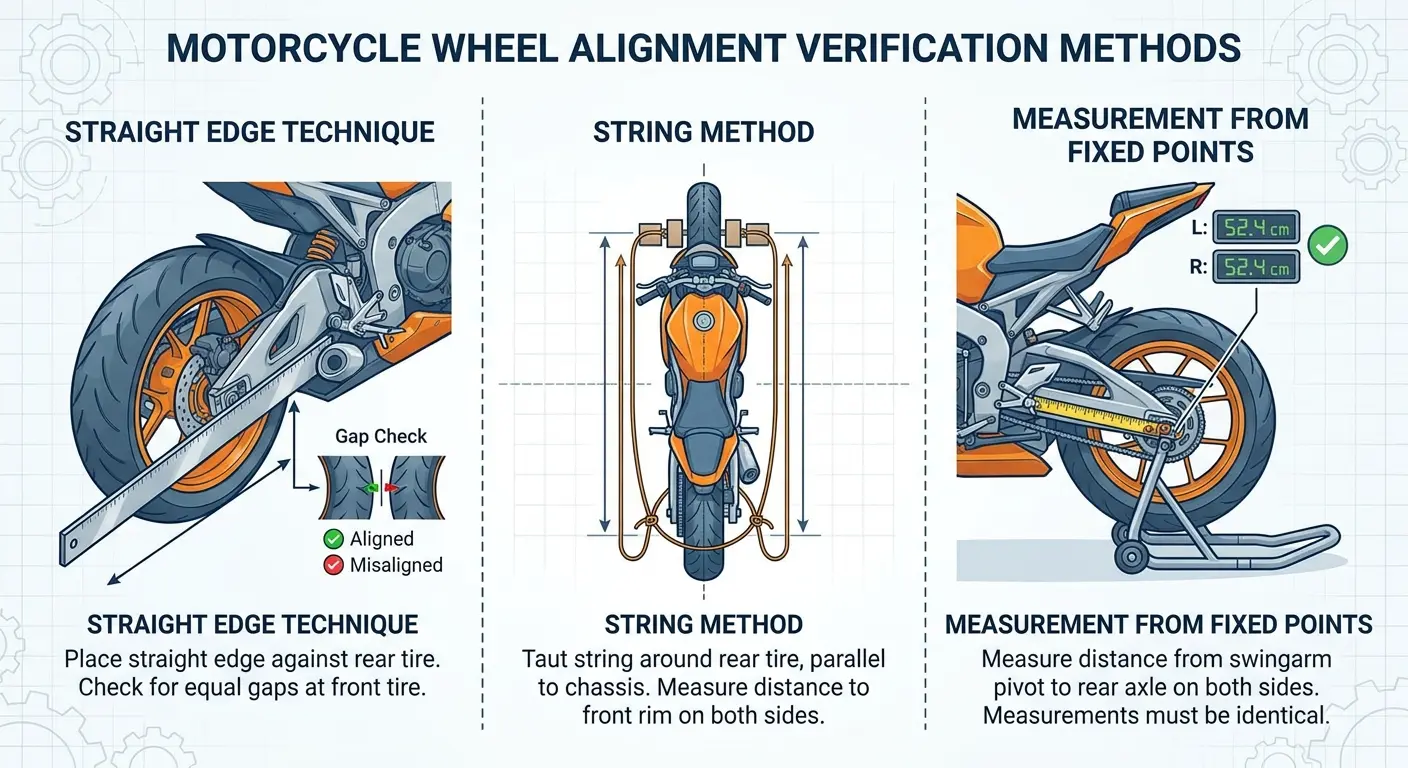
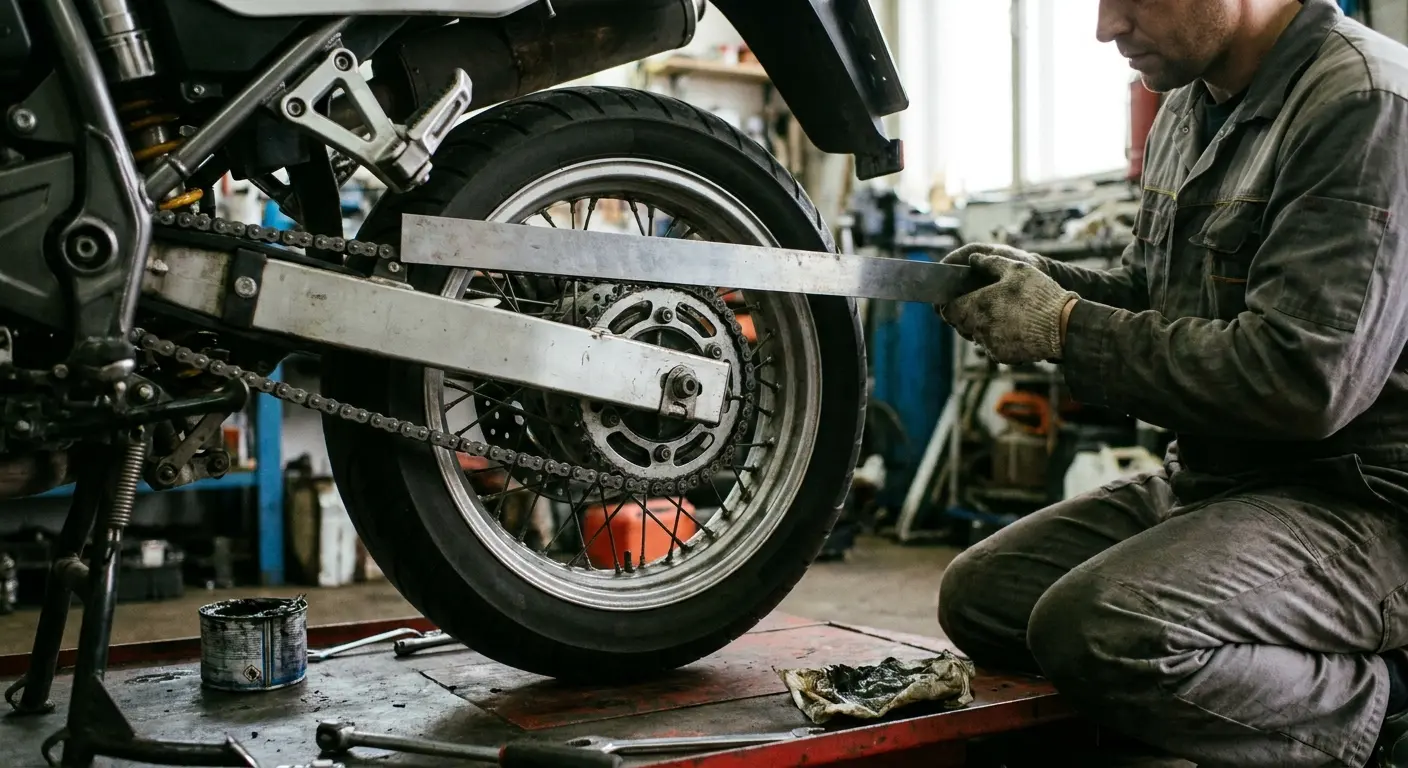
Use a straight edge along the side of your rear tire and extend it forward toward the front sprocket. The straight edge should run parallel to your chain. If it angles in or out, your wheel isn't aligned properly. This method works best with a long straight edge (at least 3 feet) because it amplifies small alignment errors into visible gaps.
Check alignment from above by sighting down the chain from behind the bike. Crouch down so your eye level is even with the top chain run. The chain should appear to run in a straight line from the countershaft sprocket to the rear sprocket. If it angles to one side, you'll see it immediately from this perspective. This visual check catches gross misalignment that might not be obvious from the swing arm marks.
Measure from a fixed point on your swing arm to the axle on both sides. Use the same reference point (usually the front of the swing arm slot) and measure to the same point on the axle (center of the axle bolt works well). The measurements should be identical within a millimeter. If they're not, your wheel is off-center even if the adjuster marks look even.
Spin the wheel and watch the gap between the chain and the swing arm. The gap should remain constant as the wheel rotates. If it varies, either your wheel isn't centered, your rim is bent, or your rear sprocket isn't mounted concentrically. A bent rim or off-center sprocket requires different fixes than simple alignment adjustment.
String alignment gives you the most accurate verification. Run a string from the front of your bike (attached to something solid like the fork leg or frame) back along the side of the bike. Adjust the string so it just touches the front tire. At the rear, the string should also just touch the rear tire. If it doesn't, your rear wheel is tracking out of line with your front wheel. This matters because misalignment between front and rear creates handling problems beyond just chain wear.
Some riders use calipers to measure the distance from the chain to the swing arm at multiple points along the swing arm's length. This catches twist in the wheel's position that might not show up in other checks. If your measurements vary as you move along the swing arm, the wheel is rotated slightly in the swing arm rather than sitting square.
After you've verified alignment through multiple methods and everything checks out, take your bike for a short test ride. We'll cover what to look for in the next section, but the point here is that static checks only tell you so much. The chain's behavior under load reveals problems that don't show up on the stand.
When to Document Your Work and Why It Matters
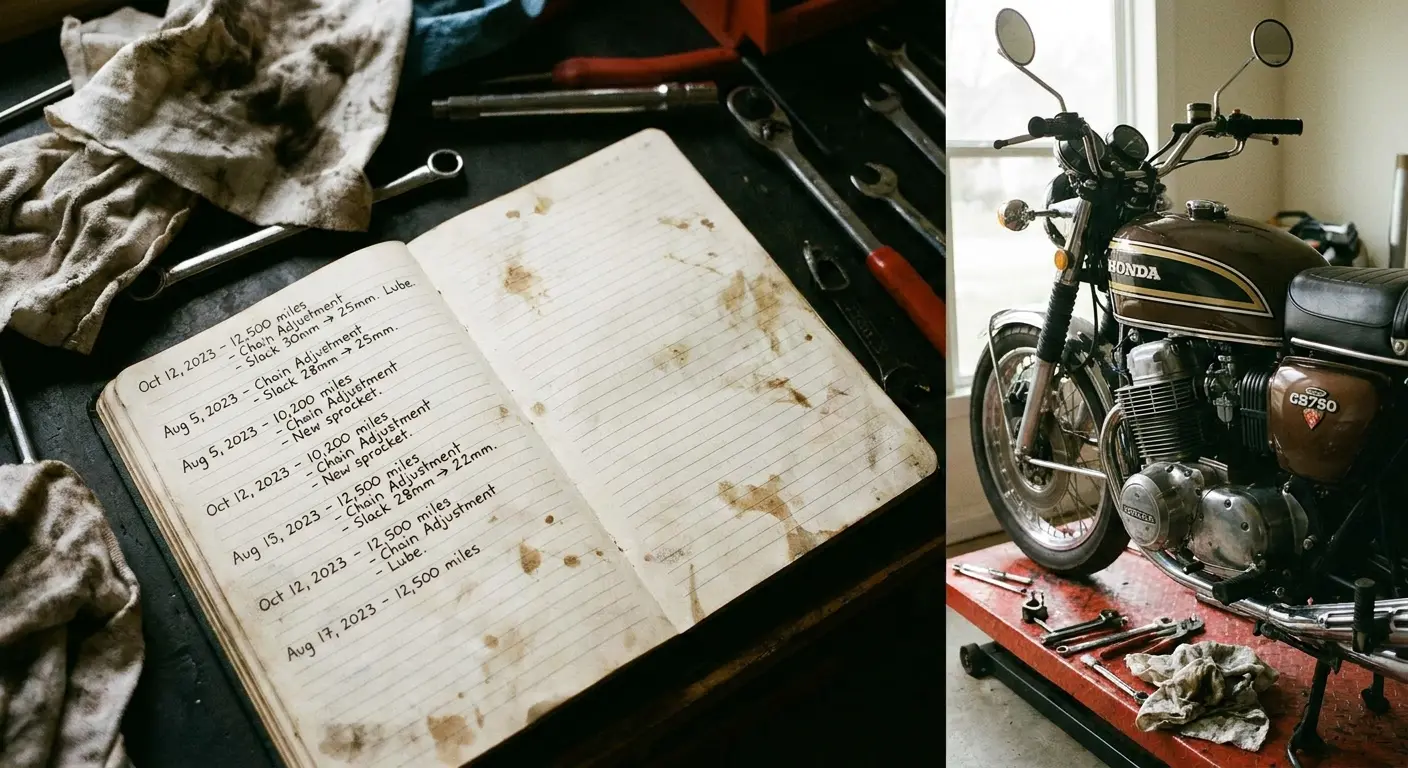
Write down your adjuster positions before and after each adjustment. You might think you'll remember, but three months from now when you're adjusting again, you won't. Knowing how much adjustment was needed and how long it lasted tells you whether your chain is wearing normally or accelerating. If you needed two full turns of the adjusters last time and you need four turns this time with the same interval between adjustments, your chain is stretching faster. That's an early warning that replacement is coming soon.
Record your mileage at each adjustment. This gives you the interval between adjustments, which should be relatively consistent if your riding style and conditions stay similar. If intervals start shortening, something has changed. Maybe your chain is wearing out. Maybe your sprockets are worn and accelerating chain wear. Maybe you're riding harder or in dirtier conditions. The mileage log helps you identify patterns.
Take photos of your sprocket teeth every few adjustments. You can't rely on memory to track gradual wear. Photos from three months ago compared to today show you exactly how fast your sprockets are deteriorating. This helps you plan for replacement before you're stranded with a worn-out drivetrain.
Note any tight spots or damaged links when you find them. If a tight spot is getting tighter with each adjustment, that section of chain is failing and you need to replace the chain before it breaks. If a tight spot stays consistent, it's just normal wear variation and you can work around it.
Document your torque wrench settings and which fasteners you torqued. This seems obvious during the work, but weeks later when you're trying to remember if you actually torqued the axle nut or just snugged it, you'll wish you'd written it down. A simple checklist prevents second-guessing.
Record environmental factors if they're unusual. If you adjusted your chain in freezing temperatures or after riding in heavy rain, note it. Temperature affects your measurements, and knowing the conditions helps you interpret whether your next adjustment is happening sooner than expected for legitimate reasons or because something's wrong.
Keep your manual's specifications written down with your maintenance log. You don't want to dig out the manual every time you need to check the slack spec or axle torque. Having the numbers in your log means you can reference them instantly while you're working. Mount your phone securely so you can access digital notes or photos without fumbling around.
Track any changes to your setup. If you change chain brands, sprocket sizes, or even tire sizes, note it. These changes affect your drivetrain's behavior. When you're looking back at your maintenance history, you need to know what changed and when so you can correlate it with any problems that developed.
Your documentation doesn't need to be elaborate. A simple notebook or a notes app on your phone works fine. The key is consistency. If you record some adjustments but not others, your data has gaps that make pattern recognition impossible. Make documentation part of the adjustment routine, not an afterthought.
Post-Adjustment Testing Most Riders Skip
Your first test should happen before you even start the bike. Shift through all the gears with the engine off (you'll need to roll the bike forward slightly between shifts to unload the transmission). The shifter should move smoothly without binding. If it feels noticeably different than before your adjustment, you may have created a problem with chain alignment or tension that's affecting the transmission's operation.
Start the bike and let it idle in neutral. Listen for chain noise. You shouldn't hear slapping, grinding, or rhythmic ticking. Some chain noise is normal, especially on bikes with exposed chains, but a properly adjusted chain should be quieter than a loose one. If noise increased after your adjustment, you may have over-tightened.
Roll the bike forward and backward slowly while watching the chain. It should move smoothly without hopping or binding. If you see the chain jump or catch at any point in the wheel's rotation, you have a problem. Either the chain has a damaged link, the sprockets are worn, or your tension is too tight.
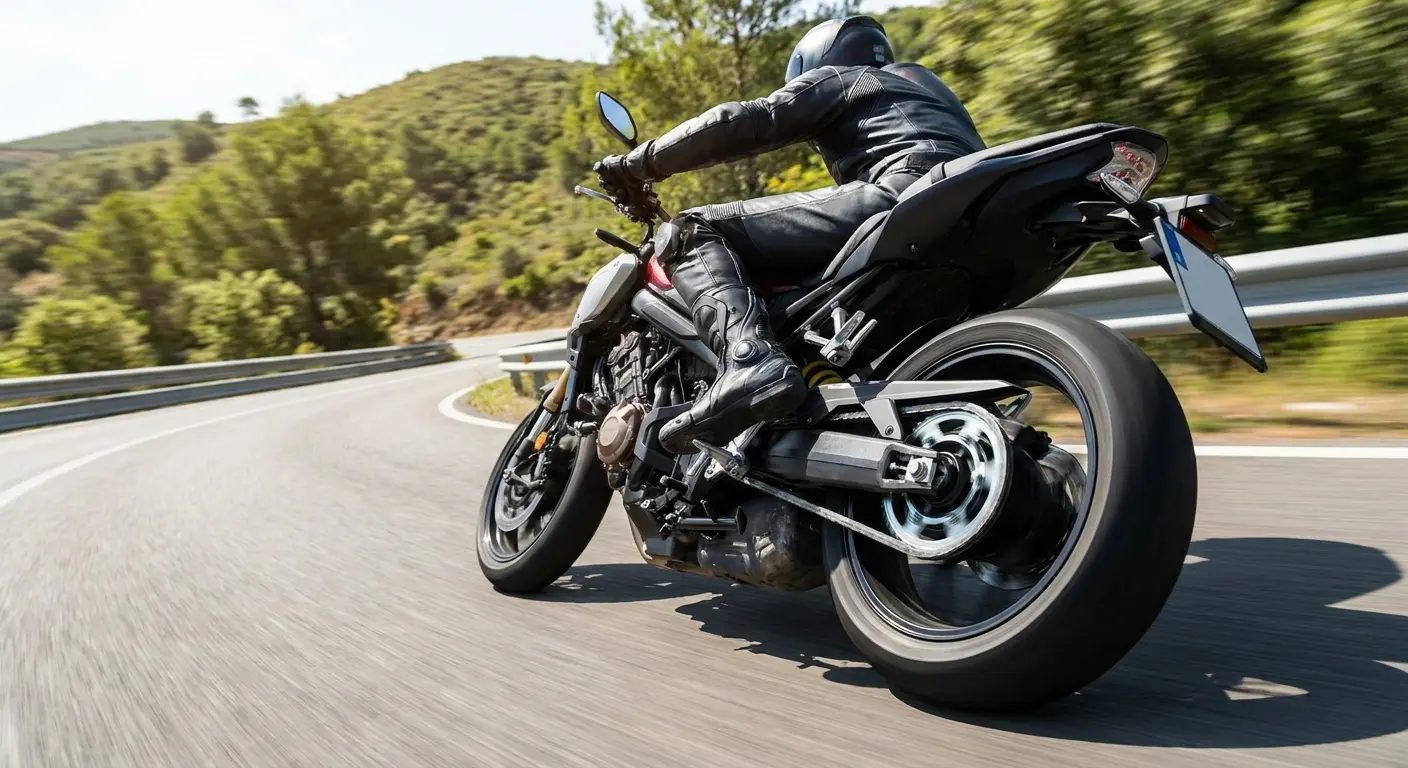
Take a short test ride in a safe area where you can focus on the bike's behavior. Accelerate gently and feel for smoothness in power delivery. A properly adjusted chain transmits power without surging or hesitation. If you feel pulsing or irregular power delivery, your chain might be binding at certain points in its rotation.
Shift through all gears under light load. Shifting should be smooth and precise. If you notice false neutrals, difficulty finding gears, or rough engagement, your chain adjustment may have changed the relationship between your transmission output and rear wheel in a way that's affecting shift quality. This is rare, but it happens if alignment is significantly off.
Find a straight section of road and briefly take your hands off the bars (only if safe and legal in your area). The bike should track straight without pulling to one side. If it pulls, your wheel alignment is off. This isn't always caused by chain adjustment, but if the problem appeared immediately after your work, that's the likely culprit.
After your test ride, immediately check your chain tension again while the bike is hot. The chain will have expanded slightly from heat. If your chain slack has decreased significantly (more than 5mm), you set your tension too tight when cold. You'll need to readjust to account for thermal expansion.
Check your axle nut torque with your torque wrench. You're not retorquing it; you're verifying that it's still at spec. If the torque wrench clicks immediately, you're good. If you can turn the nut before the wrench clicks, it loosened during your test ride. This is rare but serious. You'll need to investigate why the nut won't hold torque (damaged threads, wrong washer, contaminated threads).
Inspect your chain and sprockets after the test ride. Look for any signs of heat discoloration, fresh metal shavings, or new wear marks. These indicate that something is binding or misaligned. A proper adjustment shouldn't create any new wear patterns.
Ride normally for the next few days and stay alert to changes in how the bike feels. Sometimes problems don't manifest immediately. If you notice new vibrations, noises, or handling quirks in the first 50-100 miles after adjustment, recheck your work. You may have introduced a subtle problem that only shows up under varied riding conditions. Plan to recheck your tension after the first 100 miles following adjustment. Chains can settle into new positions as they wear into the sprockets and adjusters can shift slightly as everything heat cycles. This recheck usually shows a small amount of chain slack increase. If it's significant, you need to investigate why the adjustment didn't hold.
Final Thoughts
Look, your chain is going to need adjustment. That's just physics and metal wear. But if you're adjusting it every two weeks, something's wrong with your process.
Chain adjustment isn't complicated, but it's easy to do poorly if you're following a rote procedure without understanding what you're actually accomplishing. The difference between a chain that lasts 20,000 miles and one that's worn out at 12,000 miles often comes down to these adjustment details. You're not just setting a measurement; you're managing a dynamic system that changes with temperature, load, and wear.
The guys I know who never seem to have chain problems aren't lucky. They're the ones who found the tight spot before adjusting, who verified alignment three different ways, who documented their work, and who tested thoroughly afterward. They treated chain maintenance as a diagnostic opportunity, not just a checkbox task.
Your chain will tell you when something's wrong if you pay attention. Increased noise, shorter intervals between adjustments, uneven sprocket wear, and handling changes are all signals that something in your drivetrain needs attention beyond basic tension adjustment. Catching these signals early means fixing small problems before they become expensive ones.
Is this more complicated than you thought? Yeah, probably. Is it more work than just spinning the adjusters until it looks about right? Definitely. But you know what's more work? Replacing a $200 chain every year because you kept half-assing it.
The next time your chain needs adjustment, you'll know what to look for and why it matters. You'll understand that the swing arm marks are a starting point, not the finish line. You'll recognize that proper tension at the tight spot matters more than hitting the middle of the spec range at a random point. You'll verify your work through multiple methods because you know that each method catches different errors.
Most importantly, you'll stop chasing the same problem every few weeks because you'll address the root causes instead of just treating symptoms. That's the difference between maintaining your bike and actually understanding it.
When you finally get this dialed in (tension perfect, alignment straight, everything torqued to spec) and you take that first ride and the bike just feels right? That's what we're chasing here.
Now go ride.

