


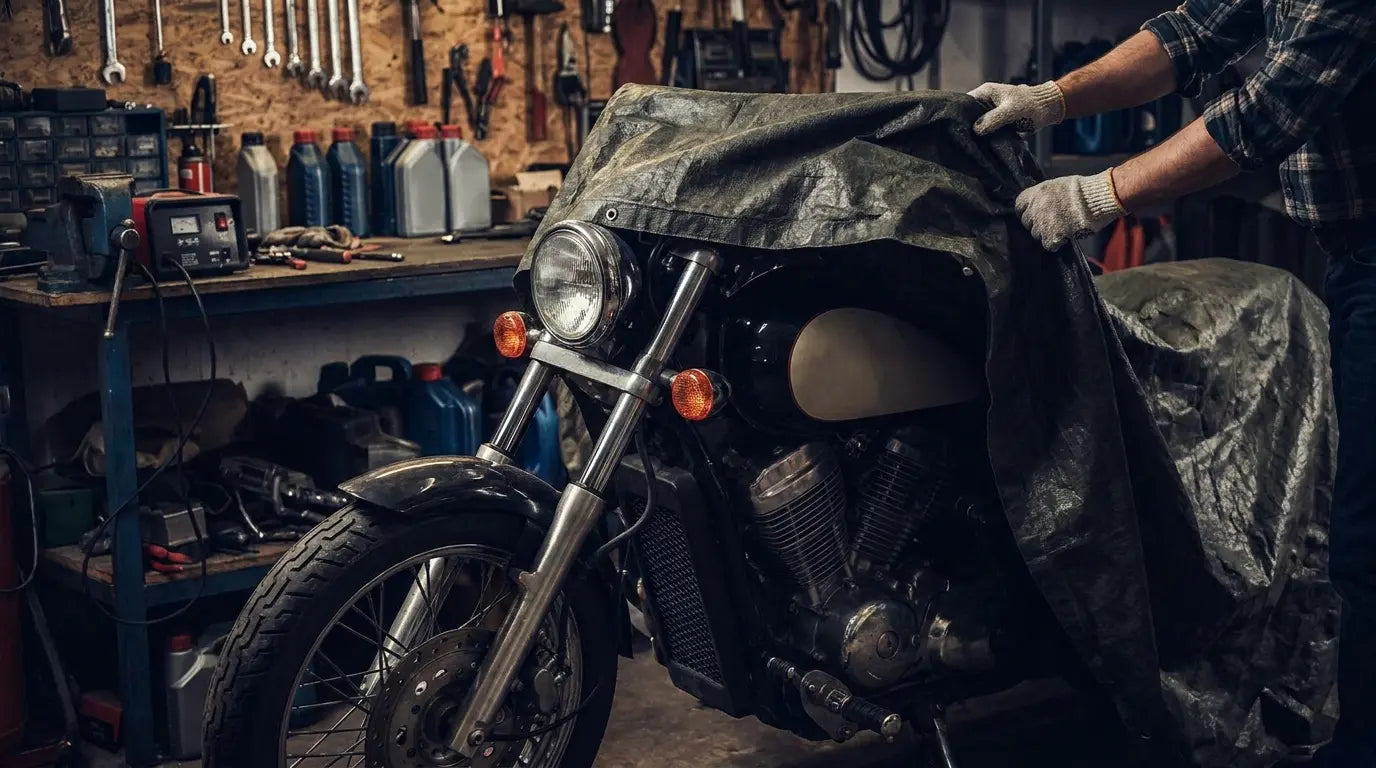
Last March, I spent three hours troubleshooting my turn signals. Battery was fine. Fuses were good. Turned out a single ground connection behind the headlight had corroded over winter. Five-minute fix, three-hour diagnosis. That's when I started actually winterizing the electrical system.
You've probably read a dozen guides on draining fuel and covering your bike. This guide focuses on the tech and electronics angle that most riders ignore until spring arrives with a dead battery, corroded connections, and a phone mount that's seen better days. Your motorcycle's electrical system needs protection just as much as the engine does, and your riding gear (especially the tech you rely on) deserves attention before months of cold storage begin.
Most riders focus on mechanical winterization. But the electrical system? It faces different threats during storage. Temperature fluctuations in unheated garages can swing 30 degrees or more in a single day. Every time it goes from cold to warm and back, you're basically pumping moisture into places you'll never see: behind gauge clusters, inside switch housings, around USB ports you installed for phone charging.
Table of Contents
Why Your Bike's Electrical System Is More Vulnerable Than You Think
Battery Maintenance Beyond the Tender
Protecting Phone Mounts and Handlebar Accessories from Winter Damage
The Corrosion Factor: Connectors, Ports, and Hidden Moisture Traps
Storage Environment: What Actually Matters for Electronics
Pre-Winter Tech Audit: Document Everything Now
Spring Startup Protocol for Electronics
TL;DR
Electrical systems face unique winter threats that standard winterization guides overlook
Battery tenders aren't enough; ground connections need individual attention and protection
Phone mounts and handlebar accessories deteriorate faster in storage than during active use
Moisture becomes corrosive when trapped in connectors over dormant months
Storage environment affects electronics differently than mechanical components
Documenting your tech setup now prevents spring frustration and troubleshooting nightmares
Systematic electronics-first approach to spring startup prevents damage
Why Your Bike's Electrical System Is More Vulnerable Than You Think
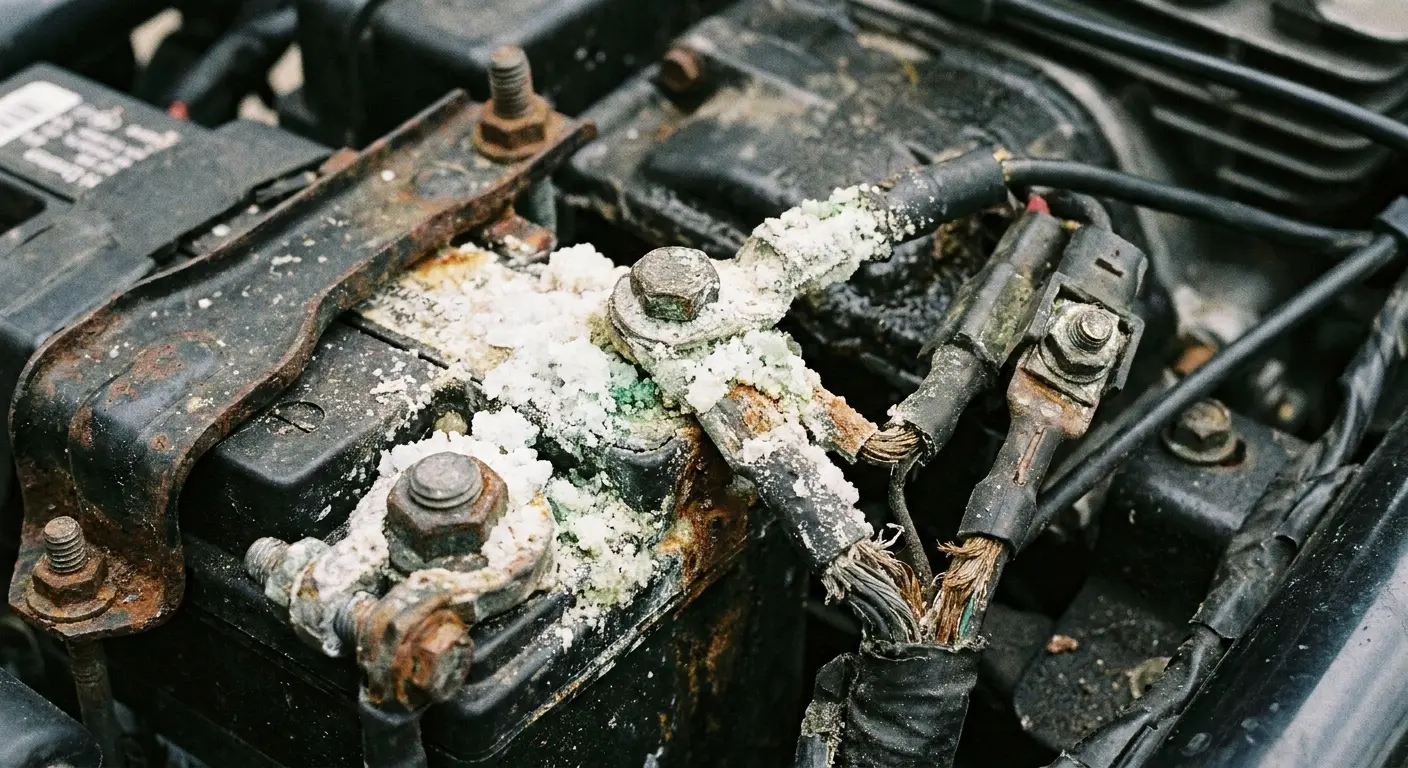
Temperature Cycling Creates Hidden Condensation
Winter storage creates conditions that are surprisingly hostile to electronics.
Your garage temperature? It's all over the place. Each temperature swing from cold nights to warmer afternoons causes moisture to condense on cold metal surfaces and work its way into connection points. The damage develops slowly through micro-corrosion that builds up invisibly during storage, creating mysterious electrical gremlins in spring.
Modern motorcycles pack more electronics than previous generations. Fuel injection systems, ABS modules, traction control computers, digital displays. Each with vulnerable connection points that winter loves to attack.
Standard winterization checklists address visible mechanical concerns but miss the sneakier electrical issues that cause intermittent problems and frustrating diagnosis. When you're learning how to winterize a motorcycle, most guides tell you to drain the carbs and change the oil. They skip the part about protecting the dozen electrical connections that'll corrode while you're dreaming of spring rides.
Component Type |
Primary Winter Threat |
Visibility of Damage |
Typical Failure Timeline |
|---|---|---|---|
Battery terminals |
Acid corrosion from moisture |
Visible (white/green buildup) |
2-3 months |
Ground connections |
Frame contact corrosion |
Hidden until failure |
3-4 months |
Sensor plugs |
Pin corrosion in multi-contact connectors |
Hidden until testing |
4-5 months |
Switch housings |
Internal moisture accumulation |
Hidden until malfunction |
3-5 months |
USB ports |
Contact corrosion from trapped water |
Hidden until use attempt |
2-3 months |
ECU connectors |
Multi-pin degradation |
Hidden until fault codes appear |
4-6 months |
My buddy Jake has an MT-07, stores it in his unheated garage in Michigan. Did everything right mechanically: fresh oil, fuel stabilizer, covered and on a tender. Skipped the electrical details. Spring startup showed 12.4 volts on the battery, the bike fired up, but the turn signals worked intermittently.
Two hours of troubleshooting later, he found it: the ground connection behind the headlight nacelle had developed enough corrosion over winter to create intermittent contact. The fix took five minutes once he identified it, but finding it consumed his entire first riding day of the season.
Why Dormancy Is Worse Than Active Use
This sounds backwards, but electronics often suffer more damage during storage than during active riding.
When bikes are in use, electrical current flowing through connections prevents corrosion buildup. Heat from operation drives out moisture. During dormancy, moisture settles into components and stays there, giving corrosion months to develop without interruption.
The materials in modern accessories (aluminum housings, rubber gaskets, spring-loaded clamps) that hold up great during riding? They respond poorly to months of temperature cycling without movement or use. Factory electrical systems face similar challenges. Connection points become vulnerable when current stops flowing and protective heat generation ceases.
Proper dormancy protection during storage differs from active riding maintenance, which is why understanding motorcycle maintenance matters before winter arrives. The techniques that keep your bike running through summer won't protect it through winter.
Battery Maintenance Beyond the Tender
Terminal Cleaning and Protection Protocol
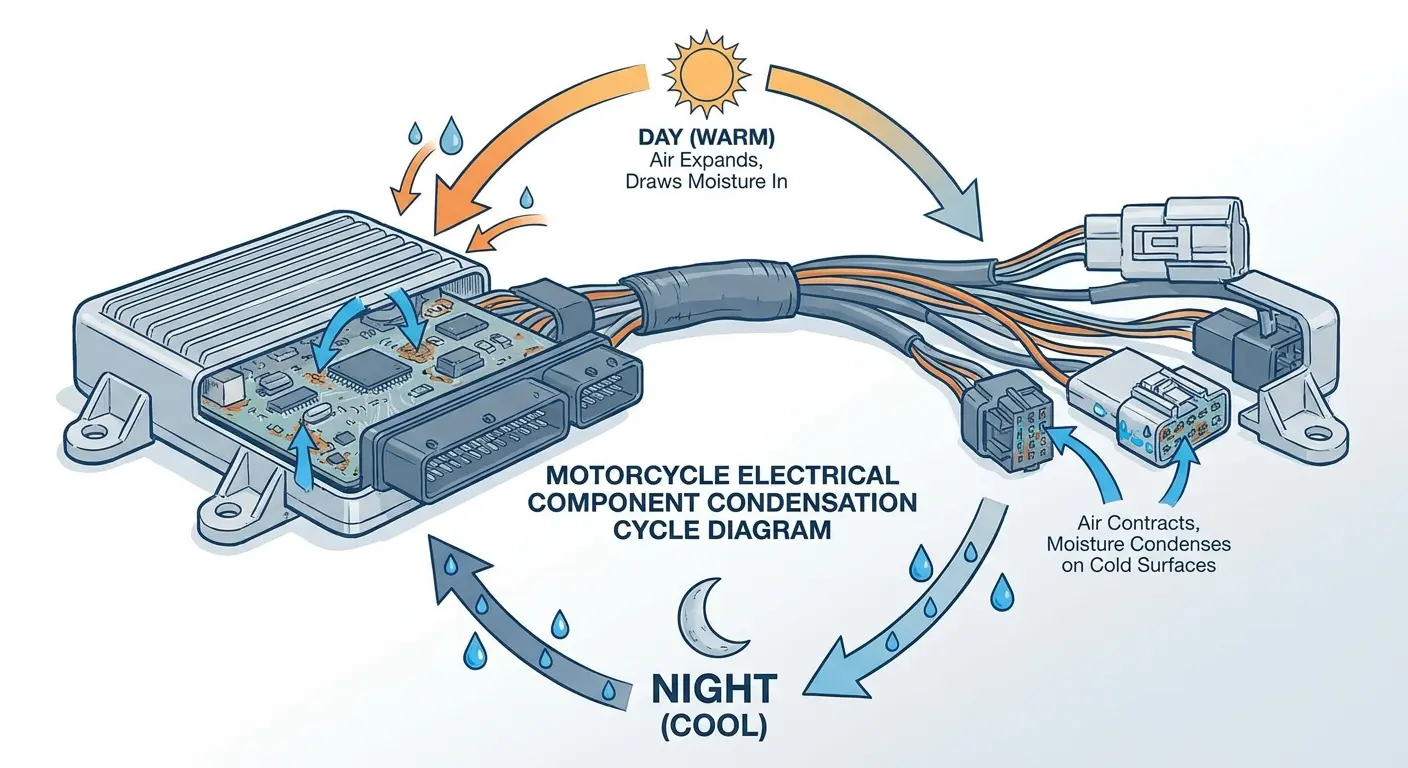
Here's what nobody tells you about battery tenders: they keep the battery charged, sure. But they don't do anything for your connections. And connections? That's where the real problems hide.
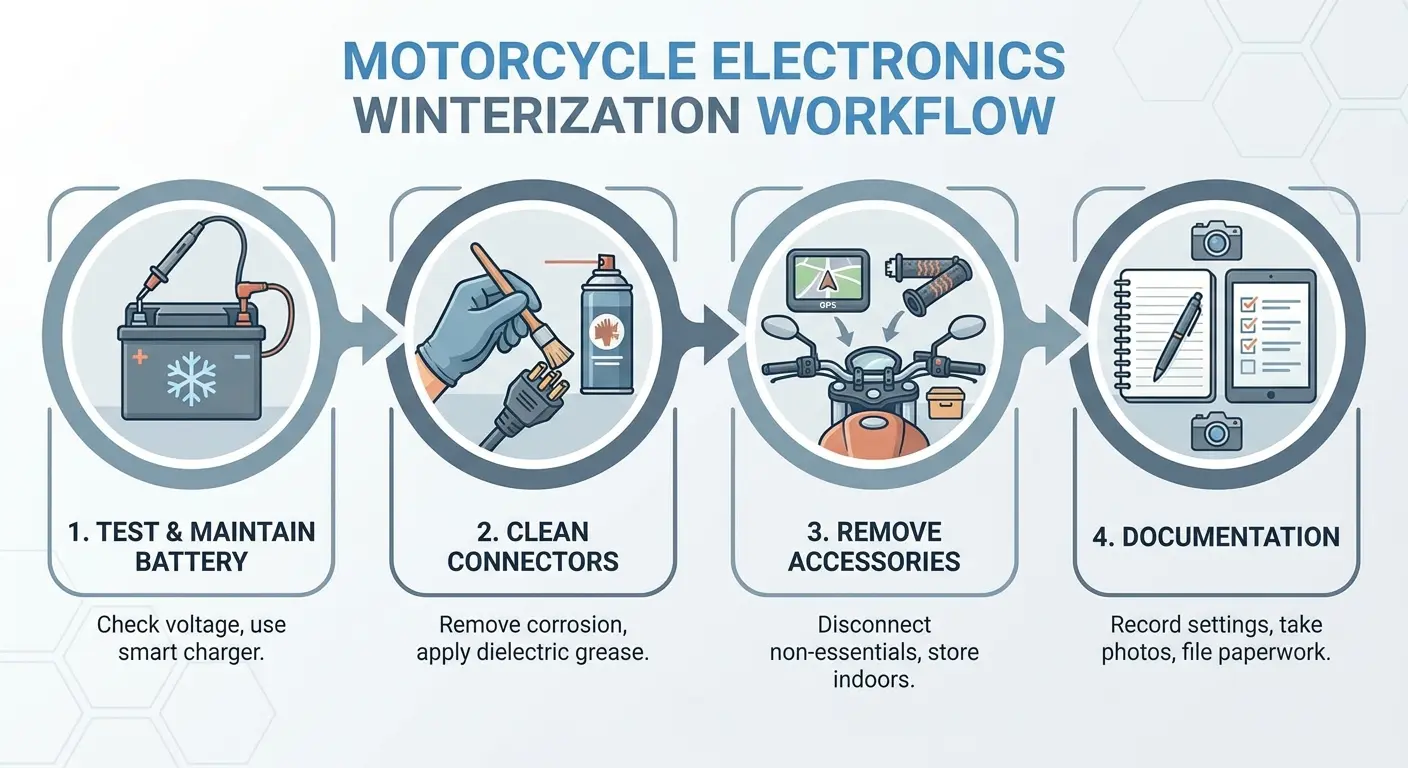
Pull both cables (negative first, always) and actually clean them. Not a quick wipe. I mean clean them. Baking soda solution for lead-acid, contact cleaner for lithium. Yeah, it matters which one you use.
The terminal connection itself is less critical than ground points scattered around the frame. Those corrode faster because they're exposed to the environment. Finding and servicing every ground connection (under seat, near ECU, at engine cases) prevents more spring electrical issues than any other single winterization task.
Ground connections. I keep coming back to these because they're that important.
Each ground point needs removal, cleaning of both wire terminal and frame contact point, then reinstallation with dielectric grease to seal out moisture. Most bikes have between four and eight ground points. Finding them all takes your service manual, but the effort saves your ass when your bike fires up perfectly in March.
Winterizing isn't just about the obvious stuff. Ground connections are the most overlooked component. They're also the most common source of weird electrical problems that make you question your sanity.
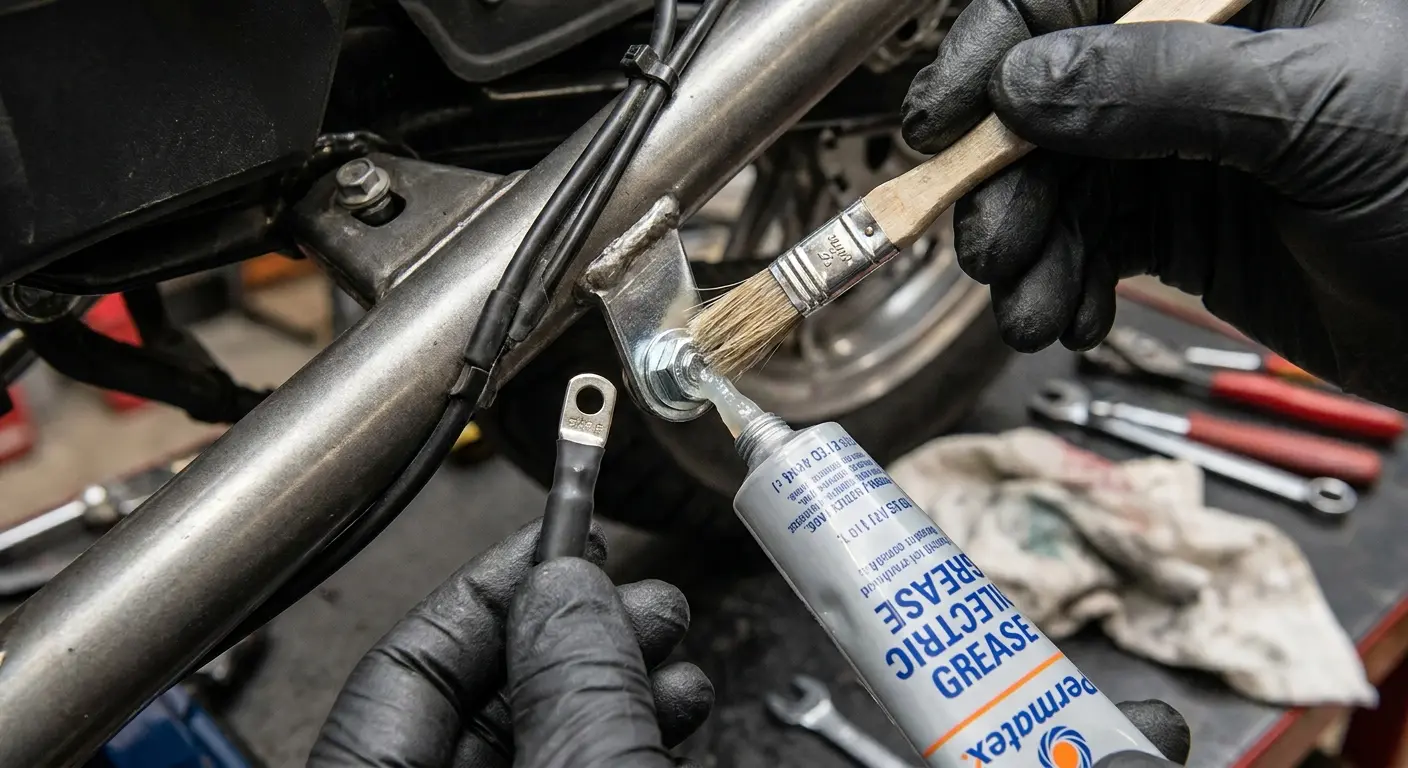
Ground Connection Winterization Checklist:
Locate all ground points using service manual (typically 4-8 locations per bike)
Photograph each connection before removal for spring reference
Remove ground wire from frame contact point
Clean wire terminal with wire brush until bare metal shows
Clean frame contact point with wire brush or sandpaper
Apply thin layer of dielectric grease to frame contact point
Reinstall wire terminal and torque to specification
Apply dielectric grease to exposed terminal end
Document completion date for each ground point
Set calendar reminder for monthly visual inspection during storage
Tender Placement, Settings, and Monthly Monitoring
Battery tender placement affects performance. Cold concrete floors make tenders work harder to maintain charge, and temperature significantly affects battery chemistry. Position your bike or battery above freezing temperatures if possible.
Tender settings must match battery type. Using wrong modes can overcharge or undercharge over months, with lithium batteries needing specific charging profiles that differ from lead-acid settings. Monthly tender checks catch loosened connections and error indicators before they become spring problems.
For storage without tender access, complete battery removal and indoor storage with monthly charging provides better protection than leaving batteries in cold environments. Document your baseline voltage before storage (12.6-12.8V for lead-acid, higher for lithium) to help assess battery health degradation in spring.
A sportbike owner in Colorado installed a lithium battery in August for weight savings. He connected his standard lead-acid battery tender in November without checking the settings. By February, the tender's error light was blinking.
The lithium battery had been overcharged repeatedly using the wrong charging profile, damaging internal cells. The battery needed replacement before spring, costing $200 that proper tender settings would have prevented. If you're storing your bike with a lithium battery, matching your tender to your battery type isn't optional.
Protecting Phone Mounts and Handlebar Accessories from Winter Damage
Why Mounts Suffer During Storage
Phone mounts take more damage sitting in your garage all winter than they do during an entire riding season. Temperature swings (cold at night, warmer during the day, repeat for four months) destroy the spring tension and turn rubber gaskets brittle.
Spring-loaded clamps lose tension when compressed for months in cold conditions. Result? Reduced grip strength and phones vibrating loose during spring riding.
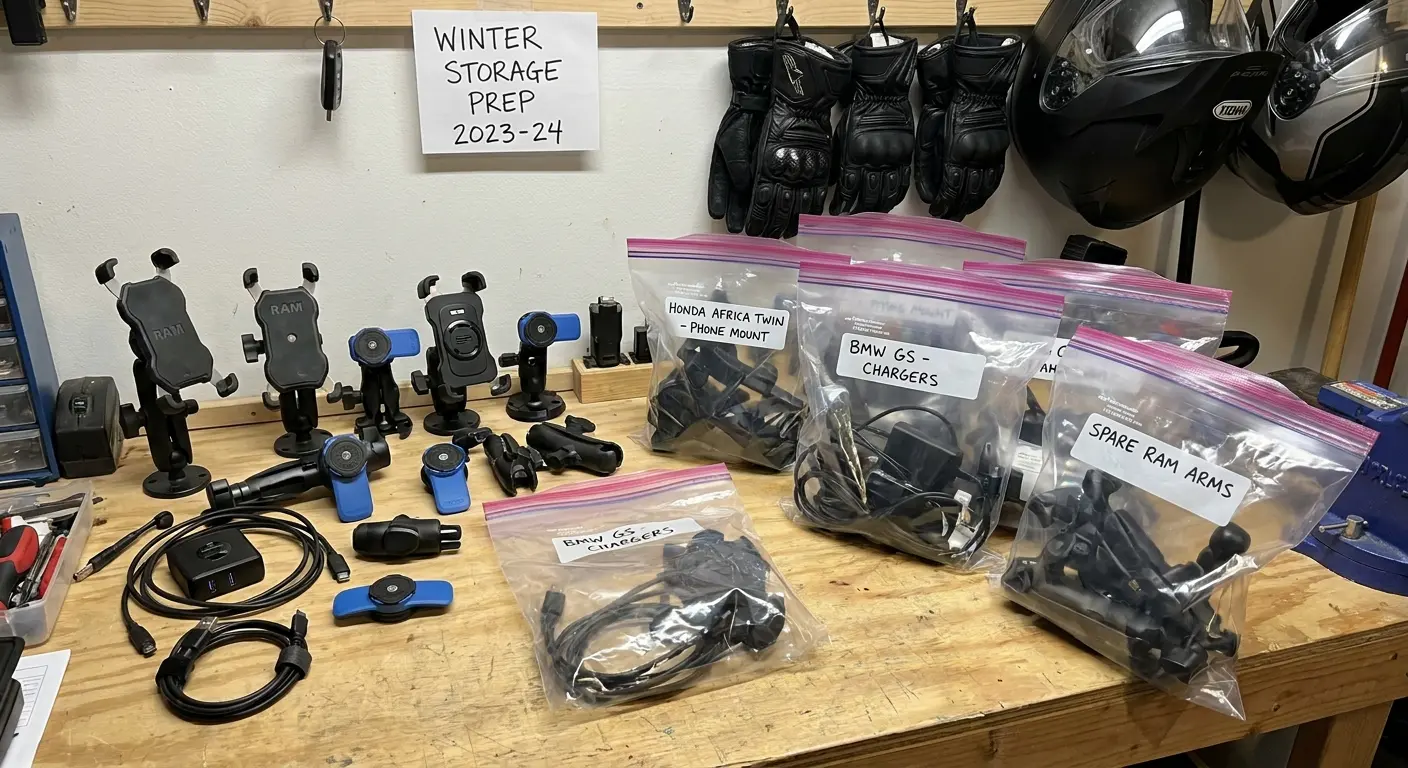
All mount types (RAM, quad-lock, magnetic, spring-loaded) should be removed and stored indoors at room temperature. Take apart multi-part systems and keep pieces in labeled bags. Prevents lost components and lets you inspect everything before reinstallation.
Rubber gaskets and O-rings that provide weatherproofing during riding become brittle from temperature extremes without regular use. The same gasket that kept water out during summer rainstorms will crack and leak after a winter in your unheated garage.
Removing and protecting your motorcycle handlebar iPhone mount during winter prevents the spring-loaded mechanism from losing tension during cold storage months. Five minutes of removal now saves you from buying a replacement mount in spring.
Mount Component |
Storage Temperature Impact |
Recommended Action |
Spring Inspection Priority |
|---|---|---|---|
Spring-loaded clamps |
Lose 15-30% tension in cold |
Remove, store at room temp |
Test grip strength before reinstalling |
Rubber gaskets/O-rings |
Become brittle, crack |
Remove if possible, store separately |
Check for cracks, replace if hardened |
Ball joints (RAM mounts) |
Friction adjustment loosens |
Loosen slightly before storage |
Re-tighten and test hold angle |
Adhesive pads |
Adhesive degrades in cold |
Remove completely |
Replace with fresh pad |
Magnetic components |
No degradation |
Can remain installed |
Clean contact surfaces |
Twist-lock mechanisms |
Moving parts collect moisture |
Remove, clean, lubricate |
Test lock/release action |
USB Ports, Heated Grips, and Electrical Accessories
USB charging ports and handlebar power outlets need complete sealing or removal. Moisture finds entry even with rubber covers, and trapped water corrodes internal contacts over winter months.
Proper sealing means electrical tape wrapped multiple times, covered with plastic bag secured by zip tie. Factory rubber caps aren't enough.
Action cameras, GPS units, and communication systems need complete removal with indoor storage. Their batteries drain slowly even when powered off, and cold temperatures accelerate drain to levels that prevent future charging.
Heated grips can't be easily removed but need moisture elimination. Run them at maximum temperature for 10-15 minutes before final storage, driving out moisture from heating elements. This simple step prevents the disappointing discovery that your heated grips only work on one side come spring.
Side note: heated grips are amazing until one side stops working. Then they're just a reminder that you should've done this winterization thing properly.
Handlebar-mounted throttle locks, cruise controls, and bar-end mirrors with integrated signals should be loosened slightly. Relieves constant pressure that deforms rubber bushings and creates uneven wear on adjustment mechanisms. Tank bags with electronic components need complete removal to prevent magnetic mount impressions on tank finish and protect integrated electronics from moisture and temperature issues.
Rokform Mount Winter Maintenance
Rokform mounts use magnetic and twist-lock systems with mechanical components that benefit from specific winter maintenance. While magnets don't degrade, twist-lock mechanisms have moving parts that need cleaning and light lubrication before storage.
The five-minute process: remove the mount from the bike, clean road grime from locking mechanism, apply minimal silicone lubricant to moving parts, then store indoors. This maintenance ensures perfect spring function and extends mount lifespan significantly.
Quality mounting systems protect expensive devices throughout ownership cycles, not just during active riding. Makes proper winter care worthwhile for riders protecting thousand-dollar phones on bikes facing seasonal storage. The twist-lock mechanism on the pro ball motorcycle phone mount needs cleaning and light lubrication before winter storage to maintain smooth operation.
The Corrosion Factor: Connectors, Ports, and Hidden Moisture Traps
Front and Rear Connector Protection
Corrosion begins immediately when moisture and metal meet. Winter storage creates accelerated conditions for this chemical process.
Motorcycles contain dozens of electrical connectors riders rarely inspect closely. Each relies on metal-to-metal contact with rubber seals designed for riding but not months of dormancy in
Motorcycles contain dozens of electrical connectors riders rarely inspect closely. Each relies on metal-to-metal contact with rubber seals designed for riding but not months of dormancy in fluctuating temperatures.
Front-end components (headlight connectors, turn signal plugs, horn connections) live in the most exposed area receiving constant water and road spray during riding. They hide moisture even when appearing dry in November. Each accessible front-end connector should be disconnected, sprayed with electrical contact cleaner on both male and female sides, allowed to dry completely, then receive dielectric grease application before reconnection.
Tail section components (brake lights, license plate lights, turn signals) face identical moisture issues but get overlooked due to access difficulty. Your motorcycle winterization checklist should include every connector you can reach, front and rear.
Connector Protection Template:
For Each Electrical Connector:
Current condition assessment: (Clean / Light corrosion / Heavy corrosion / Moisture present)
Connector type: (2-pin / Multi-pin / Sealed / Unsealed)
Accessibility: (Easy / Requires panel removal / Requires tool access)
Action taken: (Cleaned and protected / Replaced / Sealed only / Marked for spring attention)
Products used: (Contact cleaner / Dielectric grease / Electrical tape / Sealant)
Date serviced: ___________
Photo reference number: ___________
Spring recheck needed: (Yes / No)
Notes: ___________
ECU, Sensor, and Charging System Connections
ECU and control module multi-pin connectors with 20-30+ individual pins are particularly vulnerable. Corrosion on even one pin creates intermittent issues that become impossible to diagnose. Most ECU connectors hide under seats or behind side panels, needing inspection for moisture or existing corrosion signs and protection with dielectric grease if disconnection won't trigger fault codes.
The sensors are where things get annoying. Throttle position, coolant temp, air intake temp, O2 sensors, wheel speed sensors. They've all got connectors that'll corrode. The wheel speed sensors are the worst because they're right where road spray hits. Check each one for green or white buildup indicating existing corrosion that'll worsen over winter.
Charging system connections between stator and regulator/rectifier carry high current and generate heat during operation. Heat cycling combined with moisture creates aggressive corrosion that needs specific cleaning and protection.
Switch housings trap moisture inside plastic shells. Wire entry points create moisture paths that need electrical tape wrapping to supplement degrading factory seals.
Understanding how to winterize a motorcycle means getting familiar with components you might never have inspected before. Once you know where everything is, future winterizations go much faster.
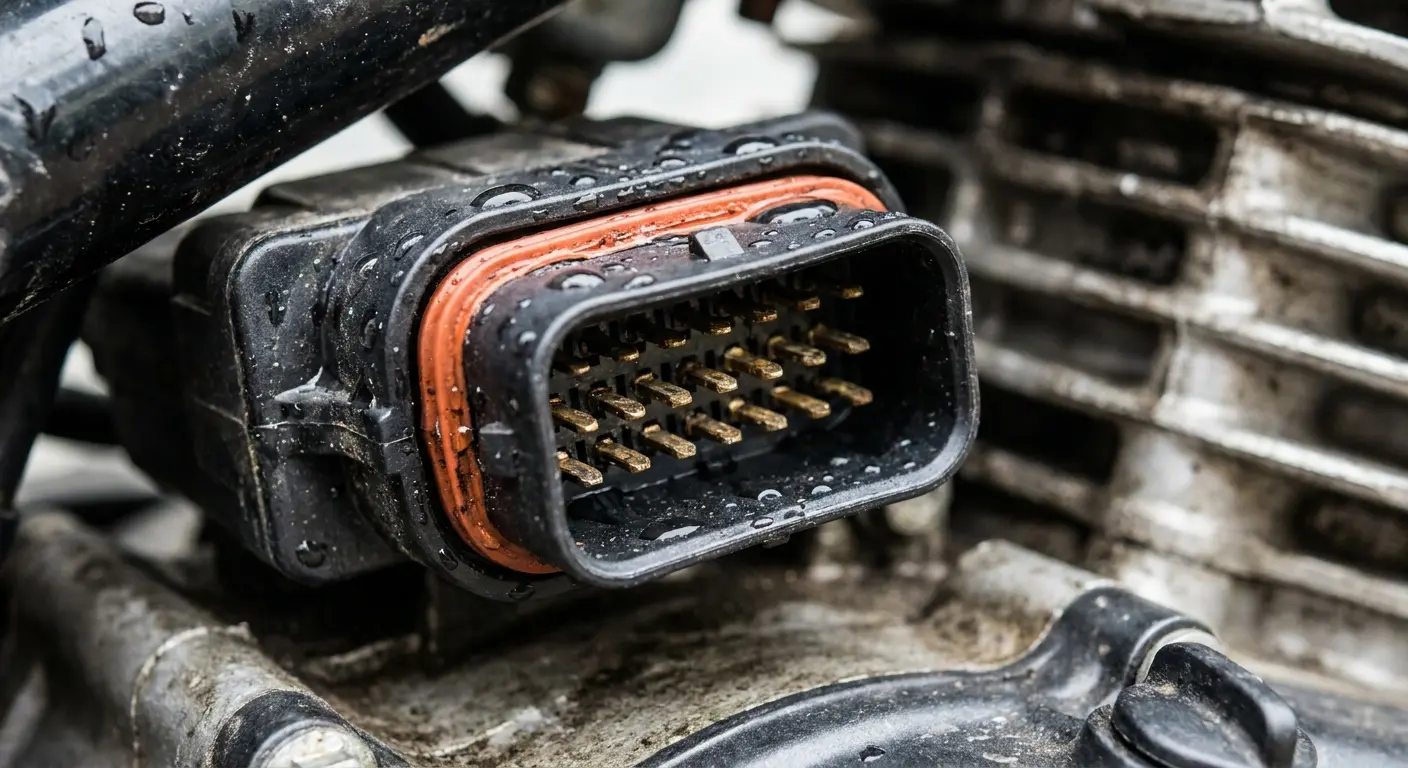
An adventure bike rider discovered his ABS warning light stayed illuminated during spring startup after winter storage in a damp basement. Diagnostic codes pointed to the front wheel speed sensor. Upon inspection, the sensor connector showed green corrosion on three of its four pins.
The sensor itself was fine, but the corroded connector created intermittent contact. Cleaning the connector and applying dielectric grease solved the issue, but the corrosion had developed entirely during the five-month storage period in a high-humidity environment.
Storage Environment: What Actually Matters for Electronics
Humidity Control and Temperature Stability
Storage environments affect electronics differently than mechanical components. Humidity is the primary enemy.
Concrete garages and basements trap moisture creating consistently high humidity that accelerates corrosion. Heated garages without year-round climate control create temperature swings producing worse condensation cycles than steady cold.
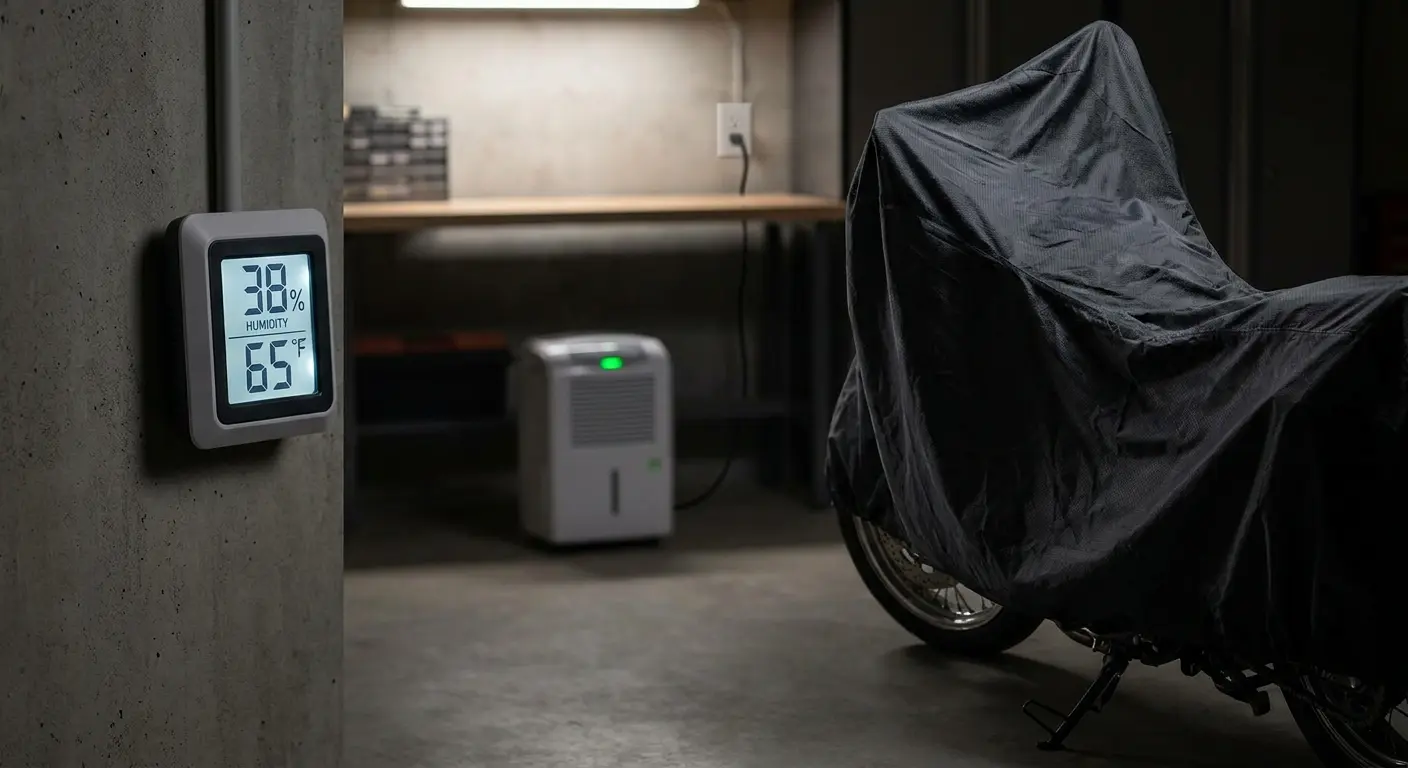
Measure your storage space humidity with inexpensive hygrometers. Gives you actual data. Target relative humidity below 50% ideally or 60% acceptably. Higher levels need active dehumidification. Small RV-sized dehumidifiers positioned near bikes create dry microclimates without dehumidifying entire garage spaces.
Temperature stability matters more than actual temperature. Garages staying at consistent 35°F protect electronics better than spaces swinging from 20°F to 55°F daily. Each swing creates condensation cycles as warm moisture-laden air condenses on cold metal surfaces then freezes and expands into vulnerable spaces.
When you're planning how to winterize your motorcycle for storage, your storage location matters as much as your preparation work. A stable, dry environment can compensate for less thorough winterization, while a terrible environment will defeat even meticulous preparation.
Strategic Positioning and Cover Considerations
Unheated but insulated storage often proves ideal by dampening temperature swings without creating dramatic fluctuations from cycling heat systems. Air circulation helps only with dry air. Fans blowing humid air accelerate some corrosion types rather than preventing it.
Bike covers protect against dust and physical damage but trap moisture if condensation forms. Use breathable fabric rather than plastic or vinyl. Check monthly for moisture buildup. I also compared the best motorcycle covers for bikes parked outside.
Storage location within garages matters significantly. Avoid direct contact with coldest exterior walls. Center positioning away from walls and doors where temperature fluctuations concentrate works better.
Concrete floors act as cold sinks drawing heat and creating temperature differentials that promote condensation. Use plywood, rubber mat, or cardboard insulation barriers particularly for low-mounted electronics like some ECU locations.
Windows create problems through sunlight heating specific areas during day then rapid cooling at night. Park away from direct sunlight while avoiding UV degradation of rubber and plastic components.
Pre-Winter Tech Audit: Document Everything Now
Photographic Documentation and Settings Recording
Human memory fails at recalling accessory wiring details and controller settings over winter months. Detailed photographic documentation is essential.
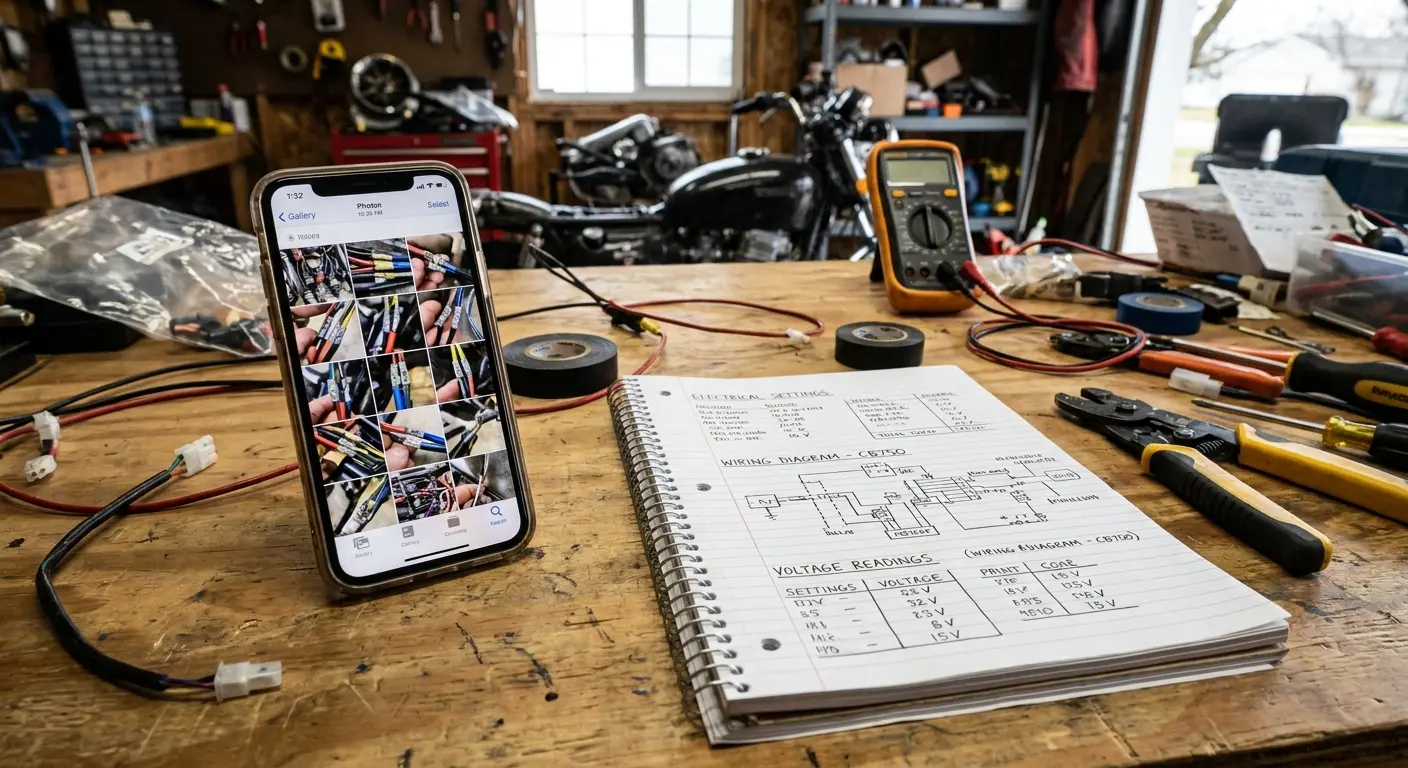
Take a comprehensive photo series. Overall shots showing accessory mounting locations, then close-ups of each component capturing connection angles, wire routing, and identifying marks or labels.
Every accessible electrical connection needs photographing to document which plugs connect where after winter disconnection for maintenance. Settings and configurations for electronic suspension adjustment, heated grip controllers, cruise control, and programmable accessories need written documentation because some systems lose settings during extended power disconnection.
Test every electrical component before storage (headlight, tail light, turn signals, horn, brake light, gauge cluster). Identifies November problems rather than discovering them in March when riding eagerness conflicts with repair needs.
Documenting your tech setup before storage is crucial when learning how to winterize a motorcycle, especially with complex mounting systems like the motorcycle perch mount that need precise reinstallation.
Baseline Measurements and Accessory Inventory
Record battery voltage with bike off then running. Provides baseline numbers for spring comparison. Significant deviations indicate storage-developed problems.
Accessories with apps or Bluetooth connections need settings screenshots for phone mounts with companion apps, helmet communication systems, and GPS units.
Create lists of every removed accessory including storage locations. Prevents spring garage searches for misplaced components.
Check firmware versions on updatable electronics (GPS units, bike computers, communication systems). Do pre-storage updating rather than dealing with updates during spring riding eagerness.
Inspect all aftermarket accessory wiring for chafing, worn insulation, or loose connections. Fix things properly now with adequate time. Wrap exposed wires, secure loose wires with zip ties, and reroute anything rubbing sharp edges.
Aftermarket alarms and GPS trackers need battery backup status verification. Internal batteries maintaining operation during main battery disconnection drain over winter and might need pre-storage replacement. These small details separate smooth spring startups from frustrating troubleshooting sessions.
Spring Startup Protocol for Electronics
Sequential Reconnection and System Checks
Spring startup order of operations prevents damage and identifies issues before they become serious problems. Rushing the process causes preventable electrical failures.
Visual inspection of every electrical component and connection should come before any power reconnection. Look for winter-developed corrosion, collected moisture, or physical storage damage while comparing observations to fall documentation photos.
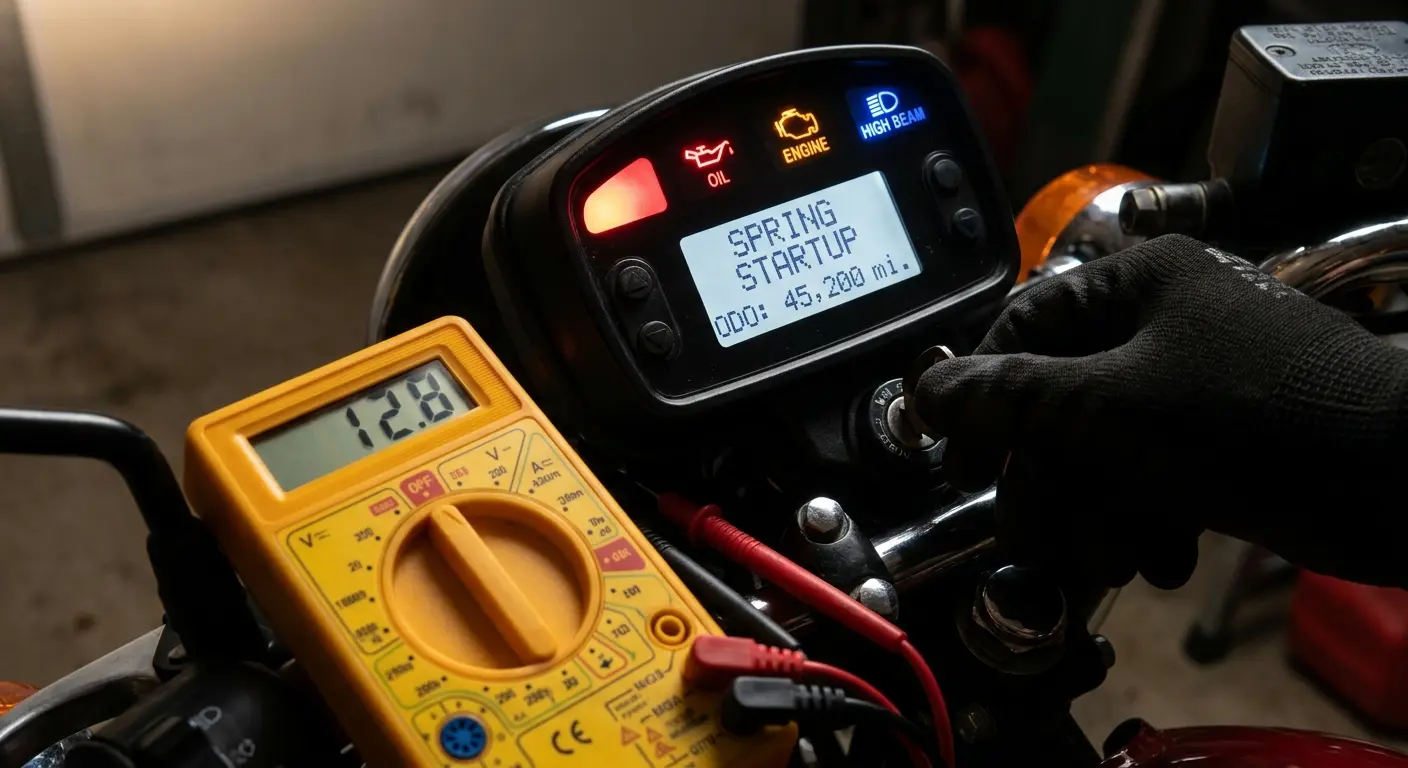
Battery reconnection (positive first, then negative with tight connections) should happen before ignition activation. Immediately check voltage against fall baseline to identify charging needs before proceeding.
Turn ignition to on position without starting engine. Watch gauge cluster for proper warning light behavior during self-check process. Warning lights staying on indicate issues needing pre-start addressing.
Test all lights (headlight, tail light, brake light, turn signals) before engine start. Identifies electrical issues separately from running problems. Listen for fuel pump priming on fuel-injected bikes to confirm electrical function before start attempts.
Spring reconnection procedures should include testing your pro series motorcycle stem mount to ensure the mounting mechanism hasn't been compromised during winter storage.
Accessory Testing and Problem Diagnosis
Engine startup should proceed to idle with gauge cluster monitoring for error messages or unusual behavior. Measure running battery voltage for 13.5-14.5V range indicating functional charging system.
Every reinstalled electrical accessory (phone mount, USB ports, heated grips, auxiliary lights) needs testing during first startup rather than discovering problems on road.
Non-functioning components need documentation-first diagnosis rather than random connection checking. Verify proper reconnection and check simple issues like blown fuses, loose connections, or wrong switch positions before complex troubleshooting.
Indoor-stored accessories need pre-reinstallation inspection for storage-incurred damage, connector corrosion, or moisture intrusion signs.
Reinstall accessories in reverse removal order. Typically means starting with battery-proximate hardwired connections then working outward to handlebar items. Proper torquing avoids stripped threads or cracked plastic housings from overtightening while preventing loose connections from undertightening.
Short neighborhood test rides reveal vibration-affected accessory performance and connection security issues not apparent during stationary garage testing. Stay alert during first several rides for intermittent problems appearing under specific conditions like post-warmup, during braking, or when hitting bumps.
Testing all accessories during spring startup includes verifying your motorcycle mount dampener is still functioning properly to protect your phone from vibration damage.
Final Thoughts
Electronics-focused winterization addresses threats that standard guides overlook. Protecting connection points, documenting configurations, maintaining accessories properly, and understanding how storage environments affect electrical components differently than mechanical ones.
You don't need complete implementation immediately. Start with battery maintenance beyond basic tender connection, vulnerable connection protection with dielectric grease, and removing accessories that don't require bike mounting. Build winterization routines incrementally each year. Add protective steps, documentation, and inspections without creating overwhelming workloads.
Look, if you do nothing else, handle the ground connections. Everything else is bonus. But those grounds? Non-negotiable.
The goal is spring riding without electrical issues. No mysterious warning lights, corroded connections, or malfunctioning accessories. Makes electronics-focused winterization worth the extra investment of time and attention during storage preparation.
Your first warm spring day should be spent riding, not diagnosing why your turn signals stopped working.

