


Table of Contents
Gear That Keeps You Connected and Charged
Solar Panel Charger with USB-C Power Delivery
Portable Power Station Under 5 Pounds
Waterproof Phone Mount System
Battery-Powered LED String Lights
Multi-Device Charging Cable
Emergency Satellite Communicator
Gear That Protects Your Stuff When Weather Turns
Compression Dry Bags with Purge Valves
Tank Bag with Rain Cover Integration
Handlebar-Mounted Dry Pouch
Collapsible Water Container with Spigot
Waterproof Stuff Sacks in Multiple Sizes
Magnetic Tank Map Holder
Gear That Makes Camp Setup Faster After Long Rides
Freestanding Tent with Minimal Stakes
Inflatable Sleeping Pad with Built-In Pump
Compact Camp Chair That Packs Flat
Multi-Fuel Camping Stove
TL;DR
Here's the deal: Dead phone plus middle of nowhere equals bad day. That's why power gear matters. Weather protection isn't about keeping everything dry but maintaining access to essentials without unpacking your entire setup in the rain. And after 8 hours of riding, the last thing you want is complicated gear that takes 30 minutes to set up.
Weight and packability determine what you can realistically bring, which is why every item here prioritizes both function and compact storage. Your phone is your GPS, your camera, and your emergency lifeline. Protect it accordingly.
Gear That Keeps You Connected and Charged
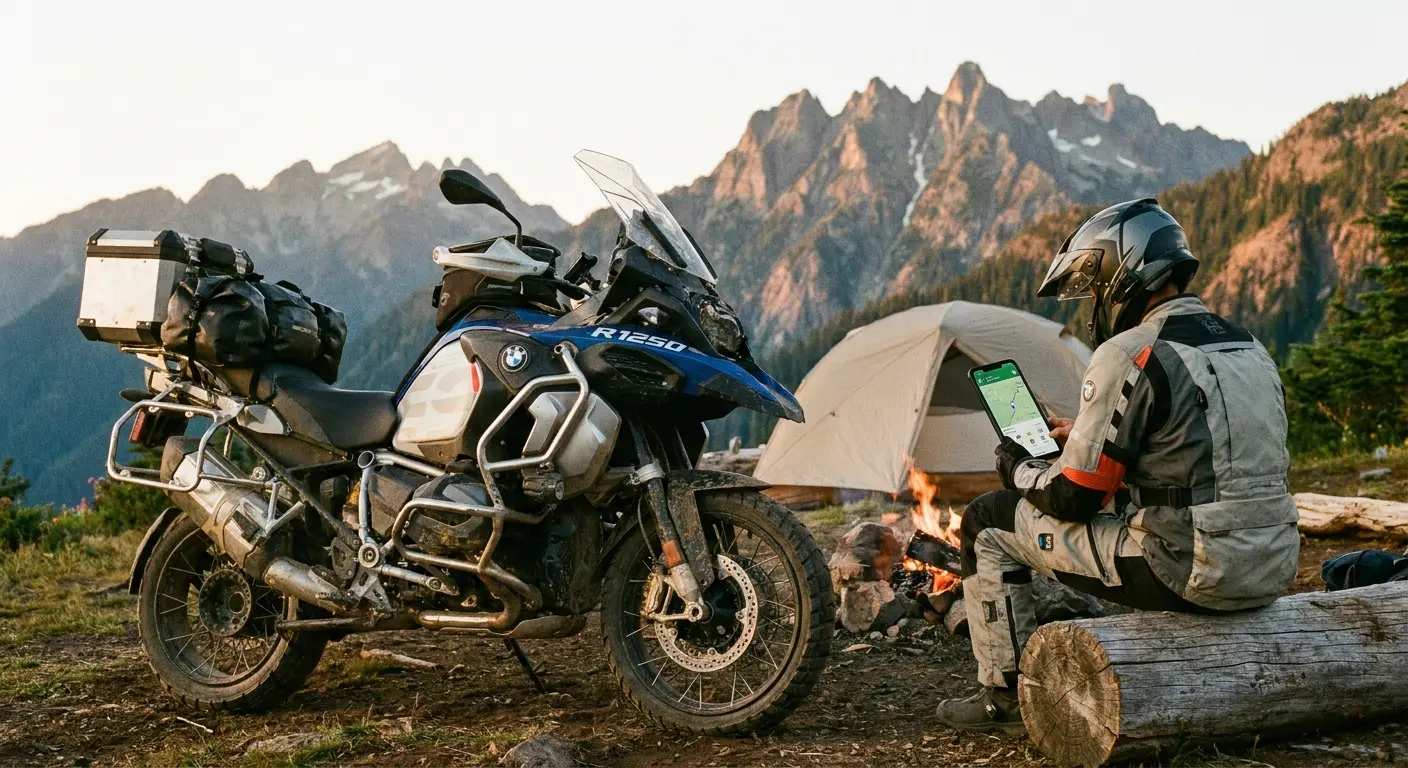
Your phone dies at mile marker 247 on a highway with no cell service. Your GPS goes blank. You can't remember if the campground turnoff was 12 miles back or 12 miles ahead. This exact scenario has happened to me twice.
Most gear lists obsess over tents and sleeping bags (fine, whatever) but completely ignore the electronics that keep you from getting lost or stranded. I'm not talking about staying glued to social media. I'm talking about GPS navigation, emergency communication, weather updates, and the ability to document your trip without your devices dying at the worst possible moment.
These six items solve specific, expensive problems that turn good trips into disasters.
First, figure out what you're charging and how often. A three-day trip requires multiple charges across all your devices. Running out of power means losing navigation, communication, and safety features. I learned this the hard way in southern Utah when my phone died and I had to backtrack 40 miles to find a gas station with working outlets.
Device Type |
Average Battery Life |
Charges Needed Per 3-Day Trip |
Primary Use Case |
Real Talk |
|---|---|---|---|---|
Smartphone |
8-12 hours active use |
6-9 full charges |
Navigation, communication, photography |
GPS kills your battery twice as fast as the specs claim |
Action Camera |
1.5-2.5 hours recording |
4-6 batteries |
Video documentation, POV footage |
*Battery says 2.5 hours. It lies. Plan for 1.5. |
GPS Unit |
12-16 hours |
2-3 full charges |
Dedicated navigation, route tracking |
More reliable than phone GPS but another thing to charge |
Headlamp |
3-8 hours (high mode) |
1-2 battery swaps |
Camp lighting, night tasks |
High mode drains fast. Use medium. |
Satellite Communicator |
24-48 hours standby |
1-2 charges |
Emergency contact, location sharing |
Standby time is legit. Active use drains it faster. |
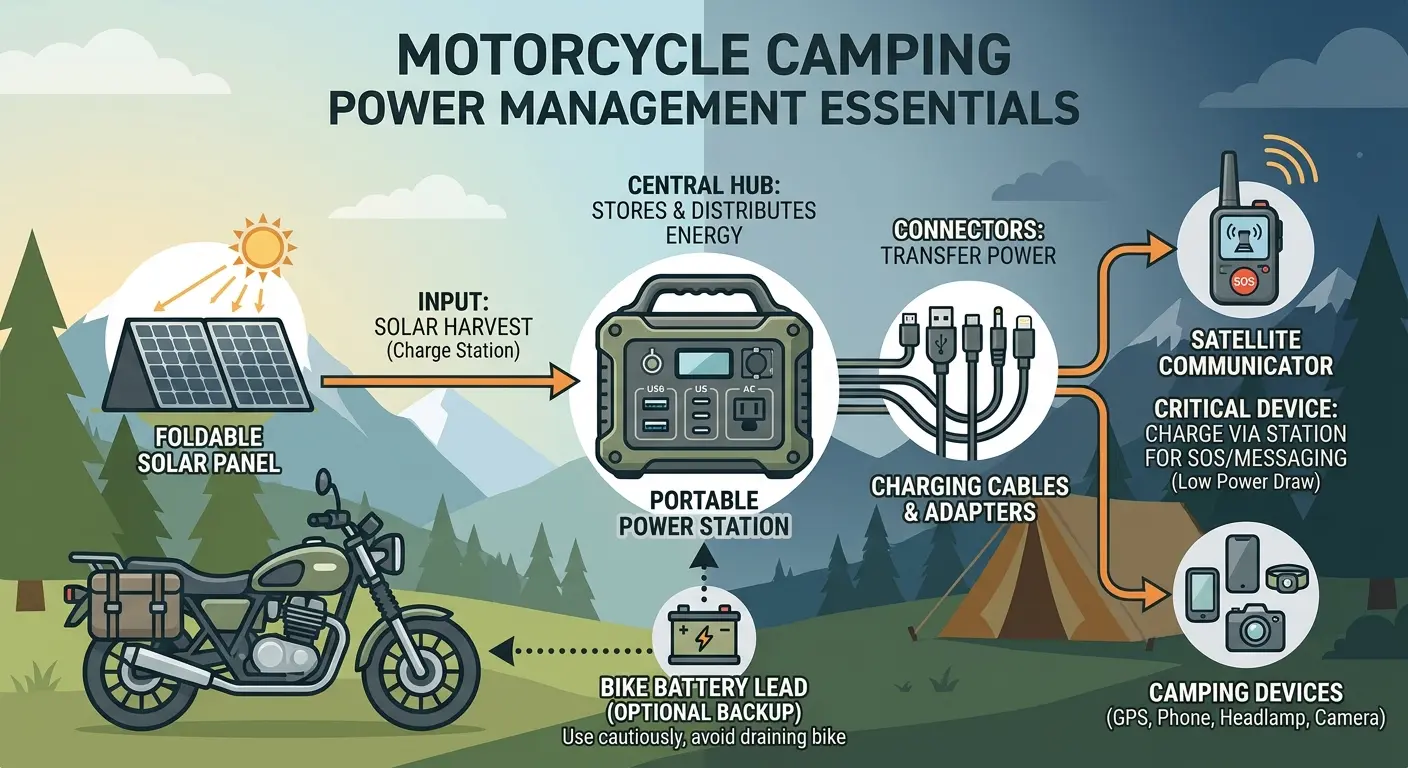
1. Solar Panel Charger with USB-C Power Delivery
Solar panels used to be either too bulky for motorcycle packing or too weak to actually charge anything in reasonable time. That's changed.
What matters now: USB-C Power Delivery at 60W or higher. This isn't just faster. It's the difference between your phone gaining 10% in three hours versus a full charge in under two. I've tested this on actual trips. The difference is massive.
Weight is critical. If your panel weighs more than 2 pounds, keep shopping. It should fold smaller than a road map.
One feature nobody mentions: kickstands. Sounds stupid until you're trying to prop a panel toward the sun on uneven ground in the middle of nowhere. I've used rocks, sticks, my helmet (all terrible solutions). Built-in kickstands solve this completely. Try finding level ground on Forest Road 317 outside of Moab. It's all slickrock and sand. Those adjustable stands saved me from spending 20 minutes balancing a panel against my luggage.
Get one with multiple ports too. You'll want to charge your phone and power bank simultaneously during the few hours of good sunlight you get each day.
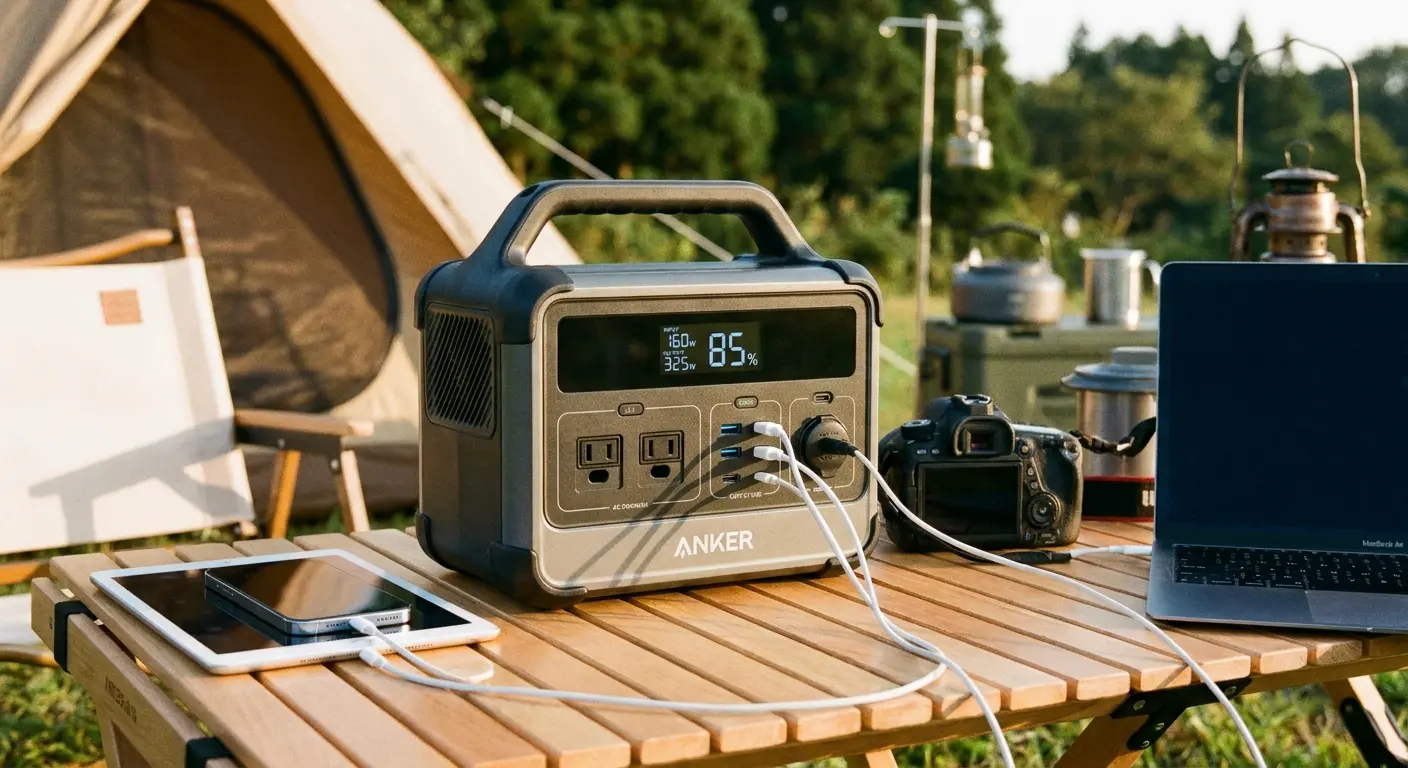
2. Portable Power Station Under 5 Pounds
Power stations have gotten way smaller. I'm not suggesting you haul a 30-pound battery brick. Modern lithium power stations in the 150-200Wh range weigh around 4 pounds and can recharge your phone 10-15 times.
This is your backup when solar charging isn't enough. Spent three days in Olympic National Forest last summer. Thick canopy, constant drizzle, solar panel was basically a paperweight. The power station kept everything charged.
Look for models with both USB-A and USB-C ports plus a 110V AC outlet. That AC outlet might seem unnecessary until you need to charge a camera battery, laptop, or heated gear. The best units charge fully in under three hours from a wall outlet before you leave, and some can recharge from your motorcycle's 12V outlet while riding (though this is slow).
I've been in situations where a dead phone meant serious problems. A portable power station eliminates that risk entirely. It's insurance against the one scenario every rider dreads: being stranded with dead navigation and no way to call for help.
3. Waterproof Phone Mount System
Your phone is your GPS, your camera, your communication device, and your emergency lifeline. Keeping it mounted, protected, and accessible is non-negotiable.
Cheap mounts vibrate loose or crack your screen from constant road vibration. I've killed three phones with cheap mounts. The last one (an iPhone 12) developed this weird screen flicker after a week-long trip through Colorado. Worked fine for calls but the camera was toast. $400 mistake.
Quality mounting systems use vibration dampening and secure locking mechanisms that won't fail at highway speeds. Waterproofing is critical because weather changes fast, and you can't always pull over immediately.
The mount should allow full touchscreen functionality through the case and provide easy access to charging ports. When selecting the right protection for your device, vibration dampening becomes critical. Rokform's motorcycle phone mounts solve this exact problem with their RokLock twist-lock system and military-grade protection, designed specifically for riders who need their devices functional and secure in all conditions.
Positioning matters too. The mount should place your phone within your natural line of sight without requiring you to look down significantly or take your focus off the road. I've tested mounts that looked great in the garage but created dangerous blind spots at speed.
Full disclosure: I use Rokform mounts. They're not cheap, but neither is replacing your phone every season. Three years, zero broken phones since I switched.
4. Battery-Powered LED String Lights
Headlamps are great for tasks, but they create harsh shadows and make everyone look directly at a bright light when talking. Battery-powered LED string lights transform your campsite into a functional space after dark.
Yes, I'm the guy with string lights on his motorcycle. Yes, I look ridiculous. No, I don't care because I can actually see what I'm doing after sunset.
Drape them around your tent, hang them from trees, or wrap them around your bike. They provide ambient light that lets you see without destroying your night vision. Most quality string lights offer 8-12 hours of runtime and pack down to the size of a tennis ball.
Some include dimming functions or color options, which might seem frivolous until you're trying to create a calm environment after a stressful day of riding in bad weather. The psychological benefit of good lighting is real. It makes your temporary camp feel less chaotic and more controlled.
5. Multi-Device Charging Cable
Carrying separate cables for every device adds weight and creates clutter. Multi-device charging cables combine Lightning, USB-C, and Micro-USB connectors into one cable.
You can charge your phone, headlamp, battery pack, and action camera from a single cable connected to your power station or solar panel. Get one with braided nylon construction that resists tangling and holds up to being stuffed into bags repeatedly.
Length matters. A six-foot cable gives you flexibility to charge devices while they're in use or stored safely away from weather. I used to carry five different cables. Tangled mess, nearly a pound of weight. Switched to one multi-device cable and cut my cable weight to under four ounces.
This is the kind of simple optimization that makes packing significantly easier.
6. Emergency Satellite Communicator
Cell service disappears fast outside cities. Like, really fast. An emergency satellite communicator lets you send messages, share your location, and trigger an SOS regardless of cell coverage.
These devices have become smaller and more affordable. Modern units are about the size of a deck of cards and weigh under 4 ounces. The subscription cost is real ($15-35/month depending on the plan, and yeah, I know, another subscription). But you can pause service during months you're not traveling.
Beyond emergencies, these devices let you send check-in messages to family or friends, which reduces their worry and gives you freedom to explore without constant "are you okay?" texts. Some models include basic weather forecasts and GPS tracking.
I know a rider who used his to coordinate a helicopter rescue after a crash on a forest service road in Idaho. The device paid for itself in one emergency. Beyond worst-case scenarios, it lets you send "I'm alive" messages to worried family members without hunting for cell service every night.
Worth it.
Gear That Protects Your Stuff When Weather Turns
I learned about compression bags the hard way. Watched my sleeping bag soak through three layers of "waterproof" luggage in a Montana thunderstorm. Everything was wet. My spare clothes, my sleeping bag, even stuff I thought was safely protected. That night sucked.
Rain happens. So does river crossings, morning dew, and the occasional dropped bike in a stream (don't ask). This section focuses on keeping your gear dry and accessible without creating a complicated packing system that takes 20 minutes to access a single item.
Here's what nobody talks about: selective protection. You don't need everything in waterproof containers. You need critical items (electronics, sleeping gear, spare clothes) protected while maintaining quick access to things you use frequently throughout the day.
These items prevent the cascade failure that happens when one wet item soaks everything else, ruining your trip and potentially creating dangerous situations. Try sleeping in a wet bag when it's 35 degrees out. You don't sleep. You shiver for eight hours and feel like death the next day.
Understanding motorcycle maintenance guide principles helps you pack the right tools for field repairs, which need their own weather protection strategy.
7. Compression Dry Bags with Purge Valves
Compression bags changed everything for me. Not regular dry bags (those trap air and take up way too much space). You need the ones with purge valves.
Here's what happens: You stuff your sleeping bag in, roll the top down, then press this little valve and watch the bag shrink to half its size. First time I did this, I actually laughed. All those trips where I couldn't fit everything, and the solution was a $25 bag with a valve.
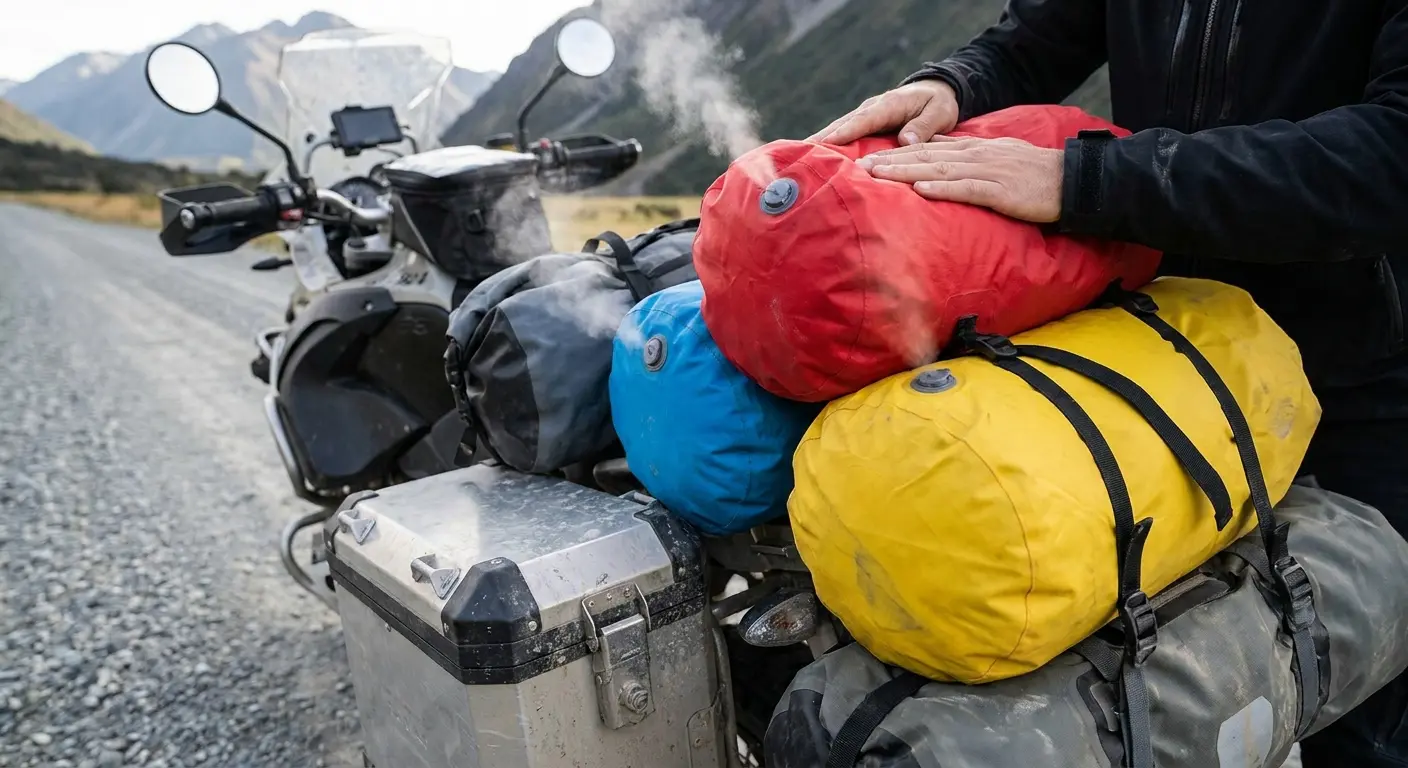
The waterproof seal keeps contents dry even if submerged, which matters during unexpected water crossings or when your bike tips over. Use different colored bags for different categories: red for clothes, blue for sleeping gear, yellow for food. This color-coding system lets you identify contents without opening every bag.
Get different colors. Sounds dumb, but when you've got four identical black bags strapped to your bike and you need your rain gear RIGHT NOW, you'll wish you'd bought the red one for clothes and the blue one for sleeping stuff. Learn from my mistakes.
The purge valve is critical. Without it, you're fighting trapped air every time you try to close and secure the bag. Quality bags use thick, puncture-resistant material (at least 500D) with welded seams rather than stitched seams that can leak over time.
I've found that three 20L bags work better than one 60L bag because you can organize by category and access specific items without unpacking everything.
8. Tank Bag with Rain Cover Integration
Tank bags keep essential items accessible while riding: snacks, sunscreen, extra gloves, toll money, or your wallet. The problem with most tank bags is they either aren't waterproof or require fumbling with a separate rain cover when weather hits.
Integrated rain cover systems store in a hidden pocket and deploy in seconds. You pull it out, stretch it over the bag, and secure it with elastic edges. The bag stays mounted, and your contents stay dry.
Magnetic tank bags work great on steel tanks but won't attach to aluminum or plastic tanks (check your bike before buying). Strap-on versions work universally but require more installation time. I prefer strap-on bags. Had three magnetic ones slide off over the years. They're uglier but they stay put.
Expansion capability is worth paying for. A bag that expands from 10L to 15L gives you flexibility for longer days or extra purchases during your trip. Clear map pockets on top are genuinely useful for paper maps or route notes, even if you primarily use GPS. Electronics fail. Paper doesn't.
9. Handlebar-Mounted Dry Pouch
Small items disappear into large bags. Handlebar-mounted dry pouches keep things you need constantly within reach: chapstick, sunglasses, energy bars, or earplugs.
These pouches mount to handlebars using hook-and-loop straps or quick-release systems. Get one that's completely waterproof with roll-top closures and clear windows on top so you can see contents without opening.
Size should be modest. A pouch that's too large blocks your view of instruments or interferes with brake lines. Aim for something in the 1-2L range.
This is particularly useful for items you need at gas stops or rest breaks. Instead of dismounting, removing gloves, and digging through your main luggage, you simply reach down and grab what you need. The time savings seem minor until you're making 8-10 stops per day and each one is 30 seconds faster. That's 4-5 minutes saved, which matters when you're racing daylight to reach camp.
10. Collapsible Water Container with Spigot
Carrying water is heavy and bulky, but you need it at camp for cooking, cleaning, and drinking. Collapsible water containers solve the packing problem. When empty, they fold flat to the size of a small book. When full, they hold 2-5 gallons.
The spigot is what makes this essential rather than just convenient. You can set the container on your bike or a rock and dispense water without lifting and pouring, which prevents spills and lets you use both hands.
This is particularly valuable when washing dishes or rinsing gear. Fill it at gas stations or campground water sources, then have clean water available at your site. Some riders skip this and buy bottled water instead, which creates waste and costs more over time. The container pays for itself in a few trips.
Look for food-grade plastic that won't impart weird tastes and reinforced seams that won't split when full. A built-in handle makes carrying easier when you need to move it from water source to campsite.
11. Waterproof Stuff Sacks in Multiple Sizes
This one's simple. Get waterproof stuff sacks in different sizes. Next.
Okay, fine. More detail: Stuff sacks are the organizational backbone of efficient packing. Waterproof versions (different from dry bags, these are lighter and more packable) protect individual items without the bulk of heavy-duty dry bags.
Use them for electronics, first aid supplies, toiletries, or spare bike parts. The key is having multiple sizes so you're not wasting space with oversized containers for small items. A good set includes 2L, 5L, and 10L sacks.
Drawstring closures work fine for most applications, but roll-top closures provide better water protection. Mesh panels on some stuff sacks let you see contents, which speeds up finding specific items when you're tired and just want to set up camp.
These sacks also protect gear from dust, dirt, and abrasion during transport. Your motorcycle luggage takes a beating from vibration and road grime. Stuff sacks create a secondary layer of protection that extends the life of your gear and keeps it cleaner between uses.
12. Magnetic Tank Map Holder
GPS is great until it isn't. Batteries die, signals drop, and screens become unreadable in bright sunlight. A magnetic tank map holder keeps a paper map or printed route notes visible and accessible.
Modern versions use strong neodymium magnets that won't slide off even at highway speeds. The clear vinyl window protects paper from rain and wind while keeping it readable.
This isn't about being old-school. It's about having a backup that doesn't require power or signal. You can mark your route, note campsite locations, or track progress without pulling over.
Some riders use these holders for gas station receipts, toll tickets, or other small papers they need to reference during the day. The holder sits flat against your tank, doesn't interfere with riding position, and removes in seconds when you don't need it. Weight is negligible (around 3-4 ounces), and it packs completely flat when not in use.
Gear That Makes Camp Setup Faster After Long Rides
Ever tried to set up a tent in the dark after 400 miles of riding? Yeah, that's why this section exists.
You've been riding for eight hours. You're tired, maybe sore, and the sun is setting in 45 minutes. The last thing you want is complicated gear that requires 15 stakes, three adjustment systems, and a degree in engineering to set up.
Faster setup means more time to rest, eat properly, and prepare for the next day. It also means you can wait longer before committing to a campsite, giving you flexibility if the first spot you find isn't ideal. These four items represent the core of your camp and are selected specifically because they minimize setup time and complexity without sacrificing functionality or comfort.
Before embarking on long distance motorcycle riding, prepare a comprehensive checklist that includes these essential items.
13. Freestanding Tent with Minimal Stakes
Freestanding tents set up without stakes (though you should still stake them down for wind resistance). This matters when you're camping on hard ground, sand, or rocky surfaces where stakes are difficult or impossible to drive. The tent maintains its shape using pole tension alone.
Setup time for quality freestanding tents is maybe 4 minutes once you've done it twice. Look for tents designed specifically for motorcycle camping: compact pack size, low weight (under 4 pounds for a two-person tent), and good ventilation to prevent condensation.
Vestibules are critical for storing gear outside the sleeping area but protected from weather. A tent without a vestibule forces you to either leave gear exposed or cram everything inside, neither of which is ideal.
Color matters more than you'd think. Bright colors make your tent visible to other campers (preventing someone from walking into your guylines at night) and easier to spot if you're hiking away from camp during the day. Darker colors absorb more heat, which is great in cold weather but miserable in summer.
Similar to selecting best adventure motorcycle models, tent choice impacts your entire trip experience. I've tested dozens of tents over the years, and the freestanding models consistently save me frustration when dealing with difficult terrain.
14. Inflatable Sleeping Pad with Built-In Pump
Sleeping pads provide insulation from cold ground and cushioning for comfort. Inflatable pads pack smaller than foam pads but traditionally require either lung power or a separate pump to inflate.
Built-in pump systems eliminate this hassle. You open a valve, press or step on the integrated pump a dozen times, and the pad inflates in under a minute. This is exponentially easier than blowing into a valve for five minutes when you're already exhausted.
R-value indicates insulation effectiveness. For three-season camping, aim for an R-value of 3.0 or higher. Thickness matters for comfort, but anything over three inches becomes unnecessarily bulky when packed. The sweet spot is 2.5-3 inches, which provides adequate cushioning without excessive weight or pack size.
Repair kits should come standard with your pad. Punctures happen, and being able to patch a hole in the field is the difference between a good night's sleep and a miserable one.
Some pads include textured surfaces that prevent your sleeping bag from sliding around, which sounds minor until you wake up at 2 AM having slid completely off your pad onto cold ground. I've had this happen enough times to make textured tops a non-negotiable feature.
15. Compact Camp Chair That Packs Flat
Sitting on the ground gets old fast, especially after a long day of riding. Compact camp chairs designed for backpacking work perfectly for motorcycle camping because they prioritize low weight and small pack size.
Look, some people say camp chairs are unnecessary weight. Those people are wrong and probably miserable.
The best versions pack flat (rather than rolling into a tube) and slide easily into panniers or strap onto luggage. Weight should be under 2 pounds for a chair that supports up to 250 pounds.
Modern designs use aircraft-grade aluminum poles and ripstop fabric that's both durable and comfortable. Setup takes about 30 seconds once you've done it a few times. The chair provides a comfortable place to sit while cooking, eating, or just relaxing after riding.
Comfort directly impacts how well you rest and recover for the next day's ride. Poor rest leads to fatigue, which leads to dangerous riding. A $60 chair that helps you sleep better and ride safer is worth every penny.
Cup holders and side pockets are nice additions but not essential. Focus on build quality and pack size first, features second.

16. Multi-Fuel Camping Stove
Single-fuel stoves are lighter and simpler, but multi-fuel stoves provide flexibility when you're traveling through different regions where fuel availability varies. These stoves run on white gas, unleaded gasoline, kerosene, or diesel.
This means you can fuel your stove from your motorcycle's gas tank in an emergency or buy whatever fuel is available locally. The stove should be compact (smaller than a water bottle when packed), easy to maintain in the field, and capable of boiling water in under three minutes.
Simmer control matters if you're doing any real cooking beyond just boiling water. Some multi-fuel stoves only have two settings: off and blowtorch. Quality models offer precise flame adjustment.
Weight runs around 14-16 ounces for the stove itself, plus another 6-8 ounces for the fuel bottle. Carry a small repair kit with spare parts (O-rings, jet cleaners) because these stoves can clog, especially when running on lower-grade fuels.
Yeah, multi-fuel stoves are fussier. You'll spend 10 minutes cleaning jets occasionally. But I've fueled mine from my bike's tank in emergencies and from gas stations in three different countries where finding canister fuel would have been impossible. That's worth the hassle.
Keeping Everything Secure and Accessible
Dead phone, no GPS, no idea where you are. I've had actual panic attacks in this situation.
We've covered power, protection, and camp setup, but there's one more critical element that most gear lists completely ignore: keeping your phone and other essentials secure and accessible while you ride.
This isn't just about convenience. It's about safety and functionality. Your phone runs your navigation, tracks your route, serves as your camera, and functions as your emergency communication device. If it's buried in a bag, you can't use it. If it's poorly mounted, vibration will destroy it or it'll fly off at speed.
Rokform's motorcycle mounts and cases solve this specific problem with their RokLock system that secures your device while maintaining full functionality. The magnetic mounting system means you can quickly remove your phone when you reach camp without fumbling with complicated release mechanisms while wearing gloves.
Their cases provide military-grade drop protection (MIL-STD 810G-516.6) that handles the constant vibration and occasional impacts that come with motorcycle travel. This is the kind of gear that prevents problems before they happen, keeping your most critical device protected and accessible throughout your entire trip.
I've watched riders lose phones to vibration damage, weather exposure, and mounting failures. The cost of replacing a phone far exceeds the investment in a quality mounting system. Plus, having reliable access to your device means better navigation decisions, safer riding, and the ability to capture moments you'll want to remember.
When you're setting up the right protection for your device during your best motorcycle phone mount configuration, vibration dampening becomes the critical factor that separates mounts that work from mounts that destroy your phone over time.

Final Thoughts
Look, I get it. This is a lot of gear.
Building a solid motorcycle camping kit isn't about buying the most expensive gear or packing every possible item you might need. It's about selecting pieces that solve real problems, pack efficiently, and work reliably when you're tired and conditions aren't perfect.
The 16 items in this list address the areas where most riders struggle: power management in remote areas, weather protection without complicated systems, and fast setup when daylight is fading. Every piece here has been chosen because it fills a specific gap in functionality that impacts your safety, comfort, or ability to enjoy the trip rather than just survive it.
Start with the essentials from each category. Test them on shorter trips. Refine your kit based on what works for your riding style and destinations.
I still pack too much. Every trip, I swear I'll cut weight, and every trip I bring stuff I never use. But the 16 items above? Those get used. Every. Single. Time.
Your setup should evolve as you gain experience and discover what matters most to you on the road. Some riders prioritize cooking elaborate meals and invest heavily in kitchen gear. Others focus on photography equipment and need robust power solutions. There's no single perfect kit for everyone.
What matters is understanding the problems you're trying to solve and choosing gear that addresses those specific challenges. I've spent years refining my setup, and it still changes slightly with each trip as I discover better solutions or new gear that genuinely improves the experience.
The items on this list represent the foundation that works across different riding styles, destinations, and trip lengths. Build from here based on your needs, and you'll have a system that makes motorcycle camping something you look forward to rather than something you endure.

